Thursday, October 29, 2020

How to Sew a Quilted Rainbow Mug Rug

I have been obsessed with sewing triangles lately, mainly because this WIP rainbow Sierpinski's Triangle quilt has taken over my thoughts and dreams:


The sewing on it has to be really precise so that all the nice points are nice and pointy and match all the other nice points, so first I practiced by sewing lots of other triangle projects.

And in the process, I came up with this quilted rainbow mug rug that I'm super into!


It's VERY good practice for the precise cutting and sewing required with triangle pieces, but at the same time it's a reasonably quick project to get through. It's apparently a fun project, as well, because as soon as I made one mug rug, I immediately pieced a second one.. and then a third... and then a fourth... and now I have a full rainbow set of six happily at my disposal.

Here's how YOU can sew a fun rainbow of your own!

You will need:
  •  60-degree triangle ruler
  • six different fabric prints in rainbow colors
  • cotton batting
  • cotton broadcloth in a single rainbow color
  • thread that matches the broadcloth
  • universal sewing needle. This one is a good size to handle the 2-5 layers of cotton that it will be sewing.
  • small iron (optional). A regular iron can handle this project, but I LOVE this particular iron for ironing seams flat as I sew.
1. Measure and cut the triangles. For this mug rug, I think that 2.5" triangles result in the perfect finished size. Your 60-degree triangle ruler has printed lines that guide you to making the correct cuts, essentially having you cut a 3" triangle that you'll sew with a .25" seam allowance. For triangle sewing, your seam allowances have to be really, really precise (the fact that I keep emphasizing this means, I fear, that my sewing is not normally so precise...), so this is also a good time to get out your ruler and make sure you know what an exact .25" seam allowance looks like on your sewing machine.

All my photos are terrible because it's raining and it's going to rain forever and if I wait until I've got natural light to photograph things so they don't look terrible I, too, will wait forever.

After my triangles are cut out, I like to play with arranging them to make sure I like the aesthetic:


2. Piece the triangles into two rows of three. Piecing together three triangles, top points aligned, will give you a perfect 180-degree straight line. Your triangle ruler will have already had you cut each triangle with one notched point, and that notched point is the easiest place to align the triangles. Carefully align two triangles, right sides together, and sew them with a .25" seam allowance. Iron that seam open.


I had to practice and practice and practice before I could consistently sew this third triangle just right. I ripped out SO MANY seams, and walked away from my sewing machine to go do something else SO MANY times. 

So that you don't have to suffer the way that I did, here's how I double- and triple-check that I've got this last triangle lined up correctly:


See the triangle points that stick out because you ironed the seam open? Those points help you match the pieces! If you've matched the notched piece at the top and you match this triangle point at the bottom, your piece is perfectly aligned and you can sew it with a perfect .25" seam allowance.

Iron the seam open, and here's what your three triangles should look like on the back:


Here's what they look like from the front:


I took the photo at a weird angle, because taking it from directly above would have entirely blocked the small amount of light present in my study on this gloomy day, but if you look carefully, you should see that the middle triangle's bottom point does not extend all the way to the bottom of the piece. There should be .25" between the bottom point and the bottom raw edge.

If there's not, rip it out and try again. Lord knows I've done that many a hundred times in the past few weeks!

3. Piece the two rows together. Lining up the points when you piece the two rows together is also a little tricky, and also had me ripping out seams multiple times before I finally figured out a couple of tricks. First, check out the picture below:


In this picture (which is actually of my Sierpinski's triangle quilt in progress, mwa-ha-ha!), see how the back of the black triangle has a top point that meets the two blue pieces? Ignore the seam that goes off to the right to make a point, and just look at where the three quilt pieces meet at one point.

That point is also the triangle's point on the front side! If you can pin that point straight through to the point on the other piece of fabric, your points will match.

It also gives you a visual guide when you're sewing. Make sure you stitch directly over that point, and your triangle will look nice and pointy from the front:


Look at how tidy and pointy and almost exactly perfect the finished hexagon is!


4. Quilt the hexagon to the batting. For these mug rugs, I've decided that I prefer quilting the hexagon to the batting only, and adding the backing fabric later. So cut out a piece of batting that's a little bigger than your hexagon--


And then quilt the hexagon to it by stitching in the ditch with white thread.

5. NOW you can sew the backing fabric to your quilt! The backing is going to serve not just as a backing, but also as the back-to-front quilt binding for your mug rug. To that end, pin your quilt to the backing fabric, then enlarge the hexagon an extra .75" on all sides. A clear ruler makes this super easy:


Cut out the backing fabric.


Crease and pin the binding. Here's where that mini iron really comes in handy! For each side, fold the extra fabric in half and iron to crease, then fold it over again and pin it to the quilt. Here's a really great tutorial with clear illustrations for exactly how to do this back-to-front blanket binding.

And here's what it looks like in progress!


Now all you have to do is sew the binding to the quilt, using matching thread. It doesn't really matter if you use a straight or zigzag stitch, and I experimented with both, but eventually decided that I prefer the look of zigzag for my mug rugs:


And so that's what I did!


I like how clean the back looks, since it doesn't have any of the quilting:


And as you can see, it's the perfect size for a coffee mug!


I enjoy making these so much that I made a listing in my Pumpkin+Bear etsy shop so that I can keep on making them. 


You can order your own quilted mug rug in sets from one to six, with the backing fabric color of your choosing. I choose your print fabrics, but they'll always be a six-color rainbow:

Trust me when I tell you that a rainbow on your coffee table is a very cheery thing to have!

Six Months Ago: A DIY Binomial Cube/Trinomial Cube Manipulative

One Year Ago: 20+ Things to Do with Apples

Two Years Ago: Movement and Grace: Scenes from the Ballet Classroom

Three Years Ago: Montessori Pink Tower Extensions for a Sixth Grader

Four Years Ago: American Revolution Road Trip: Bay Front Park, Maryland

Five Years Ago: Hawaii with Kids: Luaus and Leis on the Big Island

Six Years Ago: La Maestra

Seven Years Ago: Trick-or-Treating with IU Basketball: Haunted Hoops!

Eight Years Ago: To Build a Fire: Junior Version

Nine Years Ago: Halloweening

Ten Years Ago: Willow Bakes Amelia Bedelia's Cake

Eleven Years Ago: One Deer Down, One Clown to Go

Twelve Years Ago: Illness and Ornaments and Perhaps a Psychotic Break

Tuesday, October 27, 2020

Halloween 2020: The Global Pandemic/Pre-Presidential Election Edition

 The kids didn't even make costumes this year, and it's nevertheless our scariest Halloween yet!

This afternoon, as I drove by the Planned Parenthood with my arm out the window flipping off the abortion protestors, some guy yelled at me, "Trump is still #1! You have a nice day, Ma'am!" 

I don't totally know what to do with that. Like, my side of the conversation was very much a non-verbal, "I don't like how you want to strip away my body autonomy," and his was all, "I love stripping away your body autonomy! Also I love racist, homophobic, nepotistic sex criminal tax evaders! But at least I'm not going to call you a bitch!"

I guess he's not spending his evenings low-key planning the overland route he'll take with his daughters to Canada while evading the hunter squads that want to traffic them into government-mandated reproductive slavery because an "originalist" version of the Constitution basically has women listed as property...

Or how about another sign I saw, held by a woman protesting... a reasonable response to a global pandemic, I guess?... that proclaimed that she chose not to live in fear.

MUST BE NICE.

I, myself, am pretty busy living in all the fear over here, but in my free time I've been working my butt off trying to give my teenagers some magical memories of their second-favorite holiday even though they can't do any of their favorite things:

Such as trick-or-treating.

Trick-or-treating with friends.

Trick-or-treating from the local fraternities and sororities.

Trick-or-treating at the nearby state park.

Trick-or-treating in our favorite neighborhood with all the epic decorations.

There's already so little time left for them to enjoy the kid-version of Halloween, and now they've lost one more year.

I'm trying to make it up to them with at-home versions of sugar. Every Halloween treat they've ever wanted to try making? We have made it this month.

Check out our caramel apples that almost worked!


I'm a little bummed because I am all the time bragging how Serious Eats never does me wrong and their recipes always work for me and they're impossible for me to mess up, and yet this Serious Eats caramel apple recipe did NOT teach me how to successfully make caramel apples:


We used the candy thermometer and everything, and yet all the toppings and most of the caramel ended up slumping off of our apples. Fortunately, we're not a very fastidious people so we just spooned it all back on and ate them anyway:


They were delicious!

Will's Halloween foodie dream wasn't particularly spooky, but it was something that I know she's long wanted to do with the apples that we get from our local orchard:


Made-from-scratch apple pie, homemade pie crust and all!


I don't particularly like pie--I mean, I guess I technically like anything that has that much sugar in it, but I could tell you off the top of my head probably forty sweet treats I'd rather have--but even I thought that this pie was astoundingly tasty. And clearly the rest of the family agreed!


I kind of want to try hand pies next, but after making our traditional apple cake and several pints of applesauce, we're almost out of apples!

Here's another new recipe that we tried this year:


The kids are exceedingly fond of cinnamon rolls, and cinnamon rolls in the shape of bloody guts did not gross them out at all:


If anything, I think that baking them like this made them even more soft and tender, and the cranberry chutney that I mixed into the cream cheese frosting added not just those disgusting blobs the exact color of clotted blood, but also a lovely tang!

Here's one food tradition that I gave up on this year:


Yep, everybody's carving pumpkins and I'm not forcing any of them to save me the seeds in a separate bowl for roasting. I'm the only one who ever eats them until I start sneaking them into everyone else's food a few weeks later, but I just cleaned out the pantry and found a ton of nuts, so I've got enough going on sneaking nuts into everyone's food for the foreseeable future without adding a bunch of pumpkin seeds to the mix.


Will's pumpkin turned out adorable, but Syd's is inexplicably terrifying this year. It watches me through the family room window, and every day its smile collapses a little more into a grimace of pained loathing.

This is also only food-adjacent, but Will and I are smack in the middle of making ourselves a whole apothecary of spooky potion bottles:


I've only got a few finished out of the ton that we have planned, but they're seriously awesome and the best way to use up old bottles!


Okay, back to the food!


Every year, Matt's mummy meatloaf is more terrifying than the year before. This year, the kids specifically protested the pecan rotten teeth--see why I have to sneak nuts into their diet?--but I thought it was brilliant. That's a dozen fewer pecan halves that I'm going to have to grind up, stir into muffins, and then insist that I didn't!

We've got scary movies planned for every night this week (along with binging Supernatural, because my other hobby is attempting to get the kids hooked on my favorite weird TV shows so I have someone to watch them with), and on Saturday after dark, I'm going to lock the kids in their room and then hide candy all over the house. I'll turn off all the lights, give them each a flashlight, and release them to hunt for their Halloween candy.

At least the evening sugar high will be the same as every year!

Saturday, October 24, 2020

How to Make a Fairy Garden

A fairy garden is easy to make, and nope, it actually doesn't require any of those porcelain or plastic store-bought fairy garden accessories.

After all, the fairies don't go to Hobby Lobby for their furniture--they MAKE it!

Fairy gardens also don't have to be as elaborate as the ones that you see showing off all of their store-bought fairy accessories. Sure, a fairy garden wonderland is cute, but not everyone likes "cute."

But I promise everyone can like a fairy garden!

All you really need to make a fairy garden are a couple of small plants and suitable potting soil, a container, and appropriate handmade, found, recycled, or natural embellishments. The fairy garden becomes a magical place based on these elements alone... that's kind of WHY it's magical, you know? Simplicity is, indeed, beauty.

So scavenge up some recycled and natural materials, and let's make a fairy garden!

1. Prepare an appropriate growing environment for your plants. This step is the key to the entire fairy garden--you need the right plants, the right container, and the right soil. Make a garden that looks pretty but doesn't take care of your plants the right way, and it'll be dead within the month.

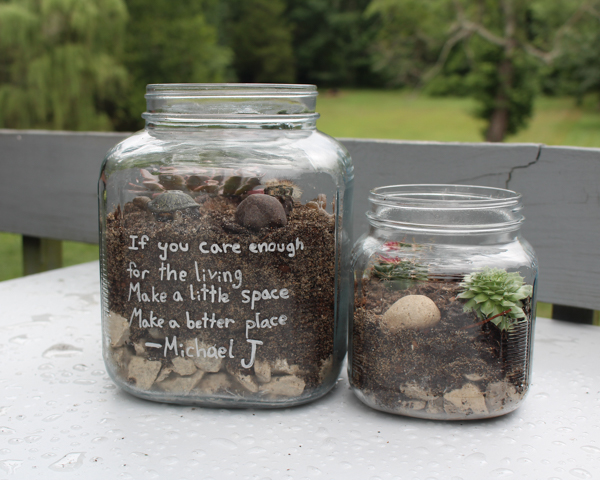
I like to start with the container. For the set of fairy gardens that I made last week, I knew that I wanted to use some old glass storage jars whose lids are... well, I don't know. Maybe the fairies took them.

For a glass container like that, I didn't want plants that would spread a ton, or get too bushy. Moss would have been cute, or a little bonsai, but after wandering around the greenhouse, and learning that they were randomly out of the venus flytraps that I'd REALLY wanted, I decided that a little desert fairy garden would be cute, like a fairy terrarium.

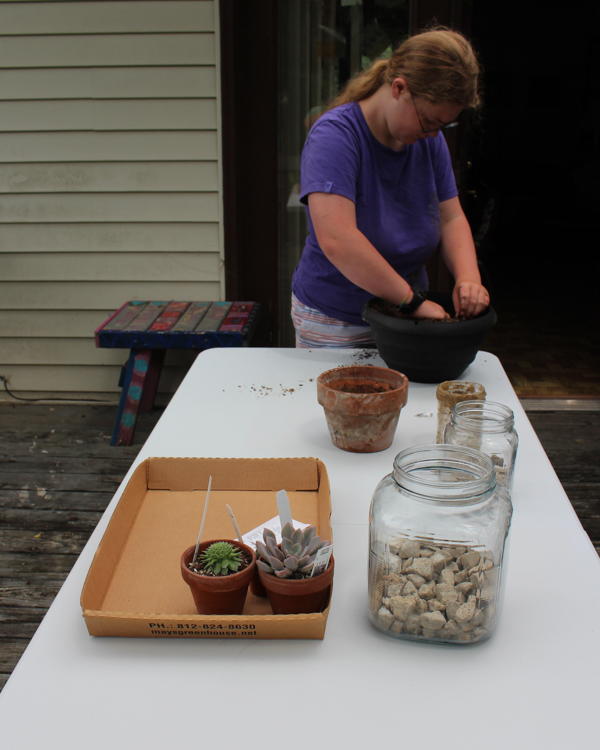
That meant succulents and cacti! Succulents and cacti both need a lot of drainage, so I put in a bottom visible layer of gravel (you could use aquarium gravel for this, or decorative river rocks, or shells, etc.), then the kid helped me mix up an appropriate potting soil for succulents and cacti--basically, potting soil plus playground sand plus peat moss or perlite. I'm ashamed to say that I used peat moss, even though I loathe buying it because its harvesting is VERY problematic, because I couldn't find the alternatives that I wanted and I needed to get the fairy gardens finished so that they could be birthday presents.

Rushed shopping and crafting is often not eco-friendly shopping and crafting, dang it.

2. Add potting soil and plants to the container. Just like in a real garden, bigger plants go in the back and smaller plants go in the front, and offsetting them to each other allows them all to be seen.

As you place the plants, begin visualizing what fairy garden embellishments you want to add, so that you'll be sure to have room.

3. Decorate your fairy garden. This is the fun part! To decorate your garden, check out these handmade fairy garden decorations for inspiration, or look around your home and yard and repurpose found items. Since my kids have been small, they've adored using their little toy animals as fairy garden decorations, and dollhouse furniture also often works well.

As you're embellishing, don't forget the container itself! One of our fairy garden birthday presents needed to be Michael Jackson-themed, and I thought about making Shrinky Dinks or polymer clay models, but it turned out that a relevant quote from one of his songs, written on in paint pen, was all that was really needed to make it perfect.

If you give your fairy garden as a gift, don't forget to include care instructions for the plants, and the appropriate fertilizer, if necessary. Giving the recipient a bottle of distilled water, a little bottle of liquid fertilizer, and a handwritten sheet of when and how much to water can be all the difference between a birthday present that's a huge hit and one that's an eventual source of guilt and self-recrimination.

Looking for more fairy garden inspiration? Check out my kid's junkyard fairy garden here, and this super easy, super magical chia sprout fairy garden that's perfect for preschoolers.

Thursday, October 22, 2020

15 DIY Potion Bottle Tutorials


Raise your hand if you, too, have a giant plastic bin full of old bottles.

No?

Okay, raise your hand if you, too, have a place back in your woods where the owners of a 1950s drive-in used to dump their trash.

Alright, that explains it. If you don't have a vintage dump on your property, then you're excused from maintaining a collection of vintage bottles of dubious quality.

It's my two-part long-running plan to 1) get all those bottles and other random pieces of assorted trash out of our wooded wonderland, and 2) upcycle as much of it as possible instead of making it part of someone else's dump. Matt particularly objects to Step 2 of this plan, as so far it's mainly resulted in me filling our 1910 general store chock-full of dirty old bottles, but still. 

This autumn, Will and I have been inspired to try to make some of these old bottles into spooky potion bottles for Halloween. After I clean them, here are some of the tutorials that we're going to try:

  1. bottles embellished with scrapbook paper. It's not spooky, but it's super cute! I don't have Halloween-themed scrapbook paper, but I do have some Halloween-themed fabric that would work equally well.
  2. bottles embellished with white paint and sandpaper. I think we're going to paint completely over most of our bottles, but I do have a few clear bottles to play with. For those, it would be interesting to try this tutorial that involves sandpapering and partly painting the bottles, so that they look spooky but still see-through.
  3. colorful potion bottles. I really like these bottles as an alternative when you want to make potions but you don't want them to be "spooky." These are definitely potions made by (or from!) mermaids and unicorns!
  4. embossed skull on a bottle. The author of this tutorial used a styrofoam skull, but I've got a couple of different skull molds, so I'm wondering if papier mache, or even plaster of Paris, wouldn't work just as well.
  5. faux mercury glass potion bottles. Mercury glass makes potion bottles look very antique and authentic!
  6. free printable labels. This DIY potion labels don't reference any popular media, so they would work for your standard fairy tale kitchen.
  7. handmade apothecary. This is the most beautifully elaborate possible use for all of these DIY potion bottles! I'd like to imagine it as the play kitchen of a particularly morbid child.
  8. hot glue and paint. Will and I are definitely going to try this tutorial. Instead of regular craft acrylic paint, however, I think I'm going to try mixing it with baking soda to give it more of a ceramic look.
  9. hot glue and paint labels only. Here's the same hot glue and paint method, but only over the part of the bottle that has the label. This leaves the rest of the bottle clear to show off your spooky ingredients!
  10. matte black potion bottles. I want our bottles to each be unique, but I DO love the uniform look of all of these matte black potion bottles. I've got this exact spray paint, so maybe I'll at least have a matte black potion bottle section in our apothecary...
  11. papier mache embellishments. There are so many beautifully embellished potion bottles in this post, but my favorite is the papier mache eyeball!
  12. poison apple bottle. I am obsessed with all of the DIY poison apple tutorials that I've seen this fall. I just need to find a round bottle in the dump!
  13. resin potions. I hadn't thought that we'd fill our bottles with anything special... until I saw this post about making potions using resin!
  14. sticker paper potion labels. These are my favorites of all the free potion labels I've found, and the clear sticker paper is genius!
  15. transferred labels. Instead of gluing labels to the bottles, this author used an image transfer method. 
Considering all the Halloween sewing projects and recipes I've also been wanting to try, as well as all the scary movies I'll be sad if I don't re-watch for the hundredth time before Halloween, I think we've got enough to keep us entertained until it's time to start Christmas crafting!

P.S. Want to see even more of our fall projects, like the from-scratch apple pie and the bloody guts cinnamon rolls? They're over on my Craft Knife Facebook page!

Saturday, October 17, 2020

How to Remake a Puzzle

I originally published this tutorial on Crafting a Green World.

There are lots of cute ways to upcycle an old puzzle into something completely new, but what if what you'd really prefer is simply another puzzle?

I mean honestly, have you ever looked at the picture on the front of a puzzle and thought, "Huh. I could do better than that!"

Well, you absolutely can!

It's surprisingly easy and doesn't take a ton of artistic talent to remake a puzzle into one that's brand-new-to-you.  This is a great craft for kids or a great way to make an educational toy for a kid. Here, for instance, I've remade a very odd puzzle (I'll show you in a minute, but trust me--it's ODD!) into a puzzle of the digits of pi. What classroom wouldn't want to have that on the shelf in readiness for a rainy-day recess?

Here's how to remake a puzzle of your own!

Supplies Needed

An old puzzle to upcycle

I have a very firm Puzzle Policy, which consists of this: we buy puzzles only from thrift stores or yard sales, never spending more than a buck or two. We happily put together our puzzles, knowing that it's highly likely that there will be missing pieces. When there are, we don't care, because we still had the fun of putting together the puzzle and anyway, it only cost a couple of dollars; I'll recycle or upcycle that puzzle, then, with a clean conscience.

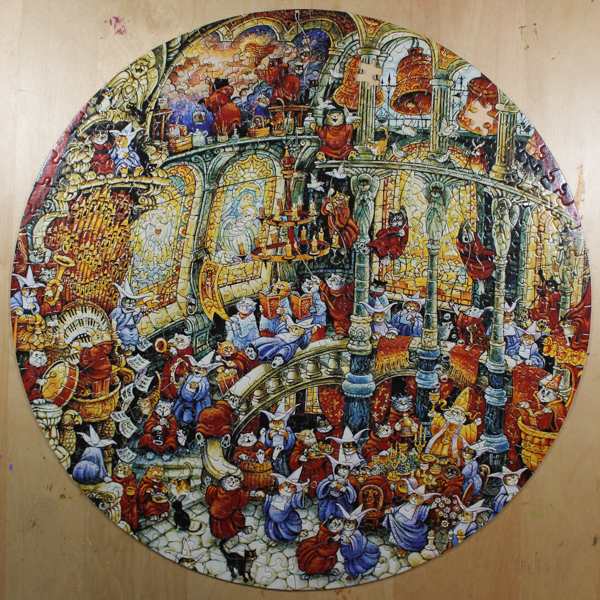
When the puzzle gods smile down upon us, however, it's a real treat, and then when I put the puzzle back in the box I'll securely tape it shut, tape on a note that reads "NO MISSING PIECES," and donate it to a thrift shop to move on to some other lucky soul. So even though my family loooooved putting together this very, very, VERY strange puzzle, it has two missing pieces, so recycled or upcycled it must be:

Acrylic paints and brushes

You'll be watering the paints down, so a little will go a long way.

Paint Pens

These can be pricey, but you don't have to buy a full set if you're planning on a limited color scheme. I got by using only black for this project.

Spray sealant (optional)

Aerosol sprays are the WORST, but if you feel like you have to seal your work--I would only if it's quite detailed and delicate--then you'd better use this instead of a brush-on sealant, which will go on too heavy and stick the puzzle pieces together.
Directions

1. Assemble the puzzle, turn it upside down, and make any necessary repairs. When my kids were younger and much more emotionally attached to their puzzles, I figured out how to make a pretty decent replacement for missing pieces--it's at least good enough to make the puzzle complete again, although of course you can tell the difference:

Here's my tutorial for how to repair a puzzle by recreating missing pieces. Give it a try!

2. Paint the puzzle with watered-down acrylic paint. Watercolors would work, but wouldn't be vibrant, and acrylic straight from the tube would be so thick that the puzzle pieces might stick together. Instead, use a paint palette to water down your acrylic paints, and use those to paint your puzzle.

Pro tip: to avoid the colors bleeding together, let an adjacent color dry before you paint right up next to it.

3. Add details with paint pens. Since the acrylics have been altered to behave more like watercolors, when you want to add detail to your painting, you'll want to use paint pens. These are spendy, but they're absolutely terrific for fine work, and you can add tons of detail that you'd otherwise need the tiniest paintbrush for.

After all the paint and glue has dried, the only thing left to do is work your brand-new puzzle!

As you can see, this puzzle is even more fun than working one whose only claim to fame is that you bought it from a store, and the more time that you put into it, the better it can look. I kept mine pretty plain, because my children are heathens and wouldn't appreciate it anymore if I'd spent fifteen more hours on it making it look cute.

You could add a ton more embellishments with the paint pens alone, and there's nothing to stop you from adding even more decorative elements, such as Swarovski crystals, glitter, or anything else that you fancy.