Showing posts with label kids' crafts. Show all posts

Sunday, February 12, 2023

How-To: Kid-Made Puzzle Piece Valentine


This tutorial was originally posted on Crafting a Green World way back in 2013.

Missing some pieces of your jigsaw puzzle, but still have a few mitchy-matchy ones? 

Your kiddos can create one handmade Valentine from just two perfectly fitting jigsaw pieces. Give them most of a box, and they can make all the Valentines for their class party. 

It's a fun upcycling project that won't cost you a cent. Yay for an eco-friendly Valentine's Day!

Here's how:

Big or small, edge or middle, this project relies on two linking puzzle pieces. Have your kiddos sort the remaining pieces from an incomplete jigsaw puzzle into linking pairs (save other orphaned puzzle pieces for more crafty upcycling projects!), then let them paint each pair a fun background color. My kiddos chose every color from red to green to black, and made themselves a glorious happy mess while they did so.

Set the pairs aside to dry, taking apart the pieces first so that they won't adhere to each other.

When the puzzle pieces are dry, fit them together again and show the kiddos how to paint a single heart onto the middle of the pairs, so that approximately half the heart rests on each piece. The kiddos can continue to decorate the pieces as they wish, with glitter and stickers and the other gaudy accouterments of kid-made greeting cards.

Once again, separate the pieces and let them dry. When everything is dry and set, the heart puzzle will be able to be taken apart and put together again. The kiddos can use the back side of their Valentines to write their name and some sort of horrible, punny Valentine greeting.

May I suggest "I love you to pieces?" Okay, I'm going to go vomit now.

Monday, April 25, 2022

Crafting with Kids: Make Your Own Plaster of Paris Figurines

I originally published this tutorial on Crafting a Green World way back in 2010!


Summer is for kitschy children's crafts. Popsicle sticks, pom poms, the ubiquitous lanyard, plus a few thousand mosquito bites are all that's necessary for the perfect summer. 

Kids' crafts, however, can compete with the eco-friendly lifestyle that we try to teach them. They want foam stickers and plastic beads, and we want them to craft with twigs and pine cones

One of the ways to teach children to craft positively is to teach them the DIY mindset. Plaster of Paris is a kid-friendly material, made from powdered gypsum (just like the dunes at White Sands, New Mexico!) that you rehydrate and then dehydrate again in a mold, and those little plaster of Paris figurines that craft stores sell are cute and fun to paint. But what sweatshop were they imported from? Who knows? 

Here's how give your kids the fun of making your own plaster of Paris figurines, all with stuff that you already have around the house. 

You will need:
  • Plaster of Paris. I bought mine half-used from a garage sale, but it's an inexpensive and easily found craft supply to find new or used.
  • Measuring cups and stirrers. You can either use cups and bowls and spoons that you can rinse off with the hose outside (NOT down your drain!), or you can do what we do and give one final use to stuff that we're just about to throw away, anyway- souvenir non-recyclable plastic cups or decorative tins or toothbrushes or used-but-dry popsicle sticks, or paint stirrers.
  • Kitchen or postal scale
  • Household objects for molds. Silicon muffin molds work well for this, as do conventional metal muffin tins, as well as any plastic or metal container. Be creative!
 1. Using the kitchen scale, measure out your plaster and water in a 2:1 ratio. This means that you need to have twice the weight of plaster that you do water. If you measure out 12 ounces of plaster, for instance, then you'll need to weigh out 6 ounces of water. 

2. Combine the plaster and water into one bowl and stir well until they're combined and there are no lumps. 


3. Pour the plaster of Paris mixture into your molds, smoothing out the tops with a popsicle stick or the flat end of a knife. 

4. After at least 30 minutes, the plaster of Paris will be firm to the touch and can be unmolded and painted with acrylic paints.  


Plaster of Paris figurines make great paperweights, party crafts, and grandparent gifts. To make them extra crafty, you can embed found objects in the plaster before it's completely firm. May I suggest twigs and pine cones, perhaps?

Saturday, October 31, 2020

How to Make Clear Slime

I originally published this tutorial on Crafting a Green World.

Slime is a wonderful sensory experience, and I'm thrilled that so many young people are embracing the joy of exploring interesting textures (there are no interesting textures on their phones!). Making slime is also a terrifically educational activity, with problem-solving and reading and following instructions combined with quite a lot of chemistry and not a little bit of physics, as well.

To make clear slime, I consulted my own resident slime-making expert. She's put in hundreds of hours making slime, and is here with us today to teach you how to make clear slime, the Holy Grail of slimes. Syd's clear slime isn't your ordinary, everyday "clear" slime that's actually milky or white, she tells me. When she says that her slime is clear, she means it is CLEAR.

As in crystal!

So read along as the world's slimiest kid takes the task of making clear slime and breaks it down so simply that even the average non-slimer adult can follow it.

To make clear slime, you will need:

  • Clear Elmer's glue. I used to be able to buy this by the gallon, but lately, I've only found smaller containers for sale. I sure hope the gallon size comes back soon!
  • Hot water. The water should be hot, but still, a comfortable temperature for a kid to touch. For mobile slime-making (yes, this is something that she does...), Syd boils a kettle of water, then pours it into a thermos for transport.
  • Contact lens solution. Buy the cheapest on the market for this project, making sure that it contains boric acid.
  • Baking soda.
  • Two mixing bowls, a spoon, and a resealable container for storage.

1. Pour 1/2 cup of clear glue into a bowl. Remember that kids do this, so don't worry about trying to make your measurements too fussy. The important thing is that you're using CLEAR glue, not white. You can use white glue for other slimes, but then your slime won't be clear!

2. Mix in 1 tbsp of saline solution. This is also known as contact lens solution.

So here's a thing that I want to tell you about: we're going to talk about borax. When slime-making first got big, there was an actual backlash as people started FREAKING OUT that their kids were touching borax. As alternatives, people started posting slime recipes that don't use borax. Some of those recipes are great, some are not, and lots of them use contact lens solution as their substitute for borax.

Y'all, contact lens solution and borax both come from boron! They're pretty much the same, just that one is in powder form and the other is dissolved into a solution.

Not that I think that you should even force your kids to avoid borax, because I don't think that at all. Heck, my kids were making laundry soap from borax with their bare hands at the age of eight (they probably should have been wearing gloves, but still). Borax is FINE, Friends. Sure, if they bathe in it every day for a month it'll irritate their skin, but so will pool water.

3. In a separate container, dissolve 1/2 tsp of baking soda into 1/2 cup of hot water. Stir it well and make sure that it dissolves completely.

4. Once the baking soda is completely dissolved, pour it into the glue mixture. Try to pour it over the entire surface of the glue mixture.

5. Wait approximately a minute, then stir. Knead if necessary. 

At first, the mixture will be a goopy mess but continue stirring and you'll be able to see when the slime activates because it will start to ball up. It will still be sticky when you start to knead it but keep working it and it will become ever more elastic and non-Newtonian until it's the perfect slime.

You will have some of your baking soda and water solution left in the bowl, and that's perfectly fine and normal.

One thing that your slime will not start out as is perfectly clear, for the simple fact that you just kneaded a ton of bubbles into it.

If you really want perfectly clear slime, then pop it into an airtight container and let it sit for a day. The next day, it will be clear!

Note that as soon as you start playing with it, though, you'll start kneading bubbles back into it. This picture is of the clear slime that Syd has played with for a while, and you can see the bubbles:

Pro Tip: Syd stores her slime in small plastic deli containers to keep it fresh--and off of my carpet! She tells me that this particular slime will lose its bounce after several days, but it's easy to reactivate it. To reactive this clear slime, dissolve 1/2 tsp baking soda in 1/2 cup hot water. Pour the older slime mixture into this solution, stir, and then knead it when it becomes firmer. Keep the reactivated slime and discard the excess water.

Saturday, October 24, 2020

How to Make a Fairy Garden

A fairy garden is easy to make, and nope, it actually doesn't require any of those porcelain or plastic store-bought fairy garden accessories.

After all, the fairies don't go to Hobby Lobby for their furniture--they MAKE it!

Fairy gardens also don't have to be as elaborate as the ones that you see showing off all of their store-bought fairy accessories. Sure, a fairy garden wonderland is cute, but not everyone likes "cute."

But I promise everyone can like a fairy garden!

All you really need to make a fairy garden are a couple of small plants and suitable potting soil, a container, and appropriate handmade, found, recycled, or natural embellishments. The fairy garden becomes a magical place based on these elements alone... that's kind of WHY it's magical, you know? Simplicity is, indeed, beauty.

So scavenge up some recycled and natural materials, and let's make a fairy garden!

1. Prepare an appropriate growing environment for your plants. This step is the key to the entire fairy garden--you need the right plants, the right container, and the right soil. Make a garden that looks pretty but doesn't take care of your plants the right way, and it'll be dead within the month.

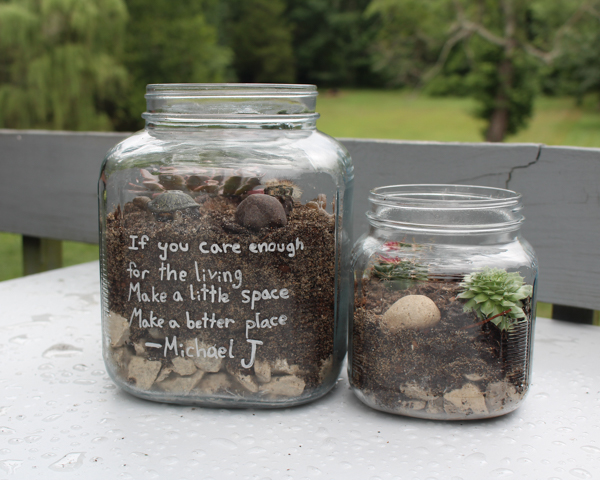
I like to start with the container. For the set of fairy gardens that I made last week, I knew that I wanted to use some old glass storage jars whose lids are... well, I don't know. Maybe the fairies took them.

For a glass container like that, I didn't want plants that would spread a ton, or get too bushy. Moss would have been cute, or a little bonsai, but after wandering around the greenhouse, and learning that they were randomly out of the venus flytraps that I'd REALLY wanted, I decided that a little desert fairy garden would be cute, like a fairy terrarium.

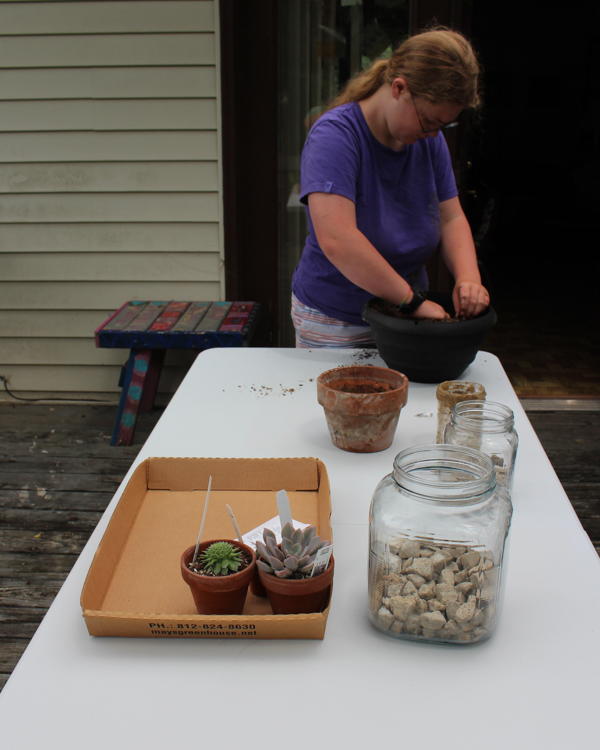
That meant succulents and cacti! Succulents and cacti both need a lot of drainage, so I put in a bottom visible layer of gravel (you could use aquarium gravel for this, or decorative river rocks, or shells, etc.), then the kid helped me mix up an appropriate potting soil for succulents and cacti--basically, potting soil plus playground sand plus peat moss or perlite. I'm ashamed to say that I used peat moss, even though I loathe buying it because its harvesting is VERY problematic, because I couldn't find the alternatives that I wanted and I needed to get the fairy gardens finished so that they could be birthday presents.

Rushed shopping and crafting is often not eco-friendly shopping and crafting, dang it.

2. Add potting soil and plants to the container. Just like in a real garden, bigger plants go in the back and smaller plants go in the front, and offsetting them to each other allows them all to be seen.

As you place the plants, begin visualizing what fairy garden embellishments you want to add, so that you'll be sure to have room.

3. Decorate your fairy garden. This is the fun part! To decorate your garden, check out these handmade fairy garden decorations for inspiration, or look around your home and yard and repurpose found items. Since my kids have been small, they've adored using their little toy animals as fairy garden decorations, and dollhouse furniture also often works well.

As you're embellishing, don't forget the container itself! One of our fairy garden birthday presents needed to be Michael Jackson-themed, and I thought about making Shrinky Dinks or polymer clay models, but it turned out that a relevant quote from one of his songs, written on in paint pen, was all that was really needed to make it perfect.

If you give your fairy garden as a gift, don't forget to include care instructions for the plants, and the appropriate fertilizer, if necessary. Giving the recipient a bottle of distilled water, a little bottle of liquid fertilizer, and a handwritten sheet of when and how much to water can be all the difference between a birthday present that's a huge hit and one that's an eventual source of guilt and self-recrimination.

Looking for more fairy garden inspiration? Check out my kid's junkyard fairy garden here, and this super easy, super magical chia sprout fairy garden that's perfect for preschoolers.

Saturday, September 5, 2020

How to Make String Art

I originally published this tutorial on Crafting a Green World.

When I was a kid, we had a couple of pieces of string art, made by an aunt, framed and hung in our house.

I mean, it WAS the 1970s, the heyday of string art.

But whereas the 1970s craze was all about making a string art owl from a kit (which we had), or a string art sailing ship, also from a kit (which we had), you can now do quite a bit better.

A lot of the imagination that you can bring to string art now comes from how simple technology is to use. Can you imagine what my aunt could have created if she'd had access to clip art and a printer? Google Images? A Cricut?!?

Because I promise you that designing your piece is by far the hardest part of making string art, and even that isn't hard. I know you've got access to Google Images and a printer, after all!

So no more kits for you! I'm going to show you how to make string art the completely DIY way--from scratch, by hand. It's going to be awesome. Here's what you need:

Tools and Supplies

  • Wood, cut to size. I can always find some scrap boards to cut down over in my Garage of Mystery, but other good sources of wood are Craigslist, Freecycle, or your local Restore. Maybe you'll be lucky enough to score a finished plaque!
  • Nails. For this particular project, I'm using 1 1/4" ring shank underlayment nails. They're a little thicker than you need, but I'm doing this project with kids, and that extra width helps them keep their grip. Feel free to use whatever nails you like and have on hand.
  • Embroidery floss. This is another supply that you might just find that someone you know would LOVE to give you. There are a surprising number of people in this world who've given up cross-stitch!

Directions

1. Prepare your wood. This step can take a lot of different forms, depending on what wood you choose and the tools you have available. You can use everything from a pre-finished plaque to a pallet board, but whereas that pre-finished plaque is ready to go, but also pricey and unsustainably sourced, something like pallet boards or scrap wood might need to be cut to size and sanded down, but they're free and keep more resources out of the waste stream.

If you're preparing your own wood, don't skip sanding it--if this is one of your first woodworking projects, you'll be surprised at how much nicer your wood looks after it's sanded. My secret trick is to round the edges of the wood piece while I'm sanding it. It won't replace the services of a router, but just sanding all the edges makes the finished piece look more professional.

Staining and sealing the wood is optional, but if you choose to do so, remember to use water-based stain and sealant.

2. Create your template. Create a template for your string art on typing or notebook paper. You can draw freehand, of course, but Google Image is also your friend, and I love using my old-school Cricut. I mean, it can draw me a parasaurolophus at the size of my choosing! How AWESOME is that?!?

3. Nail directly onto the template. Place the template onto the plaque, and then begin to hammer nails right through the paper, following the lines of the template.

Try to keep your spacing and the nail heights even, but don't stress out too much. The one thing that you DON'T want to do is pull a nail out and leave an empty hole. Just work with where you're going!

Watch, as well, for narrow spacing. You can see above how I modified my parasaurolophus, as I noticed while I was hammering nails that some of my spacing--the tail, for instance, and certainly the legs--was going to be too narrow to look nice when wrapped with string:

Try to remember, though, that nobody is going to be looking at your project as closely and critically as YOU are, so roll with any imperfections that come along.

Once you've hammered in all the nails, tear the paper away. I had to get into a few little nooks with a pair of tweezers, but it wasn't difficult.

4. Wrap with embroidery floss. Now for the fun part! Wrapping the nail art with embroidery floss is the MOST fun, and you'll find that even kids who are too young to hammer nails (although don't dismiss their abilities without really thinking about it--you'd be surprised at how young a kid can handle a hammer!) can have a ball wrapping nails with yarn or embroidery floss.

Tie a knot around one nail (secure it with a little white glue to be safe), then wrap the floss around the perimeter of your piece to outline it. Weave in and out of the nails, wrap it completely around some nails, take a break to go back and forth across your piece--feel free to have fun!

Once the perimeter is wrapped, go back and forth across your piece at every angle, with no discernible pattern, to cover the surface area with embroidery floss. After a bit, you'll be able to notice spots that have gaps and you can easily cover those. This takes a LOT of embroidery floss, so be prepared to use at least an entire skein, and possibly more, depending on the size of your piece. Tie the floss off around a nail, and again, dot the knot with a little white glue to make sure it holds.

When you're finished, you can continue to embellish your piece (not everyone I know is as science literate as I am, so I made a label for my string art parasaurolophus), and mount a picture hanger on the back so that you can hang your new masterpiece in a place of honor.

And now you can make another one as a gift for someone else!

Saturday, August 22, 2020

How to Make Stamped Clay Seed Bombs

I originally published this tutorial on Crafting a Green World.

I used to think that seed bombs do not work, full stop.

And to be fair, I had a good reason for my opinion, because most of the seed bomb tutorials that you see online just do NOT work! Here's why:

  • If the seed bomb is too big, it's not going to be able to dissolve in good time and release the seeds.
  • If the seed bomb recipe calls for too much liquid, the seeds will germinate prematurely and then die.
  • If the seed bomb recipe calls for too many seeds, they'll crowd each other out before they can grow.
  • If the seed bomb gets tossed out at anything other than JUST the right time, it won't get the proper amount of rainfall required to dissolve the bomb and nurture the seeds.

When there are so many things wrong with so many of the seed bomb tutorials that you see, it's easy to think that the whole concept is a bad one.

But done properly, and distributed carefully, seed bombs CAN work.

Here's what you'll need to do it right.

Ingredients & Supplies

  • Air dry clay. I'd suggest something non-pigmented and natural-looking, not something like Model Magic, which is super fun and my kids play with it but I have NO idea what it's made of. If you don't know what it's made of, you certainly don't want it in your garden!
  • Seed starting mix or other potting soil. Your favorite seed starting mix will work well here, but any kind of nutritious potting soil will do.  And again, avoid potting soils with "moisture retention beads" or "water crystals" included; those are just fun names for the same kind of polymer that's used in disposable diapers. You don't want that in your garden, either!
  • Native seed mix. Not all greenhouses are ethical providers of native seeds, so check with your local native plant society before you buy a packet. Better yet, save your own seeds from your favorite native plants and use those.
  • Small stamp. A regular scrapbooking stamp is exactly what you need. Scrapbooking used to be big business, so you should be able to find any stamp design you can dream of.

Directions

1. Get your hands dirty

Pinch off an amount of clay the size of a large marble--remember that the best seed bomb is a SMALL seed bomb, so don't overdo it.

2. Roll the clay into a ball between the palms of your hands

Might as well go ahead and get a little dirtier! Use the tip of a finger to make an indentation in the clay ball, and fill the indentation with as much potting soil or seed starting mix as will fit.

3. Add the seeds

Be very stingy with the number of seeds that you put in your seed bomb because you don't want them to crowd each other out of existence. Three to four seeds is plenty!


4. Seal the potting soil and seeds inside the bomb

Pull the sides of the seed bomb over the top to seal in the potting soil and seeds, then roll it around your palms again to make it back into a nice, smooth sphere.

5. Stamp the top of the seed bomb

Press hard with the stamp; you'll slightly flatten the seed bomb, but will make your stamped impression stand out nicely.

6. Let air dry

Let the seed bombs air dry for at least as long as the package of air-dry clay instructs. Thanks to the potting soil center, the seed bomb might take even longer to dry.

When the seed bombs are dry, you can store them in the same cool, dry, dark spot where you store the rest of your garden seeds. To use them, toss them onto the ground whenever the growing conditions outside match the seed packet's specifications AND there's a lot of rain in the forecast for the next week or so.

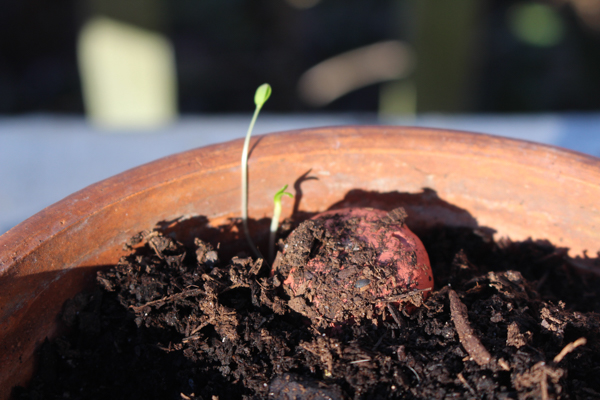
Another option is to simply press a seed bomb down into the dirt in your garden or a flowerpot and water regularly. I planted a seed bomb in a pot in my windowsill just for fun (I don't think the native plants will last inside all winter, but it's worth the experiment), and look how cute my little seedling babies are, growing out from under the safety net of their seed bomb!

My watering can didn't exactly mimic the right rainfall conditions to properly dissolve the clay exterior of the seed bomb, but even so, it was enough to get a couple of sturdy little seeds germinated and growing happily.

Imagine how happy they'll be when I toss them around the garden!


Friday, August 14, 2020

Crafts for the Apocalypse: Syd's Girl Scout Silver TAP


My kid wrote a book!

For Syd's Girl Scout Silver Award, she wanted to focus on the problem of tweens and teens spending too much time on screens. Syd really enjoys crafts and recipes and likes to follow tutorials to make new creations, so she decided that making a set of craft and recipe tutorials for other kids to follow would be a fun way to encourage them to put down their phones and pick up the cardboard and scissors.

Thus began one of the LONGEST Silver Award TAPs in history. OMG, I had NO IDEA what an involved process this would be, particularly when accomplished by the world's pickiest perfectionist.

First, Syd had to brainstorm and then settle on possible crafts and recipes. Then she had to test each one, discard the ones that she wasn't happy with, and decide on a final line-up. Then she made them all again, sometimes a few times, until she had the perfect process for each one. Then she wrote each tutorial, and went through a few revisions on some of them, because it's tricky to write a tutorial!

Fortunately, tutorial writing is exactly within my very specific skill set. 

Syd sent a draft of her tutorials to our Girl Scout troop to be beta tested, and revised some of the tutorials again based on her feedback. As all this was happening, and for the next several months after the tutorials were finished and polished, she was also creating all the art. She went through several drafts to create an original character to model the finished projects, and then a zillion drafts as she drew each of the illustrations. 

And, of course, the book needed an overarching theme, both for the illustrations and the cover art and title.

Thanks to the pandemic, the entire book became... apocalypse-themed. 

When Syd was FINALLY happy with her illustrations and art, she imported it all into Adobe InDesign and Matt showed her how to do even more edits and make the layout:


When Syd was happy with the layouts, she sent a pdf back out to the Girl Scout troop to proofread, made more corrections based on their feedback, and then made even more corrections after feedback from the MEAN GRAMMAR AND PUNCTUATION MOMSTER. 

Originally, Syd had the idea that she could present physical copies of her activity book to kids, perhaps at day camps or after school programs, possibly with a kit included or possibly in concert with some in-person programming. Obviously that was out, thanks to the apocalypse, so instead Syd created a blog to host free downloadable pdfs of her book, and then promoted it.

Syd still wanted to give out *some* copies, though, so she decided to have a few copies printed and drop them off in Little Free Libraries around town. She wrote a budget proposal and presented it to our Girl Scout troop for the funds, then emailed back and forth with a local printing company to get her order made.

And at long last, Syd had real copies of Crafts for the Apocalypse in her hands!


But only briefly, as off they went into all the Little Free Libraries in town:


I had hoped (and advocated for, and nagged about) the project would be completed and the paperwork submitted before Syd began her public school adventure this week. The paperwork isn't submitted, because apparently none of the brilliant minds in this family are brilliant enough to figure out how to create a multi-page pdf (SIGH!), but the rest of the work is done and the forms are filled out and the essays are written, so perhaps today will be the magical day when the pdf fairy comes down from on high to compile the essays and time logs and forms into one clean and efficient multi-page pdf.

This was the perfect project for Syd, even though it turned out to be way bigger than it needed to be for the Silver Award (the suggested time commitment for a Silver Award TAP is 50 hours; Syd put in over 90, and even then didn't log everything). She got to exercise her creativity, express her love of art and making things, and work through the big challenges of maintaining a giant project independently. 

And of course, the fact that her project concluded with a connection to Will's Silver Award TAP is especially sweet to me.

Now... on to Gold!

Twelve Years Ago: I'm a Wench

Thursday, July 23, 2020

Homeschool Biology: Let's Learn Neuroanatomy!


Neuroanatomy hit the requirements for a goodly portion of the kids' studies this past year.

Will needed it for AP Psychology. Syd needed it for Honors Biology. And just for funsies, I found a Healthy Brain Initiative Girl Scout fun patch that also included it!

Obviously, you can learn neuroanatomy simply by memorizing diagrams of the brain, spinal cord, and a neuron, but that's not super fun, now is it?!?

You know what IS super fun?

Making this wearable brain diagram, that's what!


The kids made both English and French-language versions--


--and tried to make one for Luna, as well, but alas, her brain is a different size...


To memorize the parts of the neuron, I had the kids create their own models using their own ideas, although they were allowed to do some research for inspiration. Even teenagers are obsessed with Pinterest! You can see Syd's Model Magic neuron above. Will's beaded neuron was equally impressive, but she built it on a table top and didn't realize that it didn't have any structural integrity until she picked it up and it collapsed into one long, beaded string.

It's a beautiful necklace, though!

So that the kids would have a diagram that they could study, I photocopied some of the pages from this awesome book--


--and had the kids color them and use them as their reference for memorization.

I also like to have the kids get their hands on real artifacts whenever I can, not just models, so although Syd objected and spirited herself away to a friend's house during this activity, Will was happily on board with learning how to dissect a sheep's brain with me.

It's a VERY good lesson in how complicated things are in real life, even when they look pretty simple in a color-by-number diagram!

That was enough neuroanatomy for all of our purposes at the time, but since this topic is one that we do spiral back around to regularly, I've got quite a big list of other games, activities, and other enrichment projects to enhance this study. Here's some of them!

  • Crochet Pattern. Learning to crochet is absolutely on my to-do list, primarily so I can make lots of nerdy little projects like this one!
  • DIY Model. This assignment is similar to the one that I assigned the kids for their neuron model--you just have to tell them the parts that must be illustrated and labeled, and let them go off to be as creative as they like!
  • Ectomy. For those who love the brain hat as much as we do, The Basement Workshop also has a game to reinforce memorization of the lobes of the human brain.
  • Fondant Brain. You know how much we love to turn everything into a cake or a giant cookie! One day, we'll bake ourselves one of those and decorate it with a fondant human brain
  • Functional Neuroanatomy. This interactive site from the University of British Columbia is as detailed as you could ever possibly need. You can watch videos, look at models, and teach yourself a LOT of brain anatomy!
  • Mold. We've got a plastic brain mold very similar to this one, which we use for Halloween baking--because of course! However, it's on my to-do list to one day use plaster of Paris, or perhaps my dream material--concrete!
  • Quilled Neuron. Syd and I have done quilling before, and we thought it was really fun. I'm feeling like a quilled neuron is not beyond our skill set!
By the time you finish all of those projects, you're going to know your neuroanatomy really, really, REALLY well!

P.S. Want to follow along with our handmade homeschool and afterschool adventures? I post lots of resources, projects, and photos of our adventures over on my Craft Knife Facebook page!

Thursday, July 16, 2020

Paint Stirrer Crossbows and Popsicle Stick Catapults: Homeschool STEM with Rubber Band Engineer


We're not exactly lacking STEM studies here in our homeschool, but I thought that the kids might like a change from robotics, so I offered them the opportunity to create something from this fun little book:


Because what could possibly be more charming than a book with a real, actual rubber band on it?!? Or more tempting than a cover that boasts the instructions for a "slingshot rifle" inside?!?

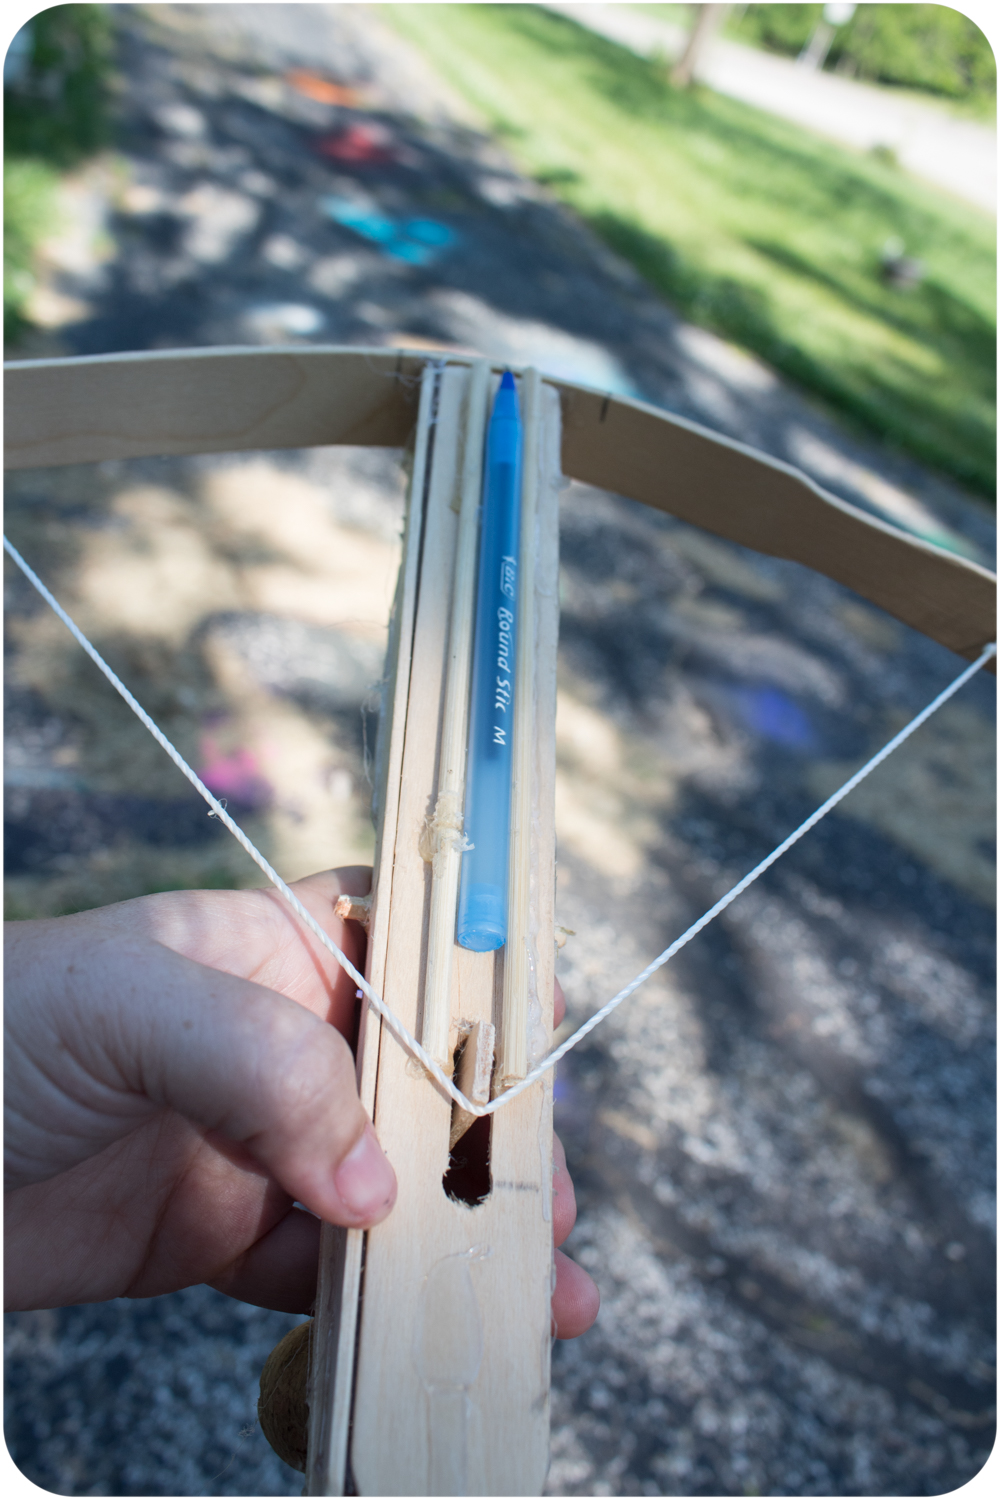
Here is Will's ballpoint pen crossbow, made from paint stirrers, bamboo skewers, a lot of hot glue, and some twine:


I don't have any photos of it in action because I didn't realize that its first shot would be its last! Will suspects that the twine she used was too stiff; she thinks she needs something with the slightest bit of stretch so it can hold a little more potential energy without putting so much pressure on the paint stirrer. 

Stay tuned for Version 2!

Syd's wooden pencil catapult was more successful overall--


--but then, she did have an assistant for its construction:


It turns out that a catapult made from duct tape, wooden pencils, and a plastic lid, shooting a cork tied to yarn, is quite the thing to keep a young cat entertained:


An automatic winder would improve the catapult's playability here, I'm told, as much of the fun for the cat involves chasing the yarn as it's being wound up again for another go:


This was definitely a good book for encouraging the tinkering aspect of STEM: the contraptions all worked fairly well, with build instructions clear enough that a kid could follow them independently, and yet they always had the potential to work better, or in a different way, with some overall easy-to-implement ideas that kids can dream up. 

In this way, rather than each contraption being the end goal, it's more the starting point (it reminded me quite a lot of the time the kids made paper roller coasters, actually!). A kid uses her fine-motor skills and ability to follow directions to create an instrument upon which her own research, ideas, refinements, and tinkering do the work to teach her the physics, math, and engineering concepts hidden within each contraption.

And if you end up with a ballpoint pen that's turned into a projectile, all the better!

P.S. Want to hear more about paper roller coasters and paint stirrer crossbows? Follow my Craft Knife Facebook page for more projectile adventures as they happen!