Showing posts with label physics. Show all posts

Thursday, December 7, 2023

Homeschool High School Chemistry: Electrolysis of Water Lab

Another day, another kitchen table chemistry lab!

I don't know what the "proper" number of hands-on labs a high school student usually conducts in a non-AP Science class is (in her year of public school Honors Biology, my own teenager conducted one), but in our homeschool high school honors science classes, I try for at least ten high-quality labs, experiments, and/or demonstrations, all written up by the student in her lab notebook for that subject. 

And they don't have to be complicated! This Electrolysis of Water lab could be conducted by an early elementary student, it's so simple. It takes just minutes, and it's easy as pie to conduct at the kitchen table.

To make it appropriate for a high school Honors Chemistry lab, just add rigor! When she completed this lab, my teenager was studying Lewis Electron-Dot Structures and calculating chemical reaction formulas, so I wrote her Post-Lab Questions to require her to practice these skills in a real-world environment.

In AP Language and Literature, she's looking deeper into the etymologies of words, so I also included a question about that to build context. 

Here's the set-up for the lab (pretend that you don't see the erasable pen that my teenagers like to use to cheat the lab notebook system of "write in pen; no erasing"):


Salting the water to the proper ratio (feel free to admire the chopstick stirring rod...):


Attaching the wires to the battery (the electrodes are currently touching, but she'll fix that as soon as she notices):


And now... observation! I always think that this is the coolest, most magical demonstration. Look at all the bubbles!


A surprise to us all: we didn't expect the aluminum to start flaking away! 


Is it an aluminum oxide coating on the foil? A manufacturing flaw resulting in improper adhesion of the aluminum that weakens it?


My favorite thing about science is the way that new information inspires new questions!

If that's not enough electrolysis for you, here are a few extension activities:

  • incorporate Snap Circuits. I actually thought pretty hard about incorporating part of this demonstration, because we have sooooo many Snap Circuits. This would be an especially good extension if your focus is actually on electricity. 
  • incorporate a pH indicator. This is a neat addition, especially if you've recently studied pH. Red cabbage pH indicator is another excellent homeschool DIY project!
  • clean iron. The Children's Museum of Indianapolis has a giant electrolysis tank where you can observe the real-time process of rust removal from one of Captain Kidd's cannons, so you can observe this real-world bit of science in action even if you don't have your own iron to clean via electrolysis.
And here are a couple of books that include similar electrolysis experiments. The Marie Curie book is even written TO middle-grade kids!

And there you have it: excellent science using household materials in just a few minutes. With that little time spent on the actual lab, you've got plenty of room to really ramp up the rigor of the post-lab questions!

P.S. Want to follow along with my craft projects, books I'm reading, dog-walking mishaps, road trips, and other various adventures on the daily? Find me on my Craft Knife Facebook page!

Tuesday, January 5, 2021

We Earned the Girl Scout Space Science Badge (after I completely rewrote it...)


To be fair, the Girl Scout Space Sciences badges at every level are more than fine as they are. They offer a good progression from Daisy and Ambassador, don't have so much overlap with school curricula that they'd be repetitive and boring, and are a fun combo of activities, academics, and hands-on work.

However, as the leader of a CSA troop during a pandemic, I have a couple of special circumstances:

  • Since the badge is offered at every level, I wanted to lead the badge in such a way that each kid could earn it at their level, and wouldn't have to repeat any activities to earn it at the next level. So basically, I had to invent new activities that met the same goals as the activities recommended in the badge books.
  • We'd planned to have an entirely outdoor meeting in November to earn this badge, which... brrr! Mind you, Girl Scouts can deal with the cold, but I thought it would be more productive to hybridize the badge, and have some activities that the kids could complete at home, while saving the must-be-outdoors activities for our meeting. 
I ended up really liking that hybrid method, by the way. As the kids get older, their badges take more work to earn, as they should! But my troop does not meet so often or for so long that we can easily do all the badge activities together and still earn badges with any regularity. Giving them the at-home kits worked well to make sure we accomplish the pedagogical and skill goals of the badge, while making the best use of our limited meeting time. Even better that it puts more of the responsibility of actually finishing the badge on their shoulders! It's a fairly low-stakes, high-interest project for practicing those crucial time management skills.

Here, then, is the agenda of activities to earn the Girl Scout CSA Space Science badge at your level:

  1. SEE THE STARS IN A NEW WAY (from the Cadette Space Science Researcher badge)

    1. Make a planisphere.

  2. DISCOVER TELESCOPES AS LIGHT COLLECTORS (from the Senior Space Science Expert badge)

    1. Look through Ms. Julie’s telescope.

  3. DISCOVER WORLDS BEYOND EARTH (from the Ambassador Space Science Master badge)

    1. Make a postcard or tourist brochure (Use NASA tourist posters for inspiration)

      1. Include graphics, explanation, postcards, and postcard stamp in at-home package

  4. DIVE INTO NASA SCIENCE (from the Ambassador Space Science Master badge)

    1. Model rockets!

      1. Drop off early in October; should be assembled, with glue cured, painted by meeting time.

    2. Can we see the ISS during our meeting?

  5. EXPLORE YOUR INTERESTS (from the Ambassador Space Science Master badge)

    1. Light Pollution

      1.  Bortle Dark-Sky Scale

        1. https://www.delmarfans.com/educate/basics/lighting-pollution/

    2. Globe at Night Citizen Science Project: https://www.globeatnight.org/

Our main theme was the ways that we explore and observe space. Many of the kids had never stargazed with any intention before, so for Step 1, I wrote everyone a lesson about naked eye observation of the night sky, in particular the regularity of the constellations, and their use as celestial calendars. I gave the kids the supplies to construct this cardstock planisphere as a paper celestial calendar/night sky viewer, and I showed the kids who brought theirs with them to our in-person meeting how to use them, and also shared around the night sky app on my phone as a comparison. The kids pretty much all preferred my night sky app, but with their analog planispheres they'll never be lost in the sky!

Step 2 was my favorite, because my favorite thing to do is to look through my telescope! While the kids and our other chaperone were finishing up their campfire dinner, I set up my telescope; it's fiddly, takes a billion years to get just right, and trying to do it while people watch me makes me nervous. It was fully dark by the time everyone had finished eating, which was perfect timing! In early November, great things to see through a telescope include Jupiter and its moons, Saturn (and its rings!), and, of course, the Moon:

And since it was right there, we looked at Mars, even though it's not exactly the most mind-blowing planet to observe through an at-home telescope. I would have loved to have shown them the Andromeda Nebula, which is my current favorite thing to look at, but I'm still learning my telescope and I'm lucky if I can find it when it's just me in a field with all the time in the world and nobody looking at me.

I didn't do so much of a guided lesson for the telescope step, but we did talk a lot about what we were looking at, what else we might look at, and about good old Galileo. The canals of Mars! How he probably burned out his retinas! You know, all that good, educational stuff!

I wanted the kids to know that most space observation is indirect, but still results in interestingly detailed descriptions of what's being observed, AND I wanted something that they could do completely at home, so for Step 3, I decided to have them make souvenir postcards for a space object of their choice. I gave them postcard blanks that I wrote, color copies of several of these NASA Exoplanet Travel Postcards as inspiration (I had Matt tile several at a smaller scale onto a single page so the kids could see lots of examples without the troop paying for lots of color printing!), a stamp, and the address of their "secret Girl Scout," i.e., another kid in the troop. I wrote them a lesson on exoplanets, the methods of indirect observation that give us information about them, and the ways that the artists of the NASA postcards used that information to construct creative visuals of them. 

Each kid's assignment, then, was to choose absolutely anything in space that humans have not stepped on or sent cameras to the surface of. They were to research their space object, creatively interpret that information to make their own travel postcard for it, then mail that postcard to their secret Girl Scout along with the name of their object and some cool facts about it. 

Here is Will's:

I love how she even included a cute slogan for her exoplanet with three suns!

Okay, Step 4 could easily be a badge of its own--and why are there no Girl Scout rocketry badges?!? I did want the kids to learn more about direct exploration of space, but mostly I wanted a super-fun, super-exciting activity that would really sell space science to them, AND I wanted it to be outdoors and social-distancing friendly.

Rockets it is, then!

I bought a bulk set of these easy-to-assemble rockets, and a variety pack of engines. I put the rockets and build instructions into the kids' at-home kits, and told them what step to stop at, because I planned for us to finish them as a group during our in-person meeting. The instructions that came with the package were... not great, unfortunately. Some kids texted me for troubleshooting advice, some kids found their own tutorial videos on YouTube, some more or less got it right on their own, and some I helped at the meeting. 

Everybody DID end up with a launchable rocket, although there were... some issues. Some kids who misread the instructions had rockets that basically blew up on the launch pad. Other kids glued their fins into very creative configurations--I should definitely have covered fin placement in my lesson!--and had rockets that spiraled off alarmingly upon liftoff. Of course it had to be my own kid's rocket that lifted off, rose about five feet, then turned 90 degrees and screamed directly at one of our chaperones. She and all the kids leapt away, the rocket landed basically where she'd been standing a half second previously, smoked quietly for several seconds, then exploded.

But most of the kids had awesome launches!


There were so many cool, technical things that the kids practiced and learned during this activity, from the build instructions to fin placement (oops!) to engine size to the practicalities of hooking up the rocket to make a complete circuit to why we always do a countdown to launch that, yeah. There should seriously be a badge for that. It was the FUNNEST!

Girl Scouts always want to make the world a better place, so for our final step, I introduced the kids to the Bortle Dark-Sky Scale. We live in an interesting location, with very dark and rural areas just a few minutes from our town, but also with a large university that also leaves the lights on at its large football stadium way too often for my liking. In other words, do NOT GET ME STARTED about light pollution!

I gave the kids an at-home copy of the Bortle Dark-Sky Scale, and we talked about it and about light pollution while we took turns looking through the telescope. I had really wanted to also do this Globe at Night Citizen Science Project with them, but it wasn't the correct time of month when we met, alas, and I didn't want to turn it into one more at-home assignment. I guess I'll save it for the next time I run this badge and need all new activities!

I think the kids all had a fun time with this badge. We had the perfect combination of activities for their different personalities--active stuff, outdoor stuff, hands-on stuff, art stuff, experiential learning stuff, and, of course, campfire and hot dog and s'mores stuff. It was one of the very few times we've met in person since the pandemic began, so I think they were all thrilled to see each other, and I'm very hopeful that rocketry and telescope observation were exciting events even for those jaded teenaged hearts. 

Next up: we navigate Girl Scout cookie season in a pandemic, maybe go kayaking in a cave, and also maybe have an entire meeting based solely on Percy Jackson.

Thursday, July 16, 2020

Paint Stirrer Crossbows and Popsicle Stick Catapults: Homeschool STEM with Rubber Band Engineer


We're not exactly lacking STEM studies here in our homeschool, but I thought that the kids might like a change from robotics, so I offered them the opportunity to create something from this fun little book:


Because what could possibly be more charming than a book with a real, actual rubber band on it?!? Or more tempting than a cover that boasts the instructions for a "slingshot rifle" inside?!?

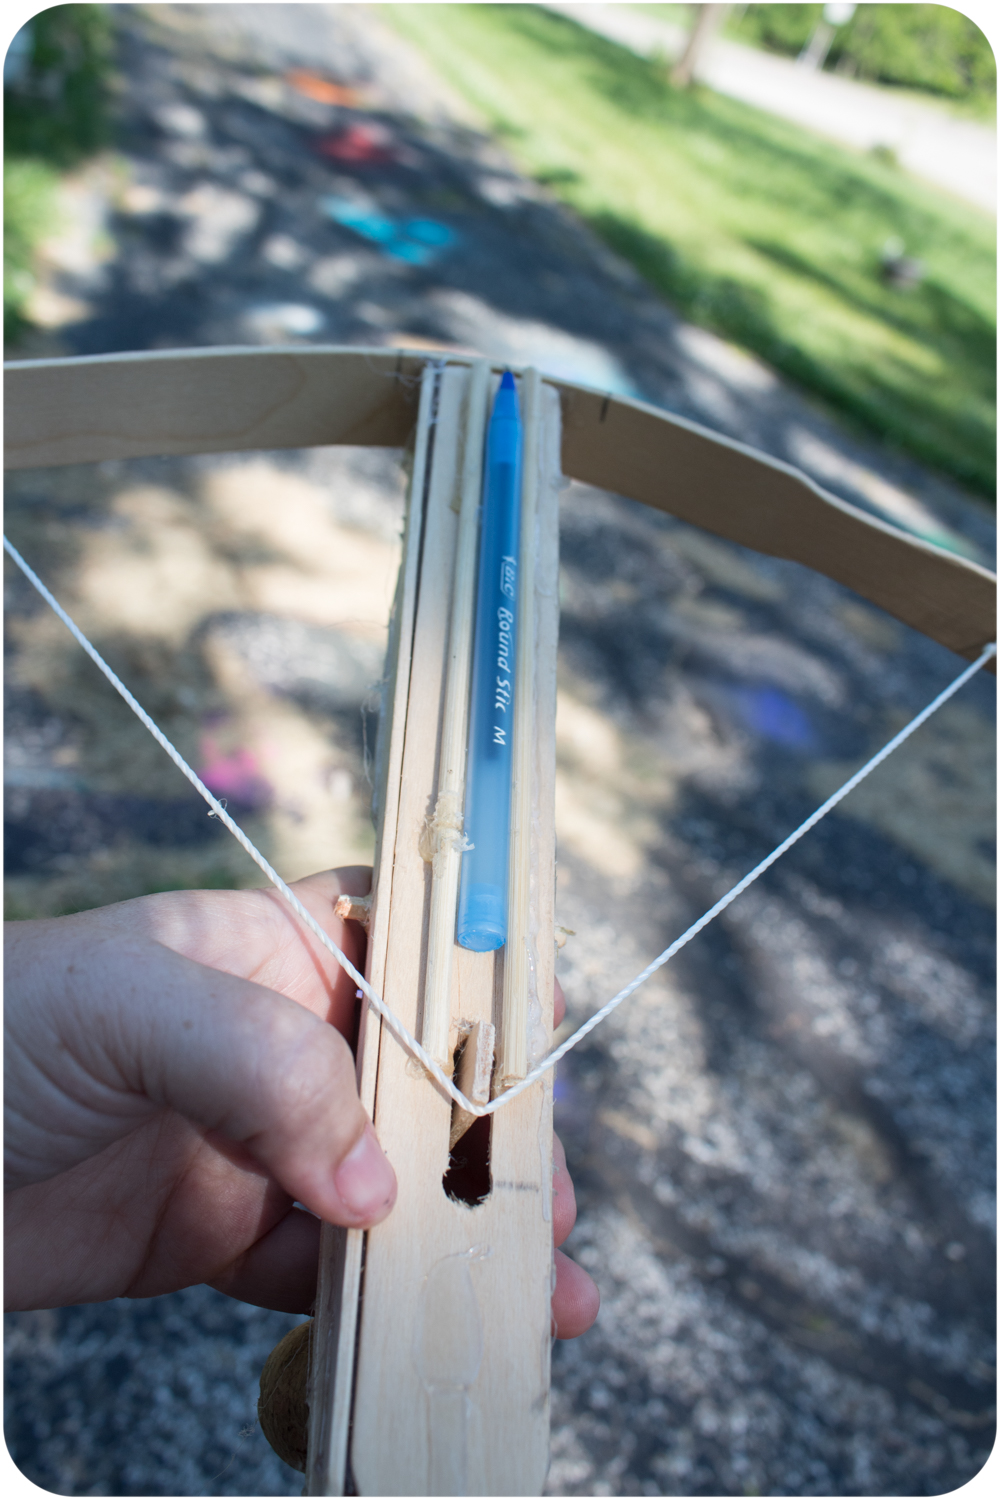
Here is Will's ballpoint pen crossbow, made from paint stirrers, bamboo skewers, a lot of hot glue, and some twine:


I don't have any photos of it in action because I didn't realize that its first shot would be its last! Will suspects that the twine she used was too stiff; she thinks she needs something with the slightest bit of stretch so it can hold a little more potential energy without putting so much pressure on the paint stirrer. 

Stay tuned for Version 2!

Syd's wooden pencil catapult was more successful overall--


--but then, she did have an assistant for its construction:


It turns out that a catapult made from duct tape, wooden pencils, and a plastic lid, shooting a cork tied to yarn, is quite the thing to keep a young cat entertained:


An automatic winder would improve the catapult's playability here, I'm told, as much of the fun for the cat involves chasing the yarn as it's being wound up again for another go:


This was definitely a good book for encouraging the tinkering aspect of STEM: the contraptions all worked fairly well, with build instructions clear enough that a kid could follow them independently, and yet they always had the potential to work better, or in a different way, with some overall easy-to-implement ideas that kids can dream up. 

In this way, rather than each contraption being the end goal, it's more the starting point (it reminded me quite a lot of the time the kids made paper roller coasters, actually!). A kid uses her fine-motor skills and ability to follow directions to create an instrument upon which her own research, ideas, refinements, and tinkering do the work to teach her the physics, math, and engineering concepts hidden within each contraption.

And if you end up with a ballpoint pen that's turned into a projectile, all the better!

P.S. Want to hear more about paper roller coasters and paint stirrer crossbows? Follow my Craft Knife Facebook page for more projectile adventures as they happen!

Monday, November 18, 2019

DIY Gears and Sneaky Gear Lessons for Your Homeschooled Steampunk Teen

It was at some Comic-Con or other that Syd first saw steampunk style, and since then she's been low-key invested in it. She's collected a few steampunk-style accessories, but to me, the main essence of steampunk is that it's DIY.

Like, hardcore DIY. Handmade rocket-powered boots and gear-operated wings, muscled together with blowtorches and too many rivets in a grimy basement workshop with music that's too loud playing to distract the neighbors from the screams of metal.

Girl, you don't buy that at Michael's! You weld it all together your own dang self!

I managed to scavenge some gears from other stuff for Syd and I to play with. We're short on old clocks, alas, but Will had an older wooden moving model kit that she was happy to donate, and it turns out that we've got lots of gears in with our LEGOs!

These scavenged gears are enough for  me to sneak in some gear-based physics and engineering lessons with Syd as we're crafting with them. A good ratio for a teen who really only wants to be making herself steampunk accessories is 1 Lesson = 1 Craft Project. So here are some good lessons to sneak in!
  • What are gears and what do they do? The Powerpoint for this lesson is actually quite informative (it turns out that I really DID want to be able to identify gear types!), but Syd would never sit through a Powerpoint, so I distill the information and re-present it in lecture format. The associated YouTube video, however, while dry, goes down a lot better because it has that retro documentary feel to it.
  • Build working LEGO gears. If you've got as big of a LEGO collection as we do, you've got everything that you need to build this working model of gears. This is a nice project to do right after the previous lesson, because you're moving straight into model-building!
  • free play. Every kid, big and small, loves experimenting with gears! Check out Syd and Will at Maker Faire Detroit eight years ago:

Gears are just really fun to get your hands on and explore, so if you can set up something similar (even those plastic toddler gears work well), I highly recommend it!

And here are some good books on gears to sneak into your teen's hands (all our books are from the library, so these are Amazon Affiliate links):


So in between and all around the sneaky learning, Syd really just wants to craft with gears, but the problem with our non-steam-powered world is that there just aren't enough gears to scavenge!

That's why we've started DIYing gears from scratch. You can play with size, you can play with color and texture, and if you don't, you know, actually need your gears to function, you can build them out of just about anything!

Here are some of my favorite DIY gear tutorials so far:
  1. cardboard 3D gears. Corrugated cardboard is the most useful supply EVER! This is a clever way to build up the gears so that they aren't flat and fake-looking.
  2. cardstock 3D gears. Here's a similar method that uses cardstock, which is fiddlier to work with but the tutorial includes templates so that at least you aren't also making your own patterns.
  3. corrugated cardboard gears. These aren't picturesque gears; instead, they're real, WORKING gears! Corrugated cardboard is an accessible supply that makes these gears super easy to make.
  4. craft foam gears. I don't love craft foam, but if you've got it handy, here's how to make gears from it. And at least craft foam is paintable, so your gears won't look like craft foam!
  5. gears art lesson. Syd wants perfect, machine-looking gears, but I think that these mostly hand-drawn gears are really awesome! I'd actually love to create that interlocking gear garland, below, with hand-drawn gears instead.
  6. gears on wreath forms. Building a gear on a flat wreath form makes the gear a LOT easier to mount on the wall.
  7. gear template. Use this template to cut your own gears out of any material.
  8. gear template generator. I can make the gears using this generator, but alas, I still can't get them to print correctly. Maybe you can do better?
  9. interlocking gear garland. The gear template for this paper garland includes an extra tab so that you can attach the gears together with brads.
  10. papercraft gears. I haven't explored all of these templates, and the instructions for many of them are in Japanese, but there are several different styles.
  11. pin gears. These working gears are made from more thick cardboard and sewing pins.
  12. pool noodle and thumbtack gears. Here's another option for working gears. Both these and the pin gears don't make cute, steampunk-style gears, but they do make gears that you can actually USE. I also like the fact that you can put the pins and thumbtacks anywhere you want so that you can play with gear ratios.
  13. plastic caps and popsicle sticks. Add a cardboard box and make more working gears!
  14. Styrofoam gears. The secrets to getting this realistic look with Styrofoam are spackle and hot glue.
Syd and I are planning to steampunk up our Christmas decorations this year. First up: a steampunk snowman!

After that... don't you think that a gear garland in Christmas colors would look nice?

Monday, October 7, 2019

Girl Scout Senior Programming Robots Badge Step 2: Build a Robot Arm (Using Girl Scout Cookie Box Cases!)

Step 2 of the Girl Scout Senior Programming Robots badge asks girls to build a robot arm, so that's just what we did!

The kids and Matt used this cardboard robotic hydraulic arm tutorial and template, and this set of syringes and tubes.

Fun fact: Matt is now low-key fired from doing school projects like this with the kids, because you ought to be able to do a big, complicated project with your own children without screaming at them. So if I assign you to do a big project with my kids, now you know how to get out of it!

ANYWAY, the kids and Matt did manage to assemble a sort-of working hydraulic arm, although perhaps because it heard so much yelling during its formative hours, it never has performed quite right. Will spent an entire extra afternoon fussing around it and got it to function much better, but none of us could get those pincers to close properly:


Ah, well. It's a lesson on the way that adding more moving parts (whether they're people or bits of cardboard and twisted wire and tubing) adds complexity and increases the potential for error!

So the cardboard hydraulic arm didn't function perfectly, but it did function well enough for the kids to better understand degrees of freedom and how the system as a whole works, and hopefully they'll remember hydraulics and cardboard as options when they're imagining and building their own robots later.

And considering that it's all cardboard, toothpicks, tubing, and glue, I think it looks pretty baller!


My favorite part, though, is all of the cookie cases that they used to build it!


I have a plan this cookie season to collect/hoard more of those cookie cases, which are all that lovely corrugated cardboard that's so perfect to make every single thing out of. And who knows? The Designing Robots badge is still to come, and perhaps in the process of earning that one, the children will discover that cardboard cookie cases and LittleBits are the perfect power couple!

Want to complete this badge step in a different way? Here are three other good DIY robot arm projects that Senior girls can do:

  • cardboard robot arm. This arm uses string to mimic the way that the muscles in a human hand pull. It would be a lot more doable for a group of girls to create individually.
  • giant computer-controlled robot arm. This arm is GIANT, and perfect for a group of girls to create together. Combine it with the Introduction to Programming Journey, since you'll be controlling this arm via computer.
  • popsicle stick arm. Here's another arm that girls could make individually, and popsicle sticks are easy to obtain!
P.S. Want more Girl Scout projects and tutorials? Check out my Craft Knife Facebook page for photos, links, and resources!

Wednesday, August 1, 2018

Homeschool Physics: We Made Paper Roller Coasters


You know that nothing is fun unless you study for it, right?

It's perfectly natural, then, that I would tack on an entire, though short, physics of roller coasters unit study to our summer, as a prelude to the family trip that we take to Holiday World (made possible because two tickets to a theme park is one of the high-level prizes in our council's Girl Scout cookie sale!) every summer.

I mean, come on. I'm the mean mom who signed her kids up for a ride physics class AT DISNEY WORLD (it was an awesome class, and if you ever get a chance to go to Disney through the YES program, you should do it!). You know I'm not above making them study for a day trip to Holiday World.

I'll tell you about the physics of roller coasters unit as a whole another time, but by far the coolest part of it was making paper roller coasters.

We used these paper roller coaster templates, and they were absolutely perfect. I had to refer to the instructions the first time I tried to assemble each component, but after that the process was straightforward and easy to remember.

The kids measured and cut the cardboard base for each paper roller coaster using old pizza boxes (we eat a LOT of take-out pizza...), and did all the design and assembly themselves--


--but I often sat with them and did grunt construction work, as there's a LOT of cutting and taping to be done to construct every single piece. Normally, kids would create these in groups, but my kids each wanted to create their own--I mean, wouldn't YOU want your very own roller coaster?--so they definitely needed some unskilled labor to help ensure this wasn't a project that took all year.

Since we did this over summer weeks that were often broken up by day trips and long weekend trips and camps, I was pretty chill about my expectations for how much time they put into creating their roller coasters. Each kid for sure put in several hours, and the younger kid spent a lot of time while the older kid was at Space Camp working on hers, 
so you'll notice that it's more elaborate than the older kid's:


I love looking at all those little details!

The kids did a LOT of problem-solving and troubleshooting as they worked, and it's exactly the type of work that I like to see my perfectionist one and my academically gifted one do, and it's why hands-on learning is so important. One thing that I could have required, but didn't, is that their paper roller coaster be consistent--it's what's required in a real roller coaster, after all. Can't have a real roller coaster that only works one out of every five times, and that only after you've fiddled a little more with it every time!


They'd already put so much time and work into their roller coasters by the time they each had a design that felt complete, though, that I didn't feel like adding more to the project. They'd also had so much fun that I didn't really feel like bringing them down by making them continue working after they felt done, and honestly, our summer has been so whirlwind that I was pretty happy to be able to film them doing one good run and then call it an ending.


Here's the older kid's paper roller coaster:


You can see that there's less to it than the younger kid's, but it's also a faster and more exhilarating ride!


I need to remember to include more of these short units into our homeschooling. We did so many of these when the kids were younger, of the type like, "Hey, you kids are super into fruit--let's spend a week learning everything about fruit!", but as they get older, we've ended up in much more involved, longer studies. They're great for really mastering a subject, but there are so many things to know and explore! And never enough time in the day!

Thankfully, though, we set aside the time for this. And when we go to Holiday World and spend the day riding terrifying roller coaster after terrifying roller coaster, it will be with the comfy knowledge that we now know quite a lot about the physics of roller coasters.

P.S. Want to follow along with my craft projects, books I'm reading, dog-walking mishaps, encounters with Chainsaw Helicopters, and other various adventures on the daily? Find me on my Craft Knife Facebook page!

Thursday, March 1, 2018

The Kid Makes Handmade Slime

My tactile, hands-on, crafty, busy kid has busied herself at the big table that we bought for just that purpose, in the playroom that we designated for just that reason, ever since we bought this house. It's one of the reasons why we bought this house, that room that I knew could be a room of the children's very own. The big kid lounges on the floor, reading or coloring (which is why I have two giant floor pillows in progress taking up half of my study/studio space), but the table is mostly the little kid's domain, for Perler beads, play dough, drawing, jewelry-making, and mostly slime.

Slime for days. Slime for YEARS!

All of the little kid's slimes have original recipes. They all have original names. They all have peculiar qualities that she can tell you all about. None of the rest of us really give her handmade slime hobby the respect that it deserves, so the other morning I took my camera, found her in the playroom (making slime, of course)--


--and said, "Okay, Kid. Show me all your slime."

This is not EVEN all her slime, because my camera battery died. It is, instead, a fairly representative selection:

This is Pink Speck Slime:


It contains glue, red liquid watercolor, liquid starch, glitter, and the tiniest little bit of shaving cream:


This is White Fluffy Slime:


It's made from glue, shaving cream, and liquid starch:


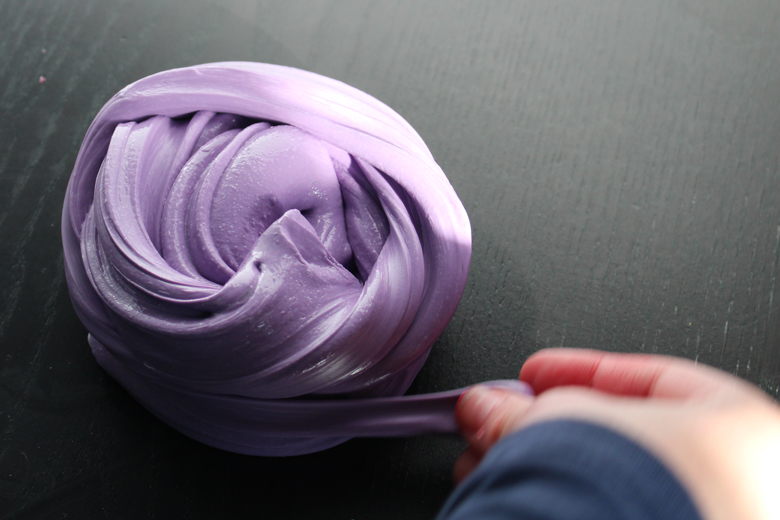
This is Purple Putty Slime:


It's made from one teaspoon thermic powder (which did nothing), glue, liquid starch, and red liquid watercolor:


This is Blue Speck Slime:


It's made from glue, glitter, and liquid starch:


This is Purple Fluffy Slime:


It's made from purple powdered tempera, glue, liquid starch, and shaving cream:

This is Black Glitter Slime:


It's made from a giant heap of glitter, the smallest amount possible of glue, and liquid starch. It's the glitter that makes it black:


This is Yellow Butter Slime:


It's made from stale yellow Model Magic, glue, and liquid starch:


This is White Cloud Slime:


It's made from glue, shaving cream, and liquid starch:


This is Clear Jelly Slime:


It's made from water, clear glue, and liquid starch:


This is Mash-up Slime:


It's made from all of the excess slimes that wouldn't fit into their containers:


This is Pink Floam Slime:


It's made from clear glue, pink floam beads, and liquid starch:


This is the little kid's personal favorite, White Snowy Slime:


It's made from clear glue, a bunch of glitter, liquid starch, and shaving cream:


This is another White Fluffy Slime or White Cloud Slime, although when I told the kid that she had showed me both a White Fluffy Slime and a White Cloud Slime already, she rolled her eyes at me, and when I pointed out that she'd just rolled her eyes at me, she informed me that she was just looking up at the door instead:


It's made from glue, a lot of shaving cream, and liquid starch (and a sarcastic tone and a couple more eye rolls, it seems):


This is Blue Floam Slime:


It's made from glue, blue foam beads, and liquid starch:


This is White Normal Slime:


It's made from glue and liquid starch:


This is Green Sand Slime:


It's made from glue, a little bit of green kinetic sand, and liquid starch:


This is Clear Unicorn Pee Slime:


It's made from clear glue, liquid starch, and some glitter:


Since slime making is the little kid's area of interest, I buy her whatever she asks for as far as slime ingredients go, and sometimes, if I happen upon a recipe with an unusual ingredient, I'll surprise her with something she hasn't asked for--that's how she ended up with the foam beads, which are a hit, the thermochromic powder, which she hasn't been able to make work so far, and some metallic pigments, which she hasn't experimented with yet.

I also bought her saline solution, which she used to make a whole series of slimes that led her to decide that she far prefers to work with liquid starch.

Here are the little kid's favorite slime-making supplies so far:

  • 2-ounce plastic storage containers. These work well for giving slime away, especially on Valentine's Day.
  • 8-ounce plastic storage containers. These are the standard size that she uses.
  • glitter. The kid has recently also asked for large-flake glitter, so we'll make a trip to the craft store this weekend to hunt some down.
  • clear glue. I buy this by the gallon.
  • foam balls. The dye comes off of these balls when it's mixed into slime, so the kid says that you might as well just buy the white foam balls and dye the slime your color of choice.
  • glitter glue. The kid is just as happy dyeing and glittering her slime from scratch, but she likes these, too, so I buy them if I see them on sale.
  • white glue. I also buy this by the gallon.
  • Stay-Flo liquid starch. This is the kid's ingredient of choice for all of her slimes.
  • miscellany. The kid has experimented with all kinds of mix-ins for her slime, everything from sand to beads to dry rice and any other ephemera that comes her way. She also likes to find unusual ingredients to make slime from. She made some awesome slime from stale Model Magic, but the slime that she tried to make from leftover play dough turned into a slimy nightmare that still makes me shudder a bit to think of it.
I don't always appreciate the kid's passion for slime making; it's sticky, and messy, and that playroom table will likely never recover, sigh. But I figure that I bought the playroom table for the kids to use, and the stickiness and messiness is just the kid feeding her senses. She's being creative, she's exercising her STEM skills with all that creating and remixing recipes and discovering new combinations, and she's engaging in whole-body physics and chemistry by exploring the properties of a whole series of non-Newtonian fluids. 

And she's mastering the entire field of slime making, and experiencing the confidence and satisfaction of that mastery. What more could I ask glue and starch to do for a person?

P.S. Want to follow along with my craft projects, books I'm reading, road trips to random little towns, looming mid-life crisis, and other various adventures on the daily? Find me on my Craft Knife Facebook page!