Showing posts with label tutorial. Show all posts

Wednesday, August 9, 2023

I Made Some Oven Mitts, and I'll Probably Make Some More


It was my birthday last week, and the kids and I had made all kinds of plans. The teenager tipped me off on signing up for birthday freebies, so we had some of those to pick up, and we also thought it might be fun to buy iced coffees and hang out for a while at our favorite indie bookstore. For dinner, a local pizza place gives you your age as a discount on your bill on your birthday, and at 47, I feel like I am finally old enough to really work that discount! Afterwards, Matt said he would set up the projector in the family room so we could all eat cheesecake and watch my favorite movie on a super-sized screen.

But first, the kids had to cool their heels for a couple of hours, because I told them that what I REALLY wanted to do the most on my birthday was sew some new oven mitts!

Our current oven mitts were all old and raggedy, which doesn't actually bother me, but Matt kept somehow grabbing pans with the raggediest part of any given oven mitt and burning himself, which is obviously not an oven mitt success story.

So I found this oven mitt pattern from Suzy Quilts, printed it out, and spent part of my birthday happily sewing away!

The exterior pieces are canvas--a couple of years ago, I got into buying canvas remnants whenever I stopped by Joann's, and for a while I was sewing all kinds of stuff with it, but now it's just sitting in my stash and I'm stoked to have a good use for it!--and cotton batting. I bought a TON of cotton batting yardage online during the Covid lockdowns (just between us, I mathed incorrectly and waaaaay overordered, ahem), and after being used on tons and tons of quilts over the past three years it's finally down to a scrappily remnant amount, as well.


The interior pieces are all quilting cotton of unknown provenance and in patterns that I LOATHE, but I keep it around anyway because quilting cotton! So useful! So a couple of these oven mitts have American flag insides, and a couple have pitchfork and straw hat insides, shudder. Don't look inside my oven mitts!

Here's a little of the quilting on the exterior pieces:


These oven mitts sew up SO quickly! I put a few shortcuts into the Suzy Quilts tutorial to make it even quicker, so if you, too, want the absolute quickest way to a new oven mitt, do this:
  1. Follow all the regular steps to cut out the pieces, baste the lining to the fabric, quilt the exterior pieces, sew the two interior pieces together and the two exterior pieces together, and turn the exterior side of the mitt right side out.
  2. Insert the interior side of the mitt (which should still be inside out) into the exterior mitt. The two parts of the mitt should be wrong sides together.
  3. Turn the raw edges of both parts to the inside, clip it well with those super handy plastic clips you finally bought yourself after seeing them on Tiktok and wanting them for years--

--and sew around the edge to finish!

Here's a photo of Luna helping me photograph my brand-new oven mitts on the back deck, right before the kids and I headed off for iced coffee, my free Crumbl cookie, and a couple of hours of book browsing:


These oven mitts have been in use for a week now, and we love them! The two layers of canvas, two layers of quilting cotton, and four layers of cotton batting feel like plenty of insulation, and the size works for every hand from the teenager's to Matt's. Even though I don't think we need more than four oven mitts in our rotation, I'm very tempted to make more while I have the canvas and the cotton batting and a pattern I love at my fingertips. I could save a couple each for these kids' future first apartments, and I could put a few in my handmade presents stash, or just set them aside to replace these when they get worn.

Actually, though, our current hot pads are just as old and raggedy, so maybe I should make some new ones to match my new oven mitts!

Thursday, August 3, 2023

An Easy Alteration To an Amazon Dress


Remember the teenager's end of the school year ballerina murder mystery party? One of the reasons why it was so fun is that it was not just a murder mystery, but ALSO a pretend high school Homecoming dance! 

Which means pretend high school Homecoming dance clothes!

This was, quite honestly, quite a lot of the appeal of the party for my own high schooler, since she's never been to a Homecoming dance... nor does she particularly desire to go to one, frankly, but dressing up and dancing with one's friends is SO fun.

Our local Goodwills do have a terrific selection of dresses, including plenty of beautiful formal ones, but dang, have they gotten spendy! Our local locations used the Covid lockdowns as an excuse to take away the monthly storewide sales, and when they reopened it was with higher prices and no more discounts, not even Color of the Week, grr. So even though I'm very much an advocate of thrifting and upcycling, I wasn't big sad when the teenager said she'd rather buy a cheap, fast-fashion, sweatshop-manufactured dress from Amazon. If it was gross, we could just return it and hit up Goodwill, after all.

The kid picked this one--


--and actually, it was pretty nice! The velvet and lace both looked good, the neckline had a well-constructed binding, the stretch fabric gave the garment good drape without needing darts (which means I didn't have to worry about misplaced darts), and the fact that it wasn't lined really just meant that I didn't have to work too hard on my alterations.

It definitely did need alterations, though. The length of the hemline and the sleeves were good, but the shoulders were way too long for my teenager's torso, and the waist was too roomy. We probably could have sized down, but the needed alterations were so easy that I could make them in less time than it would have taken to package up the return. 

For alterations this easy, I had the teenager put the dress on inside out, then I pinned the dress to fit the way she wanted it to.

I'm so glad I bought those plastic sewing clips that everyone was raving about on Tiktok!

I pinned the waist to fit, using the pins to mark my sewing lines and thereby skipping several traditional steps. Same for the shoulders, although I unpicked the top of the sleeve first:


To take in the garment, I just had to sew along the line my clips marked:


The sleeves were already slightly puffed, so I just regathered them to make them a little puffier, then pinned them and reset them into the shoulder. 

This was SUCH a quick alteration, and it really worked to show me that it's not the quality of the fabric that makes a garment look good, but the quality of the construction. The dress, pulled on straight from the package, looked okay, but it also looked as cheap as it was. But after doing nothing more than taking in the hems to fit my teenager's specific measurements, that cheap dress looked really good! It fit great, and therefore it looked great. 

A few weeks later, at my mending group's monthly afternoon when we sit in our public library and mend clothes for patrons, I used the same technique to alter a pair of work pants for a young adult who'd just started her first real white collar job. She'd purchased some khakis from Goodwill, but didn't like how wide the legs were. I had her put them on inside out, stood her on a stool, used my handy pins to narrow them the way she wanted, and then sewed along the pins. She tried them on again, and they looked great!

I'm telling you: easiest. Alteration. EVER!

Sunday, March 19, 2023

How to Remove Wax from Fabric: Two Methods


This tutorial was originally published on Crafting a Green World in 2022.

Now that the holiday celebrations have passed, do not look at your beautiful but wax-stained table linens and despair! 

It's possible to remove most candle wax from most fabric, even if your candle wax is highly pigmented, and even if your fabric is precious and delicate. Below, I'll run you through a couple of different techniques to try, one a little gentler and the other a little more aggressive. As you will likely have expected, the gentler technique has the least cleaning impact but puts the least stress on your fabric, and the more aggressive technique has the most cleaning power but is quite hard on your fabric. 

That's why I'm telling you right off that it might not be possible to remove YOUR candle wax from YOUR fabric. If it's a choice between a squeaky clean vintage table runner that's now faded, with splotchy dye runs, and falling apart at the seams vs. a vintage table runner in good condition with a couple of wax stains, I always choose the method that preserves the item and keeps the patina of a useful life. 

But for now, let's stay optimistic, shall we? 

CAUTION: All of these methods involve the application of heat to your fabric. If your wax is highly pigmented, you run the risk of heat-setting that pigment into your fabric, even if you're able to lift the wax. At the end of my post, I'll also give you a step-by-step method that offers the best chance at removing pigment stains, but messing with vintage fabrics always entails risk of damage. 

Here's the main culprit. It's definitely wax, but I don't know what kind. It's melted completely through the batting of this table runner and is also visible on the back. By the feel of it, there also seems to be quite a bit of it in the batting inside the table runner. I know the front and back of this piece are cotton, but I don't know the fabric makeup of the batting.


Method 1 (The Gentler Method): Blotting Paper and an Iron


Because we don't actually live in the Victorian times, alas, substitute white tissue paper, an unbleached paper towel, or even a clean piece of typing paper for the blotting paper. 


Fold one of these items a few times until it's fairly thick, then place it directly under the stained part of the fabric. Put another piece of paper directly on top of the stain, and hold a warm iron to it for a couple of seconds. Lift up the iron and give a little peep at the paper.  

The idea here is that you'll melt the wax using the least possible amount of heat. As the wax melts, it will be absorbed by the paper, allowing you to eventually lift the entire stain out of your fabric. 

You'll have an easier time with this method if you know the type of fabric and the type of wax you're working with. Different waxes have different melting temperatures, and so do different fabrics! Cotton, for instance, can easily stand up to an iron temperature hot enough to melt pure beeswax, but I'm not so certain about polyester. If you're lucky, perhaps you've only stained your vintage polyester table runner with soy wax, which has a much lower melting point. 

I'm pretty certain that my own vintage table runner is cotton (although, to be fair, I'm less certain about the batting...). My guess that the wax was plain old paraffin, however, is definitely incorrect. The melting point of paraffin is barely higher than that of soy, but even taking a gamble and turning the iron up to high, I lifted practically nothing of this wax. It even still felt hard to the touch!


Method 2 (The More Aggressive Method): Boiling Water


If you've ever used my method of removing wax from container candle jars, you know that boiling water is the quickest and easiest way to lift wax from a surface. 

The problem is that while a glass container can definitely hang out in a pot of boiling water without damage, your fabric might not be so sturdy. Hot water can cause vintage dyes, in particular, to bleed, a situation that might result in a fabric that, while wax-free, looks a LOT worse than it did with the wax on it! 

Proceeding with great caution, then, boil a kettle of water. Set up a portable drying rack to suspend the fabric over a surface you're not afraid to get melted wax or boiling water on (I vote for your driveway or the sidewalk!), then pour a stream of boiling water directly onto the stain. 

Your goal here is both to melt the wax with the boiling water and use the momentum of that stream of water to carry the melted wax through your fabric and out the bottom. This is a good method for my vintage table runner, in particular, because I can feel that there's even more wax clumped in the batting between its two cotton layers. 

And this is the method that worked for me! I still don't know what type of wax was on the table runner, but the boiling water carried it completely away. 

But remember when I cautioned you about pigments possibly being heat-set into your fabric using either of these methods? Yeah, the boiling water carried away all the wax, but it left a yellow stain. I'd be happy, regardless, because the stain is much less conspicuous than the wax, but I have a couple more stain-fighting tricks in my arsenal.


Bonus Method for Removing Wax Pigment


If your fabric survived a hot iron or boiling water, it's probably going to be fine with this method, but proceed cautiously and use your more conservative judgment, regardless.  


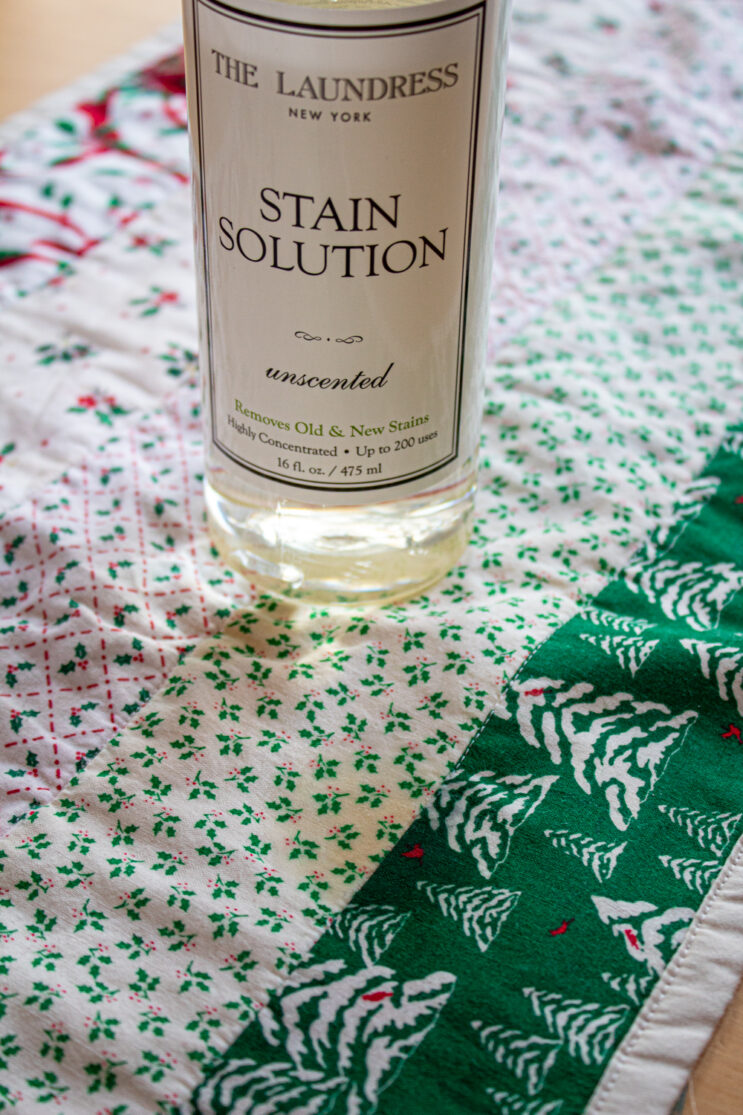
Wet your fabric, then use your finger to rub this a really high quality stain remover into the stain. Do a quick wash on warm as soon as you've rubbed the stain solution in, then pull your wet fabric out of the washing machine and give it a look over. If it's still stained, rub in a little more stain solution, and then use your finger (you can use a glove if your fingers are tender, but I hand-wash dishes in practically boiling water daily without gloves, so...) to massage in a tiny bit of sodium percarbonate. Sodium percarbonate is an oxygen bleach that's generally color-safe, but still, this is a more aggressive technique, so be careful. 

Again, do a quick warm wash as soon as you've applied the stain solution and sodium percarbonate. And again, pull the wet fabric out of the washing machine as soon as the cycle's complete and give it a look over. 

If it's still stained, get your portable drying rack back out and set your fabric somewhere sunny for the afternoon. Be careful if there are other, vivid colors on the fabric that you don't want to fade, but otherwise, sun bleaching is extremely gentle on all types of fabric. 


And, as I can attest, since it was approximately 20 degrees out when I sun bleached my table runner, you can sun bleach stains away even when it's below freezing outside! Your fabric will end up iced over... and stain-free!  

I hope this assortment of methods inspires you to use all of your beautiful linens and quilts and table runners and napkins and doilies and such the way they were meant to be used, instead of hiding them away to save for a day that may never come. When I die, I don't know if my kids will even want these precious vintage fabrics that I treasure so much, but I do know that they're more likely to want them and treasure them if I actually use them, sewing them into the memories of their happy childhoods.

Tuesday, March 7, 2023

The Best Homemade Play Dough Recipe

2011 play dough creation

I don't remember the last time my kids genuinely played with play dough for fun, but I still make this homemade play dough recipe almost every week.

I sell the play dough, undyed or dyed the color of your choice, by the pound in my Pumpkin+Bear etsy shop, but I don't see why you can't simply have the recipe so you can make your own!

2008 play dough creation. I added glitter to the blue one!

The recipe makes about one pound, three ounces of the softest, squishiest play dough you'll ever feel. It's reluctant to dry out, it holds shape well, it's soft enough to feel awesome on your hands but firm enough that playing with it strengthens those little grip and finger muscles, and it dyes like a dream. 

And it takes VERY little time to make! Certainly a LOT less time than it takes to drive to Wal-mart and back for Play Doh!

Another 2011 play dough creation

Here are the ingredients you need:

  • 1 cup flour. I try to use the cheapest flour I can find for this recipe, usually bleached all-purpose. However, when my kids were tiny and sometimes "needed" play dough right that minute, I used to use whatever flour I had on hand. I've used unbleached flour, wheat flour, and on one personally very sad occasion, organic flour (grr! It's so expensive!), and the play dough always came out great. I know different flours will change the necessary water content, though, so if you're trying for something specific, you'll probably want to experiment a bit.
  • 1/2 cup salt. The gold standard for this is, again, the cheapest iodized salt you can find. A couple of times I've run out and used salt with a larger grain, and although it worked, you can definitely see and feel the larger grains in the finished play dough. Cheapo iodized salt, however, will make your play dough as smooth as butter!
  • 2 tsp cream of tartar. Cream of tartar aids consistency and stability, so you can skip it if you need to, but the play dough won't be as nice in texture or as long-lived. 
  • 1 tbsp oil. Again, any oil works for this recipe, but I like to use the cheapest available. Canola is the cheapest, but if all I have on hand is olive, I'm just as happy with the finished play dough. You'd think that the color of olive oil would affect the tone of the finished white play dough... but it doesn't!
  • 1 cup water. 
  • dye (optional). If you want to dye your entire batch a single color, dump it into the pot with the rest of the ingredients. Otherwise, knead the dye into the finished play dough. I have tried every dye I can think of, from the cheapest to the nicest store-bought food dyes, homemade and store-bought natural dyes, liquid watercolors, and powdered tempera. For color saturation, my favorite BY FAR is powdered tempera! It will stain your hands while you're kneading it into the play dough but it won't stain your hands while you're playing with it. It also lightens the play dough in a way that feels absolutely magical and wreaks absolute hell on my ability to fit a full pound of play dough into the containers I sell it in. 

Step 1: Add all ingredients to a single pot.


Just dump it all  in!

Step 2: Cook over medium heat, stirring continually. 


This is time-consuming, because you want to cook the play dough low and slow so you don't scorch it, and you have to stir it continuously to keep it from sticking to the pot. I've never timed myself, but I do get through several minutes of a podcast or streaming show while I stir.

When the play dough loses its gummy appearance and wants to ball up, remove it from the heat and remove the play dough from the pot.

Put the pot to soak in the sink before you even try to wash it, because flour + water = glue!

Step 3: Knead until smooth.


When you dump the play dough out onto your work surface, it will look like this:


As soon as it's cool enough to touch, knead it until it looks like this!


Here's the final weight of my finished play dough:


It's ready to play with immediately, and will keep for several weeks in the refrigerator in an airtight container. When my kids were little, I'd toss it when it started looking dirty from their play, but also toss it immediately if it smells rancid or the texture and consistency change for the worse. 

P.S. Want to follow along with my craft projects, books I'm reading, road trips to weird old cemeteries, looming mid-life crisis, and other various adventures on the daily? Find me on my Craft Knife Facebook page!

Sunday, March 5, 2023

DIY Density Discovery Bottles

The bottle on the left contains marbles, corn syrup, colored water, glitter, and canola oil. The bottle on the right contains colored water and canola oil, and I've just shaken it.

This tutorial was originally posted on Crafting a Green World way back in 2015!

Use any old water-tight bottles you have on hand to create density discovery bottles for your budding scientist. 

Other than playground sand, which is apparently pig-filthy and will make your ocean in a bottle look polluted, there are a lot of simple, easy, around-the-house ingredients that will encourage babies through big kids (and even adults!) to be excited science explorers.

Glycerin falls through the colored water and rests below.

Discovery bottles put interesting ingredients into a clear, sealed bottle for easy exploration to create a liquid density experiment

Although many bottles use colored rice or beans that a kid can shake or shift to find toys hidden inside, density discovery bottles rely on the interesting property of a substance's relationship between its weight and its volume. Two substances with very different densities will not mix, or they'll mix and then settle. 

 And yes, you've seen this while cooking, but my dear Watson, have you ever really observed the phenomenon? Put it in a clear bottle, and you'll be able to. 

 Although you'll want to make these discovery bottles for babies, it's otherwise a very kid-friendly project, accessible even to toddlers. It calls for loads of hands-on, messy exploration, and your kids could easily spend hours at it--my two big kids went back and forth to it all day, then kept their most interesting creations to study the next day, as well.

DIY Discovery Bottles

You will need: 
  •  containers. Any clear jar or bottle with a tight-fitting lid will do, although I'd avoid glass, since this project is intended for children. That being said, of course, my children, who are 9 and 10, did much of their exploration in large test tubes. The bottles that we kept, however (the test tubes have long been rinsed and put away), are simply clean plastic peanut butter jars with the labels removed. 
  • eye droppers, funnels, measuring cups, a kitchen scale, and other useful tools. These will periodically need to be rinsed or washed off as you work. 
  • hot glue. If you're going to keep any discovery bottle for further play, you'll really want to glue the lid on. Really. Glue it on BEFORE your kid goes to stand on the carpet with it. 
  • interesting substances. There are so many options here, and they're all going to be found inside your house. Look around for anything that's colorful, and anything that is thin and watery or thick and sticky, but also just grab stuff, and let your kids sort out their physical properties. Here are some ideas:
    • alcohol. Rubbing alcohol or vodka and plenty of headspace will allow you to freeze your bottles so that you can observe the effect.
    • corn syrup. If you can stand to buy it (you don't have to eat it, but your purchase does support big farming), this this one is a must-have. It's very dense but still flows, and it's clear, so you can really see what's going on with it.
    • craft sand. This is apparently a clean sand, but I don't know where it comes from or how it's processed, and I don't own any, so I didn't use it. Sand, nevertheless, would be a VERY interesting substance to include.
    • dish soap. Leave plenty of headspace, and your bottle will have an interesting effect when shaken.
    • glitter. Not only is the glitter pretty, but depending on the substance, it will fall, float, or mix.
    • glycerin.
    • marbles. These will fall interestingly through the various densities of substances, especially the corn syrup.
    • oils. Unfortunately, the least eco-friendly oil--mineral oil--is also the most awesome for this project, since it's clear. Buy a bottle for the sake of Science if you can stand it, because it's worth the ability to really see the plane of interaction between oil and another substance, but otherwise use any other cooking oils.
    • vinegar.
    • water. Dye your water with liquid watercolors or food coloring so that you can see it better as it flows among the other substances.
The tutorial for this project is so simple that it isn't even a tutorial at all: all you have to do is play and explore! 

Colored water, dropped from a test tube, sits on top of corn syrup and below mineral oil.

Since my kids were doing this for Science, I required them to keep notebooks that recorded what substances they were mixing, their reactions, and their comparative densities based on these reactions. They played and explored forever in this way, and it was refreshing to see that even in a kid-land that includes, in my opinion, too much Minecraft and My Little Pony, they were thrilled by something as simple as dropping drops of colored water into a test tube half-filled with clear mineral oil. Have you ever tried that? It IS pretty great. 

Corn syrup, itself, is also pretty great. You could fill a bottle only with corn syrup and interesting little objects--marbles, glitter, dice, clean shells--and simply watching each object fall slooooooowly through the corn syrup is quite fascinating. An observant kid (and they're all observant) will notice that the object even leaves a little trail through the corn syrup as it falls. 

Or, fill your bottle half with corn-syrup and half with colored water. Add oil. Add glitter. 

Another never-fail option is simply colored water and oil. You can't dye oil, so if you're not using a clear oil, the trick is to dye your water a color that complements the yellowy, greeny oil that you've chosen. Blue, green, orange... there are a lot of colors that work. Regardless, the colored water and oil behave VERY interestingly together, so you don't want to pass this combo up.

Liquid starch is dropped through mineral oil, glitter, and colored water.

Play around with substances and mixtures to your heart's content, but when you've found a combination that you love, wipe down the bottle's rim and lid with a soapy washcloth and dry it well, then run a line of hot glue completely around the inside of the lid and screw it on the bottle. 

After it's screwed on, you can run another line of hot glue around the bottom of the lid if you're feeling paranoid--and with who knows what inside that bottle, feel free to feel paranoid. 

 Set these discovery bottles on a shelf somewhere that's convenient for you or a kid to return to whenever you want to give them a shake or a turn and watch the pretty colors and interesting interactions. 

Although you'll have used shelf-stable substances, you'll also want to check on them every now and then, and if you see any sign of bacteria growth, obviously pour them out, wash the bottle, and pitch it into the recycling. 

Sunday, February 12, 2023

How-To: Kid-Made Puzzle Piece Valentine


This tutorial was originally posted on Crafting a Green World way back in 2013.

Missing some pieces of your jigsaw puzzle, but still have a few mitchy-matchy ones? 

Your kiddos can create one handmade Valentine from just two perfectly fitting jigsaw pieces. Give them most of a box, and they can make all the Valentines for their class party. 

It's a fun upcycling project that won't cost you a cent. Yay for an eco-friendly Valentine's Day!

Here's how:

Big or small, edge or middle, this project relies on two linking puzzle pieces. Have your kiddos sort the remaining pieces from an incomplete jigsaw puzzle into linking pairs (save other orphaned puzzle pieces for more crafty upcycling projects!), then let them paint each pair a fun background color. My kiddos chose every color from red to green to black, and made themselves a glorious happy mess while they did so.

Set the pairs aside to dry, taking apart the pieces first so that they won't adhere to each other.

When the puzzle pieces are dry, fit them together again and show the kiddos how to paint a single heart onto the middle of the pairs, so that approximately half the heart rests on each piece. The kiddos can continue to decorate the pieces as they wish, with glitter and stickers and the other gaudy accouterments of kid-made greeting cards.

Once again, separate the pieces and let them dry. When everything is dry and set, the heart puzzle will be able to be taken apart and put together again. The kiddos can use the back side of their Valentines to write their name and some sort of horrible, punny Valentine greeting.

May I suggest "I love you to pieces?" Okay, I'm going to go vomit now.

Monday, January 9, 2023

Bleach-Painted T-shirts: A Tutorial


Twice in the past few months, I've wanted to make some kind of custom fan apparel, but I didn't want to devote a ton of time, energy, or money to it. The first was for a Mother Mother concert, and the second was a present for all of the children dancing the (kind of shitty, because you have to wear a fat suit and giant mascot head that's apparently hot, smelly, and hard to see out of) role of Mouse in our local university's production of The Nutcracker

You can do this project a lot more nicely than I did it, with super clean lines and really even tones, but here's how you can ALSO do it quick and dirty-like, whether it's for a concert tomorrow or you've got to make six in a row and you're already bored.

To bleach paint T-shirts, you will need:

  • black 100% cotton T-shirt. The best shirt is obviously a thrifted shirt, and for my Mother Mother shirt I did find the perfect black T-shirt at Goodwill. Speaking of... y'all have the Goodwill prices gotten absolutely RIDICULOUS in your area, or is my town the only one in which the local Goodwills have decided that not only do they no longer need to offer any sales or discounts on the crap they're literally given for free, but they've also just absolutely jacked up their prices to Jesus? I'd long more-or-less abandoned the little indie thrift shops around me for more than just the occasional browse-through, because their selection is the pits compared to Goodwill, but 2023 is the year that I rededicate myself to their cause. Anyway, I picked up the six Medium Team Mouse shirts that I needed via a Black Friday Doorbuster from one of the big-box craft stores. I feel like those shirts have a reputation for being cheap in quality as well as price, but 100% cotton shirts are nothing to sneeze about these days, when pretty much every shirt and its dog is infused with polyester!
  • backing material. This will need to be thick enough to keep the bleach from bleeding through to the back of the T-shirt. I used a brown paper grocery bag.
  • bleach. Get the cheapest, and don't get it on you.
  • cotton swabs.
  • glass dish.
  • paper stencil.
  • glue stick (optional). 

Step 1: Prepare the stencil.


Both of the stencils I wanted to make were word art, so I just did them in Google Docs. Because I am basic.

But at least I printed them as outlines to save ink!


Cut out the stencils and save the widows, since you'll need to place them back on the shirt before you paint.

My Team Mouse stencil took up two pages, so I taped them together with the spacing that I wanted.


Step 2: Paint!


Place your backing material inside the shirt, making absolutely sure it will cover where you'll be bleach painting. 

You can either just set your stencil on the shirt, if it's fairly short and simple--


--or you can tape it down with more masking tape.


I even took the glue stick to the back of those fiddly M and U sticky-outy bits to make sure they stayed put, and I also glued down the widows. I was able to reuse this same stencil for all six Team Mouse shirts, gluing the bits and the widows each time and pulling them up afterwards.

Then, put on a podcast and start painting within the lines!


I found it easiest to first draw the outline of each letter, then color in the center. It made them look wonky as I went, since the bleach activates right away--


--but I think it evens out pretty well by the end:

I'm disappointed in how much the edges bled, but none of the recipients of these shirts seemed to notice, and you also can't really tell when you're standing a normal distance from the human wearing it.

Below is the first shirt I did, though, and for that one I just painted away and it also looks fine:


Step 3: Rinse and Wash.


After I finished painting, I gave the bleach a few more minutes to even out the last couple of letters, then I rinsed each shirt very, very well under cool water and then tossed it into the wash. I washed each individually so nothing else would accidentally get bleach stained, but fortunately my washing machine has an eco-friendly quick wash, so I'm not the cause of the nation's water shortage.

I haven't tried it, but this TikTok recommends a hydrogen peroxide rinse to deactivate the bleach:


Might be worth a try!

Step 4: Show off your beautiful work.


Here's what happens when you ask your husband to photograph you in your beautiful shirt in front of the theater where Mother Mother is about to play:


Seriously, it's a cell phone camera. You have to really try if you want to get your thumb in the way of a cell phone camera.

And here's one particular member of Team Mouse, coincidentally the one who walked by as I was finishing up and asked if she could use the rest of the dish of bleach to customize her own shirt. Since "her own" shirt is inevitably the shirt that I messed up on (can't give a flawed shirt to someone else's child, gasp!), I happily let her also make her shirt the most elaborately cutest:


It's very likely that I'll do this project a few more times this year, because it's SUCH a quick, easy, and cheap way to customize a T-shirt. I would like to get smoother edges, though, so next time I'm going to play around with thickening the bleach first so it can't run away from me.

Wednesday, December 14, 2022

DIY Borax Crystal Ornaments


This is such a fun and easy project that sneaks a bit of STEM into holiday crafting.

A few days ago, Will and I were in the mood to do a quick Christmas craft. We'd just cleaned the house for guests, so I didn't want to drag out a ton of crafting supplies, and we were already busy, so I didn't want to start something time-consuming and fussy.

Our solution: borax crystal ornaments!

The hands-on time commitment for these ornaments is just a few minutes, although be aware that the crystals will need to be left alone to grow for several hours, and preferably overnight. However, if you've got a countertop or table that doesn't get bumped every five minutes like my countertops and tables do, ahem, you can start this project in the morning and then check back in on it throughout the day to marvel at your crystal's growth!

To make your own lovely borax crystal ornaments, you will need:

  • borax. I use this sometimes as a laundry booster, so I have it on hand with my cleaning supplies. If you don't already own it, research its cleaning properties and you might find that you'll be happy to have it on hand, too!
  • pipe cleaners. I also have these on hand, although now that the kids are not so much kids anymore (sob), I suppose the time is coming that I'll have used up my last pipe cleaner and will have no need to buy more. Okay, that just got real sad...
  • popsicle stick and thread. You don't need to use these specific materials, just something that you can tie to the pipe cleaner and something that you can rest on top of the container. 
  • container. To avoid having to rinse a crust of borax crystals out of a jar, I cut the top off of some of the one-liter flavored sparkling waters that Syd and I are unfortunately obsessed with. Such wasteful packaging! Such delicious water!
  • water and spoon.
  • measuring cups. You'll need one-cup and a quarter-cup measuring cups.
And here's how to make your borax crystal ornaments!

1. Bend a pipe cleaner into a fun ornament shape. It needs to be small enough that it won't touch the sides or bottom of the container that will hold it, but otherwise you can create any shape that you like. The liter bottles that Will and I used were on the narrow side of the spectrum, so after some trial and error Will eventually hit on a spiral design that fit perfectly with plenty of room to spare AND looks utterly magical when crystalized!

You can crystalize two or three ornaments at once with the borax solution we use, and with Will's design we were able to do two spirals per container.

When you've got a design that you like, tie your thread to it, leaving plenty of length to wrap around the popsicle stick later.


2. Put water to boil, and while you're waiting, measure out 1/4 cup of borax and pour it into the bottom of the container you'll be using to grow your borax crystal ornaments.

When the water boils, measure out two cups and pour it into the container, then stir the borax well to create a saturated solution. The boiling water shrunk our plastic bottles a bit, but fortunately they remained usable.

3. When the solution is still, drop the ornament into the container and adjust the depth at which it sits by wrapping the string around the popsicle stick. The ornament shouldn't touch the sides or bottom of the container, and should be fully submerged. You can pour more hot water into the container to submerge the ornament, if needed, because this solution already has WAY more borax than required.


And don't forget that if there's room in your container, you can crystallize multiple ornaments at once!


4. Leave the ornaments alone to crystallize. Over the course of a few hours, they'll go from looking like this--


--to looking like this:


5. After about 24 hours-ish, remove the ornaments and let them air dry on a clean towel.


When they're completely dry, knot the string into a loop and hang them on the tree!

I don't know if these ornaments will last from year to year, but I do plan to store them and see. They're definitely much sturdier than the washing soda crystals that Will and I also tried; those didn't cover the pipe cleaner very well, and they started getting crumbly just a few days later:

Washing soda crystals look interesting through a microscope, but they don't make good ornaments.

If you want to turn this into a whole homeschool unit study (here's the very fun crystals unit study we did a few years ago!), here are some ideas:
  • Make those washing soda crystals, and whatever other easy crystal recipes you can find. Compare and contrast!
  • Try crystallizing objects other than pipe cleaners. Will and I did this, and we found that shells worked okay and wood worked less okay and was a pain in the butt to make sink. Give a kid enough containers, and I'm sure they could have all kinds of fun scrounging around the house and yard for objects to try!
  • Look at the finished crystals through a microscope. My kids LOVED this kid-friendly USB microscope when they were younger. 
  • Model crystal shapes. These models are more challenging (click on the broken image to be taken to the pdf model), while these are simpler. Copy them onto pretty cardstock, or draw your own decorations, and they'd also make lovely ornaments!
  • Read about crystals. These are some of the books about crystals that my kids enjoyed when they were younger:

If you need to sneak in a media component to get your kids interested, Frozen and The Dark Crystal have fun crystal references, although The Dark Crystal will also scare the snot out of your younger kids.