Showing posts with label fabric. Show all posts

Sunday, March 19, 2023

How to Remove Wax from Fabric: Two Methods


This tutorial was originally published on Crafting a Green World in 2022.

Now that the holiday celebrations have passed, do not look at your beautiful but wax-stained table linens and despair! 

It's possible to remove most candle wax from most fabric, even if your candle wax is highly pigmented, and even if your fabric is precious and delicate. Below, I'll run you through a couple of different techniques to try, one a little gentler and the other a little more aggressive. As you will likely have expected, the gentler technique has the least cleaning impact but puts the least stress on your fabric, and the more aggressive technique has the most cleaning power but is quite hard on your fabric. 

That's why I'm telling you right off that it might not be possible to remove YOUR candle wax from YOUR fabric. If it's a choice between a squeaky clean vintage table runner that's now faded, with splotchy dye runs, and falling apart at the seams vs. a vintage table runner in good condition with a couple of wax stains, I always choose the method that preserves the item and keeps the patina of a useful life. 

But for now, let's stay optimistic, shall we? 

CAUTION: All of these methods involve the application of heat to your fabric. If your wax is highly pigmented, you run the risk of heat-setting that pigment into your fabric, even if you're able to lift the wax. At the end of my post, I'll also give you a step-by-step method that offers the best chance at removing pigment stains, but messing with vintage fabrics always entails risk of damage. 

Here's the main culprit. It's definitely wax, but I don't know what kind. It's melted completely through the batting of this table runner and is also visible on the back. By the feel of it, there also seems to be quite a bit of it in the batting inside the table runner. I know the front and back of this piece are cotton, but I don't know the fabric makeup of the batting.


Method 1 (The Gentler Method): Blotting Paper and an Iron


Because we don't actually live in the Victorian times, alas, substitute white tissue paper, an unbleached paper towel, or even a clean piece of typing paper for the blotting paper. 


Fold one of these items a few times until it's fairly thick, then place it directly under the stained part of the fabric. Put another piece of paper directly on top of the stain, and hold a warm iron to it for a couple of seconds. Lift up the iron and give a little peep at the paper.  

The idea here is that you'll melt the wax using the least possible amount of heat. As the wax melts, it will be absorbed by the paper, allowing you to eventually lift the entire stain out of your fabric. 

You'll have an easier time with this method if you know the type of fabric and the type of wax you're working with. Different waxes have different melting temperatures, and so do different fabrics! Cotton, for instance, can easily stand up to an iron temperature hot enough to melt pure beeswax, but I'm not so certain about polyester. If you're lucky, perhaps you've only stained your vintage polyester table runner with soy wax, which has a much lower melting point. 

I'm pretty certain that my own vintage table runner is cotton (although, to be fair, I'm less certain about the batting...). My guess that the wax was plain old paraffin, however, is definitely incorrect. The melting point of paraffin is barely higher than that of soy, but even taking a gamble and turning the iron up to high, I lifted practically nothing of this wax. It even still felt hard to the touch!


Method 2 (The More Aggressive Method): Boiling Water


If you've ever used my method of removing wax from container candle jars, you know that boiling water is the quickest and easiest way to lift wax from a surface. 

The problem is that while a glass container can definitely hang out in a pot of boiling water without damage, your fabric might not be so sturdy. Hot water can cause vintage dyes, in particular, to bleed, a situation that might result in a fabric that, while wax-free, looks a LOT worse than it did with the wax on it! 

Proceeding with great caution, then, boil a kettle of water. Set up a portable drying rack to suspend the fabric over a surface you're not afraid to get melted wax or boiling water on (I vote for your driveway or the sidewalk!), then pour a stream of boiling water directly onto the stain. 

Your goal here is both to melt the wax with the boiling water and use the momentum of that stream of water to carry the melted wax through your fabric and out the bottom. This is a good method for my vintage table runner, in particular, because I can feel that there's even more wax clumped in the batting between its two cotton layers. 

And this is the method that worked for me! I still don't know what type of wax was on the table runner, but the boiling water carried it completely away. 

But remember when I cautioned you about pigments possibly being heat-set into your fabric using either of these methods? Yeah, the boiling water carried away all the wax, but it left a yellow stain. I'd be happy, regardless, because the stain is much less conspicuous than the wax, but I have a couple more stain-fighting tricks in my arsenal.


Bonus Method for Removing Wax Pigment


If your fabric survived a hot iron or boiling water, it's probably going to be fine with this method, but proceed cautiously and use your more conservative judgment, regardless.  


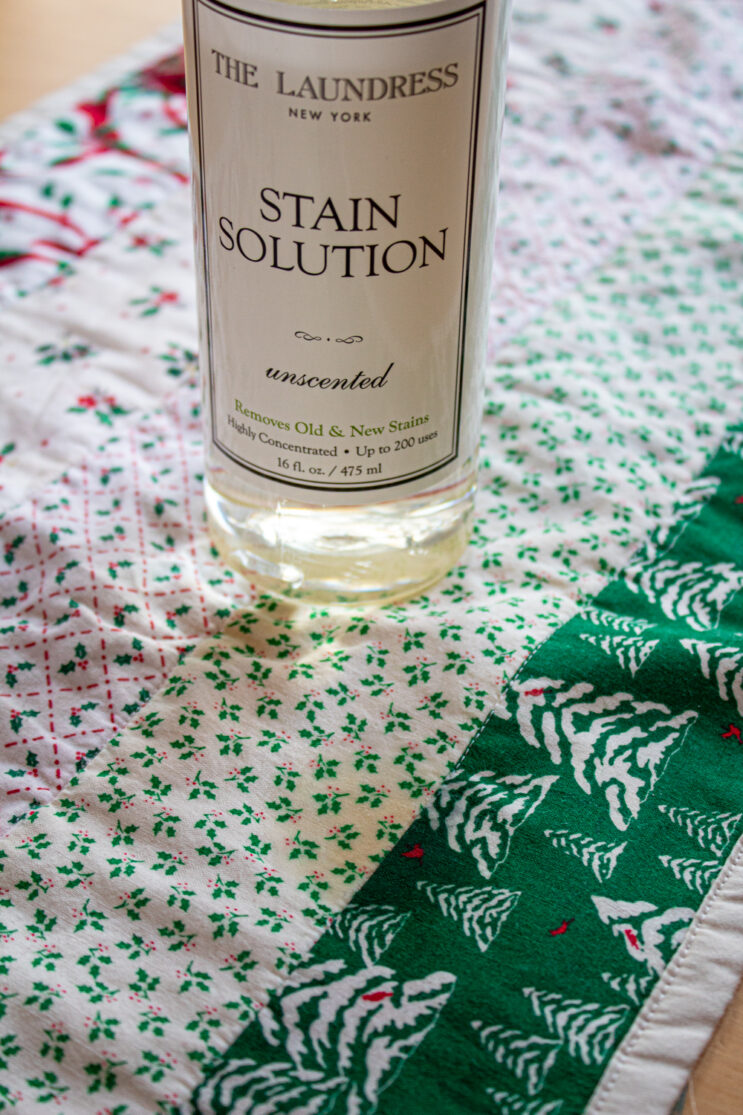
Wet your fabric, then use your finger to rub this a really high quality stain remover into the stain. Do a quick wash on warm as soon as you've rubbed the stain solution in, then pull your wet fabric out of the washing machine and give it a look over. If it's still stained, rub in a little more stain solution, and then use your finger (you can use a glove if your fingers are tender, but I hand-wash dishes in practically boiling water daily without gloves, so...) to massage in a tiny bit of sodium percarbonate. Sodium percarbonate is an oxygen bleach that's generally color-safe, but still, this is a more aggressive technique, so be careful. 

Again, do a quick warm wash as soon as you've applied the stain solution and sodium percarbonate. And again, pull the wet fabric out of the washing machine as soon as the cycle's complete and give it a look over. 

If it's still stained, get your portable drying rack back out and set your fabric somewhere sunny for the afternoon. Be careful if there are other, vivid colors on the fabric that you don't want to fade, but otherwise, sun bleaching is extremely gentle on all types of fabric. 


And, as I can attest, since it was approximately 20 degrees out when I sun bleached my table runner, you can sun bleach stains away even when it's below freezing outside! Your fabric will end up iced over... and stain-free!  

I hope this assortment of methods inspires you to use all of your beautiful linens and quilts and table runners and napkins and doilies and such the way they were meant to be used, instead of hiding them away to save for a day that may never come. When I die, I don't know if my kids will even want these precious vintage fabrics that I treasure so much, but I do know that they're more likely to want them and treasure them if I actually use them, sewing them into the memories of their happy childhoods.

Saturday, June 27, 2020

How to Make an Upcycled Denim Slipcover for a Couch

I originally published this tutorial on Crafting a Green World.

Our couch is horrible.

It's got good bones, I guess. I mean, isn't that what you're supposed to say about a couch that you bought used 15 years ago and brought into a house with toddlers, knowing that before you bought it the couch lived in the lounge of a freshman dorm for who knows how long previously, and the darn thing is still standing?

It's still standing, but it looks horrible. Like, really, really horrible, in a way that even I, the queen of Lived-In Chic, am embarrassed about whenever people visit and I have to expose them to the horror of its appearance.

But here's the thing: a couch that looks horrible? That is SO fixable. Just throw a slipcover over that little monster and go on with your life! And if you don't have a slipcover? It is SO easy to sew one from scratch!

The key to this DIY slipcover project is lots and lots of upcycled denim. Fortunately, old denim is easy to come by--as soon as I announced this project, I had family and friends and people I didn't even know practically throwing their old blue jeans and denim shorts and jean skirts at my head.

I finally had to start saying a flat-out no to anyone who tried to hand me a bag of clothes (even then, sometimes I'd wake up to find a bag on my porch), and I've still got enough to slipcover all three sections of my horrible couch and probably make my entire family warm, heavy denim quilts this winter, as well--stay tuned!

Tools & Supplies

Here's what else you'll need to make this upcycled denim slipcover for your couch:

  • Large-format pattern paper. Newspapers work well for this. If your paper isn't large enough, tape additional pieces to it until it is.
  • Cutting and measuring tools. I work with a fabric tape measure, ruler, self-healing cutting mat, rotary cutter, and fabric scissors.
  • Sewing machine with a denim needle and heavy-duty thread. For extra security, you can use the thread that's designed specifically for denim.

Directions

Grab your tools, and let's get sewing up that ugly couch!

1. Measure And Piece Together The Big Rectangle

Your couch definitely has a big rectangle. Maybe it's the back, or maybe, like mine, you'll get a whole straight section running from the bottom in front, up to the seat and across, up to the back and over, and down the back to the floor. Thanks to that big rectangle, the only slipcover pieces that I need to sew are the big rectangle and two matching side pieces.

To measure this big rectangle, here's where your fabric tape measure comes in handy. My couch is 45" across, and using my fabric tape measure I could measure everything from the bottom front to the bottom back as one continuous length of 92".

Add a couple of inches to each measurement for a seam allowance, and go piece together a GIANT denim rectangle!

To actually piece together that big rectangle, simply start squaring off pieces of denim and sewing them together. The goal is to create a piece that's larger than the required dimension so that you can square again, if necessary, and trim it down to size. Pretend that you're making a crazy quilt; the nice thing about using denim is that everything is basically the same colorway, so it'll all go reasonably well together.

And yes, feel free to include pockets and embellishments! Keep metal pieces off of this big rectangle, because you don't know yet what part will be the seat and what part the backrest, but in a minute when we do the sides of the slipcover, then even grommets and zippers are fine.

When you've got your big rectangle finished, drape it over the couch and, if necessary, trim it further.

2. Make A Pattern For The Slipcover's Side Pieces

Tape together newspaper or large-format paper until you have a piece that's larger than the side of your couch.

Line up the bottom of the paper with the floor, and hold the paper against the side of the couch.

Trace the edges of the couch onto the paper. When you've got the outline, lay it flat on the floor and use a straightedge and a french curve to help you neaten the lines. You can also add an inch of seam allowance.

Cut out the pattern piece and hold it up to the couch again to double-check it. Redraw or trim as necessary.

3. Trace And Piece Together The Slipcover's Side Pieces

Again, your goal is to piece together denim that is larger than the pattern piece, then trim it to size. I don't know who gave me their old denim skirt, but I was STOKED to see that when I cut it in half and cut out the zipper and waistband, it was still enough fabric to make one entire side panel of my slipcover! Yay!

Conversely, I did a LOT of piecing for the second side panel. Don't forget that those large pieces of denim are nice to work with, but using up small pieces and scraps is just as important when you're trying to save as much material as possible from the waste stream. In the photo below, I pieced my trimmings from the big rectangle to the panel, then traced the pattern piece directly onto it and cut away the extra. As a note, I seriously overestimated the dimensions because I was paranoid, and it's easier to trim away than to add more fabric!

I did the same trick of piecing together a section made of small scraps, sewing it to the panel, and tracing the pattern to trim the excess to make this backrest section. Since the section that I was adding was pretty small, I dove deep and used up some pretty small scraps to piece it:

4. Sew The Slipcover Panels Together

When you have the big rectangle and both side panels complete, you can sew them together. Double-check your work first by placing everything on the couch and checking its fit; when I did this, I discovered that I should cut a couple more inches off the width of my big rectangle. I don't know if I accidentally added my seam allowance twice, or was just, again, overly generous with my measuring. Regardless, the slipcover looks much nicer when it's clearly well-fitted!

I'll be frank: this is NOT the cutest thing that I've ever sewn. Patchwork denim furniture is not one of the goalposts of my interior design aesthetic. But you know what? I don't have it in my budget to buy a brand-new couch this year, nor do I have the desire to trash a perfectly decent piece of furniture that is still super comfy and only looks like garbage. This upcycled denim is just as sturdy as upholstery fabric (with NO flame retardants!), and, as I've already discovered, when a kid leaves an uncapped Sharpie lying on it, it's just as easy to patch as a pair of blue jeans.

Besides, the worn denim has made that couch even more impossibly comfortable, and the whole thing doesn't look half bad when it's covered in throw pillows and kittens and happy kids.

Thursday, November 16, 2017

23 Things to Make with the New Girl Scout Fabric


I, and volunteers around the country, let out a great squeal of excitement the other day when we learned that there is now such a thing as Girl Scout fabric.

Because obviously I don't live and breathe Girl Scouts enough--I also have to WEAR IT!!!

Which is about right, because I'm the kind of person who really just wants to spend my free time doing something along the lines of wearing Harry Potter jammy pants (which I own) and a Harry Potter shirt (which I own), watching Harry Potter on DVD (obviously), while flipping through the books (so I can compare them to the movies of course!).

Give me a chance to run a Girl Scout troop meeting while eating Girl Scout cookies and wearing jammy pants and a... I don't know, poncho?... made from Girl Scout fabric, and I am all. In!

Anyway... I don't actually have any Girl Scout fabric in my hands right now, because what I am actually doing is living and breathing the Nutcracker instead, but soon, my Friends. Soon Thanksgiving break will come, which means that Nutcracker rehearsals will be on hiatus and all I'll have to do is keep practicing my French braiding (Syd is wearing a wig this year, and has to have her hair French braided and pinned to her skull underneath it), so I will have LOADS of time to finally drive that whole ten minutes from my house to Joann's and buy myself some Girl Scout fabric.

ALL of the Girl Scout fabric.

The only thing that I know for sure right now that I'm making is jammy pants for me and the girls, because of course, so this long list that you're about to read is just me brainstorming other cute things that I think would be even cuter when sewn with Girl Scout fabric:
  • fleece blanket with trim. This fleece blanket would definitely be simple enough for a kid to sew, but the addition of the trim would add a lot of interest. A Girl Scout green trim would be especially cute.
  • tote bag. I could definitely use a couple of tote bags to carry around all of my Girl Scout meeting supplies. The simple lines of this one would let the fabric print take center stage (I write, just a few yards from a literal center stage, as Syd dances the Mother Ginger dance in a rehearsal room three flights up)
  • bucket bag. This roomier bag that you can close completely would make a good choice for the kids to carry their own stuff to troop meetings, or on overnights.
  • circle skirt. The fabric is a little spendy, considering that I already own plenty of cotton fabric, and it couldn't be part of either kid's uniform (I've already sewn the kid who wears skirts a Girl Scout uniform skirt, reversible with a prettier print on the other side because who can get excited about a khaki skirt?), but I do think that a simple circle skirt, made with one of the cotton prints, would look really sweet when paired with a camp T-shirt.
  • quilt. I wouldn't make a quilt just out of Girl Scout fabric (although maybe I should squirrel some away, or even start assembling blocks, for the Girl Scout T-shirt quilt that I'm planning to make both of my girls when they're older?), but I really like this method for using up smaller scraps of fabric in quilts
  • headband. This would be the PERFECT thing to make with the fabric! The kids could wear it with their uniforms, but it wouldn't be so branded that they couldn't wear it with their everyday clothes, as well.
  • zippered pouch. Depending on the size, the kids could use this to carry their cash while selling cookies, or it could hold their SWAPS at events.
  • sun hat. My favorite hat pattern is on Creativebug, but since I can't link to that one, this one is  a close second. My original idea for sun hats had been a Girl Scout color on one side and a fun print on the other, but both kids understandably rebelled at having yet one more khaki accessory. But if one side was a fun GIRL SCOUT print, it would totally work!
  • messenger bag. All of the girls in my troop could really use a small messenger bag like this one, just big enough to hold their water bottle and their notebook and pencil.
  • pajama shorts. These would be cute summer pajama bottoms, especially for Girl Scout camp. If you wanted to make a complete pair of pajamas, you could take a white shirt and applique a trefoil or your girl's initial on in the same print.
  • pillowcase. This would be another cute item to take to Girl Scout camp--make pajamas, the fleece blanket, and the pillowcase, and your kid will be totally decked out! Notice that I'm not linking my favorite burrito pillow method, because this particular tutorial is better if you want to fussy cut your fabric, which you would.
  • water bottle sling. I still like the idea of the slightly larger messenger bag better, because I like the girls in my troop to also bring their notebooks and pencils on field trips, but for hiking, a kid could just throw her water bottle sling over her shoulder and be all set!
  • pajama pants. I deeply want to make jammy pants for me and both girls out of fleece, but this pattern would work with cotton or flannel, too.
  • bean bag checkers. This fabric checkers set would be another opportunity to fussy cut and show off the cute Girl Scout prints. The whole set would be something fun to bring out on troop camping trips. Because you HAVE to play checkers when you're camping!
  • bandanna quilt. You'd have to modify this tutorial, because bandannas don't need hemming, but this would still be a pretty simple project to sew, and the four big pieces mean that it wouldn't have a lot of prep work, either.
  • pennant. Instead of felt for the background, you could use a Girl Scout print with interfacing behind it. Put each girl's name on it in felt, and I could imagine it being a cute souvenir for them to carry in a parade, or to plant in front of their tent while camping or at camp.
  • bean bags. You can do all sorts of games with a set of bean bags, so this would be a good permanent addition to a Daisy or Brownie troop.
  • lunchbox napkins. I've sewn a couple of these for the kids to use when they take a packed lunch somewhere. They're easy to sew, and would be a good teaching element/party favor for a meeting dedicated to the Junior Social Butterfly badge. 
  • one-seam skirt. Syd has made this exact skirt as a birthday gift for another little girl before, so I know a kid can sew it! You can use one cut of fabric to make two identical skirts, actually, so a whole troop of girls could learn to sew by sewing their own Girl Scout skirts.
  • apron. There are cooking badges at all levels of Girl Scouts, so girls of any age could use their own aprons. For Cadettes and up, though, you probably need to find a bigger pattern, as this particular one looks like it's designed for younger kids.
  • Geranium dress. This is a dress pattern for kids; I think the clean lines would show off a special print nicely.
  • ouch pouch. This is a little bag that can hold a small first aid kit--the tute uses quilting cotton and shows you how to piece a little red cross onto the front. As Juniors, both of my girls made backpack first aid kits as part of their First Aid badge, and this would have been so cute to put them in. Actually, they still carry those first aid kits, so maybe I could just surprise them with new packaging...
  • fabric-covered notebook. Even non-sewers could show off their cute fabric this way, and it would help the girls identify which notebook they're supposed to be bringing to meetings.
Have any other ideas for things to make with the Girl Scout fabric? I'm still brainstorming, so let me know!

Monday, August 12, 2013

Kid-Made Tree Swing

Apparently, all you need is--what is that? Two yards?--of fabric (fortunately, it was a piece that was given to me and that I don't especially care for, but that was just happy chance) and a willing mulberry tree that has two branches at just the right distance and angle. These appear to be the factors that the kids used when making this, their now most beloved tree swing:


The first that I knew of this creation was hearing the ungodly scraping of branches against my study window, running over to check what the hell the kids were doing to the house this time, and seeing Will happily swinging here while Syd was telling her a story of what sounded like what adventures might ensue if the chickens escaped.

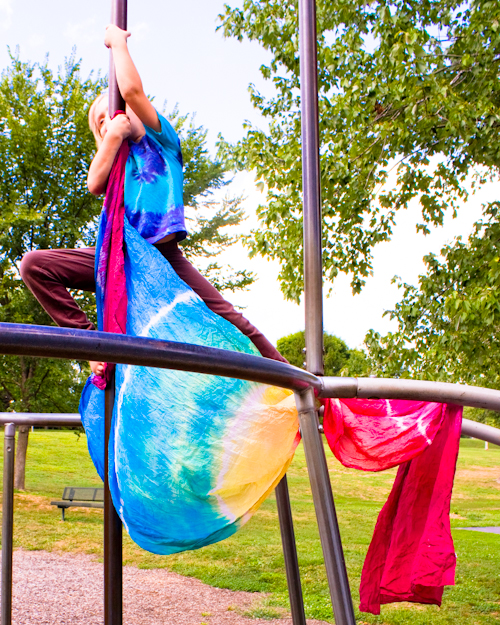
The girls have been going through a phase of experimenting with tying their play silks to any and everything and hanging and swinging off of them (thank goodness for sturdy silk!), so I wasn't *too* surprised to see this latest invention. I've recently finished up dying them several new long rainbow play silks (I did a terrible job on the color transitions, and they look horrible, but fortunately my kids are easy to please--in THAT area, at least), so I'm eager to see what new wonders of engineering they'll come up with.

Tuesday, April 23, 2013

My Latest over at Crafting a Green World: Cupcake Flags and Earth Day Crafts


Yes, there is a dinosaur-themed party in our future. Sydney has decided that she wants her seventh birthday party to be a dinosaur party (AND a surprise party, which I had expected, since she's never stopped talking about her half-birthday surprise party of a year and a half ago).

I've got a Dinosaur Party Pinboard up, and I'm continually updating it with ever-more-ambitious projects--volcano cupcakes! Miniature watermelon dinosaur eggs!--as well as some brand-new ideas that I'd have to be crazy to attempt. Could I REALLY prepare ten plaster of Paris volcanoes for children to paint and erupt as a party activity? Should I REALLY conceal each child's party invitation in a papier mache dinosaur egg that must be cracked open to get to it? 

Do I REALLY have that much time, not to mention silliness, to expend in the next few weeks? I suppose we'll find out...

Tuesday, March 5, 2013

My Latest over at Crafting a Green World: Postage Stamp Quilts and Handmade Memory Games


and a round-up of handmade memory games, including this felt and fabric scrap one that I've been working on:


I do love them (since I have a ton of that ecru felt, I'm looking forward to adding to the game using new scraps whenever I sew), but I have to say that they're highly engineered and really fiddly and time-consuming to create. I really regret deciding to make multiple sets all at once (one for us, one as a big sibling gift for two of the girls' friends, and one extra), as I am WEARY of the ironing, trimming, sewing, trimming, ironing, sewing, and trimming, and I'm going to have to force myself to complete at least that second set before we see our friends later this week.

Now the two baby gifts that I also need to make, neither of which I've decided upon yet? THAT I'm looking forward to creating!

Monday, March 5, 2012

Rainbow Fairy Dress Revealed

This dress was completely Sydney's vision, with my construction to order. If you're curious, I go into much more detail about the pattern-drafting and my sewing methods in my project show-and-tell over at Crafting a Green World, but here I just want to show off the outfit that both Sydney and I worked very hard on, and that we're both pretty thrilled with in its outcome:


Ideally, Sydney will be modeling her Rainbow Fairy Dress in this year's Trashion/Refashion Show in our community. Otherwise/in addition, I'm sensing a spring and summer full of lots of rainbow fairy magic coming our way.

Wednesday, October 26, 2011

Willow's New Pajamas

Somewhere in the midst of the vampire cloak and the mermaid skirt and the biography fair project and painting the girls' new bedroom purple and orange and putting our community garden plot to bed, Willow's new pajamas got themselves sewn:

The pattern is an old McCall's 6535. I like the style of the shirt quite a lot, but the sizing is way off--Willow is lost in her size 7!

Fortunately, the size 7 pants are perfect, and may find themselves sewn up some more in fleece this winter. Time will tell if I attempt to re-size the shirt for another go, or if I just use a different pattern next time:

Will chose the fabric, of course. Now that I've given up craft fairs for the foreseeable future I don't thrift constantly, and thus don't have a huge stash of thrifted material always on hand, so we're visiting the fabric store a lot more these days--thank goodness for sales and my educator's discount card!

I still try to keep my rule that every project must include SOME components from the stash, however, so these pajamas are made from a flower flannel purchased for this project and a purple hearts fabric purchased who-knows-when:

I made a second pair of these pants in that flowered flannel, and I think that one pajama top with two matching pairs of pajama pants will serve nicely in lieu of two complete sets of pajamas. Syd is getting one pair of pajamas and one nightgown, AFTER the Halloween costumes are finished:

And then both girls are getting some pairs of fleece pants for the winter, for everyday wear accompanied with thrifted T-shirts (or thrifted elaborate party dresses, in the case of the younger sister):

And what will I wear this winter?

Eh, who cares?

Sunday, August 28, 2011

Our Giant Multi-Colored Play Silk Canopy

I of course didn't want to mess up the hand-dyed, multi-colored play silk canopy that I was preparing to list in my pumpkinbear etsy shop, so I let the girls' own copy, as identical as two handmade pieces can be, stand in for the official version:


And yep, that's pretty much a typical day for the play silks!