Showing posts with label beeswax. Show all posts

Sunday, March 19, 2023

How to Remove Wax from Fabric: Two Methods


This tutorial was originally published on Crafting a Green World in 2022.

Now that the holiday celebrations have passed, do not look at your beautiful but wax-stained table linens and despair! 

It's possible to remove most candle wax from most fabric, even if your candle wax is highly pigmented, and even if your fabric is precious and delicate. Below, I'll run you through a couple of different techniques to try, one a little gentler and the other a little more aggressive. As you will likely have expected, the gentler technique has the least cleaning impact but puts the least stress on your fabric, and the more aggressive technique has the most cleaning power but is quite hard on your fabric. 

That's why I'm telling you right off that it might not be possible to remove YOUR candle wax from YOUR fabric. If it's a choice between a squeaky clean vintage table runner that's now faded, with splotchy dye runs, and falling apart at the seams vs. a vintage table runner in good condition with a couple of wax stains, I always choose the method that preserves the item and keeps the patina of a useful life. 

But for now, let's stay optimistic, shall we? 

CAUTION: All of these methods involve the application of heat to your fabric. If your wax is highly pigmented, you run the risk of heat-setting that pigment into your fabric, even if you're able to lift the wax. At the end of my post, I'll also give you a step-by-step method that offers the best chance at removing pigment stains, but messing with vintage fabrics always entails risk of damage. 

Here's the main culprit. It's definitely wax, but I don't know what kind. It's melted completely through the batting of this table runner and is also visible on the back. By the feel of it, there also seems to be quite a bit of it in the batting inside the table runner. I know the front and back of this piece are cotton, but I don't know the fabric makeup of the batting.


Method 1 (The Gentler Method): Blotting Paper and an Iron


Because we don't actually live in the Victorian times, alas, substitute white tissue paper, an unbleached paper towel, or even a clean piece of typing paper for the blotting paper. 


Fold one of these items a few times until it's fairly thick, then place it directly under the stained part of the fabric. Put another piece of paper directly on top of the stain, and hold a warm iron to it for a couple of seconds. Lift up the iron and give a little peep at the paper.  

The idea here is that you'll melt the wax using the least possible amount of heat. As the wax melts, it will be absorbed by the paper, allowing you to eventually lift the entire stain out of your fabric. 

You'll have an easier time with this method if you know the type of fabric and the type of wax you're working with. Different waxes have different melting temperatures, and so do different fabrics! Cotton, for instance, can easily stand up to an iron temperature hot enough to melt pure beeswax, but I'm not so certain about polyester. If you're lucky, perhaps you've only stained your vintage polyester table runner with soy wax, which has a much lower melting point. 

I'm pretty certain that my own vintage table runner is cotton (although, to be fair, I'm less certain about the batting...). My guess that the wax was plain old paraffin, however, is definitely incorrect. The melting point of paraffin is barely higher than that of soy, but even taking a gamble and turning the iron up to high, I lifted practically nothing of this wax. It even still felt hard to the touch!


Method 2 (The More Aggressive Method): Boiling Water


If you've ever used my method of removing wax from container candle jars, you know that boiling water is the quickest and easiest way to lift wax from a surface. 

The problem is that while a glass container can definitely hang out in a pot of boiling water without damage, your fabric might not be so sturdy. Hot water can cause vintage dyes, in particular, to bleed, a situation that might result in a fabric that, while wax-free, looks a LOT worse than it did with the wax on it! 

Proceeding with great caution, then, boil a kettle of water. Set up a portable drying rack to suspend the fabric over a surface you're not afraid to get melted wax or boiling water on (I vote for your driveway or the sidewalk!), then pour a stream of boiling water directly onto the stain. 

Your goal here is both to melt the wax with the boiling water and use the momentum of that stream of water to carry the melted wax through your fabric and out the bottom. This is a good method for my vintage table runner, in particular, because I can feel that there's even more wax clumped in the batting between its two cotton layers. 

And this is the method that worked for me! I still don't know what type of wax was on the table runner, but the boiling water carried it completely away. 

But remember when I cautioned you about pigments possibly being heat-set into your fabric using either of these methods? Yeah, the boiling water carried away all the wax, but it left a yellow stain. I'd be happy, regardless, because the stain is much less conspicuous than the wax, but I have a couple more stain-fighting tricks in my arsenal.


Bonus Method for Removing Wax Pigment


If your fabric survived a hot iron or boiling water, it's probably going to be fine with this method, but proceed cautiously and use your more conservative judgment, regardless.  


Wet your fabric, then use your finger to rub this a really high quality stain remover into the stain. Do a quick wash on warm as soon as you've rubbed the stain solution in, then pull your wet fabric out of the washing machine and give it a look over. If it's still stained, rub in a little more stain solution, and then use your finger (you can use a glove if your fingers are tender, but I hand-wash dishes in practically boiling water daily without gloves, so...) to massage in a tiny bit of sodium percarbonate. Sodium percarbonate is an oxygen bleach that's generally color-safe, but still, this is a more aggressive technique, so be careful. 

Again, do a quick warm wash as soon as you've applied the stain solution and sodium percarbonate. And again, pull the wet fabric out of the washing machine as soon as the cycle's complete and give it a look over. 

If it's still stained, get your portable drying rack back out and set your fabric somewhere sunny for the afternoon. Be careful if there are other, vivid colors on the fabric that you don't want to fade, but otherwise, sun bleaching is extremely gentle on all types of fabric. 


And, as I can attest, since it was approximately 20 degrees out when I sun bleached my table runner, you can sun bleach stains away even when it's below freezing outside! Your fabric will end up iced over... and stain-free!  

I hope this assortment of methods inspires you to use all of your beautiful linens and quilts and table runners and napkins and doilies and such the way they were meant to be used, instead of hiding them away to save for a day that may never come. When I die, I don't know if my kids will even want these precious vintage fabrics that I treasure so much, but I do know that they're more likely to want them and treasure them if I actually use them, sewing them into the memories of their happy childhoods.

Wednesday, August 10, 2022

The Foolproof Way to Make Poured Teacup Candles


I have finally locked down THE foolproof way to make perfect poured candles from any wax type and in any heat-proof container.

The secret weapon is a drill!

Up to now, I'd always been stymied by the process of choosing an appropriately-sized wick for both the wax type and the container dimensions. If your wick is too small, the candle will tunnel, look awful, and eventually just pathetically peter out. If your wick is too large, the candle will burn way too hot, smoke and sputter, and potentially crack the container and set your house on fire.

Neither is ideal.

So, here's the secret: you pour your candle wax into the container of your choosing, just as if you're making the candle, but you DO NOT ADD A WICK.

Let the wax rest for 48 hours, then get a drill and literally drill a hole for the wick directly into the wax. Insert a wick, light it, let the candle burn for an hour, and see how you like it. You can pull the wick out and replace it, drill holes for additional wicks, repour wax over the top of the candle to start over, etc.

There is no way to mess up the entire candle, yay!

I did a lot of wick tests for the poured teacup candles that my Girl Scout troop wanted to make. I wanted a wick size that would work for most sizes of teacups, AND I was really hoping to use the multi-pack of candle wicks that I found at Goodwill for 99 cents, because I'd already spent quite a bit on the beeswax.

Unfortunately, this is what my first wick test looked like:


That's 8 ounces of beeswax, and I don't know what the make and model of the wick is, but clearly it isn't going to be able to keep up with burning through an entire teacup of beeswax.

So I made a couple of changes:
  1. I gave up on the idea of a 100% beeswax candle in a teacup. Beeswax burns so hot that I decided that it's just not an appropriate candle wax for a teacup candle, which narrows quite dramatically. I couldn't free myself from the intrusive daydreams of some kid's teacup candle getting too hot, exploding into their face, and then setting their house on fire.
  2. I embraced the idea of multiple wicks! Test burning a wick from the Goodwill pack let me measure the diameter of the melt pool, which makes deciding on the number and placement of additional wicks a lot easier.
Here, then, is the foolproof method that I used to make poured teacup candles with teenagers. This tutorial assumes that you already figured out the melt pool you'll get with the wick and waxes you're using. If you don't know that info, do the thing I wrote about above where you pour a wickless candle, then drill a hole into the cured wax, insert a wick, and test it out. With this specific ratio of beeswax to coconut oil, the wax is actually soft enough that you can ditch the drill and just use a sharp bamboo skewer to make the holes for the wick. It SO quick and easy!

1. Melt 8 ounces of beeswax. I used aluminum cans in a crock pot for this, so that when I did the project with my Girl Scout troop, each kid could be in charge of their own can of wax. 

Eight ounces plus the coconut oil, below, was more than most kids needed to fill their teacups, so I had silicon molds on hand that they could pour the excess into. We saved all that awesome wax so we can make more candles someday!

2. Wick the candle. While the beeswax was melting, I showed the kids how to stick the tabbed wicks to the bottoms of their teacups. With this wax blend and the wick size, the melt pool for each wick was 1.5" diameter. I passed out rulers, and the kids figured out for themselves how many wicks they needed to create a full melt pool, and where those wicks should be placed. 

Since we'd be lowering the burn temperature of the beeswax by adding coconut oil, this wick placement is a pretty low-stakes judgment call, so I gave advice when asked, but otherwise let the kids consult with each other and/or figure out where they wanted their wicks to go on their own. Candlemaking is overall a heavily adult-monitored activity, thanks to the safety concerns, so it's nice to let the kids make their own decisions whenever possible.

In the future, though, I will explicitly note that the wicks should be no closer than half that burn diameter to the edge of the teacup. What with placing the wicks on their own and then figuring out how to keep them upright while the wax melted, some wicks ended up pretty close to the wall of the teacup. Not the biggest deal, but it will lead to more smoke and soot than if the wick has enough space to burn cleanly.

2. Add 1/4 cup of coconut oil to the melted wax. I chose to figure out a volume measurement for the coconut oil just to make it easier for a group of teenagers to do while all standing around a table. You could also probably measure out and add the coconut oil to the can at the same time as you measure out the beeswax, but I did all the beeswax measuring before my troop arrived so I could start it melting in the crock pot, and I wanted to leave something for the kids to do.

I had the kids use a pot holder to remove their can of melted wax from the crock pot and put it on their own work space, then measure and pour the coconut oil into the melted wax. I gave them popsicle sticks to stir with.

3. Use popsicle sticks or bamboo skewers to prop the wicks in place. Even if the wicks are primed and stiff, they'll collapse as soon as the hot wax melts their own wax coating. It's better to prop the wicks in place before you pour.

4. Pour the melted wax into the teacups. I encouraged the kids to pour a little at a time, hoping to avoid too much wax shrinkage, but I'm not sure if it made a difference. This step was utter chaos! It's VERY exciting to pour candles, and somebody is definitely going to spill, and everybody is going to have trouble with their wicks shifting. The kids find it thrilling, though, so just go with it.

Here's what it looks like when the wax is poured and starting to set:


The wick placement is really good on those candles! 

5. Trim the wicks, and let the candles set for 48 hours. For bonus points, save the trimmed wicks to make new candles!

I was VERY worried that the candles wouldn't be solid enough for the kids to take them home that day, but another bonus of adulterating beeswax with coconut oil is that the wax solidified much quicker than 100% beeswax would have. 

6. Let the candles burn for at least an hour the first time they're burned. I'm a believer that the first burn is crucial to building a proper melt pool. It probably matters more for some candles than others, but I think that burning a candle for at least an hour that first time gives it a fair shot at establishing a good melt pool.

Here are the candles my kids made, after about an hour of burn time:


You can see the melt pool better with this overhead shot:


The candle on the right is perfect. The middle candle, after a few more burns, did build up to a full melt pool. The candle on the left is still tunneling down that original melt pool, mostly, I think, because the bottom wick is butting up against the wall of the teacup. 

And here's how it looks to have teacup candles in your life!

Overall, I think this was a decently teenager-friendly project, and I'm satisfied that this is about the most foolproof method around for pouring teacup candles. The kids talked about making candles for holiday presents, so we might revisit this in a few months. Otherwise, I'm thinking that sand candles could be a fun project for a camping trip!

P.S. Want to follow along with my craft projects, books I'm reading, dog-walking mishaps, road trips, and other various adventures on the daily? Find me on my Craft Knife Facebook page!

Monday, August 1, 2022

The Goal is No Girls Injured: Prepping To Lead the Girl Scout Retired Girl Scout Folk Arts IP


I DO know what I'm doing. I didn't volunteer willy-nilly to teach seven teenagers how to pour lye into distilled water and molten wax into teacups without a firm base of knowledge.

But dang, there's nothing to make you question your skill set when doing a risky project than volunteering to do that project with seven teenagers! 

There are a couple of reasons why I'm engaging in SO much prep work before I lead this Girl Scout retired Folk Arts IPP that my Girl Scout troop planned. 

1) Left to my own manic devices, I'm not as safe as I ought to be. I run Dremel cut-off wheels centimeters from my radial artery, remove the tips of fingers with craft knives, and I definitely pour both lye into distilled water and molten wax into teacups bare-armed, bare-legged, and barefoot. 

2) Left to my own manic devices, I also veer from the script more often than not and muscle through several iterations of a project to get the desired result. Candle that I poured tunneling? Eh, melt it down, pour it again, and try a different wick. Soap didn't cure properly? Shovel it all in the crockpot to hot-process. 

That's fine for me, because I've got nothing but time and an endless capacity for frustration. But I want these teenagers' projects to work, and work well. They are going to learn the GLORIES of soapmaking, by God, and the ECSTASY that is a properly-wicked, burning-just-to-the-edges-but-no-farther tea cup candle!

So that was my weekend project!

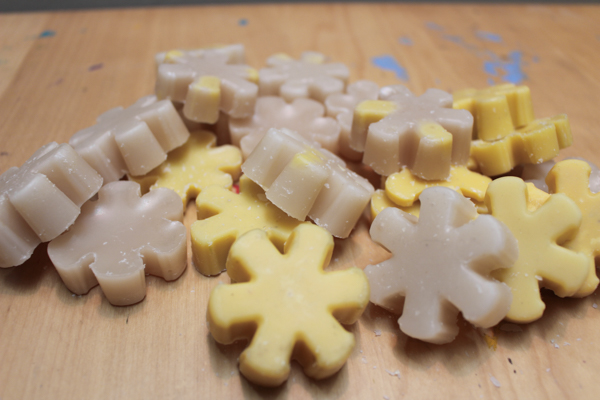
First up, I had Matt (who tested negative for COVID after six days in isolation, so I set him free, which I *think* is okay to do? I guess I'll know when I take my own COVID rapid test in a couple of days!) make his very first batch of cold-process soap, with no information at his disposal other than my verbal instruction. This was great, because I could make note of the tricky parts of the process and the places where I'll need to give specific warnings to the kids (for Pete's sake, don't stick your head OVER the solution of lye and water!!! Why would you even do that?!? It's literally steaming, and I just told you that it's giving off toxic fumes!!!), and I could time about how long the recipe takes to trace. Twenty-five minutes, which is a bit of a yikes, but the kids are all great chit-chatters so I think it will be okay.

Making this batch ahead of time was also good because I can unmold it in front of the kids and show them how to tell if it's cured enough to cut, since they'll be doing that part at home.

On to the flower pressing! I toyed with the idea of having the kids make mini flower presses to carry in their backpacks, something that I, personally, would love the snot out of, but I dunno. Kids' attention spans aren't real long these days, so I kind of doubt that they'd all take to the six-week wait for their pressed flowers. Instead, I hit up the ReStore, found 12 unglazed ceramic tiles for three dollars, and decided to teach the kids how to press flowers in the microwave and send each of them (except for my own kids, who can share) away with their own set of tiles for microwave flower pressing at home. Even a modern teenager has enough attention span to spend one minute microwaving flowers!

And then we can make pretty things with them!

My kids and I loved making these pressed flower bookmarks, and I think my Girl Scout troop would, as well, but a multi-day, multi-step process isn't going to work. These are teenagers--they're going to dump whatever they come home from their Girl Scout troop meeting with on the floor of their bedrooms and not look at it again for three months. If I'm super lucky, they'll be willing to do maybe one more step after that, but definitely not fourteen more steps, some of which require yet more wait time.

So I figured out how to simplify the process!

The grated cheese is not related to the microwave flower pressing...

I'll have to write new tutorials for both the flower pressing and the pressed flower bookmarks, because I feel like I streamlined the process for each of them by quite a bit:


And now I'll have some samples to show the kids!


They will still need to seal them 24 hours after our meeting, but I think I can get away with pouring a tablespoon or so of matte medium into wee zip baggies for them to take home. That should keep the matte medium fresh enough to still be painted on when the bookmarks are discovered on bedroom floors in three months.

The poured candles in teacups was the trickiest project to figure out for kids. Kids will be bringing teacups in different sizes and shapes, and I want them to be able to pour candles that will burn correctly for whatever container they bring.

I got a tip from a candlemaking book once upon a time that the best way to test wick sizing in a non-standard container is to pour the candle into the container without a wick, let it cure, then drill a hole to insert a wick. If the size doesn't work, pull the wick out, re-drill the hole if necessary, and try another wick!

I'm glad that I tried this, because this wick that I tested is a hard nope:


I tried a larger wick size, got another hard nope, and finally decided that I'd never be able to burn a candle the width of a teacup with straight beeswax, so I poured a new candle with a beeswax and coconut oil combination:


Better, but ultimately still a nope! Grr!

Syd had the idea to just multi-wick it, which... success!


The above photo is from about half an hour into the candle's first burn. At an hour's burn time it had reached its maximum melt and made it almost completely to the edges of the cup all around. Normally, you'd want a container candle to burn all the way to the edge, but with the way that a teacup narrows to the bottom, I think this wick size and placement is perfect. I don't want the candle to burn too hot towards the bottom.

Add in a lecture on the biology of honeybees and the chemistry of triglyceride hydrolysis, and that's this Folk Arts meeting all prepped!

Now let's just hope that COVID rapid test comes out the way I want...

Monday, November 8, 2021

Pumpkin+Bear Shop Update: So Many Candles!

The kids and I have apparently been making candles for a decade, which...

Time has been flying in a horrifying way, lately.

Candlemaking is not only something that I can do quite well now (not surprising, since I've apparently got a decade of experience at it!), but something that I've been finding very meditative and comforting lately. I took advantage of my mental renaissance to finally photograph and list in my Pumpkin+Bear shop the many different styles and sizes of candles that I've been making for the past ten years but just never got around to actually selling for money.

Ahh, it feels so good to stop procrastinating!

I now offer just about every size and style of beeswax candle that a person could possibly long for.

Here's a traditional pillar candle, eight inches tall and 1.25" in diameter:


And here's a tapered version in that same size. It's the same 1.25" at the base, but tapers to just .25" at the tip:

And here's my absolute favorite style of that taper candle--it's STRIPEY!!!


I also now sell a miniature version of that stripey taper. It's still 1.25" at the base, but it's only four inches tall:


I also make striped pillars! These have a regular pillar candle at the core, and I cover them with strips of different colors of beeswax.

I also finally offer a third size of my rainbow taper candles. This one, too, is only 4" tall:

And because I already have the holidays on my mind, I made a 4" Christmas tree taper!

I still offer all my old favorites, the Waldorf ring candles and the birthday candles:


But the whole family is just a LOT bigger now!


Shh, don't tell, but that family portrait, above, does show a favorite candle of mine that I still don't sell!

Sunday, September 12, 2021

How to Make a Teacup Candle

This tutorial was originally published on Crafting a Green World in 2016.

If made correctly, a teacup candle is beautiful, useful, and endlessly refillable. You'll love its warm light and gentle scent, and you'll enjoy your teacup candle far more than you would a boring old store-bought container candle. 

 You will need: 

  beeswax or soy wax. I use beeswax, but soy wax is an excellent substitute. Just don't use paraffin! 

  wax-only crock pot or double boiler and repurposed glass jar. I thrifted a small crock pot years ago to use just for my beeswax crafts, and it's still going strong! As an alternate, you can use a double boiler and melt your solid wax in any old glass jar inside of it. 

  vintage teacups. Use only teacups that have no visible cracks or hairline cracks in the body of the cup; chips at the rim and broken handles should be okay, but use your own judgment. 

  hot glue gun and glueYou could use epoxy glue if you don't have a hot glue gun, but hot glue really is the best choice here. 

  pencil, tape, and clothespins. You'll use these only to hold your wicking in place, so feel free to find substitutions. 

  wicking. You can buy wicking constructed specifically for container candles, or use your own stash wicking that's appropriate for the diameter of the candle that you're making, or for a smaller diameter candle (this is called underwicking). 

 1. Examine your teacup for flaws. Your teacup should be able to withstand the candle burning, but an older teacup that has flaws might not. Check your teacup carefully for any cracks or crazed glazing; a couple of chips on the rim or a broken handle shouldn't matter, but any flaws on the body of the cup might affect its structural integrity. 

  2. Melt your wax. Using your crock pot or double boiler, melt enough solid wax to fill your teacup most of the way. I pour my leftover beeswax into novelty silicon trays and then store it in a glass jar, so that's why my wax is adorable. 

  3. Measure and glue down the wicking. Measure out a length of wicking about twice the depth of your teacup, then dispense a dollop of hot glue in the bottom center of the teacup and press one end of the wicking into it. 

 4. Brace the wicking. Tape the other end of the wicking to a pencil or chopstick, then wrap the wicking around it until it's nice and straight and taut. To keep it that way, I like to pin a clothespin to each end of the pencil, then brace them against something--here, I'm using my scissors--to keep the entire contraption from shifting.


5. Pour in the wax. Using a ladle, carefully pour melted wax into the teacup, trying your mightiest to keep it from sloshing against the sides of the cup.

To keep the wax from shrinking away from the sides of the cup as it hardens, pour about 1/3 of the wax into the teacup, let it set, then another 1/3, let it set, and then the last 1/3.

6. Trim the wick. Cut the wick just above the top of the wax, and reserve the excess wick for another project.


Teacup candles make excellent handmade gifts, especially for those people who you don't otherwise know what to give--teachers, hostesses, your great aunt, etc.

Or, you know, yourself. You get to have a teacup candle, too!

Saturday, August 15, 2020

How to Remove Wax from a Jar Candle

I originally published this tutorial on Crafting a Green World.

Here's a shout-out to my fellow VERY thrifty crafters!

I like to do a lot of wax crafts, but beeswax is expensive, and lacking my own set of beehives, my budget can't quite keep up with my habit.

Fortunately, I also have a lot of jar candles around the house, some homemade (with more lovely beeswax!) and some gifted or store-bought (with various qualities of wax, but often most likely the cheapest). When these candles burn down there's always still some wax left at the bottom and around the sides of the container. Reclaiming that wax is a simple process, and when I'm done, I have all-new wax to craft with!

It's worth it even to reclaim that cheap wax of unknown (but probably petroleum-based) provenance. You can use it to make fire starters, or dye it and use it to make wax seals. Perhaps you have an origami boat that you'd like to waterproof?

The possibilities for reclaimed beeswax or soy wax are endless, of course, including remaking your own jarred or poured or dipped candles.

And don't forget that you can also reuse the jar that the candle came in! I'll show you how to get it squeaky clean near the bottom of my post.

Supplies

Here's what you need to reclaim the wax from your jar candles:

*Save yourself some trouble and hit up your nearest thrift shop for the cheapest crock pot on the shelf, and then use it only for crafting. I bought this crock pot from Goodwill for $1.50 probably a decade ago, and it works perfectly for me and then lives out in the garage when I don't need it.

Directions

1. Cover your work surface with newspaper, then ready your crock pot.

Because I promise you that you do NOT want to spill melted wax all over your kitchen. Just... you really don't.

2. Add the jar candle containers and water to the crock pot.

Oh, if only it were so easy! So here's the thing: those nearly empty jar candle containers are going to want to FLOAT, dagnabit. It's super annoying, and also, you really don't want to get water in the containers with the beeswax.

What you have to do, then, is wedge the containers in so that they can't float away. Setting a ceramic plate on top of them works well, as does filling Mason jars with water and setting them in the crockpot to take up all the rest of the available space.

3. Melt and pour.

After everything is wedged tightly into place, all you have to do is turn your crock pot on and wait for the wax to melt. I like to pour the melted wax into silicone molds, not only because the wax slips out so easily when it's cooled, but also because afterward, you have lots of manageable little blocks of wax that it's then easy to melt again and use for all your projects.

Often, your melted candle wax will have soot or wick fragments in it. If so, pour it through a layer of cheesecloth to catch the impurities.

4. Store reclaimed wax separately.

It's worth it to always store this reclaimed wax separately from your other wax stash. If you have no idea what type of wax you've reclaimed, you obviously don't want to mix it in with your lovely soy and beeswax, but even if it's soy or beeswax that you've reclaimed, you still don't want to simply add it back to your stash. Reclaimed candle wax is fine for making more candles, but I certainly wouldn't want to use it for the skin care products that I also make using beeswax.

Now, what about those reclaimed jar candle containers? Even with the wax melted and poured out of them, you'll notice that they're still waxy. The trick to getting them squeaky clean is to completely immerse them, right side up, in a large pot of water. Make sure there's plenty of water covering the top of the containers. Heat the pot of water on the stove, and when the water temperature reaches the melting point of the wax that the candle containers once held, the remaining wax will melt and float to the top of the water.

You have to play around with this method a bit and keep a good eye on the pot, because your wax of unknown provenance is going to melt at an unknown temperature, and if you have several candle containers in the pot, you're probably going to be dealing with a different melting point for each of them. But when all the wax has finally melted and floated up to the top of the water, you can take the pot off the burner and let the water cool.

Skim the solidified wax off of the cooled water and toss it, and then you're free to check out your former candle containers. They'll likely still be sooty and need a good scrub-up, but after that, they're ready to reuse or upcycle.

Might I suggest that you use them to make another jar candle?

Wednesday, October 9, 2019

Crafty Book Review: The Scented Candle Workshop

You guys! The most frustrating thing about candlemaking is choosing the correct wick size. It's the most frustrating part of the process because so often you DON'T choose the correct wick size--or at least I don't--and then all your work is wasted on a candle that you're embarrassed to show anyone else because it burns so super wonky.

If you're using one of the popular waxes--soy wax is super popular right now, for instance--you can generally find a lot of information about it online, perhaps even enough info to get you started with the correct wick size right off, but I really like beeswax, which is already a tricky wax for candles, and every batch of beeswax is different and burns a little differently.

The only way I knew how to choose the correct wick size was trial and error, as in I'd make the entire candle with a wick, it'd burn and look crappy, and I'd have to remelt it and try again. Big bummer, and not conducive to much candlemaking.

Then a publicist sent me a review copy of The Scented Candle Workshop, and in it is a type of burn test that I've never seen before, and it's actually quick and efficient, totally doable, and waste-free!

Y'all, I set it up immediately:

My favorite thing about this project is that the authors suggest doing the burn test in a disposable aluminum baking pan. We've got just a few of these kicking around in case I ever get it into my head to make some freezer meals (as if!), and I was happy to sacrifice one to the cause.

Here you can see my burn test just getting started:

I set it up with all of my current wick sizes, even the ones that I already happily use for specific candles. I've got the tiny braided cotton wick that I use for my rolled beeswax birthday candles, the larger braided cotton wick that I use for my rolled beeswax taper candles, an ECO-10 wick, ECO-12 wick, ECO-14 wick, and an unlabeled wick that came with a separate candlemaking kit.

The kids helped me keep track of the candles as we went about our school day:


And when their burns were finished, I had an exact depiction of exactly the diameter of burn I could get from each candle wick! When it was cool, I peeled the beeswax away from the aluminum baking pan (it's now unsuitable for food, but can be used for more candlemaking projects) and stored it until I'm ready to make my next candle.


And now that I've written them down, I know exactly what candle wick that I want to use to make a rainbow beeswax candle in a Mason jar:


Now that I've seen this burn test, I think I'm actually going to change the wick size that I've been using for my upcycled vintage Coca-Cola bottle candles, too. It's amazing the knowledge that proper science can bring!

I have two more projects from The Scented Candle Workshop on my list to try, now that I've got all my wicks sorted. Stay tuned for an emergency candle in an Altoid tin and a Mason jar candle scented with my favorite essential oils!

I was given a free copy of The Scented Candle Workshop, because I can't write about a book unless I've spent an afternoon burning beeswax in a pie tin at its direction!

Friday, October 5, 2018

How to Make Waxed Thread


I freelance over at Crafting a Green World, an eco-friendly crafting blog. Every now and then, on a non-regular basis, I'll share one of my favorite tutorials with you..

...such as this one! I originally published this waxed thread tutorial over here at Crafting a Green World.

Whether you're a bookbinder or a leather worker, want to sew outdoor-friendly projects, or are interested in macrame or jewelry making, you have a use for waxed thread. Why spend more on a store-bought waxed thread from a big-box craft store when it's so easy to make? If you do any other kinds of crafting with natural materials, you likely have the beeswax on hand already, meaning that your DIY waxed thread will be absolutely free, with no surplus packaging. Another bonus to making your own waxed thread is that you're not bound by whatever is commercially available; you can wax a rainbow of embroidery flosses (as I'm doing in this tute), your favorite linen thread, or strands of yarn that you've spun yourself. 

In case you're still not sold, I should mention that it takes seconds--seriously, seconds!--to make waxed thread. It takes longer than that to find what you want on Amazon and click on it, or to drive across town to the store and back.

Here's how to make it!

You will need:

Solid beeswaxIf you have crumbles of beeswax or one large block, here's how I remold beeswax into smaller, known quantities that are far easier to handle--and they're cute!

Thread or floss of your choice. I'm using your bog standard embroidery floss from my stash for this project. Other great choices are linen threads, hemp twines, or heavyweight sewing thread. Just remember that waxed thread is for hand-sewing only--do NOT put this in your sewing machine!

1. Cut off a length of your selected thread. Since I use my waxed thread for bookbinding, I cut it to the appropriate lengths for the books that my kids and I want to make. If you're hand-sewing, arms-length works, and for jewelry making, let your project guide you.


2. Draw the thread across the solid beeswax. Draw the thread completely across the block of beeswax six or seven times, then pick up the other end of the thread and do the same in reverse. You will be able to feel the thread taking up the wax as you go. Several times in each direction should be plenty, but you can make the thread as heavy with wax as you'd like.

See? Waxed thread is too easy NOT to DIY!

Need some inspiration for what to actually DO with your waxed thread? Never fear! Check out the following ideas:

1. Bookbinding. Lightly-waxed embroidery floss is absolutely perfect for the five-hole, stab-bound book that my kids and I love to make. For an even more eco-friendly project, upcycle an old greeting card as the book's cover.

2. Button braceletYou can use regular embroidery floss for this project, but waxed floss will hold the buttons in place better.

3. Cranberry or popcorn garlandYou don't have to use dental floss, but using a waxed thread will keep the cranberries, especially, from soaking through and rotting the thread.

4. DreamcatcherThese are easy to make in any size, with any embellishments that you like.

5. Seed bead and waxed linen thread braceletThis is a great tutorial, and the close-up views of the waxed linen thread let you see exactly what YOUR waxed thread should look like.

6. Sewing leather. Here's a handy stitch to use when sewing leather, and some good advice on choosing thread length when hand-sewing leather.

P.S. Did you know that you can also wax yarn? The result is not something that you would sew with, but instead, a bendy, sticky, keeps-its-shape toy that kids LOOOOOOOVE!

Monday, July 24, 2017

How to Make a Beeswax Candle in an Upcycled Container

You know that I've been obsessed with my found vintage Coca-Cola bottles, right? I'm pretty sure that I'm not going to be happy until I've figured out a hundred ways to upcycle them.

Here's my latest creation, and the project that I'm currently the most excited about:


Why, yes, I DID turn a vintage Coca-Cola bottle into a candle!

Here's the best way to clean your old glass bottles. Cutting, grinding, and polishing the bottle is a whole other skill set that I've been learning, and I'll tell you all about that another time--although I HAVE found the perfect technique for it all, rest assured!--but for now, let's just talk about how to pour a beeswax candle into an upcycled glass or metal container, as that on its own is an awesome skill set to have and it makes an awesome candle.

Here's what you'll need:


  • beeswax and a way to heat it (I prefer a crock pot, which is dead simple to find dirt cheap at any thrift store)
  • upcycled glass or metal container, such as a Mason or jam jar (I am not responsible for making sure that your container can handle heat--use common sense, Friends!)
  • candle wicks. If your candle sucks, it's pretty much always because you used the wrong diameter of candle wick. Wicks have specific diameters for specific diameters of candles, so do your research.
  • hot glue gun, hot glue sticks, tape, and a pencil with an eraser.
  • heat gun or hair dryer
1. Set up the candle wick in the container. Put a generous amount of hot glue near the end of the wick, then use the eraser end of the pencil to help you push it into the middle of the container and center it at the bottom:


Don't do this immediately before you pour the hot beeswax; the hot glue needs a little time to cure, or it will melt and set your wick free when the melted beeswax hits it. If that happens, put an oven mitt on your hand and just pour the melted beeswax back into the crock pot, ready to start again.

Wrap the wick a few times around the middle of the pencil, which you're going to set on top of the container. Get the wick nice and centered, then tape the free end to the side of the bottle:


Your wick will stay stable and centered, and you won't have to cut it at this step and waste it.

2. Melt the beeswax. If you melt beeswax at too high of a temperature for too long, it will darken, so keep your crock pot on low and turn it off when you no longer need the beeswax.

3. Pour the wax into the candle. I spilled a lot of beeswax before I decided to stop trying to pour around the pencil and just pour into the middle of the container, right over the pencil. You can clean the wax off of the pencil later, or it can just be the pencil that you always use in candlemaking.

I poured a little too much wax into this candle--


--but I did a better job with this bottle after I realized that I should mark a line on the bottle to pour to rather than eyeballing it:


4. Fix your mistakes. Let the beeswax harden, then cut off the wick and check out all the places on your candle that suck. I had a lot of dribbles and spills, and with that Coca-Cola bottle, especially, I had a LOT of air bubbles, especially against the sides of the bottle, messing up the whole look. And I had those marks on the amber bottle candle where my excess wicking was touching the top of the wax.

To fix all of your mistakes, what you do is get out your heat gun or a hairdryer, and remelt the beeswax. Don't point it at just one spot so that you don't crack the container, but melt all around the bottle and at the top so that air trapped against the sides of the bottle can get out, and new wax can flow in from the top. You can even melt more beeswax in the crock pot and pour it over the top, although you'll have to do the heat gun step again after that wax cures, too, probably:


After you've evened out the wax and gotten all the air bubbles out, your candle should look pretty dang awesome! Light it, love it, and don't leave it alone.

P.S. Now that I no longer have Crafting a Green World's Facebook page to handle, I miss the interaction that social media brings. Please come hang out with me at my Craft Knife Facebook page instead! It's fun!