Monday, January 3, 2022

Whirlwind Trip to NYC Day 1: Indiana to Harlem

I planned this Christmas trip to New York City back in August, when I was high off of two recent successful traveling adventures and naively confident that my days of having Covid ruin my plans were over.

I ought to know better, as I'm a Medievalist and every now and then I feel the urge to randomly tell people that the Black Death lasted upwards of five years. And if our trip had been planned to start just a day or two later I'd definitely have cancelled it myself, because the day we arrived in Grand Central Terminal was the day the news reports got big that apparently NYC was chock-full of Covid, and everywhere we went people were lined up for curbside Covid tests, and the thing that I most wanted to do in the city got cancelled because of Covid the literal day I planned to do it...

Ah, well. The kids, my partner, and I emerged safe and sound, and all have our negative Covid tests in hand to prove it.

And on the first day of our trip, we got to watch the sunrise from the sky!

We flew into Newark, primarily because in my limited experience I've found the TSA agents there to be ever so slightly less cruel than the TSA agents in JFK (Have I ever told you that I get "selectively screened" A LOT? Like, barring the time that a TSA agent put her hands into my literal underpants in front of everyone in the security line and I cried, it's more or less a family joke, and when my partner looked over at the Indy security checkpoint and saw a TSA agent swabbing the bottom of one of my socked feet he just rolled his eyes and got my bags off the belt for me, but nevertheless, it's the WORST and you bet I evaluate my airports based on the level of humiliation I've experienced there in the past). 

I bought round-trip tickets for us on the Coach USA airport shuttle, which let us off near Grand Central Terminal at something like 10:00 am. 

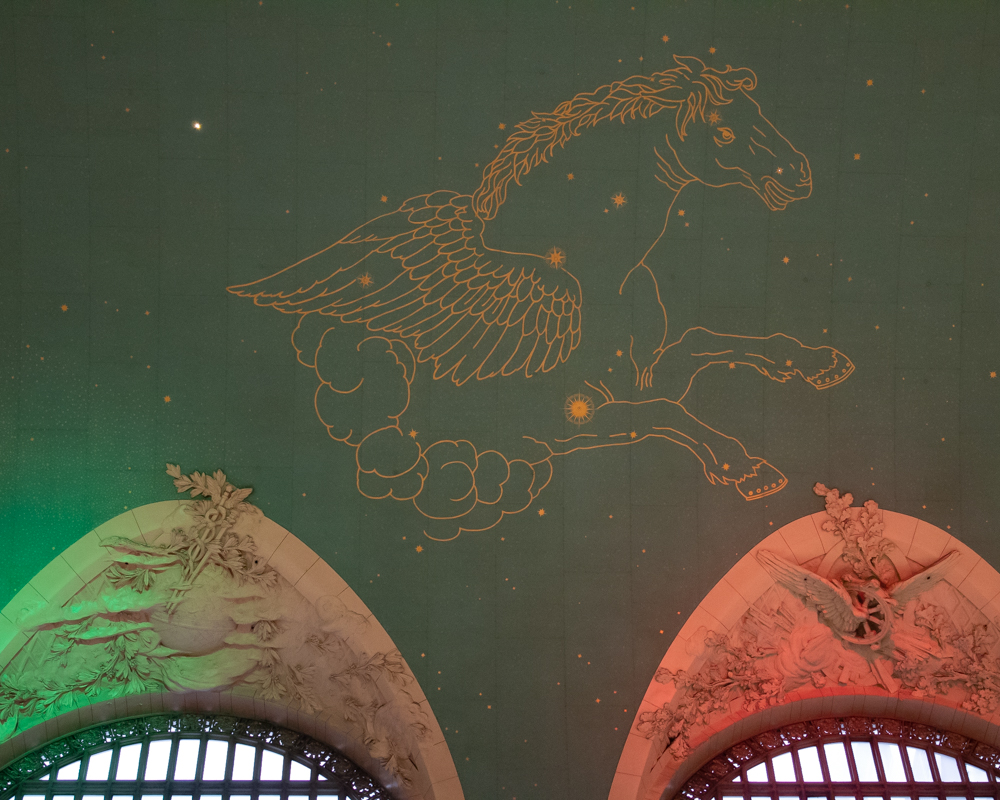
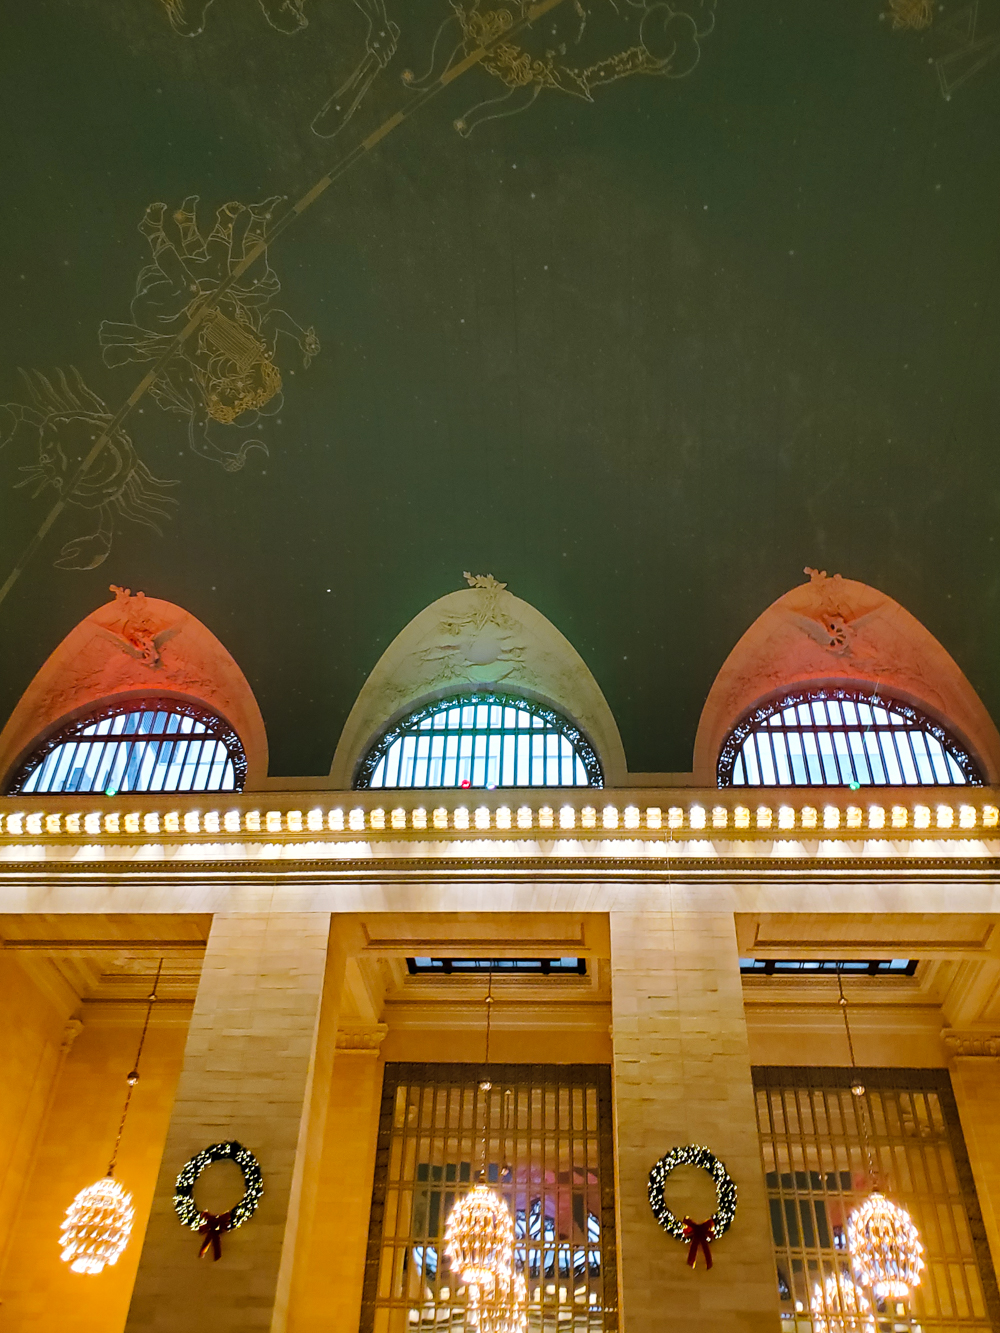
I actually bought an audio tour of Grand Central Terminal, thinking it would be a fun (for me!) way for us to kill a couple of hours, but honestly, it took us a couple of hours just to figure out how to buy the 7-Day Unlimited Metro Cards that I wanted (probably at least an hour of trying vending machine after vending machine, each time unable to figure out why it wanted to charge us hundreds of dollars for something that should be thirty-ish bucks each, only to finally read the words on the machine and notice that it sold TRAIN tickets, not SUBWAY tickets. And then the adventure trying to figure out where the subway ticket machines live!). As well, we definitely weren't used to how crowded Grand Central was (I mean!), so we mostly just gaped at the zodiac ceiling mural--


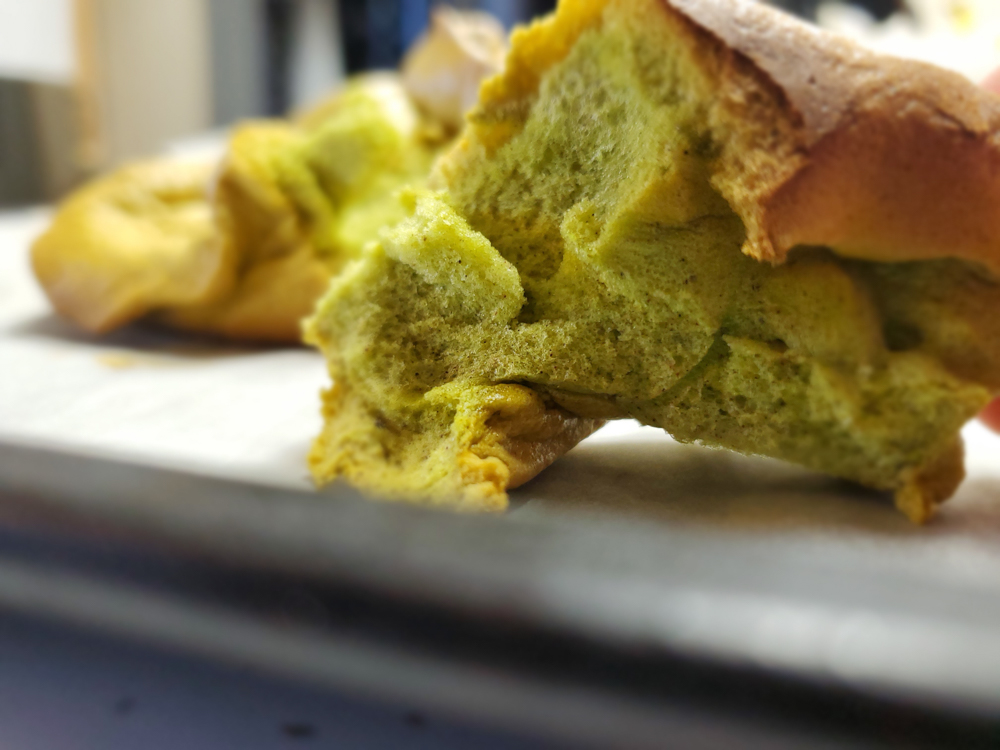
--fueled up at Doughnut Plant--

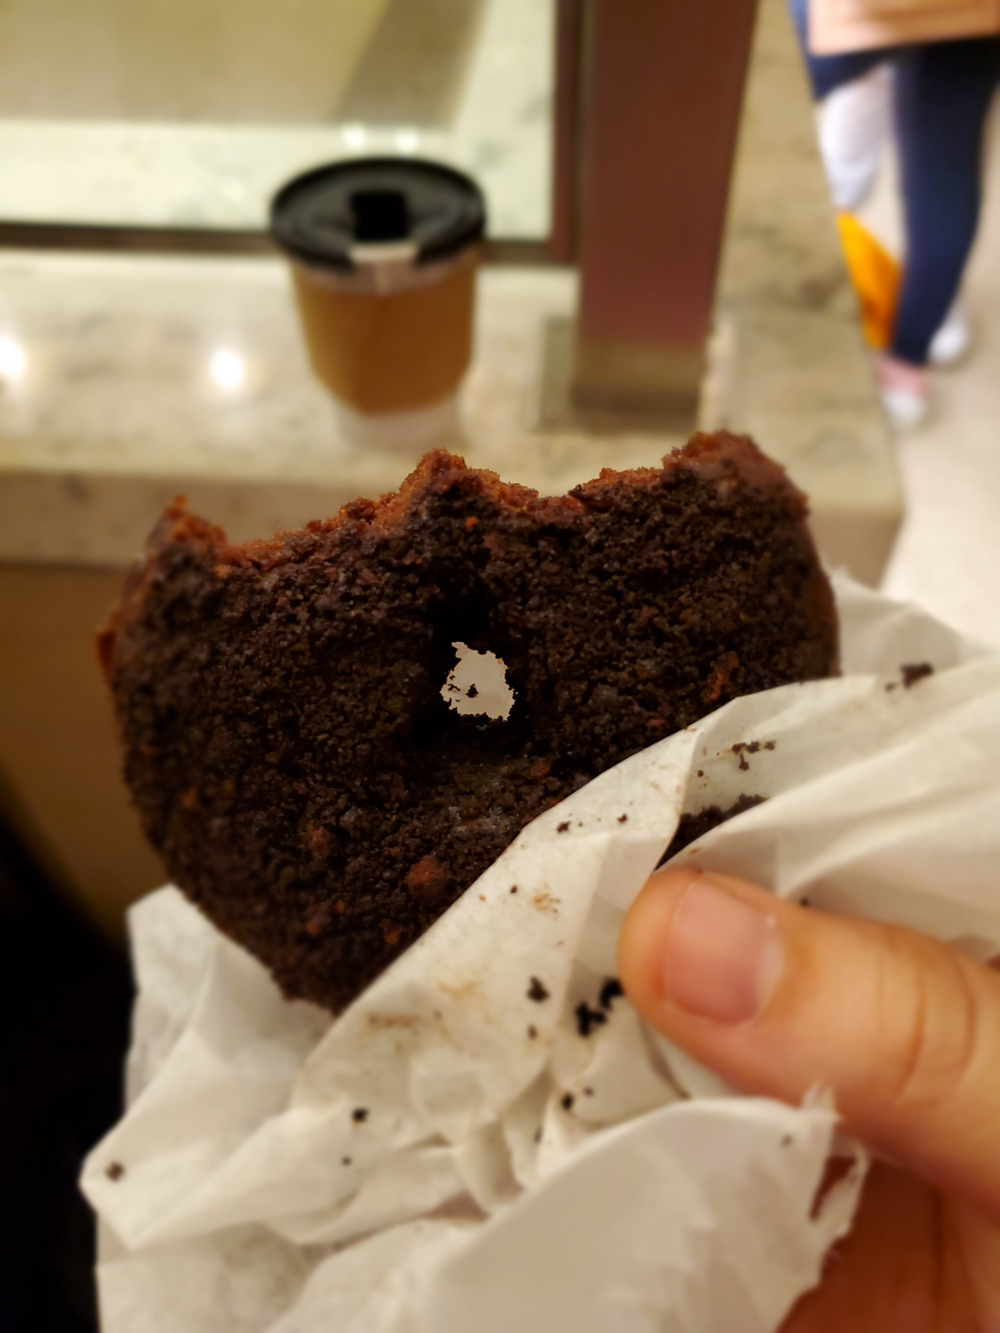
This is the Brooklyn Blackout, which is the most delicious doughnut I've ever eaten. Totally worth spilling coffee down the front of one of the two shirts I'd brought, leaving me with one shirt and a sweatshirt smelling vaguely of coffee for the rest of the trip because obviously I'm WAY too lazy to hand-wash a shirt on vacation!
--went up and around and out and around and in and across and down and FINALLY figured out where to buy the correct Metro Cards, and then headed out to wander. 

And look up!


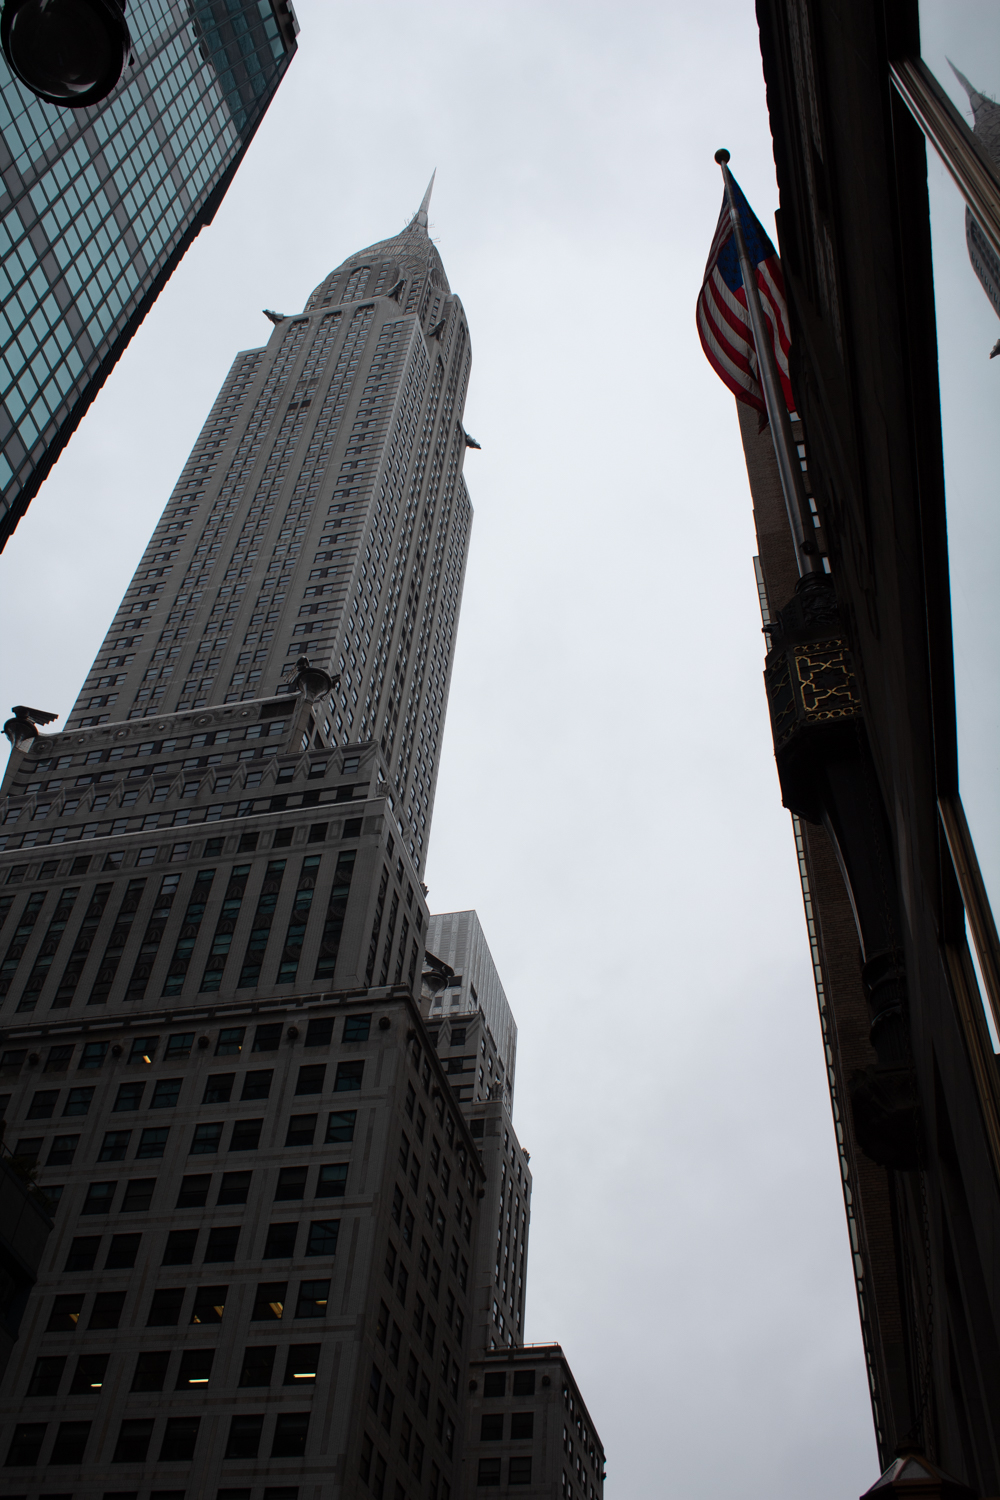
Found the Chrysler building! 


Here's the charming path to the New York Public Library:


Apparently nobody else found this path as charming as I did, so here begins the typical NYC practice of my partner and the kids forging quickly ahead, looking neither up or about themselves to sightsee, turning their heads just every now and then to find me mosying twenty feet behind them and then waiting impatiently for me to catch up before forging ahead again.


We had our luggage with us so I didn't really want to go inside anywhere, and therefore we confined our visit this time to the outside of the New York Public Library.


My library-lovingest kid made the acquaintance of Patience and Fortitude--

This is before we upgraded to my current favorite COVID masks.

--and we assured them that we'd definitely come inside and tour the treasures on our next visit.

Fortunately, Bryant Park has lots to do outdoors in December!

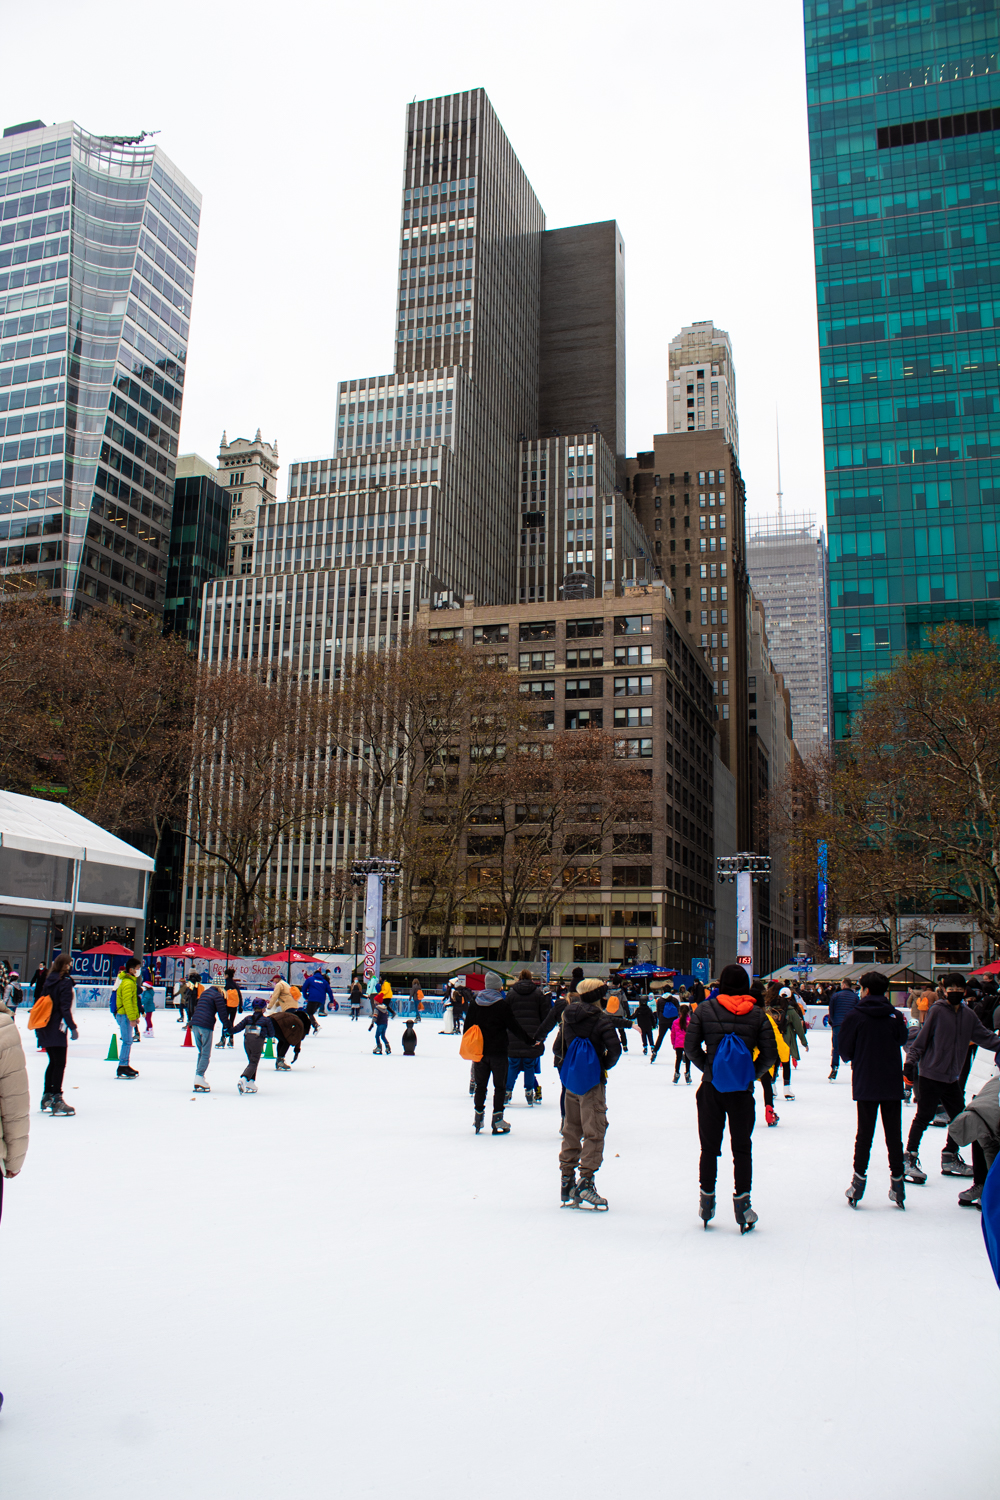
We didn't ice skate. It's funny because there's so much to do in New York City, that everyone who visits can fill their time doing completely different things from everyone else who visits, so whenever I've told someone about our trip that person immediately starts peppering me with questions that relate to the stuff THEY'D do, like "Did you ice skate at Bryant Park? Did you climb the Empire State Building? Did you eat a hot dog from a cart?", and I'm all, "No, no, no...", making it sound like we just sat on our butts the whole trip. 

We have a puzzle with this fountain on it!

Browsing Bryant's Park's Winter Market was suitably festive, as was walking north on 5th Avenue while admiring the buildings and the window displays.

The Rockefeller Tree, though, was... a little underwhelming?

We decided it's TV's fault. They make the tree look absolutely massive, so when you see it in person, yes, it's absolutely massive, but not, like, the most massive thing ever? And it's in front of the genuinely massive Rockefeller Center, so really it can't compete.

The skating rink is genuinely charming, though.

The Christmas Balls Fountain is way less crowded and way more photogenic, in my humble opinion.

We were all getting really exhausted/really excited to check into our AirBnB by this time, so we walked to the Times Square subway station, passing Radio City Music Hall on the way.

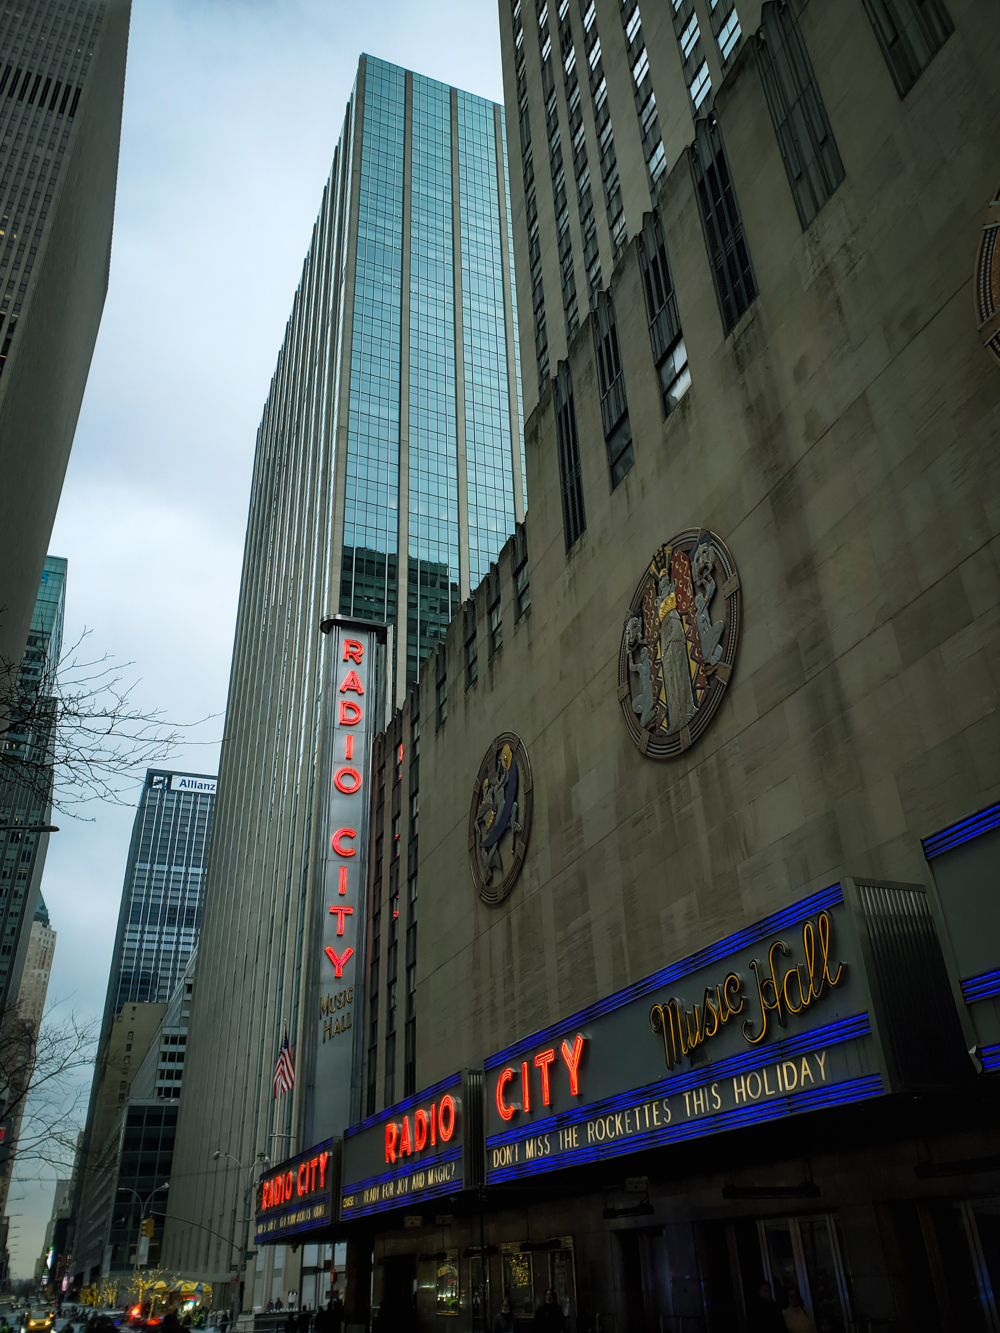
By this time, I already knew that the Rockettes had just a few hours ago cancelled the rest of their performances for the entire season, and it gave me a sinking and unhappy feeling in my gut re. Covid and lockdowns and shows I had my heart set on and really, really, really didn't want to get cancelled...

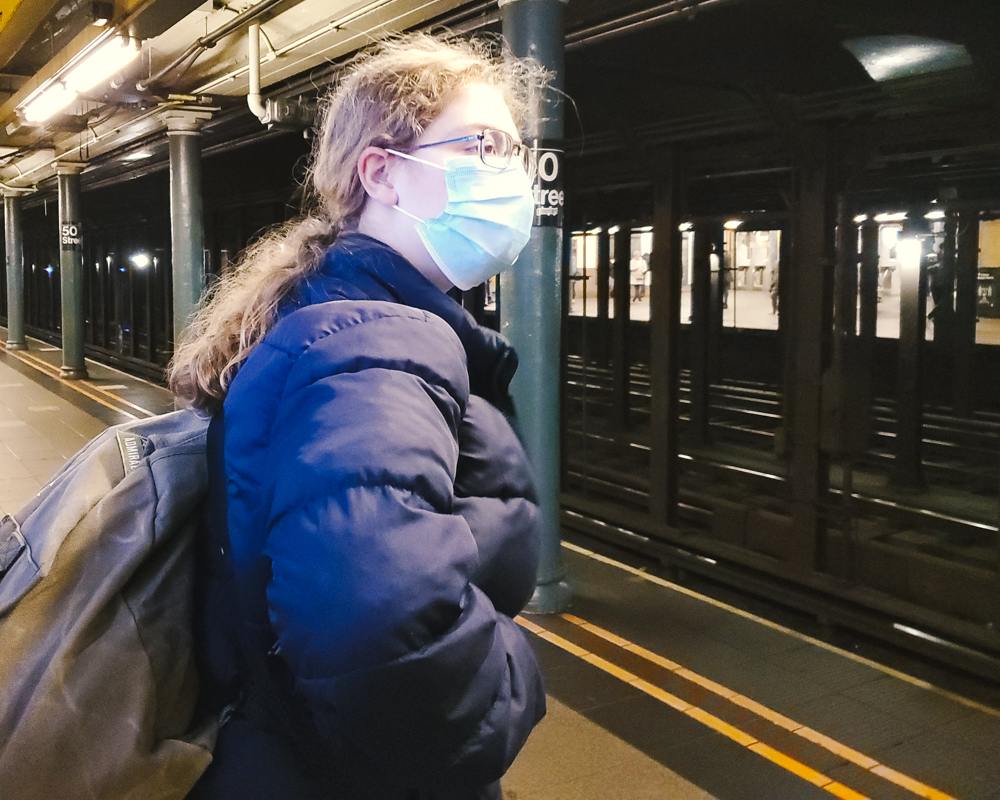
The kid is on the lookout for a rat, which she desperately wants to see.

There were some quirks checking into our AirBnB--this is only the second time I've ever booked an AirBnB, and both times checking in has been quirky. Is this the norm?--but good lord, the place felt like heaven after getting up at 4:00 am and then hoofing it all over creation with our bags in tow. The Harlem neighborhood that it's in was so comparatively more quiet and peaceful than where we'd been battling for space with other tourists all day, it was roomy and comfy with a giant couch big enough for us all to sprawl simultaneously (something I now realize we absolutely need in our own home!), and best of all, the TV was already logged into someone else's Netflix account!


I'd kind of only meant us to stay long enough to unpack and buy some groceries, and I had a nebulous idea that we'd head out again, unburdened by our luggage, to do some more sightseeing, but a kid laid down on that couch and promptly fell asleep, so I figured we were more or less done for the day. 

Might as well take a shower, order some takeout, and see what's on Netflix!

P.S. Want to follow along with my craft projects, books I'm reading, road trips to weird old cemeteries, handmade homeschool high school studies, and other various adventures on the daily? Find me on my Craft Knife Facebook page!

Tuesday, December 28, 2021

How to Make a Display Board from Upcycled Girl Scout Cookie Cases

This tutorial was originally published on Crafting a Green World in 2017.

 Kids and their display boards, amiright? Science Fairs and History Fairs and Biography Fairs and 4-H presentations and I can't even imagine what else, just that it all requires a display board. 

 Years ago, I made the kids re-usable tri-fold display boards, some out of chalkboard and some out of dry erase board, and we LOVE them and use them for all of our academic fairs. We used them for two years of Girl Scout cookie booths, as well, but this year, with a super-motivated troop of Girl Scouts whose collective goal was to sell at multiple booths every weekend all season, I deeply desired something lighter and more portable, something a kid could easily carry three of at a time. The display would need to stand up independently but also fold flat for storage. Oh, and it had to be upcycled, because obviously. 

 Fortunately, I have LOADS of supplies available, what with the hundreds of Girl Scout cookie cases that are now in my house. This tutorial calls specifically for Girl Scout cookie cases, but you can substitute any type of shipping box that you have on hand, if you're creative with your modifications.

 You will need: 

  three Girl Scout cookie cases. It doesn't matter which type of cookie you use (I mention this because the box is a different size for each type of cookie), as long as you use at least two of the same type. 

If you don't know a Girl Scout, call your town's Girl Scout office or just pop by a Girl Scout cookie booth in progress and ask--they will undoubtedly be THRILLED to pawn off their empty cases on you so that they don't have to deal with them themselves! 

  duct tapeDuct tape isn't super eco-friendly, but it IS the best tool for this project. When you're ready to recycle your display board, pull the duct tape off and throw it away. 

  cutting mat and box knife. You don't even need a ruler for this project!  

1. Break down two Girl Scout cookie cases and overlap them. In the image above, you can see that I'm overlapping them about halfway across the flattened top flap. This is enough overlap to give the join strength, but I've avoided overlapping them at a fold to keep the display stable. Duct tape the join. 

 2. Cut off one flap. Decide which side of the display will be the front and which the back, and then cut off one of the flaps from the backside. Use your box knife to cut this flap in half, lengthwise, so that you've got two long tabs. Set them aside. 

 3. Flatten the third box, then duct tape the long sides of the flaps at one end together. Check out the image above for details--don't tape up the bottom! 

 4. Center the third box on the backside of the display board, aligning the crease line just above the flaps that you duct taped in Step 3 with the bottom of the display board. Take another look at the image for Step 3 to see what this looks like. Duct tape the top of this third box to the back of the display board, but only along the top side. Look at the above photo to see how I've taped across that join on both sides of the flattened box, then taped down to give it more security. This entire flattened box should now be able to work like a hinge. Fold the flattened box along that lower crease line until it's easy to do so. 

 5. Duct tape the tabs to the bottom of the display board. Center each tab on that flap from the third box that you've taped the sides of--the idea is that the tabs will insert into those flaps to stand the display board up. 

 Again, duct tape each tab on both sides to make each a hinge, then support each with another couple of pieces placed perpendicularly. These tabs will get a LOT of wear! To assemble the display board, insert each tab fully into its slot:

 Your display board should then stand up on its own!  The kids in my Girl Scout troop covered the front of each display board with newsprint, then decorated it to make their displays. 

This technique would work well for a one-time display, but the paper got torn up WAY before cookie season was over--although the display boards themselves are still going strong! Next year, I'll direct the kids to sturdier embellishing materials. Feel free to send me suggestions for what to use in the Comments below!

Sunday, December 26, 2021

I Finally Learned How to Sew Zippers (and I Have the Zippered Bags to Prove It!)

 Look who finally taught herself a very basic sewing skill after nearly eighteen years of sewing!

Looking for some stocking stuffers that I could DIY for Matt and the teenagers, I hit upon some of the numerous tutorials for zippered bags that I've got Pinned. I've saved so many tutorials for bags, pouches, and cases of all kinds, and yet I rarely made any, because I was still scared of zippers!

Well, Friends, this was my year, and this was the tutorial that I used. I followed it even when I couldn't quite work out what it was leading up to, and behold! When I was finished, I had an only slightly wonky zippered pouch to show for it!

And then I made another, and it was less wonky.

And then another.

And then I just went ahead and cut out one for almost every single zipper that I've got in my stash. I have had those zippers for... so long, and although they were one hundred percent handed down to me from somewhere or another, I no longer remember ever remotely where they're from. 

Some of them were at least fifty years old, though, and still in their original packaging! I hadn't realized until reading that tutorial that cutting a stash zipper to the correct size was as easy as this--

--and this!

And look how much happier all those vintage zippers are to be in their new homes!

I also learned, for the first time, exactly how to use my zipper foot, and I figured out exactly how to handle that zipper pull. The trick to getting it past your needle is to raise the needle as high as you can while still keeping it in the fabric, and then raise your presser foot, too. The zipper pull will zip right by!


I managed to fussy cut the very last Nutcracker Prince and Mouse King battle scene from the fat quarter that I bought from Spoonflower and make Syd a zippered pouch to keep her masks safe in her ballet bag:

I used stash fabric for the rest. I hid these three away for Christmas stockings (can you figure out who got which bag?)--

--and I made a few extras for general use:


I am so good with zippers now, you guys, you're not even going to believe it. I'm off to find something else VERY zipper-heavy to sew!

Thursday, December 23, 2021

Pointe Shoes and Twinkle Lights

 The other day I bribed my favorite ballerina into indulging me with a holiday photo shoot:


Syd badly needs a new pair of pointe shoes (something to add to the holiday to-do list!), and that is always my favorite time to commemorate how a well-used pair is meant to look.

A photo shoot with Gracie is generally all the inducement Syd needs to submit to her own set of photos. For each of the next images, imagine me in Photoshop painstakingly lassoing and filling in about a thousand cat hairs from her marley. 

Ah, well... the marley needed a wash anyway!


We then tried to get some photos of Jones, but turns out he's terrified of roll-up dance floors and twinkle lights.

So then Will and I tried to get some cute photos of Luna, and, well...

Back to pointe shoes and picking animal hair out in Photoshop, shall we?


We're not really a Christmas card or family holiday photo sort of people, so I think this will do for commemorating the season!

Saturday, December 18, 2021

Sew an Easy One-Seam Skirt

This tutorial was originally published on Crafting a Green World in 2016.


 Remember my most favorite ever fabric print (that matches our favorite book series!), that Hobbit book cover panel that I turned into a fabric wall hanging

 There were actually TWO Hobbit book covers in that yardage that I bought! 

 The burning question that I asked myself then became: what ELSE can I do with this beautiful fabric to show it off to its fullest extent? 

 I think that this skirt fits the bill perfectly. It's made from that single panel, with a casing made from stash fabric, and its existence in my life is currently making me very, very happy. 

 Even if you don't have your own perfect panel, this skirt is super easy to make from one single length of fabric. You will need: 

  fabric. My Hobbit panel is 54"x22." Since the skirt is elastic-waisted, quite a wide margin of lengths will work well here. You will also need stash fabric for the waistband. 
  elastic. 

  1. Measure out your skirt. The selvage-to-selvage side will be the length of your skirt, so cut enough for the length that you want plus an inch or so for a bottom hem. The fabric's yardage will be the width of the skirt, gathered up by the elastic waistband. 


  2. Measure the waistband casing. The waistband casing should be twice the width of your elastic plus an inch for a seam, and the same length as your skirt's width. Fold the casing fabric in half lengthwise and iron to crease the fold.  


3. Sew the casing fabric to the skirt. Place the fabrics right sides together, and sew the casing fabric to the skirt. You'll be closing the casing and top-stitching it down after you sew the skirt's side seam. 

  4. Sew the skirt's side seam! I used a French seam for this, because I like the way that it encases the raw fabric edges and is so sturdy, but you can use your favorite seam. 

  5. Close the casing. Fold the casing back down along the crease line so that the wrong sides are together, then follow the exact same line of stitching to sew that side, too, to the front of the skirt. Leave an opening to insert the elastic later.  

Fold the casing up so that it's no longer folded against the skirt, then iron the raw edges down toward the skirt. Top stitch all the way around. Your casing should now look like the skirt's waistband, other than that hole you've left for the elastic. 

  6. Hem the bottom of the skirt. Use your favorite method. 

  7. Insert the elastic. Use a safety pin to help you feed the elastic through the casing, then sew the elastic together, sew the casing closed, and you're done! 

 I made this skirt for my younger daughter, but I really like the fact that since the width of the skirt is so generous, it really ought to fit her until she's an adult. I may have to replace the elastic a couple of times, but she should be able to walk around in her twenties in an awesome Hobbit skirt!


Tuesday, December 14, 2021

Cooking with Teenagers: Cloud Bread

 Your teenager has discovered angel food cake, only she calls it "cloud bread." 

And where did all the teenagers find out about angel food cake?

Tiktok, of course!


There are billion iterations of this recipe, all heavily borrowed (ahem) from each other, so I don't know which teenager was the first to post the recipe, but I'm pretty sure it was a teenager because they didn't put in any cream of tartar.

Teenagers rarely understand the point of cream of tartar.

Cloud bread is actually healthier than angel cake, as well, with no flour and quite a bit less sugar, although the sugar part may just reflect the fact that you're only using three egg whites, instead of the twelve that angel cake recipes usually call for. But egg whites and sugar... I mean, that's healthier than a lot of packaged breakfast foods! And I'm always nagging Syd to eat more protein, anyway, so cloud bread is basically the perfect food for her.

Syd and I also like the fact that it only takes a few minutes to make and get into the oven, and the way that you can spice and dye it any color you like. Here are a couple of different batches we've made recently:

Whipping the egg whites!

We use tapioca starch instead of corn starch in our recipes. I don't know why I got on that kick or if it's any better for you or the environment (for all I know, maybe it's worse for you!), but it works the same and it's, like, a tiny bit less Number 2 Field Corn in your system, so there you go.

Scraping it onto parchment paper

It's a lot tougher than you'd think to make it look smooth and loaf-like.

And look how soft and fluffy it turns out!

We were going for Christmas green with this batch. I don't think we nailed it...

It's sweet and light, a tiny bit sticky but still suitable for pulling off a bit and eating it out of hand. It does deflate a bit when cool (*cough, cough* needs cream of tartar *cough*), but since it's made from just three egg whites and some sugar, there's no need to leave any servings long enough to deflate.

Here's what else my teenagers and I cook together!

Saturday, December 11, 2021

How to Make a Fabric Wall Hanging

 This tutorial was originally published on Crafting a Green World in 2016.

If you're a fabric hoarder collector like me, then you completely understand that fabric is art. 

 That being said, of course there are times when you want to showcase that beautiful fabric of yours not on a body, or even on a quilt, but instead displayed on the wall like the art that it is. 

 Making a fabric wall hanging is a little more complicated than just nailing a length of fabric to your wall (that wouldn't work because the fabric would pull and warp), but it's actually not much more complicated. The trick is to attach the fabric to something that you CAN nail to the wall. 

 Here's how to make that fabric wall hanging happen! 

 You will need: 

  fabric. I'm using a panel that's 20"x54". It's a print of The Hobbit's book cover that I bought from Spoonflower, and it's my current Most Favorite Thing. Ideally, your fabric panel will have a margin of at least 2" at the top and bottom that you don't love. If not, then sew a narrow strip of fabric at the top and bottom. 

  wood. You'll need two thin boards, around 1"-2" wide and each a little longer than the fabric panel. I've still got a bunch of boards in the garage from when I tore out the closet in the kids' bedroom last year, so I cut one of those up for this project. 

 glue. You can use a variety of glue for this project, but hot glue is the least fussy. 

  1. Cut your panel to size. You need an extra 1"-2" at the top and bottom of this panel where you're going to attach it to the wood, but the sides of the panel can be cut flush to your pattern or hemmed to be so. Take care to cut the top and bottom of your panel completely parallel; otherwise, your panel will hang wonky!  

You can also starch the fabric at this step--here's how to make homemade fabric starch

  2. Prepare the wood. Because I'm cutting down an old board for this project, I also needed to sand it and stain it. You can paint your boards in a custom color, as well, or leave them natural. 

  3. Attach a hanger. Choose the board that will be on top, then attach the hanging hardware to it. There are several ways to do this. You could nail on a picture hanger or wire, attach an old belt, or do as I've done and drill a hole at each end of the board. 

After the fabric is mounted to the board, thread a length of clothesline or paracord through each hole, back to front, and knot it in the front. 

At the back, hot glue the cord from the place where it emerges from the hole straight up to the top of the board--this will keep it from flipping the board sideways when you hang it. 

  4. Attach the fabric to the wood. This part is a little fiddly, because you want your panel to hang straight and even. Going in small sections, glue the top two inches of the top of the panel to the back of top board. Be careful not to stretch the fabric as you work, and take care to keep it level. 

 Repeat for the bottom of the fabric and the bottom board. 

 Your fabric wall hanging is going to look great wherever you put it, but when you're tired of it, just cut it away from the boards and make it into something else!

Friday, December 10, 2021

Our Favorite Christmas Books, Movies, and Music

Lord of the Rings is absolutely a Christmas book if you read it out loud in front of the tree at Christmas-time! Also, it has amazing food descriptions.

 Alright, Friends! Need something to watch or listen to while you craft all the Christmas crafts?

The kids and I have got you covered!

BOOKS


  • The Best Christmas Pageant Ever, by Barbara Robinson. I don't know if this is a genuine classic, of if it's on my mind every year because of how much I loved watching the movie version on cable. It was also my town's Christmas play one year when I was little, and I remember getting Papa to drive me to the children's auditions so that I could make a total ass of myself in the middle of a high school gymnasium.
  • A Christmas Carol, by Charles Dickens. This is one of the books that we do as a family read-aloud in December. 
  • I Spy Christmas. Are kids still obsessed with I Spy books? I keep our old copy of this in storage with the ornaments and decorations, and every year it's just as fun as it was when the kids were tiny and obsessed with all things I Spy.
  • The Night before Christmas, by Clement Moore. We've got an old picture book version of this that the kids were OBSESSED with one December when they were small. Ever since, Matt still reads it aloud to them every Christmas Eve.
  • The Nutcracker, by E.T.A. Hoffman. It's oddly difficult to find an unabridged edition of this book, but the story is so weird that it's worth it!
  • The Polar Express. One Christmas, many years ago, the kids went outside on Christmas morning to find on the driveway a bell that must have fallen off of Santa's sleigh. Every year, when the kids put it on the Christmas tree, one of them shakes it near my ears and insists that SURELY I MUST HEAR IT RINGING?!? Alas, however, I do not. It's clearly broken, and I don't know why they insist on pretending that it isn't...


MOVIES

  • A Garfield Christmas Special. I have a weird attachment to made-for-TV Christmas specials, the cheezier, the better. The kids love Garfield, too, AND Jon is from Indiana, so this is for sure a legit choice for holiday viewing.
  • Star Wars Holiday Special. Don't watch this. Even if you love Star Wars, don't watch this. I put it on one year as a whim when Will was requesting "weird" Christmas movies, and now we're locked into watching it every year. 
  • White Christmas. I have no idea when we started the yearly tradition of watching this, because it's not even that uniformly good, and we've been watching it every year since way before the kids should have been interested. But now we've got a billion inside jokes from this movie that we literally say all year, and it would be unthinkable to skip it.


MUSIC

Syd colored these ornaments at a public library Nutcracker event when she was... two, maybe? I laminated them, and every year it gives me the greatest pleasure to find them in our ornaments bin, laughingly praise Syd's artwork, and watch her hang them on the tree.

  • Caga Tio. When the kids were preschool and early elementary, I used to sign us up for a lot of mail exchanges with other kids around the world. The kids did postcard exchanges, Artist Trading Card exchanges, state culture swaps, and a holiday card exchange in which a child from Catalan sent us the most bafflingly-illustrated homemade Christmas card that turned out to be a drawing of Caga Tio. A parent had clearly translated the kid's accompanying letter for her, making heavy use of what I assume is a vernacular dictionary, because the letter described the beloved Catalonian Christmas tradition of Shit a Log, including the lyrics to a favorite folk song that went something like, "Shit a log, shit a log, shit out something nice for me!" Reading this kid's letter was just about the best moment of Will's life to date.
  • "Christmas Tree Farm." It's one of Syd's oldest videos, and also my favorite! 
  • French Christmas Songs. The kids think it's very annoying that I'm always trying to add the French language sort of atmospherically into their subconsciouses, but I persist in turning this playlist on while we do holiday crafts. 
  • My Favorite Christmas Songs. This is my playlist of my Christmas favorites. Don't be surprised if it hits pretty much like one of those "Rockin' Christmas" CD collections. I have very little taste!
  • The Nutcracker. I mean, of COURSE! We don't necessarily listen to this all December, but from November until the curtain drops on Syd's final performance of the season, I wouldn't be surprised if I have this on every single day--I get REVVED UP with excitement for The Nutcracker! 
Is it just me that's having a hard time believing it's nearly Christmas, or getting into the "Christmas" "spirit?" I mean, it's 50 degrees and raining outside right now. Will and I have spent the entire morning finishing up her college applications to Swarthmore and Yale, with a billion more to do, it feels like, before January 1. College applications feel like they are sucking up all my focus and sapping my festive energy.

This weekend, though, I vow to start taking my own list seriously. Perhaps it will be a White Christmas family movie night, with popcorn, homemade chicken alfredo pizza, and white chocolate fondue for dessert. Or maybe it will be the night I force everyone to get into their jammies, hand them thermoses of hot chocolate and bags of popcorn, and we drive around town looking at Christmas lights while listening to my holiday playlist. Or we'll do Cards Against Life Day, where we half-watch the Star Wars Christmas Special while playing endless rounds of Cards Against Humanity using our decks of mostly made-up cards. 

Ugh, that means I definitely have to go grocery shopping first. Why does emotional labor always include an annoying dose of physical labor, as well?