This tutorial was originally published on Crafting a Green World in 2017.
Kids and their display boards, amiright? Science Fairs and History Fairs and Biography Fairs and 4-H presentations and I can't even imagine what else, just that it all requires a display board.
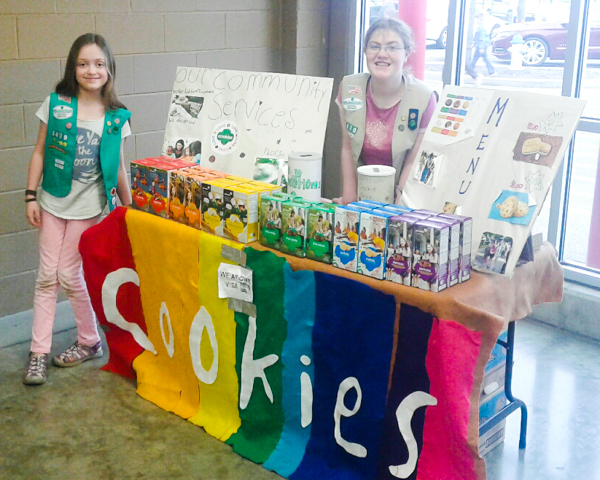
Years ago, I made the kids re-usable tri-fold display boards, some out of chalkboard and some out of dry erase board, and we LOVE them and use them for all of our academic fairs. We used them for two years of Girl Scout cookie booths, as well, but this year, with a super-motivated troop of Girl Scouts whose collective goal was to sell at multiple booths every weekend all season, I deeply desired something lighter and more portable, something a kid could easily carry three of at a time. The display would need to stand up independently but also fold flat for storage. Oh, and it had to be upcycled, because obviously.
Fortunately, I have LOADS of supplies available, what with the hundreds of Girl Scout cookie cases that are now in my house. This tutorial calls specifically for Girl Scout cookie cases, but you can substitute any type of shipping box that you have on hand, if you're creative with your modifications.
You will need:
three Girl Scout cookie cases. It doesn't matter which type of cookie you use (I mention this because the box is a different size for each type of cookie), as long as you use at least two of the same type.
If you don't know a Girl Scout, call your town's Girl Scout office or just pop by a Girl Scout cookie booth in progress and ask--they will undoubtedly be THRILLED to pawn off their empty cases on you so that they don't have to deal with them themselves!
duct tape. Duct tape isn't super eco-friendly, but it IS the best tool for this project. When you're ready to recycle your display board, pull the duct tape off and throw it away.
cutting mat and box knife. You don't even need a ruler for this project!
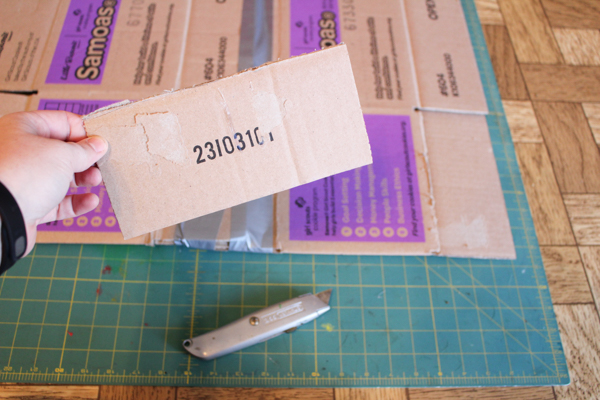
1. Break down two Girl Scout cookie cases and overlap them. In the image above, you can see that I'm overlapping them about halfway across the flattened top flap. This is enough overlap to give the join strength, but I've avoided overlapping them at a fold to keep the display stable. Duct tape the join.
2. Cut off one flap. Decide which side of the display will be the front and which the back, and then cut off one of the flaps from the backside. Use your box knife to cut this flap in half, lengthwise, so that you've got two long tabs. Set them aside.
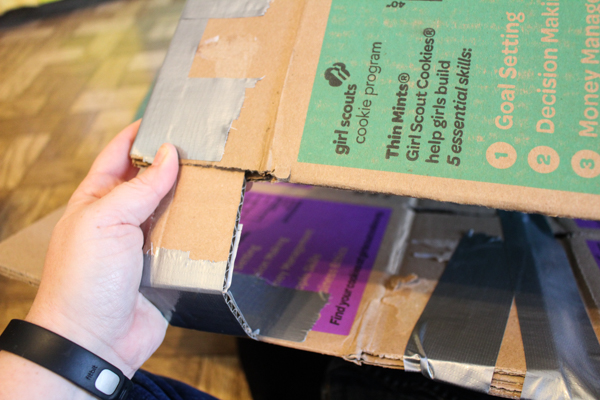
3. Flatten the third box, then duct tape the long sides of the flaps at one end together. Check out the image above for details--don't tape up the bottom!
4. Center the third box on the backside of the display board, aligning the crease line just above the flaps that you duct taped in Step 3 with the bottom of the display board. Take another look at the image for Step 3 to see what this looks like. Duct tape the top of this third box to the back of the display board, but only along the top side. Look at the above photo to see how I've taped across that join on both sides of the flattened box, then taped down to give it more security. This entire flattened box should now be able to work like a hinge. Fold the flattened box along that lower crease line until it's easy to do so.
5. Duct tape the tabs to the bottom of the display board. Center each tab on that flap from the third box that you've taped the sides of--the idea is that the tabs will insert into those flaps to stand the display board up.
Again, duct tape each tab on both sides to make each a hinge, then support each with another couple of pieces placed perpendicularly. These tabs will get a LOT of wear! To assemble the display board, insert each tab fully into its slot:
Your display board should then stand up on its own! The kids in my Girl Scout troop covered the front of each display board with newsprint, then decorated it to make their displays.
This technique would work well for a one-time display, but the paper got torn up WAY before cookie season was over--although the display boards themselves are still going strong! Next year, I'll direct the kids to sturdier embellishing materials. Feel free to send me suggestions for what to use in the Comments below!


No comments:
Post a Comment