Showing posts with label recycled crafts. Show all posts

Sunday, November 12, 2023

DIY Upcycled Cardboard Polyominoes


This tutorial was originally posted on Crafting a Green World.

Polyominoes are a super fun educational toy. When made from upcycled cardboard food packaging, they’re also super eco-friendly!


If you’ve ever played Tetris, you know what polyominoes are, AND you know how fun they are!

Without getting too mathy, because I know that scares some of y’all, polyominoes are shapes that you can draw on a piece of graph paper using the same number of squares.

You know dominoes, right? Those are polyominoes made of two units.

Tetrominoes are made of four units. When you play Tetris, you’re playing with tetrominoes!

Pentominoes, pieces made from five units, are my personal favorite.

There are infinite really interesting math problems–many of which have never been completely solved!–that utilize polyominoes. But even for us non-professional mathematicians, polyominoes remain very fun. You can build cool patterns with them. You can create puzzles from them, then try to solve them! And, if you have a kid around, they’re a sneaky way to build their logical reasoning skills and to teach concepts of area, perimeter, patterning, and other even more abstract, sophisticated geometry and measurement concepts.

Also, I’m just going to say it one more time–they’re really fun!

You don’t need another set of plastic game pieces kicking around your home, though. Instead, here’s how to make any set of polyominoes that you want from sturdy, upcycled, recyclable cardboard.

To make your own set of upcycled cardboard polyominoes, you will need:

  • upcycled cardboard. Cardboard food packaging is perfect for this project–for this tutorial, I’m making all my polyominoes from Girl Scout cookie boxes! It would be VERY fun, though, to make “life-sized” or giant polyominoes from corrugated cardboard.
  • graph paper. Once upon a time, I scored the rest of someone’s stash of 1″ graph paper at a yard sale, but the internet exists now, and so you can just print graph paper at any size. Or if you, like all the other cool kids these days, don’t own a printer, you can buy it commercially.
  • measuring and cutting supplies. I made all these polyominoes with a pen and a pair of scissors.
  • double-sided tape (optional). All polyominoes other than Tetris pieces are meant to be able to be flipped over, and if you get into doing polyomino puzzles, solutions will often require it. For that reason, I make most of my own polyomino pieces double-sided. But if the difference between the front and back of a polyomino piece doesn’t bother you, then don’t bother with this extra step!

Step 1: Create the polyomino patterns.


This first step is my favorite!

On graph paper, sketch out the outlines of your polyominoes. You can easily Google patterns for various polyomino sets, but kids, especially, find it VERY fun to create their own polyominoes from scratch.

Cut out your polyominoes, and you’re ready to apply them to the cardboard.

Step 2: Use the paper templates to make cardboard polyominoes.


Trace around the polyominoes and cut them out of the upcycled cardboard.

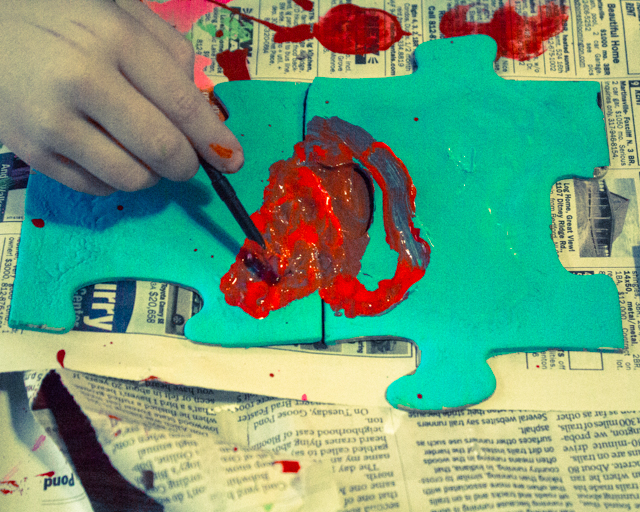
Using upcycled cardboard food packaging gives you a lot of scope for creativity! If you’ve got a variety of colors, like I do with my Girl Scout cookie boxes, it can be fun to make each type of polyomino a different colors. Or, decide that the plain cardboard side will be front-facing, and decorate the pieces with markers.

Step 3 (optional): Make the polyominoes double-sided.


Tetris gets away with not letting you flip pieces by making the flipped side a completely separate piece. For every other use, though, you’ll generally want to be able to flip your pieces over. If you’re using cardboard that’s roughly the same on the front and back, that’s not a problem, but with this cardboard food packaging that has a printed side and a plain side, I’ve discovered that many people, and especially kids, find it non-intuitive to have to flip pieces. We’re just not used to working with both the “front” and “back” of a puzzle!

To solve that problem, make your polyominoes double-sided.


Just cut out a second piece (flip the pattern over if the piece isn’t symmetrical!), then attach the two with double-sided tape. Now both of your sides look cute, and it’s easy to realize that you can flip them!


There are so many ways to extend the fun of polyominoes while exercising your brain and developing numeracy and logical reasoning skills. A mini set taped onto a magnet sheet and put into an Altoids tin is a terrific little travel game; for even more fun, hand-draw or print puzzle templates on plain paper and cut them out to fit in the tin, too. A larger set of tetrominoes and a few pieces of grid paper taped together make a fun two-player, analog Tetris game; for more fun, add more magnets and place on a wall-mounted metal sheet.

P.S. Want to follow along with my craft projects, books I'm reading, dog-walking mishaps, encounters with Chainsaw Helicopters, and other various adventures on the daily? Find me on my Craft Knife Facebook page!

Saturday, November 4, 2023

DIY Corrugated Cardboard Tower of Hanoi


This tutorial was originally published on Crafting a Green World.

Tower of Hanoi is a super simple, surprisingly fun logic game suitable for early elementary through adults.


I have a weakness for solitaire games, especially logic puzzles. I’ve built up a respectable collection thanks to thrift stores and yard sales, but there’s always room for one more puzzle in my life, especially one that’s NOT made from plastic!

This Tower of Hanoi is NOT made from plastic! Instead, it’s made from that likely-looking piece of corrugated cardboard hanging out there in your recycling bin. Cut it up, add some decorations, and you’ll have yourself a brand-new version of a 140-year-old logic game.

Here’s everything that you’ll need to DIY your own Tower of Hanoi:

  • corrugated cardboard. Since the pieces are manipulatives, I prefer the thicker, sturdier corrugated cardboard over the thinner kind for this project.
  • measuring and cutting tools. You’ll need circles of varying diameters to use as templates for your Tower of Hanoi pieces. Look around, and I bet you can scavenge these circles from your existing bottles, cups, caps, etc.
  • embellishment supplies (optional). You don’t *need* to embellish the pieces, but since when did that stop anyone from making something pretty?

Step 1: Measure and cut the pieces.


You can play Tower of Hanoi with three or more pieces, but I think seven or eight pieces are a good total number to have. You can always subtract pieces from a larger set to make a round easier!

To make the complete puzzle look like a lovely tower, select circle templates with different diameters, ideally ones that will give a nice graduated look from smallest to largest when you stack them. As you can see from the above photo, you should be able to find all of these circle templates around your house. My smallest circle template is an eensy SodaStream flavoring bottle cap, and my largest is the top of a plastic drink cup from my favorite pizza place–I also used the bottom of the cup to make a different circle!

Trace all the circles onto corrugated cardboard, then cut them out by hand with sturdy scissors.

If you like the way the undecorated Tower of Hanoi looks, you’re done! However, I think the game looks a LOT cuter with some embellishment…

Step 2: Decorate the pieces.


With seven pieces to my puzzle, how could I NOT make a rainbow?

One of the many amazing things about corrugated cardboard is that it takes all kinds of embellishment like an absolute dream. I painted these circles with Liquitex acrylics, but Sharpies or even Crayola markers all show up well. Use Mod Podge to decoupage scrapbook paper, or paint plus paint pens to make more detailed artworks on these tiny canvases.

Step 3: Play!


The rules of Tower of Hanoi are simple:

  1. Start with the tower stacked with the circles in descending order, smallest to largest.
  2. You have three total spaces in which you can work, and you start with the stacked tower sitting on one space. Younger players might benefit from having a play mat on which you’ve drawn out three spaces for them, but it’s unnecessary for older players.
  3. The objective of the game is to reassemble the tower on another space. The reassembled tower must again be stacked with the circles in descending order, smallest to largest.
  4. You may move one circle at a time between any of the three spaces.
  5. You may NOT stack a circle on top of a circle that is smaller than it. Circles can only be put on empty spaces or stacked on top of circles that are larger than them.


The above photos illustrate a few different moves in the game. I don’t want to give you too many moves so that I don’t spoil your fun, but you can see from the photos the three working spaces, and the circles that are placed on a space or on top of a larger circle.

Remember that you can’t move an entire stack of circles at once–you can move only one circle at a time!

If you want to see the game in action, check out this online playable version.

If you’re a mathy kind of person, there IS a mathematical solution, and a pattern, to this puzzle. Figuring out how to record your moves is also a great introduction to analog coding, for those of you interested in STEM enrichment.

Want to give someone you love a sneakily educational gift? A beautifully embellished Tower of Hanoi inside a lovely little carrying case is just the thing!

Know a kid who’s high-energy and always seems to need more gross motor activity? Upscale this to a giant 3D version that they have to use their whole bodies to stack! Exercising their brain will make them just as tired as exercising their body, so you might even get a full night’s sleep!

P.S. Want to follow along with my craft projects, books I'm reading, dog-walking mishaps, encounters with Chainsaw Helicopters, and other various adventures on the daily? Find me on my Craft Knife Facebook page!

Sunday, October 15, 2023

How to Make the Easiest Upcycled Cardboard Building Set


This tutorial was originally published on Crafting a Green World.

This upcycled cardboard building set is a terrific open-ended toy that won’t cost you a cent!


If you’ve ever seen a kid with a handful of LEGOs, you know how wonderful open-ended building toys are. They let kids exercise their creativity, build their problem-solving skills, strengthen math and physics concepts–and keep themselves entertained for ages, too! Open-ended toys have a lot more extended play-value than toys that have a single purpose (and a lot LOT more play-value than noisy, light-up toys!).

This particular upcycled cardboard building set is as open-ended as they come. You can create the pieces in any shape you can imagine, connect them in a myriad of ways, and even paint or decorate them however you’d like. And the best part is that as long as you have a piece of corrugated cardboard in your recycling bin, you can expand on your building set forever.! Tbh, creating the set is as fun as building with it!

Here’s how to make the quickest, easiest, and SUPER fun upcycled cardboard building set:

To make this building set: you will need:

  • corrugated cardboard. Thin cardboard won’t work for this project, but pretty much any corrugated cardboard will. If you’re short on corrugated cardboard, check your local recycling center or ask around your friend group for shipping boxes.
  • scissorsCutting corrugated cardboard does take hand muscles, but larger scissors make it easier. If you’re making this project with younger kids, let them draw the pieces they want onto the cardboard, and then you can do the tough job of cutting them out. If kids are a little older, though, give them a go at cutting the cardboard themselves–it’s tough, sure, but it builds the hand muscles they need for writing by hand and other fine motor activities.
  • tools for embellishment (optional). I really like the look of these plain, but with paint, markers, or stickers, you can add variety and creative inspiration. Googly eyes are always fun, as are pieces painted in a rainbow of colors. Use your imagination to make the cardboard building set of your dreams!

Step 1: Draw templates (optional), and cut the cardboard into shapes.


I’m a little obsessed with geometric shapes, but you can cut your corrugated cardboard pieces however you like. If you’re making a basic set for a kid, a variety of geometric shapes, along with some free-formed, more abstract pieces, will give them a good starting place.

If you’re making a set WITH a kid, however, my favorite technique is to encourage the kid to draw or cut any fun shape their heart desires, modeling a few ideas for them, perhaps, to give them the idea. While they’re being creative, I’ll cut out those same boring geometric shapes (I’m obsessed!) so that they’ve got some basic pieces to work with, as well.

Step 2: Cut notches in the cardboard pieces.


Cut a thin notches in the cardboard pieces wherever you’d like them to connect. Longer notches will hold the connections more firmly, but you don’t need the notches to go more than 1/4 or 1/3 of the way through the piece.

Cutting notches is a little easier than cutting out the pieces, so if you’ve got a kid who’s on the cusp of being able to cut the corrugated cardboard, this is a doable activity to help build their hand strength.

This is also a great place to add to the interest of the set. Finding unusual places to cut notches encourages kids to make more creative connections.

To play with this toy, simply connect the notches and start building!

I think kids have the best time when they can follow their own interests and imaginations, but you can sneak in some STEM problem-solving by offering up challenges. What is the tallest tower you can build? What is the longest bridge you can build between two chair backs? Can you build a square shape using only circle pieces? Try building a cat!

Cheap, accessible toys like these are especially important to have out in the world, because they build equity. The local underfunded childcare center probably doesn’t have fancy Magna-Tiles, and heck, even Duplos are ridiculously expensive these days, but anyone can make and donate a huge set of the most beautiful cardboard building toys with some time and patience.

And homemade toys like that are important for every kid to have, even if their parents can afford the bougie stuff. Maybe it’s the pre-Christmas anti-consumerist crankiness starting in me already, but I think it’s crucial for every kid to learn that some of the best toys are both handmade and free. I mean, I love all those fancy, expensive natural wood toys as much as the next crunchy mom (ask me about my Waldorf toy obsession anytime!), but you know what’s nearly as natural, and even more free, than that?

CARDBOARD, that’s what!

Sunday, August 27, 2023

DIY Cat Scratcher from Upcycled Corrugated Cardboard Boxes

This tutorial was originally posted on Crafting a Green World.

This upcycled cardboard cat scratcher is a great way to use up all your corrugated cardboard boxes. Cats love it, and it's a useful donation to your local animal shelter.

There comes a time in every person's life when they find themselves simply awash with cardboard. Maybe you just finished unpacking from your latest move. Maybe you went a little too ham on the most recent gift-giving holiday. Maybe your Girl Scout troop sold 2,000 boxes of Girl Scout cookies and now you have 250 empty cookie cases to show for it.

Whatever the situation that has left you with too much corrugated cardboard, I have the perfect solution: an upcycled cardboard cat scratcher!

Cats LOVE this style of cat scratcher, and it's a great one to make for them because it's eco-friendly on both ends: use upcycled cardboard to make it, and recycle it when you're done with it. Make a few of these cat scratchers and tuck them around your space so your cat never has an excuse to sharpen their claws on your furniture. If you don't have cats, make these cat scratchers anyway and donate them to your local animal shelter. My local animal shelter specifically requests this style, and my Girl Scout troop enjoys making and donating them.

This cat scratcher is an improved version of the two types that I made back in 2020. In the years since, I've refined my style to what my own cats and the animal shelter prefer, and redesigned the scratcher to be sturdier and more easily recyclable. My own cats do still really like that round one from the 2020 tutorial, and that's a great style if you've got a lot of room to devote to a nice, big cat scratcher. This version here, though, has a more inconspicuous profile, transports better, and my local animal shelter says it works better in their cat enclosures.

To make this upcycled cardboard cat scratcher, you will need:

  • lots of corrugated cardboard. If you're using Girl Scout cookie cases, you'll need about five per cat scratcher. Otherwise, prepare to cut up more cardboard than you thought you'd need--this cat scratcher uses a LOT!
  • measuring and cutting tools. At the minimum, you need a ruler and a pair of sturdy scissors. The work will go quicker with a quilting ruler, self-healing cutting mat, and craft knife.
  • hot glue gun and hot glueYou're not going to use much, but this is still an essential component.

Step 1: Cut the bottom off of a box.

Choose a cardboard box whose area at the bottom has the dimensions that you're looking for in a cat scratcher.

Measure 2" up from the bottom of the box all the way around, then cut. Reserve the rest of the box for Step 2.

The bottom of this box will be the base for your cat scratcher.

If necessary, reinforce the bottom box flaps with hot glue.

Step 2: Cut corrugated cardboard into strips.

Flatten and/or disassemble a corrugated cardboard box, then examine it to see which way to cut. You want to cut across the corrugations, not parallel to them. When you cut, the cut edge of the box should show a cross-section of the corrugations--that's what the kitties love to dig their claws into!

Use a ruler and craft knife to cut a 2" wide strip down the cardboard, then repeat until you've cut up the entire box. Recycle or repurpose any leftover cardboard.

Measure the length of your box bottom, and cut the cardboard strips to this length. Recycle/repurpose any end pieces that don't reach the correct length.

Continue cutting cardboard into strips until you have enough strips to completely fill the box bottom. If you're making these from Girl Scout cookie cases, it takes about five cases, including the one you cut the box bottom from, to make this cat scratcher.

Step 3: Insert strips into the box bottom, gluing as you go.

After you've got enough strips, dump them all out of the box bottom and set up the hot glue gun. Lightly glue the strips together as you reinsert them.

This is my biggest improvement over the 2020 version of this cat scratcher; when the strips weren't glued together, I found that occasionally my cats would snag their claws into one and pull it out of the box! THIS cat scratcher keeps all its strips nice and snug inside for ultimate cat scratching perfection.

Step 4 (optional): Glue the cat scratcher to the base.

If you want to make the cat scratcher REALLY sturdy, then after all the strips are glued together, carefully pry the whole thing out of the box bottom, then use hot glue to lightly glue it back in. This will keep even the most enthusiastic cat from pulling the entire cat scratcher out of its base.

Either way, the added beauty of this corrugated cardboard cat scratcher is that it's DOUBLE-SIDED! When a cat has worn one side of the scratcher down, carefully pry it out of the base (the hot glue should peel away fairly easily, if you weren't too enthusiastic when you glued it), flip it over, and reinsert it, re-gluing it as necessary.

The model for this tutorial is Dill, one of the three-week-old kittens plus mama cat (also in some pics) that I'm currently fostering for my local animal shelter. I'll keep them safe and happy here with me until the kittens weigh at least two pounds and are at least eight weeks old, and then I'll bring everyone back to be speutered and adopted. Kittens this young don't do well in a shelter setting, and foster families are crucial to their survival, well-being, and proper socialization. If you've got space in your living area and your heart, please reach out to your local shelter and ask about their foster programs

This is one of my all-time favorite upcycling projects. It's a nearly-waste-free way to turn trash into treasure, it fills an incredibly useful niche in cat gear that you'd otherwise have to buy new, and it's a simple, cheap donation project that directly benefits the most innocent creatures in your local community.

I challenge you (and me!) to make every unwanted corrugated cardboard box that comes into our lives into a cat scratcher for use or donation.

Sunday, February 12, 2023

How-To: Kid-Made Puzzle Piece Valentine


This tutorial was originally posted on Crafting a Green World way back in 2013.

Missing some pieces of your jigsaw puzzle, but still have a few mitchy-matchy ones? 

Your kiddos can create one handmade Valentine from just two perfectly fitting jigsaw pieces. Give them most of a box, and they can make all the Valentines for their class party. 

It's a fun upcycling project that won't cost you a cent. Yay for an eco-friendly Valentine's Day!

Here's how:

Big or small, edge or middle, this project relies on two linking puzzle pieces. Have your kiddos sort the remaining pieces from an incomplete jigsaw puzzle into linking pairs (save other orphaned puzzle pieces for more crafty upcycling projects!), then let them paint each pair a fun background color. My kiddos chose every color from red to green to black, and made themselves a glorious happy mess while they did so.

Set the pairs aside to dry, taking apart the pieces first so that they won't adhere to each other.

When the puzzle pieces are dry, fit them together again and show the kiddos how to paint a single heart onto the middle of the pairs, so that approximately half the heart rests on each piece. The kiddos can continue to decorate the pieces as they wish, with glitter and stickers and the other gaudy accouterments of kid-made greeting cards.

Once again, separate the pieces and let them dry. When everything is dry and set, the heart puzzle will be able to be taken apart and put together again. The kiddos can use the back side of their Valentines to write their name and some sort of horrible, punny Valentine greeting.

May I suggest "I love you to pieces?" Okay, I'm going to go vomit now.

Thursday, October 27, 2022

Useless Halloween Decorations: DIY Cement Pumpkins

A few weeks ago, one of my teenagers asked me, "Hey, what Halloween projects are we doing this month?"

OMG I was thrilled. Stockholm Syndrome has set in, y'all!

Also, you guys. My family has TRADITIONS. Good ones, too! Ones that the teenagers like and happily anticipate! I messed up on a lot of parenting stuff, but traditions I figured out all by myself from scratch.

So, since Halloween projects are clearly a tradition (that I didn't know until now was actually a tradition, but okay!), every weekend this month a kid or two and I have been doing a Halloween project together. A couple of weekends ago Syd, Matt, and I did this--

--which, more on that later, but I'll just say that 1) a Jack-o-lantern is actually quite painful to wear on your head and 2) it was TOTALLY WORTH IT. 

And last weekend, Will and I took a couple of pairs of Syd's old ballet tights and made cement pumpkins!

Coincidentally, these were also a little painful, but also totally worth it!

To make cement pumpkins, you need:

  • legs from old tights. The parts that you use shouldn't have holes or runs.
  • Portland cement, with assorted mixing and measuring tools.
  • rubber bands.

1. Prepare your materials.

Cut a section of leg anywhere from six inches to a foot long, and knot one end.

Add a cupful of Portland cement mix to a bucket, then add some water and stir. You want the cement to be about the consistency of cake batter, so play around with adding more cement mix and water until it feels right. 

2. Fill the tights with cement.


Scoop cement into the tights and shake it down to the bottom. Add cement until you have the size of pumpkin you want, although remember to leave enough room in the tights to knot the top:


3. Add rubber bands.

Thump the cement-filled tights on the tabletop a couple of times to settle the cement, then adjust it so that the bottom knot is tucked into the middle bottom of the cement package and the top knot is centered at the top.

Begin wrapping rubber bands around the cement package:


Through trial and error, Will and I discovered that if the rubber bands are tight and cut really tight grooves into the cement, the tights and rubber band will be nearly impossible to remove from those grooves later. We highly recommend rubber bands that are wrapped more like the blue one that runs vertically in the photo below, NOT the pink one that runs horizontally:


4. Let cure, then remove the rubber bands and tights.

Allow the cement to cure for at least 24 hours, after which it should look something like this:


Loosen the tights by grasping the knots on each end and pulling them away from the cement:


Then, tear away the rubber bands and peel off the tights and discard:


They're quite dusty afterwards, so rinse them with the garden hose.


You can embellish these pumpkins in all kinds of ways, from shiny sealant to paint or decoupage, adding corks or twine or braided cord for a vine, felt or leather or book page leaves, etc. Will and I found, though, that all our pumpkins happened to look cute in a single stack on the coffee table, so that's what we did!

Wednesday, August 10, 2022

The Foolproof Way to Make Poured Teacup Candles


I have finally locked down THE foolproof way to make perfect poured candles from any wax type and in any heat-proof container.

The secret weapon is a drill!

Up to now, I'd always been stymied by the process of choosing an appropriately-sized wick for both the wax type and the container dimensions. If your wick is too small, the candle will tunnel, look awful, and eventually just pathetically peter out. If your wick is too large, the candle will burn way too hot, smoke and sputter, and potentially crack the container and set your house on fire.

Neither is ideal.

So, here's the secret: you pour your candle wax into the container of your choosing, just as if you're making the candle, but you DO NOT ADD A WICK.

Let the wax rest for 48 hours, then get a drill and literally drill a hole for the wick directly into the wax. Insert a wick, light it, let the candle burn for an hour, and see how you like it. You can pull the wick out and replace it, drill holes for additional wicks, repour wax over the top of the candle to start over, etc.

There is no way to mess up the entire candle, yay!

I did a lot of wick tests for the poured teacup candles that my Girl Scout troop wanted to make. I wanted a wick size that would work for most sizes of teacups, AND I was really hoping to use the multi-pack of candle wicks that I found at Goodwill for 99 cents, because I'd already spent quite a bit on the beeswax.

Unfortunately, this is what my first wick test looked like:


That's 8 ounces of beeswax, and I don't know what the make and model of the wick is, but clearly it isn't going to be able to keep up with burning through an entire teacup of beeswax.

So I made a couple of changes:
  1. I gave up on the idea of a 100% beeswax candle in a teacup. Beeswax burns so hot that I decided that it's just not an appropriate candle wax for a teacup candle, which narrows quite dramatically. I couldn't free myself from the intrusive daydreams of some kid's teacup candle getting too hot, exploding into their face, and then setting their house on fire.
  2. I embraced the idea of multiple wicks! Test burning a wick from the Goodwill pack let me measure the diameter of the melt pool, which makes deciding on the number and placement of additional wicks a lot easier.
Here, then, is the foolproof method that I used to make poured teacup candles with teenagers. This tutorial assumes that you already figured out the melt pool you'll get with the wick and waxes you're using. If you don't know that info, do the thing I wrote about above where you pour a wickless candle, then drill a hole into the cured wax, insert a wick, and test it out. With this specific ratio of beeswax to coconut oil, the wax is actually soft enough that you can ditch the drill and just use a sharp bamboo skewer to make the holes for the wick. It SO quick and easy!

1. Melt 8 ounces of beeswax. I used aluminum cans in a crock pot for this, so that when I did the project with my Girl Scout troop, each kid could be in charge of their own can of wax. 

Eight ounces plus the coconut oil, below, was more than most kids needed to fill their teacups, so I had silicon molds on hand that they could pour the excess into. We saved all that awesome wax so we can make more candles someday!

2. Wick the candle. While the beeswax was melting, I showed the kids how to stick the tabbed wicks to the bottoms of their teacups. With this wax blend and the wick size, the melt pool for each wick was 1.5" diameter. I passed out rulers, and the kids figured out for themselves how many wicks they needed to create a full melt pool, and where those wicks should be placed. 

Since we'd be lowering the burn temperature of the beeswax by adding coconut oil, this wick placement is a pretty low-stakes judgment call, so I gave advice when asked, but otherwise let the kids consult with each other and/or figure out where they wanted their wicks to go on their own. Candlemaking is overall a heavily adult-monitored activity, thanks to the safety concerns, so it's nice to let the kids make their own decisions whenever possible.

In the future, though, I will explicitly note that the wicks should be no closer than half that burn diameter to the edge of the teacup. What with placing the wicks on their own and then figuring out how to keep them upright while the wax melted, some wicks ended up pretty close to the wall of the teacup. Not the biggest deal, but it will lead to more smoke and soot than if the wick has enough space to burn cleanly.

2. Add 1/4 cup of coconut oil to the melted wax. I chose to figure out a volume measurement for the coconut oil just to make it easier for a group of teenagers to do while all standing around a table. You could also probably measure out and add the coconut oil to the can at the same time as you measure out the beeswax, but I did all the beeswax measuring before my troop arrived so I could start it melting in the crock pot, and I wanted to leave something for the kids to do.

I had the kids use a pot holder to remove their can of melted wax from the crock pot and put it on their own work space, then measure and pour the coconut oil into the melted wax. I gave them popsicle sticks to stir with.

3. Use popsicle sticks or bamboo skewers to prop the wicks in place. Even if the wicks are primed and stiff, they'll collapse as soon as the hot wax melts their own wax coating. It's better to prop the wicks in place before you pour.

4. Pour the melted wax into the teacups. I encouraged the kids to pour a little at a time, hoping to avoid too much wax shrinkage, but I'm not sure if it made a difference. This step was utter chaos! It's VERY exciting to pour candles, and somebody is definitely going to spill, and everybody is going to have trouble with their wicks shifting. The kids find it thrilling, though, so just go with it.

Here's what it looks like when the wax is poured and starting to set:


The wick placement is really good on those candles! 

5. Trim the wicks, and let the candles set for 48 hours. For bonus points, save the trimmed wicks to make new candles!

I was VERY worried that the candles wouldn't be solid enough for the kids to take them home that day, but another bonus of adulterating beeswax with coconut oil is that the wax solidified much quicker than 100% beeswax would have. 

6. Let the candles burn for at least an hour the first time they're burned. I'm a believer that the first burn is crucial to building a proper melt pool. It probably matters more for some candles than others, but I think that burning a candle for at least an hour that first time gives it a fair shot at establishing a good melt pool.

Here are the candles my kids made, after about an hour of burn time:


You can see the melt pool better with this overhead shot:


The candle on the right is perfect. The middle candle, after a few more burns, did build up to a full melt pool. The candle on the left is still tunneling down that original melt pool, mostly, I think, because the bottom wick is butting up against the wall of the teacup. 

And here's how it looks to have teacup candles in your life!

Overall, I think this was a decently teenager-friendly project, and I'm satisfied that this is about the most foolproof method around for pouring teacup candles. The kids talked about making candles for holiday presents, so we might revisit this in a few months. Otherwise, I'm thinking that sand candles could be a fun project for a camping trip!

P.S. Want to follow along with my craft projects, books I'm reading, dog-walking mishaps, road trips, and other various adventures on the daily? Find me on my Craft Knife Facebook page!