Showing posts with label crafting for children. Show all posts

Saturday, August 6, 2022

WIP: I Finished Piecing the Road Map Quilt Top

 Matt refers to this as "mission creep."

My original objective was to make my baby niece, who likes cars, a simple little roll-up road play mat. 

Then I got left at home alone for too long, started a five-hour podcast about a school group that got stranded on Mount Hood, and things... got out of hand.

This is the Fishing Net quilt pattern. I'm not proud of my visual design sense (although I do think it's improved over the years), so thank goodness that one of my kids has a GREAT visual design sense and the patience to hold my hands and reassure me as I continually disturb her to ask things like, "Would it be weird to have some black roads and some grey roads?" or (holding up several coloring pages of this quilt pattern that I have filled in with crayon) "Do you like the way I colored it here better, or do you like this one better? Or this one?"

She liked the alternating grey and black roads better, so that's the way I started planning it!

I DID iron all my fabric, but animals kept lying down on my layout and then the robot vacuum got into it, as well.

Syd was also required to look at every piece of flannel that I own and help me come up with believable prints and colors for a road map, then lay them where they ought to go:

Here we have a park, two neighborhoods, two construction zones for the epic mini Tonka trucks I bought her, and a ginger cat without a thought in his head:


Now I've added a couple of rivers, a couple of parking lots, a dino dig site, and an ocean:


And now I've got everything!


I was actually just finishing cutting out the pieces for this quilt as Matt and Will pulled into the driveway, home from Peru. Neither of them are big communicators, especially when they travel, so imagine my surprise when instead of coming straight in for hugs and celebrations and snuggling on the couch, Matt backed away from me when I met them on the driveway and asked for a COVID test.

And then imagine how I felt when both their COVID tests were so chock-full of COVID that they pulled up that dreaded second line right away. By the time the fifteen-minute timer actually went off, I'd already partitioned off part of the house, fetched the air mattress and extra sheets and towels, and was busy sobbing quietly to myself in the bathroom.

Friends, let's follow Grandma's on the Roof rules with your loved ones: if you're traveling and wearing your mask like a baller but have to take a six-hour bus ride with some maskless stranger wetly coughing behind you the entire time, maybe just, you know, go ahead and tell your loved one at home that. And then a couple of days later, when you're finally heading home and you arrive at the Chicago airport and you've got just a four-hour drive ahead of you and you start thinking, "Huh, I'm starting to feel kind of crappy," maybe just shoot your loved one a quick text along the lines of "Hey, feel like shit, COVID tests on the driveway before hugs!" That way your loved one, who's barely seen two sentences in a row out of you for the past two weeks and misses you a LOT, can, you know, modulate her excitement with some fair warning.

I mean, hypothetically.

ANYWAY, you know what spending the entire next day after a huge disappointment disassociating from your sadness does for you?

It makes you SUPER PRODUCTIVE!

The instructions had me piece big triangles as if they were log cabin quilt blocks. It was a little tricky to wrap my head around, but I only had to pull out the seam ripper once, so yay for me!

So then the quilt actually comes together as four big triangles, with that one road that runs corner to corner pieced last as a sash:

Especially considering that I wasn't really able to picture how it would look pieced, even with all the pieces laid out (darn my visual-spatial thinking deficits!), I am SO happy with how this road map quilt top turned out!


My next visual-spatial reasoning challenge is to add just enough applique road map embellishments to give a hint as to the purpose of each different part of the map, without having the embellishments look tacky or ugly or overwhelming or too restrictive.

Wednesday, February 9, 2022

A Skeleton Mermaid Tail Snuggle Sack, For She Who Contains Multitudes


A few years ago, I sewed each of the kids one of those snuggle sacks that were super trendy at the moment. You know the ones that are like lap blankets but also sleeping bags... sleeping bags for your legs, I guess? They're perfect for all those times when you want a comfy blanket but you also want your hands free for snacks and a book.

I used two layers of thick fleece for my snuggle snacks, and Matt made the patterns for me. Will got a giant fleece shark, complete with a pelvic fin and both dorsal fins, and large enough that she could use it as a sleeping bag, if she wants. It's quite amusing to walk through the family room and see her kicked back reading on the couch, half-consumed by a giant fleece shark.

Syd got a mermaid tail (it was the Year of Mermaids, you might recall), but I purposefully made hers a little shorter, because you obviously can't be swallowed up to your smile by a mermaid tail! It can go up to the small of your back, max--any further and people wouldn't glimpse you and accidentally assume that you're a real mermaid. So Syd's mermaid tail snuggle sack was perfectly Syd-sized, with mermaid scale fleece on the outside, and she looked like a real mermaid that whole winter every time she wore it.

And then she hit a growth spurt, and by the next winter her mermaid tail snuggle sack was about a foot too short.

Back when I sewed those first snuggle sacks, I'd had another idea for a snuggle sack that wasn't quite right for my littler kid who loved mermaids sincerely and intensely, nor for my bigger kid who liked dark stuff, but liked sharks even better.

It turned out, though, that my other idea was absolutely perfect for a kid who has grown up a few years and now loves both mermaids AND dark stuff.

Finally, the world is ready for my skeleton mermaid tail snuggle sack!

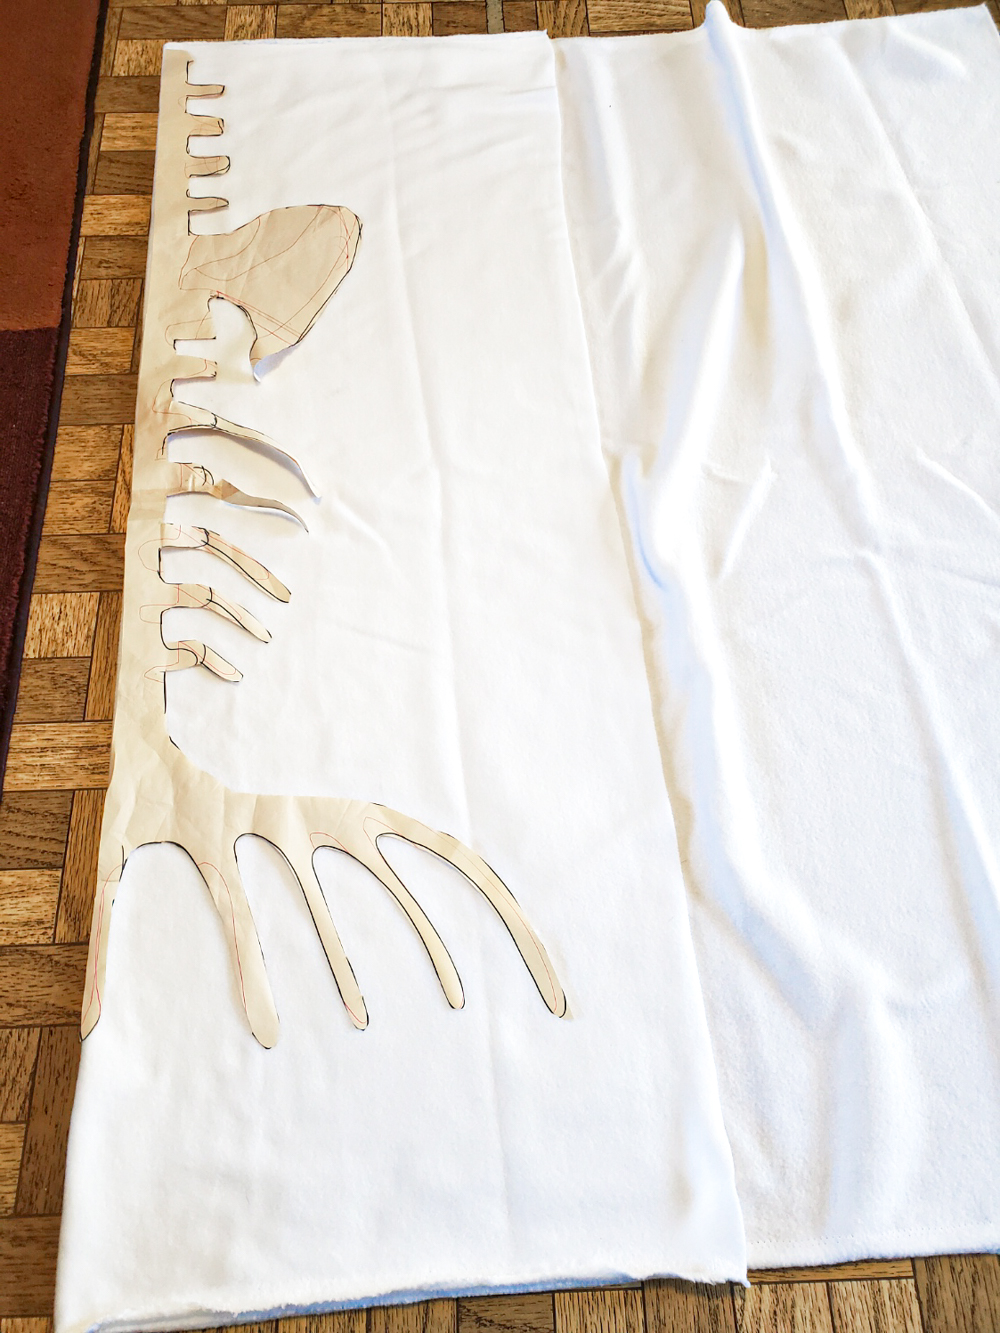
But first, Matt had to make me a pattern. Have you ever imagined the skeletal structure of a mermaid? It looks, I assure you, exactly like this:

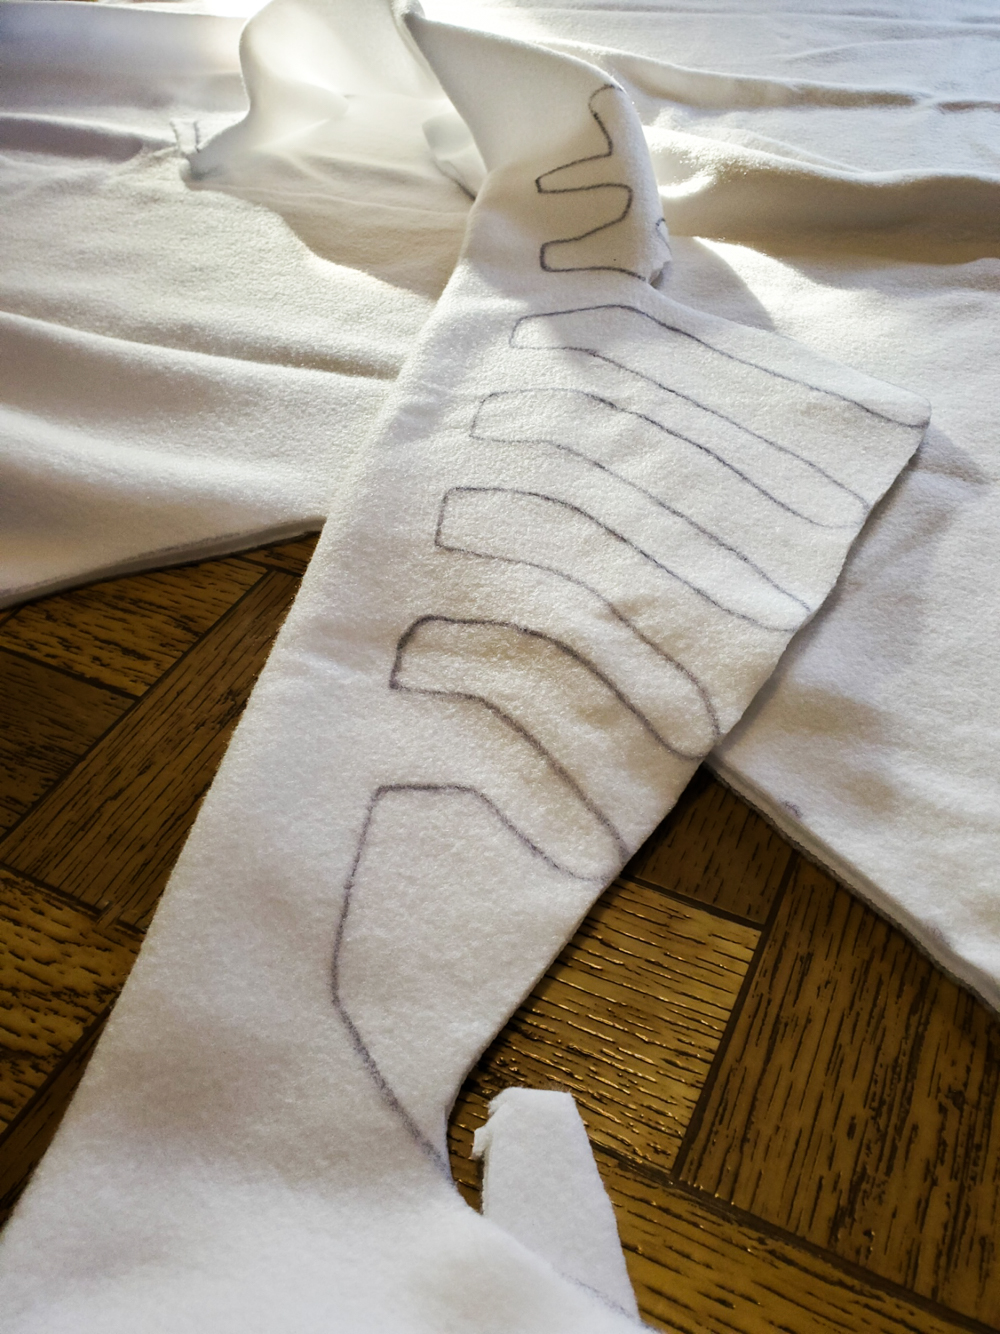
You only have to draw one half of your mermaid's spine, then trace and cut it on the fold:

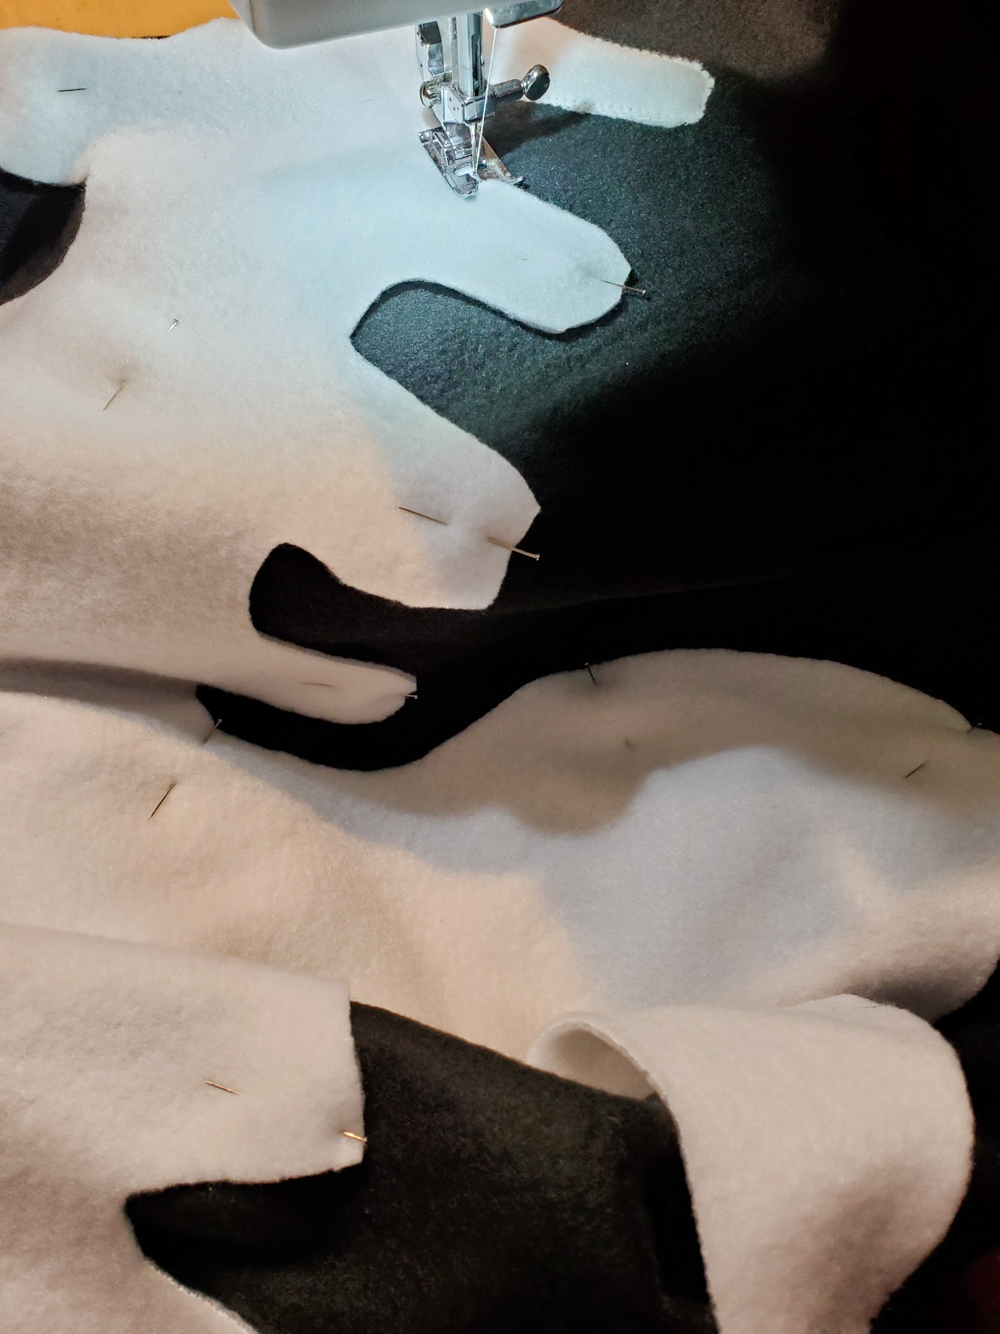
After that, the snuggle sack is the easiest of builds--WAY easier than that dang shark! I copied Syd's original mermaid tail pattern onto black fleece, added a couple of feet to the top to accommodate that growth spurt, then appliqued the skeleton onto the front piece before sewing it together:

So. Much. APPLIQUE!


The inside lining of the skeleton tail is stash red fleece, because that's the inside color of mermaids, of course!

I LOVE how Syd's skeleton mermaid tail snuggle sack turned out:


It's cozy and warm and makes you feel like a mermaid without being, you know, twee or cringe or whatever word the kids are using these days. 

Saturday, January 29, 2022

How-to: Kid-Decorated Bean Bags from Stash Fabric


This tutorial was originally published on Crafting a Green World way back in 2013!

Got some stash light-colored fabric? 

 Got a bored kid? 

 These bean bags don't take much material, so any light-colored fabric from your scrap bin is great for this project. Your kiddos will have a fabulous time decorating them with fabric pens or fabric paints, and when they're done, just a few straight seams and a handful of beans turns them into a super-fun soft toy. 

 Kid-decorated bean bags make great gifts for children to help make for other children--perfect for all those summer birthday parties that you're constantly shuttling them off to. They'll keep them busy creating on a rainy day, and the finished bean bags are soft enough that a hurled one has a good chance of not knocking over something delicate and expensive in your living room. 

 Here's how to make your own: 

  1. Cut scrap fabric to size. We'll be following along with my original stenciled bean bags tutorial to make these kid-decorated ones, so I'm using my standard 4.5" square template. You can go larger, though, if you've got some larger scraps and you don't want to create waste by trimming them. Just stick to a square shape, and feel free to experiment! 

  2. Back with freezer paper, or starch the heck out of it! Stiffening the fabric is really essential to making this a kid-friendly project--kids don't like shifty, squiggly surfaces, and trying to use fabric markers to draw a detailed portrait of the cat on an un-stiffened piece of cotton is just a recipe for a tantrum. And don't you have enough of those already? 

 You can saturate the fabric with spray starch (have you tried homemade spray starch?), but my quicker, simpler solution is to iron freezer paper to the back of my fabric. It gives each square the sturdiness of paper, and my kids have no problems working on that surface. 


 3. Let the kids loose! I have a large selection of Jacquard fabric paint, Tee Juice markers, and Crayola fabric crayons, and I set my kids free with all of them. My kiddos LOVE to use the fabric paints and fabric markers, but I can't ever get them to try out the fabric crayons (too fussy!). 

 Whichever medium you use, let it dry and cure for at least 24 hours before the next step. 


  4. Sew the bean bags. Follow my stenciled bean bags tutorial, or just wing it--it's not rocket surgery. You could use your own dried beans, but if you're going to purchase dried beans for these bean bags, though, go ahead and purchase white beans. It doesn't make a ton of difference, but especially if you're using thinner fabric and haven't covered the surface completely in paint, the white beans look a little nicer inside the bean bags than pinto beans do. 

 Your kiddos can start playing with their bean bags as soon as you've finished sewing them. If you'd like to give them as a gift, it just takes another ten or so minutes to also sew up a nice drawstring bag to package them.

Saturday, January 22, 2022

Tutorial: Stenciled Bean Bags

 This tutorial was originally published on Crafting a Green World way back in 2010!

I like to make educational toys for my girls--matching games from their artwork, file folder games, extension activities for the books they read, anything that will allow them to incorporate what I want them to learn into the pleasures of their lives. These particular bean bags were inspired by my three-year-old, who hasn't yet memorized her numbers. Sure, she can count on her fingers and plays a mean game of Uncle Wiggily, but sit down long enough to figure out the difference between a 5 and a 9? Eh. Why not just call everything an 8? 

 The beauty of the stenciling, however, is that you can put anything that you want on these bean bags--kids' names, states and capitals, letters (I really want to make this alphabet bean bag set), or instructions for the craziest Game Night game ever! Here's how to make them: You will need:
  • fabric scraps measuring at least 4.5" square. I used quilting cotton, but canvas, upholstery remnants, felt, and even vinyl would work, although you might need to modify your stenciling method with a different fabric
  • sewing machine with a medium-weight universal needle and matching thread. I top-stitched around these puppies twice to make them secure, so I'd advise a thread that will blend, not fetchingly contrast, with your fabric here.
  • dried beans. I used pinto beans, which were the cheapest, and used about three pounds of dried beans for 30 bean bags. Any dried legumes, rice, or even cherry pits would also work.
  • freezer paper, sponge brush, and professional-quality fabric paint for freezer paper stenciling
1. Cut out two squares of 4.5" fabric for each bean bag that you want to make. 


 2. It's easy to paint the stencils on your fabric before you sew it together. I used my Cricut to cut the stencils directly into my freezer paper, and I stenciled the positive image of each number on one side and the negative image on the other side. If you haven't tried freezer paper stenciling before, it's easy--check out my freezer paper stencil tutorial for more tips and tricks. 

 3. Making sure that the stenciled images on each fabric square are aligned in the same direction, face the two sides of each bean bag together and sew around 3 and one-half sides--you're going to leave yourself an opening half of one side long for stuffing your bean bag. 

 4. Clip the corners of each bean bag to reduce bulk, then turn them right side out, using a chopstick or dull pencil to push the corners out nice and sharp. 

 5. Top-stitch twice around three sides of each bean bag--don't top-stitch around the side that has the opening, because you'll do that one after the bean bag is stuffed. 

 6. Fill each bean bag with dried beans. I like mine nice and stuffed, but in order to top-stitch easily and neatly close your opening, leave a least an inch's room at the top. 


 7. Top-stitch the side with the opening twice. This will neatly close the opening and give that side the same sturdiness as the other sides, while allowing it to match, as well. 


 Now they're ready for tossing!

Tuesday, January 18, 2022

The Putting Away of Childish Things... For Now


During the first year of the pandemic, back when we were all home all the time, Matt helped the kids do a HUGE clean-out of old toys from their playroom. I about wrung his neck when I saw the size of their donation pile, then hid in the bathroom and sobbed for a dramatically long time, then barely spoke to him for most of a week, and yet of course it had to be done sometime.

Although I don't know why it couldn't wait until after I've died of old age, but whatever. If the guy couldn't stand sharing his work-from-home office space with a billion toys that hadn't been played with in years, then he couldn't stand it, I guess. Or they're all just heartless and have no souls with which to appreciate the precious childhood memories locked into those toys.

ANYWAY!

Souls or not, they knew better than to so much as lay one finger on the things that I've made for the children over the years. Which just means that now, of course, I've got to take those precious memories--I mean stuff, of course it's all just stuff, ahem--off the shelves with my own hands and put it all away somewhere.

I dealt with the kids' play silks first, keeping only the ones that still looked pristine or that the kids had helped me make, washing them and hanging them out to dry and then folding them up and sealing them away in plastic.

Next, Syd helped me deal with the kids' HUGE collection of bean bags. The kids adored bean bags for a ton of years, and every so often I'd make them a new set. Rainbow bean bags. Stenciled bean bags. Halloween bean bags. Bean bags with their art on them.

Again, we kept only the ones that are still perfect and the ones that the kids did the decorating for. That still resulted in quite a stash!


Bean bags don't wash, so I only had to air them out (okay, and photograph them!) one more time before putting them in plastic:


I hope the kids appreciate all the extra room they've now got for their boring teenager stuff, humph! And next we've apparently got to go through their nearly infinite supply of small plastic animals (I'd say we should have bought stock in Schleich, but they're pretty much all secondhand), because who needs an entire wall of toy animals when you're a teenager?

I mean, I probably only have to store them away until both kids move out, and then I can get all of my favorite toys of theirs back out and remodel their room into a shrine to their childhoods...

Sunday, January 16, 2022

How-to: Organic Terrycloth Hooded Towel with Applique


This tutorial was originally posted on Crafting a Green World back in 2013.

There's nothing like hopping out of the pool and into a comfy, soft, bounteous towel. But big beach towels are hard for little kids to manage, and that bleached, dyed terrycloth can be scratchy and harsh on damp, delicate skin. 

It's an organic terrycloth hooded towel to the rescue! This hooded towel isn't for babies--if you start with your own organic terrycloth fabric, you can sew this hooded towel with proportions perfect for big kids. Organic terrycloth won't add any extra chemicals to your kiddo's tender skin, and it's softer than those cheap-o novelty beach towels. 

And just in case there's any doubt who that awesome hooded towel belongs to, there's plenty of room on the back for a monogram, done superhero-style in the case of my superhero-loving kiddo, who's decided that her hooded towel does, indeed, look a LOT like a superhero's cape. 

 Need a superhero cape/hooded towel for your own kiddo? Read on for the tute: 

1. Take your kiddo's measurements, and figure out yardage. First, measure your kiddo's height--look how she's grown! 

Your hooded towel will be in the shape of a square turned diagonally, so this height measurement will be the diagonal length of the square. To calculate the length of each side of the square, use the Pythagorean theorem, in which c equals the diagonal and both a and b equal the lengths of the other two sides of the right triangles made from the square with that diagonal. No, you don't want to do that math? Fine, use this square calculator, but don't forget that your geometry teacher TOLD you you'd need the Pythagorean theorem one day! 

Using the Pythagorean theorem, and then rounding up to the next inch, I discovered that each side of my square needed to be 36" (do not include a seam allowance here or anywhere else on this project); this was a yay, because it meant that I could sew the entire hooded towel for my seven-year-old from one yard of organic natural terrycloth. 

Now, measure the top of your kid's head from front to back; this will be the altitude of the right isosceles triangle that makes up the hood. To cut a right isosceles triangle to this altitude, fold the remaining terrycloth to the bias, measure the altitude, and cut. 

Fold the terrycloth to the bias to measure the altitude of the triangle formed by the fold.

2. Make homemade bias tapeCut printed or undyed organic flannel on the bias at a width of 4", then make bias tape out of it. You will need enough bias tape to cover the perimeter of your square and the base of your triangle. 

3. Sew bias tape to the hood. Just sew the bias tape to the base of the triangle; the other two edges of the hood will be covered later. 

Sew bias tape to the base of the triangle forming the hood, then pin the raw edge of the triangle to one corner of the towel.

4. Attach the hood to the towel. Line up the two raw edges of the hood with the two raw edges of one corner of the towel. Pin well. 

Sew the bias tape around the perimeter of the towel.

5. Sew bias tape to the towel. Sew bias tape entirely around the perimeter of the towel, mitering the corners (here's how to miter corners with bias tape). When you come to the hood, you'll be encasing both the raw edges of the towel and the raw edges of the hood with that bias tape. 


I basted the applique to the towel’s back, then went back over it with a satin stitch.

6. Applique the hooded towel. Your hooded towel is perfectly serviceable at this point, but it might still need some personality. You can cut a monogram, or really anything that you wish, out of flannel, center it onto the back of the hooded towel, and applique it on using your machine's satin stitch. NOW it's got some personality! 

Monday, May 10, 2021

Two Free Pairs of Bike Shorts Were Living in My Fabric Stash


Syd mentioned that she needed a new pair of comfy, stretchy exercise shorts for dance class, so into my fabric bin I dove!

I knew I had some spandex fabric leftover from our DIY leggings kick of three years ago, but just between us, I suspected that there wouldn't be enough spandex left to sew anything, because we hit that leggings kick pretty thoroughly!

I'd forgotten, though, that noses had been snubbed at the camouflage spandex that I'd bought, foolishly thinking that the kids would find it cute. They did NOT find it cute back in 2018, but it turns out that in 2021... well, it's still not their favorite print, but it's certainly good enough for a couple of pairs of bike shorts. I'm a little disappointed that there is just no way to match thread to the camouflage fabric, but it doesn't bother me so much that I'd put forth any effort to find a solution, either (edit: apparently, this is the solution. Now I know, at least!)

Syd's grown enough that now I can use my favorite Patterns for Pirates leggings pattern for her as well as Will. I love the fit of these leggings, the range of sizes in the pattern, and the customization options. Home-sewn leggings are still more expensive than store-bought, fast fashion leggings (and honestly, at the moment our local Goodwills are also absolutely stuffed with LulaRoe leggings, too, so you don't even have to go the fast fashion route to find cheap leggings), but the leggings that you sew yourself using a free pattern from the fabric that's just been sitting in the bottom of your fabric bin for the past three years?

Well, those are basically free leggings, and well-sewn, free bike shorts exactly when you need them, no trip to the store required, is way better than sweat shop clothes!

Monday, May 3, 2021

Unseasonable Craft Alert: I Sewed Next Year's Easter Presents Because Reasons

The reason being that I figured out exactly what I SUPER wanted to sew for my baby niece for Easter far too close to Easter to actually sew it, but I was so excited about it that I didn't want to set the idea aside for the ten months that it would take me to be bored of it when I remembered it again and not want to do it.

Because you might as well sew what you're excited to sew when you're excited to sew it!

Even if it will sit in your closet for the next ten months until you can mail it off to your niece at a seasonally appropriate time.

I'm especially excited about this fabric Easter basket, because I made it from the vintage quilt top that I have had in my stash for... a decade, perhaps? Shamefully, I don't even remember where I got it! Either someone once upon a time gave me their old quilt top, or I scored it from some upcycling center or freecycling meet-up, but ever since then, it has sat in the back of my fabric stash. I'd notice it when I was digging for something specific, and feel kind of guilty because surely there is SOME cool thing I could be making from someone's vintage charm quilt top!

Turns out that the cool thing? Is Easter baskets.


The Easter eggs took a lot of fiddling to get right, and I learned a lot about fabric grain and stretch as I did so. Say yay to the self-taught sewer figuring shit out on her own!


I finally decided that I prefer canvas to quilting cotton, both for the interesting texture and because I think the Easter eggs hold their shape better (I'm using pre-printed fabric, but you could also sew these in plain canvas and then decorate them with paint and markers!). When I make another set, though, I think I'm going to also experiment with interfacing to make the eggs even more absolutely perfect than they already are:


As usual, I had some buddies helping me out with these photographs. We are all loving the newly sunny and warm days!


If you want a set of your very own, I've now got a listing for these Easter egg softies and their vintage quilt basket up in my Pumpkin+Bear shop on etsy:


I'll make you your own set, though, because this particular set has one particular kid's name already on it, and it's going to spend the next ten months in my closet waiting for the perfect time for me to give it to her!

P.S. Want some other Easter crafts and projects that you can do, seasonably appropriate or not? Here's my massive list of all my favorite Easter craft tutorials.

P.P.S. Want to follow along with my craft projects, books I'm reading, road trips to weird old cemeteries, looming mid-life crisis, and other various adventures on the daily? Find me on my Craft Knife Facebook page!