Wednesday, December 28, 2011

An Overhead Projector Christmas Tree


Probably anyone who owns an old-school overhead projector knows how much free play they get. Sure, we use the projector for map tracing, copywork of all sorts, and all sorts of math and science activities, but with just the clear plastic sheets and a nice set of overhead markers, the kids dream up all sorts of fun play--during a playdate a couple of weeks ago, one little kid drew at least a dozen scenery pages on the plastic sheets and then projected an entire play that she'd just made up, using her fingers as all of the characters.

If you have any other accessories, such as translucent pattern blocks, then you're perfectly set up. I bring out the overhead projector as an actual party activity, especially for little siblings or friends on the younger side of the guest list, but my own kids will still spend entire quiet mornings or afternoons engrossed in play with the projector.

Only rarely, outside of helping out with some academic activity related to one of their areas of interest, do I set up an actual "activity" involving the overhead projector, but recently I invited Syd to create an overhead projector Christmas tree.

She drew a tree on a clear plastic page:


She set the page on our projector, and decorated it with translucent geometric shapes:


She enjoyed its projection on the wall, and then took it apart and did it again!

Unfortunately, we only have a small amount of wall space suitable to using the overhead projector in our living room, although as wall space it is ideal, since you can tape a large piece of paper onto it and copy from the projector:


One day, however, the finished basement playroom will become a place that the children do not fear to tread (something about a monster with lots of arms, and one of them is really long and has a pincher on it...), and therefore a place where it gets more use than as a dumping ground for out-of-favor toys, and then, I tell you, THEN we'll have tidy shelves of art supplies and books and toys, and plenty of room in the middle for active play, and a TV so that I have room to use my old-school workout videos...

...oh, and a much larger wall space for the overhead projector.

Tuesday, December 27, 2011

The Secret to Life's Happiness is Baked Doughnuts

Because doesn't this just look like perfection?

Willow has made the baked doughnuts from Knead It, Punch It, Bake It!: The Ultimate Breadmaking Book for Parents and Kids a few times now, and every time I swear they turn out tastier! This time we refrigerated the dough overnight before rolling it out, simply because Willow ran out of time to finish that evening, and I do believe that it made the dough much easier to work with--less sticky, easier to cut, etc.

But of course, who cares about the baking instructions? Everybody knows that the real treat is dunking them in melted butter, rolling them in cinnamon-sugar--

--and munching them up while they're still warm:

Fabulous, yes?

Even better that they're made by the seven-year-old.

Sunday, December 25, 2011

Tutorial: Popsicle Stick Christmas Ornaments (or Wands!)

When the holidays become most bustling--to and fro to winter gymnastics camp, to and fro to playdates with schooled children who are temporarily out of school, to and fro for last-minute bits and bobbles, to and fro to the library to appease the child who CANNOT take a major car trip without several dozen novels, back to gymnastics camp for the winter show, shitfire we have to make one more trip to the grocery store for cookie dough and oranges, not to mention, you know, the TEN-HOUR car trip--that, to me, at least, is when simple Christmas crafts are the most magical. Everyone settles down, everyone slows down, everyone relaxes back into the home and back into the process, not the product, of the winter holidays.

While, due to the bustling, some of our most favorite Christmas crafts, such as baking cherry bread with Daddy and decorating gingerbread houses with me, have actually been relegated to post-road trip New Year's activities, we made the time every day to come together for some simple special activities every day, such as these painted and glittered popsicle stick ornaments.

To start, you'll need plain popsicle sticks and glue--yes, you can use plain white glue for these, but you'll have to let them dry for several hours before you paint if you do, and if you use hot glue, you'll be painting five minutes later. A Star of David is two triangles--

 --with one upside-down and on top of the other:

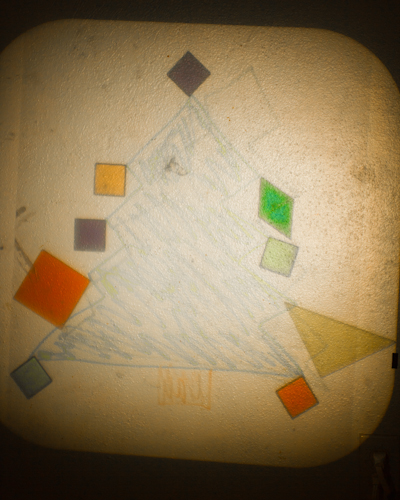
A tree is one triangle and one stick--

--placed vertically from top to bottom:

Of course, after an ornament or two, the girls were done with that nonsense and fully focused on popsicle stick wand-making. This is why we only have a half-dressed tree at the best of times.

After the glue is dry on the popsicle stick creations, paint them--

--and then, while the paint is still wet, sprinkle the glitter right on:


Wait, did I say sprinkle? I meant douse. Liberally.

When the paint is dry, hang up your obligatory two ornaments onto the tree, and then spend the rest of the evening wielding your wand:


She was turning me into something not very complimentary, alas, on account of I had just told her that it was time for bed. Such is life for a young wizard...

Tuesday, December 20, 2011

Candy Christmas Trees

We're doing gingerbread houses just as a family this year, so in lieu of last year's larger gingerbread house party (which was well worth it, as everyone had a fabulous time, but did require me to pre-bake and assemble a half-dozen gingerbread houses), this year the girls had over a little buddy and his mama (my buddy) to make far simpler candy Christmas trees.

The Christmas trees really are quite simple, requiring only waffle cones that Willow trimmed with kitchen scissors to sit evenly upside down, green frosting (I used white chocolate melted in our fondue pot and dyed green, similarly to what I do with gingerbread houses, but I quickly realized when the kids all got to work that this was major overkill), and loads of yummies.

They were messy--

--a little ugly (and yes, of course, that's mine below that I'm calling ugly)--

--and absolutely wonderful.

Saturday, December 17, 2011

Beeswax Ornaments: Honey on the Tree

For a couple of days it seemed the crafts-only crock pot was always hot, keeping beeswax melty, spreading that honey scent throughout the entire house, while we all took our turns (many turns!) making beeswax ornaments for our Christmas tree, and the trees of our family and friends.

So simple, so satisfying, so sweet(!) to make:


To make your own, check out my beeswax and fabric scrap ornament tutorial over at Crafting a Green World.

Thursday, December 15, 2011

Caution!!! Elves at Work!

with beeswax
and silicon molds
fabric scraps
and a sewing machine
bias tape
and waffle cones
red and green M&Ms
and cardstock
kite paper
and glue
a guillotine paper cutter
and FIMO clay
Photoshop
and digital scrapbook supplies
Sharpies
and, of course, a well-used box of

Christmas is busily, happily, (and quite inefficiently) being crafted. And photographed, and written about, of course--but not for now! Everyone knows that Christmas craft revelations have to come AFTER Christmas!

Monday, December 12, 2011

Beeswax Paper in Bee Culture Magazine

One of my favorite things about writing for Crafting a Green World is the fact that I retain ownership of my own work. That means that when the editor of Bee Culture magazine, having seen my beeswax paper tutorial posted at Crafting a Green World, writes me to ask if I could submit that tutorial to their magazine for publication, I may say yes!


I wish that getting my work in print was ALWAYS this easy!

P.S. Want to follow along with my craft projects, books I'm reading, dog-walking mishaps, and other various adventures on the daily? Find me on my Craft Knife Facebook page!