Showing posts with label woodwork. Show all posts

Saturday, October 3, 2020

How to Make Fabric Decoupaged Blocks

I originally published this tutorial on Crafting a Green World.

Don't let outgrown building blocks languish unloved in a back closet when there are so many beautiful ways to upcycle them!

I've been in the process of slowly upcycling my kids' old building blocks for years (I promise, there will still be more building blocks in the world when/if I have grandchildren!), and one of my favorite ways to upcycle building blocks is to turn them into holiday decorations using simple decoupage techniques.

I've already shown you how easy it is to decoupage blocks with paper, but you'll be pretty excited to know that decoupaging blocks with fabric is EVEN easier! Fabric is sturdier than paper, which means that you need fewer layers of Mod Podge to seal it, and the surface is so much more forgiving than paper, so you'll find that every Mod Podge layer looks nice and smooth, in stark contrast to all the fussing that one tends to have to do with paper decoupage.

For paper or fabric decoupage, the supplies are nearly identical. Here's what you need:

Supplies

  • Outgrown building blocks. I love the look of plain cubes, but you can decoupage any block shape.
  • Fabric, pencil, and scissors. You'll be fussy cutting your fabric to size, then trimming, if necessary.
  • Mod Podge and a foam paintbrush. Foam paintbrushes aren't as eco-friendly as natural hair brushes, but they apply the glue smoothly, and if you wash them well after each use they'll last forever.

Directions

  1. Prepare your fabric. If it's new fabric, there's no need to wash and dry it just for this project, but you should iron out any creases.
  2. Measure and cut the fabric. I like to fussy cut the fabric pieces for my decoupaged fabric blocks, so I use the block itself as my template, tracing around each side on the reverse of the fabric piece. You can do this with a pencil or piece of chalk, and if you cut INSIDE the lines that you drew, the piece will match the side of the block more closely.
  3. Glue the fabric to the block. Working on one side at a time, paint a layer of Mod Podge onto the block, carefully smooth the fabric piece onto that side, and then paint another thin layer of Mod Podge on top of the fabric. Let it dry completely before you glue another side--this isn't a hands-on time-consuming project, but it DOES take up a lot of resting time!

You might think that these cute blocks are only for decorating--and yes, they DO make super cute decorations!--but once they're sealed with Mod Podge, a kid can play with them just as they do any other blocks. I wouldn't let a kid who's still mouthing things have them, but any other kids would probably love having some fun, festive holiday elements added to their open-ended block play.

Saturday, September 5, 2020

How to Make String Art

I originally published this tutorial on Crafting a Green World.

When I was a kid, we had a couple of pieces of string art, made by an aunt, framed and hung in our house.

I mean, it WAS the 1970s, the heyday of string art.

But whereas the 1970s craze was all about making a string art owl from a kit (which we had), or a string art sailing ship, also from a kit (which we had), you can now do quite a bit better.

A lot of the imagination that you can bring to string art now comes from how simple technology is to use. Can you imagine what my aunt could have created if she'd had access to clip art and a printer? Google Images? A Cricut?!?

Because I promise you that designing your piece is by far the hardest part of making string art, and even that isn't hard. I know you've got access to Google Images and a printer, after all!

So no more kits for you! I'm going to show you how to make string art the completely DIY way--from scratch, by hand. It's going to be awesome. Here's what you need:

Tools and Supplies

  • Wood, cut to size. I can always find some scrap boards to cut down over in my Garage of Mystery, but other good sources of wood are Craigslist, Freecycle, or your local Restore. Maybe you'll be lucky enough to score a finished plaque!
  • Nails. For this particular project, I'm using 1 1/4" ring shank underlayment nails. They're a little thicker than you need, but I'm doing this project with kids, and that extra width helps them keep their grip. Feel free to use whatever nails you like and have on hand.
  • Embroidery floss. This is another supply that you might just find that someone you know would LOVE to give you. There are a surprising number of people in this world who've given up cross-stitch!

Directions

1. Prepare your wood. This step can take a lot of different forms, depending on what wood you choose and the tools you have available. You can use everything from a pre-finished plaque to a pallet board, but whereas that pre-finished plaque is ready to go, but also pricey and unsustainably sourced, something like pallet boards or scrap wood might need to be cut to size and sanded down, but they're free and keep more resources out of the waste stream.

If you're preparing your own wood, don't skip sanding it--if this is one of your first woodworking projects, you'll be surprised at how much nicer your wood looks after it's sanded. My secret trick is to round the edges of the wood piece while I'm sanding it. It won't replace the services of a router, but just sanding all the edges makes the finished piece look more professional.

Staining and sealing the wood is optional, but if you choose to do so, remember to use water-based stain and sealant.

2. Create your template. Create a template for your string art on typing or notebook paper. You can draw freehand, of course, but Google Image is also your friend, and I love using my old-school Cricut. I mean, it can draw me a parasaurolophus at the size of my choosing! How AWESOME is that?!?

3. Nail directly onto the template. Place the template onto the plaque, and then begin to hammer nails right through the paper, following the lines of the template.

Try to keep your spacing and the nail heights even, but don't stress out too much. The one thing that you DON'T want to do is pull a nail out and leave an empty hole. Just work with where you're going!

Watch, as well, for narrow spacing. You can see above how I modified my parasaurolophus, as I noticed while I was hammering nails that some of my spacing--the tail, for instance, and certainly the legs--was going to be too narrow to look nice when wrapped with string:

Try to remember, though, that nobody is going to be looking at your project as closely and critically as YOU are, so roll with any imperfections that come along.

Once you've hammered in all the nails, tear the paper away. I had to get into a few little nooks with a pair of tweezers, but it wasn't difficult.

4. Wrap with embroidery floss. Now for the fun part! Wrapping the nail art with embroidery floss is the MOST fun, and you'll find that even kids who are too young to hammer nails (although don't dismiss their abilities without really thinking about it--you'd be surprised at how young a kid can handle a hammer!) can have a ball wrapping nails with yarn or embroidery floss.

Tie a knot around one nail (secure it with a little white glue to be safe), then wrap the floss around the perimeter of your piece to outline it. Weave in and out of the nails, wrap it completely around some nails, take a break to go back and forth across your piece--feel free to have fun!

Once the perimeter is wrapped, go back and forth across your piece at every angle, with no discernible pattern, to cover the surface area with embroidery floss. After a bit, you'll be able to notice spots that have gaps and you can easily cover those. This takes a LOT of embroidery floss, so be prepared to use at least an entire skein, and possibly more, depending on the size of your piece. Tie the floss off around a nail, and again, dot the knot with a little white glue to make sure it holds.

When you're finished, you can continue to embellish your piece (not everyone I know is as science literate as I am, so I made a label for my string art parasaurolophus), and mount a picture hanger on the back so that you can hang your new masterpiece in a place of honor.

And now you can make another one as a gift for someone else!

Thursday, August 27, 2020

My New DIY Treadmill Desk is Everything that is Awesome


I guess one of the okay things about living safe and sound at home during a pandemic is that various projects that we have put off for a variety of months and years are occasionally finally getting done.

Will incubated eggs like she wanted to last summer but didn't get around to doing before it got cold (I bought her this incubator for her birthday last year). I made the Christmas tree topper whose pattern I printed out probably this time last year. I'm almost finished with the quilt that I wanted to give to my kid last winter. Hell, I even just finished up two months of physical therapy to fix the shoulder that I busted almost exactly a year ago to this day!

One of the reasons why my shoulder got so bad (other than, you know, me ignoring my chronic pain...), suggested one of my physical therapists, was likely my professed habit, as I told them, of "spending most of my days hunched like a gremlin over either a keyboard or a sewing machine." I feel like over the course of my many visits, at one time or other every single physical therapist in the practice gently suggested to me that, you know, I NOT do that.

So now I spend some of that time sitting on a yoga ball instead, or standing with my laptop propped up on a big cushion--there's really not a great way to make a laptop ergonomically correct, it turns out, since the screen and the keyboard are so compressed together.

But the need to get some variety into my sedentary occupations reminded me that I LOVE vibing on my treadmill, and I have wanted a treadmill desk for probably a decade (Noel, when did you trade me your old treadmill for my old DVD player? Was that a whole decade ago?). 

And wouldn't you know it, but like many of my most procrastinated-against projects, my brand-new DIY treadmill desk took probably five minutes to make, maybe twenty if you count the time it took to pick out the materials in the big-box hardware store (I'm not going to count the drive there and back as time spent on the project, because we were there buying stuff for probably fourteen different projects, and also I was a little tipsy so I bought some plants I didn't need, too). 

Matt and I bought one finished board longer than my treadmill is wide but about as wide as the treadmill's horizontal handrails are long. We also bought two bungee cords the same length as the board.

Our sophisticated mounting system is to lay the board across the handrails and stretch the bungee cords underneath it, bungeeing it to the handrails and hooking the ends over the short ends of the board. Matt was all prepared to do more stuff to make it sturdy, but that's all it took! It's totally sturdy!

As I type this I'm trundling along at a happy 1 mph, my posture for sure not perfect (shoulders BACK, Julie!!!) but also for sure not hunched forward and slumped over in a way that makes the state of my scapulas absolutely shocking for a physical therapist to witness. It feels really nice to get some restless energy out when I've got a lot of writing to be going on with, and the desk is big enough that I can make myself a whole magpie's nest on top of it with all my stuff. 

It's a DIY win! I kind of even have the urge to go flip through all my planners from the past decade and find the one where I wrote "DIY treadmill desk" in some random to-do list next to some random week...

...AND CROSS IT OFF!!!!!!!

Monday, August 24, 2020

The Summer of the (DIY) Wooden Stars

You guys, I have been without a working sewing machine for SOOOO LOOOOONG!!!!!

Fortunately, my "good" sewing machine didn't break until AFTER I'd sewn plenty of cloth masks for everyone, but when it broke, it broke for good.

(See what I did there?)

The day that I heard that my sewing machine was unrepairable, I switched it out at the repair shop (I drive to one in the next town, now, on account of I'm still scared of the people who run the one in my own town) with my beat-up old sewing machine, the one that Matt replaced for me as a present a few years ago when IT broke, but I still keep it around because it has an awesome bobbin-winder.

In another piece of good luck, my beat-up old sewing machine is old enough that its parts are mostly metal, which means that it WAS repairable... or at least, that's what the repair shop has told me. They've also tell me, every time we call (once a week!) for an update, that they've finished their repair and all they need to do is test it.

You would think that a sewing machine repair shop, when faced with a machine that they've already repaired and are now simply storing and not being paid for, would be eager to do the very last thing that they have to do to that machine before they can 1) get it out of their workshop and 2) get paid money in exchange for their goods and services. If you think that, though, you're likely not mentally or emotionally suited to run a sewing machine repair shop.

And that's why, in all my new-found non-sewing time, I've been experimenting with a wide variety of non-sewing productive things to do with my hands.

And somehow in that process, I became obsessed with making wooden stars?

I don't know. It's weird. The whole thing started out being normal--I figured I'd make our Christmas tree a nice wooden star tree topper. Then I made a smaller one as an ornament. Then I had some wood leftover, so I made a couple more. Then I found some more wood. Then I thought that maybe I could paint some of the stars, so I found some more wood.

At this point, I'm basically out of scrap wood, so I'm about to go and tear apart a wooden pallet and see if I can also make stars out of pallet wood. If I can--I'll just be frank with you; I'll probably make a LOT more.

To be fair, though, the process is quite satisfying! Here's one star just after I cut it out of some super old board that was probably in our garage when we moved here:


Here I am about to sand the snot out of it (pro tip: get a quarter-sheet palm sander because it's cheaper to buy full sheets of sandpaper and tear them to size yourself)--


--but then deciding that it would be terrible to ruin that gorgeous patina and instead just sanding the sides and curving the edges:


Here's a larger version of the star from that same wood. Check out the old nail holes!


Here I am spending some art time with Will. She's coloring the world's most epic fantasy landscape, I'm gluing wooden stars together, and we're both listening to Welcome to Night Vale:


I cut some other stars out of such clean, nice wood that I didn't bother priming them before I painted them:


I want all that nice wood to show between the layers of my rainbow!


Here's the finished tree topper, all set up and ready to go in my Pumpkin+Bear etsy shop!


It was SO MUCH FUN to make. The second that I scrounge some more wood out of nowhere I'm going to make another!

Our Christmas tree is already so busy that I forced myself to make this very sedate, lightly stained and sealed only, tree topper for our home:
It's a weensy bit wonky, but it was the very first one that I made!

I am, however, right this minute working on painting a galaxy onto yet another giant wooden star, so who knows if our tree topper will stay regal and sedate and simple this year, or if it will be conquered by galaxies or rainbows--or both!

Thursday, July 16, 2020

Paint Stirrer Crossbows and Popsicle Stick Catapults: Homeschool STEM with Rubber Band Engineer


We're not exactly lacking STEM studies here in our homeschool, but I thought that the kids might like a change from robotics, so I offered them the opportunity to create something from this fun little book:


Because what could possibly be more charming than a book with a real, actual rubber band on it?!? Or more tempting than a cover that boasts the instructions for a "slingshot rifle" inside?!?

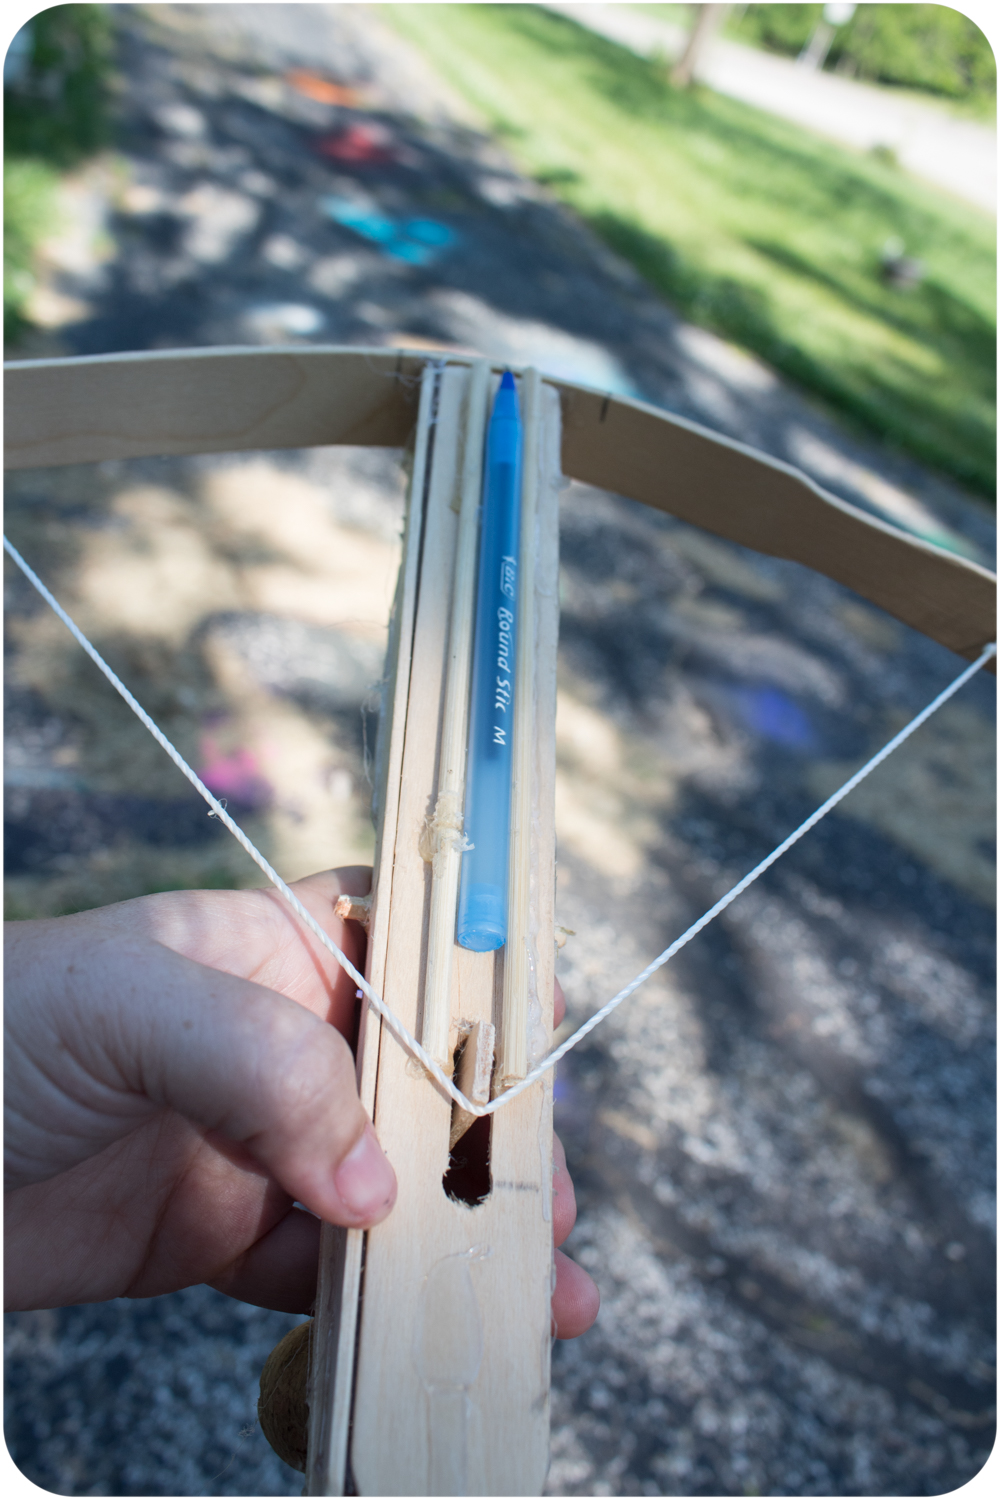
Here is Will's ballpoint pen crossbow, made from paint stirrers, bamboo skewers, a lot of hot glue, and some twine:


I don't have any photos of it in action because I didn't realize that its first shot would be its last! Will suspects that the twine she used was too stiff; she thinks she needs something with the slightest bit of stretch so it can hold a little more potential energy without putting so much pressure on the paint stirrer. 

Stay tuned for Version 2!

Syd's wooden pencil catapult was more successful overall--


--but then, she did have an assistant for its construction:


It turns out that a catapult made from duct tape, wooden pencils, and a plastic lid, shooting a cork tied to yarn, is quite the thing to keep a young cat entertained:


An automatic winder would improve the catapult's playability here, I'm told, as much of the fun for the cat involves chasing the yarn as it's being wound up again for another go:


This was definitely a good book for encouraging the tinkering aspect of STEM: the contraptions all worked fairly well, with build instructions clear enough that a kid could follow them independently, and yet they always had the potential to work better, or in a different way, with some overall easy-to-implement ideas that kids can dream up. 

In this way, rather than each contraption being the end goal, it's more the starting point (it reminded me quite a lot of the time the kids made paper roller coasters, actually!). A kid uses her fine-motor skills and ability to follow directions to create an instrument upon which her own research, ideas, refinements, and tinkering do the work to teach her the physics, math, and engineering concepts hidden within each contraption.

And if you end up with a ballpoint pen that's turned into a projectile, all the better!

P.S. Want to hear more about paper roller coasters and paint stirrer crossbows? Follow my Craft Knife Facebook page for more projectile adventures as they happen!

Sunday, May 24, 2020

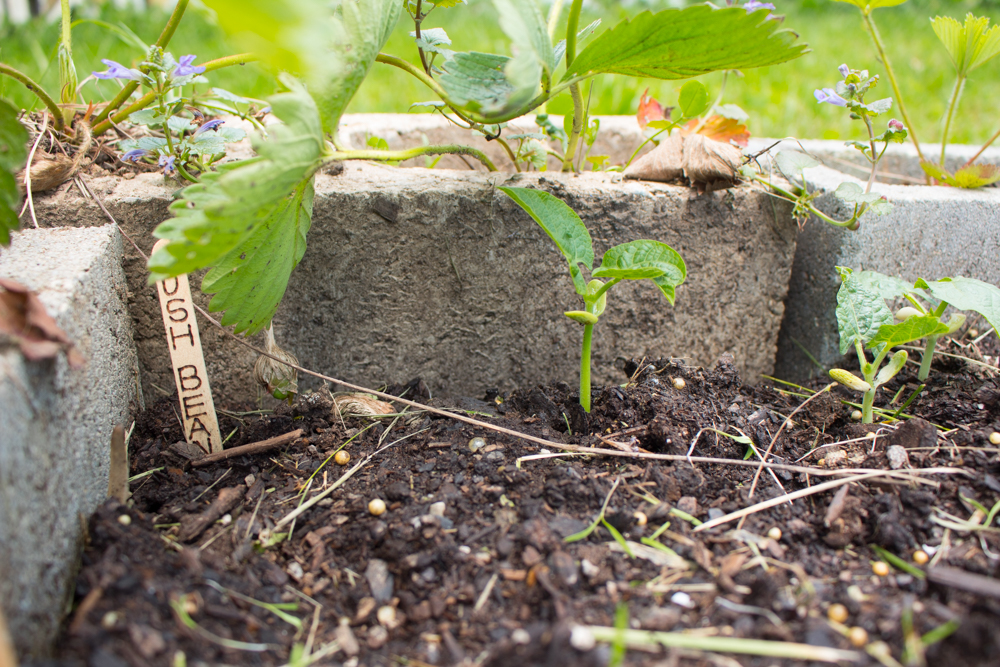
Wood-Burned Popsicle Stick Plant Markers


Our spring is so rainy, and our property so much wants to be a marsh, that the opportunities to actually get out and get seeds into the dirt during that precious getting-seeds-into-the-dirt window are few and far between, and you have to jump on them when they appear.

Like, you're just looking out the window, minding your own business, and you're all, "Oh, sun! Hey, there was some sun yesterday, too, so maybe if I go out in the yard I'll only sink up to my ankles in mud, not my thighs! I should go plant ALL THE THINGS!!!"

That's how, a couple of weekends ago, I ended up in a frenzy of planting all the things (not ALL the things, because we weren't far enough from the last frost to plant the sunflower seeds, but definitely all the OTHER things!), and I discovered that I needed some plant markers, stat!

I don't expect these popsicle stick plant makers to last beyond this season, because popsicle sticks aren't terribly hardy, but they turned out to be exactly what I needed at the moment I was in need:


I'm moving most of my garden plots around AGAIN, so since these popsicle sticks take just a couple of minutes to wood burn, it was easy for me to be all, "Okay... I think I'll try the radishes here this year and then the carrots can go here and, why not, how about I stick another row of radishes behind them," and then pop inside and quickly make the markers and put them in the ground before I forgot which was which and what I put where:


I already have a nice, bark-free stick saved up from a recent hike in our woods to wood burn something a little nicer for the perennials, but honestly, I'll probably just throw those radish and carrot markers in the fire pit when I'm through with them...

... because they clearly can't go back in the same garden plot next year, as Spots would rather sleep in it. Le SIGH!!!

This sage is from a pack of old-ish seeds that I found. I'm SUPER excited that it's growing!

I move this pot of catnip to a new hiding spot every time a cat finds it, because otherwise they'll eat it to the ground and then they won't have anymore catnip!


I'm excited about my little garden this year, because this is probably the first year since I've gardened that I won't be going away at all, and therefore I can dote on it all summer long. No chance of coming home after two weeks to a half-overgrown, half-dead, totally weedy plot that's been invaded by every rabbit within two miles!

I mean, I'd rather have the big trip that I planned with my Girl Scout troop and a ratty garden, but at least I get carrots and radishes and tomatoes and basil along with my miserable frustration and disappointment.

Wednesday, April 29, 2020

A DIY Binomial Cube/Trinomial Cube Manipulative


If you've figured out that you can make a manipulative to literally represent (a + b + c)^2, then it's not a big stretch to figure out that you can also make a manipulative to literally represent (a + b + c)^3.

One is a literal square. The other is a literal cube!

I made this DIY trinomial cube to match faces with my DIY trinomial square. This means that it's also set to a 1" standard, NOT a 1 cm standard as are most of my other DIY math manipulatives. But since it was soooooo much easier to find 1", 1.5", and 2" blocks than it was to find 1 cm, 1.5 cm, and 2 cm blocks, it also means that I could take some major shortcuts on this build and save myself a lot of time gluing teeny-tiny wooden blocks together.

I'll take the shortcut every time!

The math isn't exactly tricky on this, but there's a lot of it, and a lot of moving parts, so bear with me.

The trinomial cube has three layers. Layer A is a trinomial square in which every prism has Height a. For my project, a = 1".

Layer B is a trinomial square in which every prism has Height b. For my project, b = 1.5".

Layer C is a trinomial square in which every prism has Height c. For my project, c = 2".

The base block for each layer is a wooden cube that I purchased from Casey's Wood Products:

From left to right, that's a 2" cube, a 1.5" cube, and a 1" cube.

Let's go back to Layer A. We already know that every prism in Layer A will have a height of 1". The cube in Layer A is a^3, with a measurement of 1" x 1" x 1". This is nothing but a 1" wooden block, with no extra pieces added to it. As part of this layer you're also going to have a piece that's b^2, and a piece that's c^2, each with a height of 1", and the prisms that combine the measurements of ab, ac, and bc, each with a height of 1"

For every prism in this layer, you can start with a 1" wooden block, and glue on either .5" wooden blocks or 1" wooden blocks to make the correct sizes.

Here are all the prisms for Layer A:
  • a^3 (1" x 1" x 1"). This is a 1" wooden block.
  • ab^2 (1.5" x 1.5" x 1"). This is a 1" wooden block plus 10 .5" wooden blocks.
You need one ab^2 for Layer A and two ab^2 for Layer B.
  • ac^2 (2" x 2" x 1"). This is four 1" wooden blocks.
You need one ac^2 for Layer A and two ac^2 for Layer C.
  • two copies of  ba^2 (1.5" x 1" x 1"). This is a 1" wooden block plus four .5" wooden blocks.
  • two copies of ca^2 (2" x 1" x 1"). This is two 1" wooden blocks.
  • two copies of abc (1" x 1.5" x 2"). This is two 1" wooden blocks plus eight .5" wooden blocks.
You need two copies of abc for every layer, so six in total.

Every prism in Layer B will have a height of 1.5". The cube in Layer B is b^3, with a measurement of 1.5" x 1.5" x 1.5". This is nothing but a 1.5" wooden block, with no extra pieces added to it. As part of this layer you're also going to have a piece that's a^2, and a piece that's c^2, each with a height of 1.5", and the prisms that combine the measurements of ab, ac, and bc, each with a height of 1.5".

Here are all the prisms for Layer B:
  • ba^2 (1.5" x 1" x 1"). This is a 1" wooden block plus four .5" wooden blocks.
You need two ba^2 for Layer A and one ba^2 for Layer B.
  • b^3 (1.5" x 1.5" x 1.5"). This is a 1.5" wooden block.
  • bc^2 (1.5" x 2" x 2"). This is a 1.5" wooden block plus twenty-one .5" wooden blocks.
You need one bc^2 in Layer B and two bc^2 in Layer C.
  • two copies of ab^2 (1.5" x 1.5" x 1"). This is a 1" wooden block plus 10 .5" wooden blocks.
  • two copies of abc (1" x 1.5" x 2"). This is two 1" wooden blocks plus eight .5" wooden blocks.
  • two copies of cb^2 (2" x 1.5" x 1.5"). This is a 1.5" wooden block plus nine .5" wooden blocks.
You need two cb^2 for Layer B and one cb^2 for Layer C.

Every prism in Layer C will have a height of 2". The cube in Layer C is c^3, with a measurement of 2" x 2" x 2". This is nothing but a 2" wooden block, with no extra pieces added to it. As part of this layer you're also going to have a piece that's a^2, and a piece that's b^2, each with a height of 2", and the prisms that combine the measurements of ab, ac, and bc, each with a height of 2".

Here are all the prisms for Layer C:
  • ca^2 (2" x 1" x 1"). This is two 1" wooden blocks.
You need two ca^2 for Layer A and one ca^2 for Layer B.
  • cb^2 (2" x 1.5" x 1.5"). This is a 1.5" wooden block plus nine .5" wooden blocks.
  • c^3 (2" x 2" x 2"). This is a 2" wooden block.
  • two copies of abc (1" x 1.5" x 2"). This is two 1" wooden blocks plus eight .5" wooden blocks.
  • two copies of ac^2 (1" x 2" x 2"). This is four 1" wooden blocks.
  • two copies of bc^2 (1.5" x 2" x 2"). This is a 1.5" wooden block plus twenty-one .5" wooden blocks.
I painted these prisms the same way I painted the trinomial square prisms, except for the cube, every face will be painted. All the 1"^2 faces are yellow, the 1"x1.5" faces are green--


--the 1.5"^2 faces are blue--


--the 1"x 2" faces are orange, the 1.5" x 2" faces are purple, and the 2"^2 faces are red:


Some prisms in different layers are identical, so here are the total number of prisms by type that I needed:
  • one a^3 (1" x 1" x 1"). This is a 1" wooden block.
  • one b^3 (1.5" x 1.5" x 1.5"). This is a 1.5" wooden block.
  • one c^3 (2" x 2" x 2"). This is a 2" wooden block.
Here's a^3, b^3, and c^3.
  • three ba^2 (1.5" x 1" x 1"). This is a 1" wooden block plus four .5" wooden blocks.
  • three ca^2 (2" x 1" x 1"). This is two 1" wooden blocks.
  • three ab^2 (1.5" x 1.5" x 1"). This is a 1" wooden block plus 10 .5" wooden blocks.
You need one ab^2 for Layer A and two ab^2 for Layer B.
  • six abc (1" x 1.5" x 2"). This is two 1" wooden blocks plus eight .5" wooden blocks.
you need two abc prisms for each layer.
There are a lot of abc blocks, so thankfully Spots was willing to help me photograph them!


  • three cb^2 (2" x 1.5" x 1.5"). This is a 1.5" wooden block plus nine .5" wooden blocks.
three cb^2
  • three ac^2 (1" x 2" x 2"). This is four 1" wooden blocks.
three ac^2
  • three bc^2 (1.5" x 2" x 2"). This is a 1.5" wooden block plus twenty-one .5" wooden blocks.
three bc^2
 Spots is sorry that she knocked over my blocks, so here's a blep to make up for it:


And also a boop for good measure:


 And here's what it looks like when it's all finished!

LAYER A


LAYER B


LAYER C


Spots is still not helping...


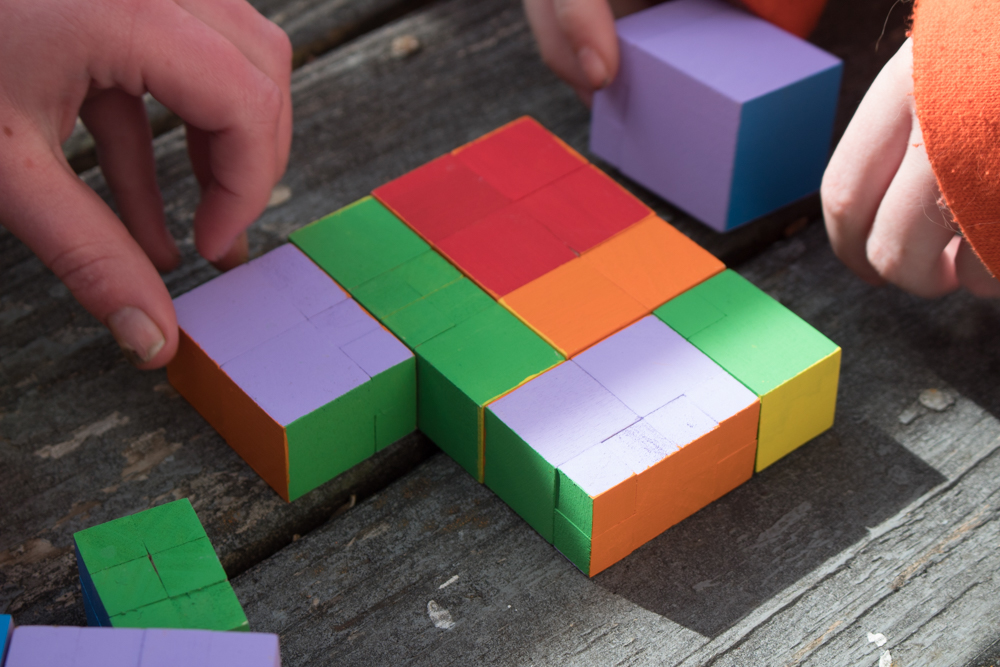
The kids wandered over as I was finishing photographing the cube (meaning that now I had two teenagers AND a cat helping me...), so I told them this was a puzzle that I'd just finished building and invited them to see if they could put it together:


They didn't notice that it was a pattern, at first, and so made some unworkable choices:


Eventually, though, a light bulb came on...


And behold! It's laid out unusually, but it's our trinomial cube!


Here's the Montessori setup for the binomial and trinomial cubes. They're normally given to small children to work as a puzzle, which is a great way to make that higher level math familiar and not scary at all when they come to it later.

And here are a couple more references, if you want to plan a lesson around the binomial or trinomial cube:

Want to see what other mischief we (and the cats) manage to get up to with our brand-new DIY trinomial cube? Check out my Craft Knife Facebook page for updates!