Showing posts with label crafting. Show all posts

Saturday, October 23, 2021

How We Refinished This Thrifted Wooden Shield

 This tutorial was originally published on Crafting a Green World back in 2016.

Some things you just cannot pass by, such as a great toy hiding underneath a gross one. 

 On a recent trip to Goodwill, my kid showed me this wooden shield. It was finely crafted, made from a solid piece of wood with sturdy straps on the back, but man, it was a mess. It looked as if it had been given to a kid to paint, and then that kid had painted one hundred thousand layers of muddy paint on it.

 I am all about process-oriented art, my friends, but when it's done on a great toy, an heirloom quality wooden one that some other kid would be absolutely thrilled to have?  It bummed me out to look at it.

 So even though the kid is probably a wee bit too old for it, I told her we could buy it. At a buck, the price was for sure right, but also, I knew that very few people were going to look at that gross toy in that Goodwill and see what I saw: a great toy that just needed some sweat equity and some TLC. 

  Step one: sand that baby down! I made the kid do some of the sanding with our trusty palm sander, but I took over when she got tired of it, because it was a big, tedious job. 

Friends, there were a LOT of layers of paint on that shield!  

Hiding way, way, at the bottom was also a printed outline of a two-headed dragon, probably what the child was intended to color. My older kid would have loooooooved to color a shield with a two-headed dragon on it, but alas, this dragon had one hundred thousand layers of muddy paint on it, so it got sanded down with all the rest. 

 To do a really bang-up job, you could use sandpaper with progressively finer grit after you'd sanded all of that paint off, and end up with a shield face that was as smooth as butter. I didn't bother going too smooth, though, because I knew that the techniques we were going to use to refinish the shield wouldn't require it. 

  Step two: base coat. If it had been up to me, I would have painted a nice design on top of the bare wood, then sealed everything, leaving some natural wood to show and be pretty. This is my kid's shield, however, and she likes things to shine; she spray painted a base coat of gold on top of the bare wood.

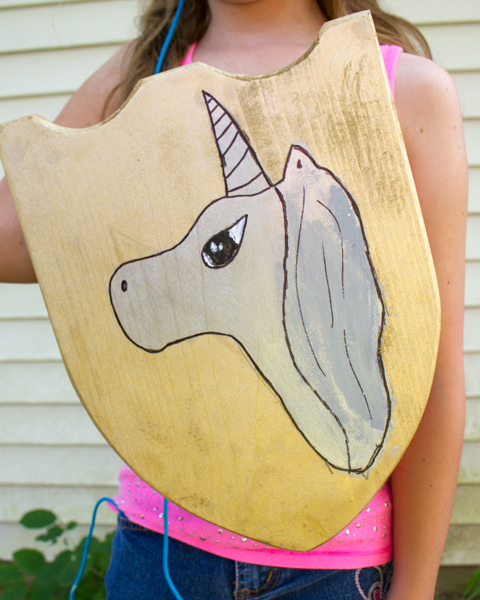
  Step three: draw a design. My kid worked on this for a while, because first she drew a bird, then decided that she didn't like it, so erased the entire thing and drew a unicorn. I had her draw her design in pencil so that she could erase it, but if that didn't work, it wouldn't have been a big deal to lightly sand the shield, repaint the base coat, and go again.  

After she was happy with the penciled design, she went over the pencil with black Sharpie to give her a better outline to color in. 

  Step four: paint the design. I gave my kid our nice artist's acrylics to use when she painted in all the colors on her unicorn. Craft acrylics are a good substitute, but artist's acrylics are thicker, and I think they're better for details and smaller projects.  

After she'd finished painting, she went back over the Sharpie lines, to cover any paint that had gotten out of the lines. The finished result looks neat and tidy. 

  Step five: seal the shield. This step isn't completely necessary, but the shield will last longer and hold up better to hard play if you do. I didn't want any of my kid's beautiful unicorn to chip off, so I sealed it with a clear sealant. 

 My kid and I are very pleased with the finished product--it's a great toy now, and is one hundred percent worth the buck that I paid for it. The wooden shield looks a million times better, will hold up for all kinds of pretend play and dress-up, and it's so lovely now, decorated with my kid's artwork, that I can certainly see it being a keepsake for her after she's grown.

 I mean, come one--she painted a unicorn on it. Can you get any more ten-year-old girl than that?


Saturday, October 9, 2021

Make a Folder from a Cardboard Record Album Cover

This tutorial was originally published on Crafting a Green World in 2016.

You're going to have the coolest school supplies on the planet when you make yourself an upcycled folder from a cardboard record album cover.  

Cardboard record album covers are perfect for this project--they're a little sturdier than your regular dime a dozen cardstock folders (which is a good thing!), but still light and easy to carry, and their prominent graphics both recall the look of your favorite themed folders and are unique to your own old-school interests. 

Seriously, where else on the planet am I going to find a Simon and Garfunkel folder for myself? 

 Tip: To find cardboard record album covers to upcycle, check out yard sales and thrift stores. People barely know how to properly store records anymore, which means that a lot of the ones that you can pick up on the cheap have been mistreated and are now completely unplayable. Unplayable records are records ripe for upcycling! 

How to Make a Folder from an Album Cover

You will need: 

  cardboard record album cover. You'll need one entire record album cover, as well as one additional piece of cardboard of the same dimensions. Two record sets will provide the necessary cardboard, or you can utilize part of another record album cover. 
  x-acto knife and self-healing cutting matWhile cutting the cardboard to make one of these folders, I sliced a gigantic piece of flesh almost completely off of my index finger. I then proceeded to half pass out in the middle of the floor, bleeding profusely, while my two children hovered over me, horrified, and repeatedly asked me what to do.  It's important to make memories with your children, Friends! 
  duct tapeDuct tape isn't an eco-friendly craft supply, but it IS the best supply for the job here. You're also not going to be using a ton of it, and the folders that you make are sturdy enough that they should last for a super long time, so I'm comfortable with it. If you're not, play around with perhaps stitching or lacing up your folders, and then tell me all about it in the Comments below!  

1. Measure and cut your cardboard record album cover. For this folder, you will be using both the front and back of one cardboard record album cover, keeping them attached on the left side to form the folder's natural fold. The height of the record album cover, 12", is perfect for a folder. 


To get the correct length, 9.5", cut the excess 2.5" away from the right side of the cover. Watch your fingers!!! 

 Slit open the top and bottom of the record album cover, leaving the left side attached. 

  2. Measure and cut the upcycled folder pockets. From a second piece of cardboard, measure and cut two rectangles with the dimensions "9.25 x 5". Notice that the length of the cardboard is slightly less than that of each folder half--this will decrease bulk at the fold. 

The height of each pocket is up to your discretion, although 4"-5" looks proportionate and will do a good job holding your papers. 


  3. Tape the hinge of the upcycled folder. Measure out a piece of duct tape that's a little longer than the height of the folder, then cut it in half lengthwise--you'll have the easiest time if you use duct tape scissors (I own this pair). Use one of the halves to cover and strengthen the folder's hinge.  

After you've folded the duct tape to cover both sides of the hinge, trim off the excess at each end. 


  4. Place and tape the pockets. Turn the folder over and place the cardboard pockets on each side, lined up with both the bottom and outside edges. Use the second half of duct tape to cover the inside hinge, catching both cardboard pockets.  

Overlap or trim off any excess tape at each end. 


  5. Tape all the other edges. You can now cover the perimeter of the folder with duct tape, again measuring out the correct length for a side and cutting it into two lengthwise.  


Fold each piece of tape under to cover both the outside and inside edges of the folder, and don't forget to make sure that the tape catches the edges of the cardboard pockets, too. Trim excess tape after you've taped each side.  


These folders really are SUPER sturdy, and will stand up well to being tossed into a backpack and used all year. And next school year, you can use them again!

Saturday, October 2, 2021

Make a Cardboard Record Album Cover and Duct Tape Bookmark

 This tutorial was originally published on Crafting a Green World in 2016.

If you need something a lot sturdier than plain paper, but you still want to craft with some upcycled materials, then this cardboard record album cover and duct tape bookmark is for you! 

 The vintage cardboard record album cover, taken from a damaged record, makes an awesome front for your bookmark, while the duct tape strengthens the entire thing and covers up the back of the bookmark, concealing any stains or rips or other flaws. 

 Got a favorite record album cover that you've been wanting to upcycle? Here's how to make a cardboard and duct tape bookmark for yourself! 

 You will need: 

  vintage cardboard record album cover. Take this from a record that's no longer playable, and do something else awesome with the record

  duct tapeIt's not an eco-friendly crafting supply, but when used in moderation, it's SUPER fun! Check out the time that the kids and I made duct tape wallets!

  hole punchYou can use any size, although I think one that's just slightly wider than the diameter of your yarn looks better than one that's really wide. 

  yarn or embroidery floss. Choose a color that matches your bookmark.  

1. Cut out your bookmark. Using a favorite bookmark as a template, trace a bookmark outline onto a scrap of cardboard record album cover (these are the scraps leftover from my upcycled record album cover folder project), then cut it out. 

  2. Back with duct tape. I LOVE our duct tape in novelty colors, and I have a pretty great time matching cute duct tape colors to stuff. For the most eco-friendly project, make the bookmark no wider than your roll of duct tape.  

3. Cut the duct tape away from the bookmark. If you have duct tape scissors, this will be MUCH easier to do. 

  4. Add the tassel. Punch a hole at the top center of the bookmark, then cut off a length of yarn or embroidery floss that's about double the length of the bookmark. Thread it through the hole and tie a square knot.  

This cardboard and duct tape bookmark would make a pretty cool present when presented along with a brand-new book, and an especially cool present if you can manage to make it from someone's favorite album.

Saturday, September 18, 2021

Make a Treasure in a Bottle Charm

This tutorial was originally published on Crafting a Green World in 2016.

If you've got something small that you want to show off, but don't want to get damaged, keep it safe AND on display. Make a treasure in a bottle charm out of it! 

 My kids and I have done this craft before with lots of little treasures, but on this particular occasion, we are going to make a treasure in a bottle charm or two out of some small fossilized shark teeth that we collected ourselves. We love fossils, and we love sharks, AND we love things that we do ourselves, so there's no way that we weren't going to show these beauties off!

Make a Treasure in a Bottle Charm

This project is a little unusual for me, as you do need a couple of special supplies that you likely can't upcycle or find in nature, so don't be afraid to spend a little time shopping around. 

  very small glass bottleI prefer a real glass bottle--not plastic!--with a real cork. You may have to look around for this, as a lot of the jewelry findings that you'll come across will be plastic.

  glycerin or sand. There are a couple of different ways to do this project, one with glycerin and one with sand. Beach sand will work unless you want to add water or oil to make the scene look like an ocean in a bottle; if you want a mini ocean, I have learned--from experience!--that you really need to use clean craft sand, not beach sand, alas. 

  treasures. We used a shark tooth plus a couple of tiny shells for each bottle. 

  eye pinIf you're going to keep your treasure in a bottle on a shelf, you won't need an eye pin, but if you want it as a charm or pendant, you'll need this plus a pair of jewelry wire cutters. 

  epoxy glue. My favorite is E6000.

 1. Thoroughly clean the glass bottle. You want the opening, especially, to be squeaky clean, as that's where the glue will adhere, but you'd be surprised how much dust can be found on the inside of a brand-new, unopened bottle, sigh. I use rubbing alcohol on a q-tip, but if you don't like to use rubbing alcohol, vinegar will also work. 


  2. Add your treasure. The most frustrating thing for my kids is the fact that the mouths of the bottles are so small that not every treasure will fit inside. If you're going to suspend your treasure in a bottle, you don't really want one that's very large, anyway, so just keep this fact in mind for the purposes of expectation management. 

  3. Fill the bottle up to the neck with glycerin. I use an eye dropper, and try (mostly in vain) to keep the glycerin from touching the inside of the neck. If you do drip--and you will!--wipe it down again with your cleaning solution. 

 If you've got shells in your bottle, it's a good idea to let the bottle rest for a day before the next step. The little air pockets in the shells will gradually work their way out, and if you don't want bubbles in your bottle forever, you want them to do this before it's sealed. 

  4. Glue the cork on. Put a small amount of epoxy glue around the outside of the cork, then push it into the bottle. 


  5. Cut an eye pin to fit. You don't want it to poke out of the bottom of your cork, so trim it with wire cutters. 

 6. Insert the eye pin. Again, put a small amount of epoxy glue around the outside of the eye pin, then push it into the center of the bottle. 


 This treasure in a bottle makes a lovely pendant for a necklace, but also a beautiful Christmas ornament, especially for a tabletop tree. I think it looks equally pretty, though, just sitting in a shadow box, ready to be admired by all who walk by! 

Sunday, September 12, 2021

How to Make a Teacup Candle

This tutorial was originally published on Crafting a Green World in 2016.

If made correctly, a teacup candle is beautiful, useful, and endlessly refillable. You'll love its warm light and gentle scent, and you'll enjoy your teacup candle far more than you would a boring old store-bought container candle. 

 You will need: 

  beeswax or soy wax. I use beeswax, but soy wax is an excellent substitute. Just don't use paraffin! 

  wax-only crock pot or double boiler and repurposed glass jar. I thrifted a small crock pot years ago to use just for my beeswax crafts, and it's still going strong! As an alternate, you can use a double boiler and melt your solid wax in any old glass jar inside of it. 

  vintage teacups. Use only teacups that have no visible cracks or hairline cracks in the body of the cup; chips at the rim and broken handles should be okay, but use your own judgment. 

  hot glue gun and glueYou could use epoxy glue if you don't have a hot glue gun, but hot glue really is the best choice here. 

  pencil, tape, and clothespins. You'll use these only to hold your wicking in place, so feel free to find substitutions. 

  wicking. You can buy wicking constructed specifically for container candles, or use your own stash wicking that's appropriate for the diameter of the candle that you're making, or for a smaller diameter candle (this is called underwicking). 

 1. Examine your teacup for flaws. Your teacup should be able to withstand the candle burning, but an older teacup that has flaws might not. Check your teacup carefully for any cracks or crazed glazing; a couple of chips on the rim or a broken handle shouldn't matter, but any flaws on the body of the cup might affect its structural integrity. 

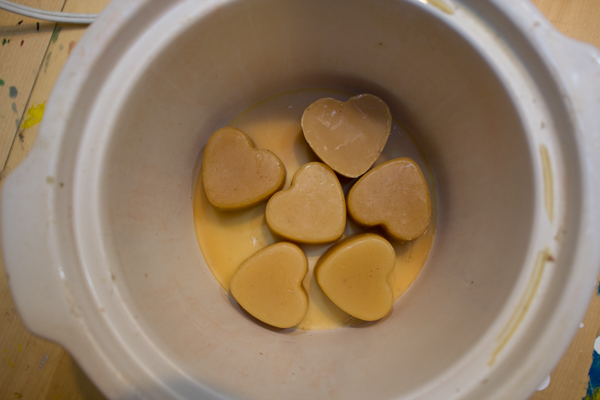
  2. Melt your wax. Using your crock pot or double boiler, melt enough solid wax to fill your teacup most of the way. I pour my leftover beeswax into novelty silicon trays and then store it in a glass jar, so that's why my wax is adorable. 

  3. Measure and glue down the wicking. Measure out a length of wicking about twice the depth of your teacup, then dispense a dollop of hot glue in the bottom center of the teacup and press one end of the wicking into it. 

 4. Brace the wicking. Tape the other end of the wicking to a pencil or chopstick, then wrap the wicking around it until it's nice and straight and taut. To keep it that way, I like to pin a clothespin to each end of the pencil, then brace them against something--here, I'm using my scissors--to keep the entire contraption from shifting.


5. Pour in the wax. Using a ladle, carefully pour melted wax into the teacup, trying your mightiest to keep it from sloshing against the sides of the cup.

To keep the wax from shrinking away from the sides of the cup as it hardens, pour about 1/3 of the wax into the teacup, let it set, then another 1/3, let it set, and then the last 1/3.

6. Trim the wick. Cut the wick just above the top of the wax, and reserve the excess wick for another project.


Teacup candles make excellent handmade gifts, especially for those people who you don't otherwise know what to give--teachers, hostesses, your great aunt, etc.

Or, you know, yourself. You get to have a teacup candle, too!

Saturday, September 4, 2021

Make Two Matching Skirts from Two Yards of Fabric

This tutorial was originally published on Crafting a Green World in 2016. 

My daughter wanted to figure out how to make matching skirts for her and a friend. With just two yards of fabric, you can do this, too! 

 My younger kid loves to make handmade birthday gifts for her friends, and in the lead-up to a recent party, she came up with her most ambitious idea yet: handmade matching skirts for herself and her friend. Skirts can actually be pretty easy to sew, so thankfully this project was less ambitious than some of her handmade gift ideas. And ever since I sewed my first one-seam skirt from that awesome Hobbit fabric, I have known exactly how to do this. 

 With just 2 yards of fabric, you can do this, too. These matching skirts will fit everyone from middle-sized kids (I'd say about eight years old on), to some adults, and if you don't have a ten-year-old helper, then they're both super quick and super easy to make. 

Here's how to make matching skirts!

How to Make Matching Skirts

You will need: 

  2 yards of fabric. Even though I have an embarrassing amount of fabric in my stash, a lot of it in lengths over 2 yards (shame on me!), I nevertheless let my child pick out yet more fabric just for these skirts. At least I used the entire amount to make them, so I wasn't adding to my stash... 

 Pro Tip: If you're sewing only for the eight-to-twelve-year-old set, you could get away with using only 1.5, or even just one, yard of fabric for these skirts. You want a length that's at least double your kid's waist measurement, but if you don't care if the skirt fits her forever, then save your fabric! 

  1/2" elastic to match 2 waist measurements. Since I pretty much am always sewing for some growing girl or another, I always cut my elastic to their exact waist measurement; sewing the elastic together will make it about an inch smaller, which is a little loose, but all the kid is going to do is grow. If you're sewing for an adult, you may want to make your own elastic measurement a little more conservative. 

  needle, thread, cutting tools, etc. You know what you need! 


 1. Iron and cut the fabric. Iron the fabric, then fold it in half lengthwise and iron again to crease the fold. Cut along the crease, and you'll be left with two lengths of fabric that are 2 yards long by approximately 22.5 inches wide. 

  2. Sew the side seam of each skirt. Just as with my one-seam skirt, you now only have to sew that one side seam for each skirt, then hem and add a waistband casing to each. For the ultimate beginner project, you can sew a simple side seam. A French seam, however, is only a little more difficult and is much neater and stronger. That's what we used for these skirts. 


 3. Hem the bottom of each skirt. Fold up the raw bottom edge of each skirt and iron it, then fold up again to encase that raw edge, iron again, and pin and sew. 


 4. Make the waistband casing for each skirt. Again, fold up the raw top edge of each skirt, iron to crease, then fold up again, this time by about 1". Iron to crease, pin, and sew close to that folded edge, leaving a 2" gap open for inserting the waistband. 


 Pro tip: To make my waistbands look neater, I like to sew another line of stitching along the top of the casing as well as the bottom. 

 5. Insert the waistband. Put a safety pin into one end of the elastic, then use that to help you feed the elastic all the way through the waistband. Don't let the tailing end of the elastic escape into the waistband casing, and DON'T twist the elastic! 


  6. Finish the waistband. Overlap the two ends of elastic and sew them together, then sew closed the gap in the waistband. 

 These skirts make lovely matching gifts for sisters, best friends, or mothers and daughters. For extra cutesy fun, buy a couple of plain skirts and stencil something else mitchy-matchy on them! 

Saturday, August 28, 2021

How to Make a Brown Paper Bag Journal

This tutorial was originally published on Crafting a Green World in 2016.

A brown paper bag journal is quick, easy, and makes a great writing and drawing surface! Grab a bag from the recycling bin and follow the easy instructions. 

 If you need a quick and easy notebook, the answer is no farther than the local grocery store on the day that you forget your cloth bags--this brown paper bag journal project is quick, easy, and makes a great writing and drawing surface! 

 This brown paper bag journal is good and sturdy, so you can take it out on hikes or throw it in your backpack for when inspiration strikes. It's about as unpretentious as they come, though, so you don't have to worry about messing up your "nice" journals (which I hope you don't--that's what they're there for!). The brown paper takes a variety of media surprisingly well, and my family has found them to be especially great for themed notebooks and journals for specific projects--my kids made the ones in these photos to use as current event journals for the coming week. 

 Here's what you need to make a brown paper bag journal for yourself!

Brown Paper Bag Journal


two brown paper bags. This will make a medium-sized notebook of sixteen pages, although you can easily add a lot more pages if you use more bags. You may also have to use more bags if you don't want to include any of the store's graphics in your journal, but we just decoupage over it. 
  four clothespins. Or clamps, or paperclips. 
  embroidery thread and needle. This is about the perfect weight for the binding of these books--thread would be too thin, and twine too thick. 


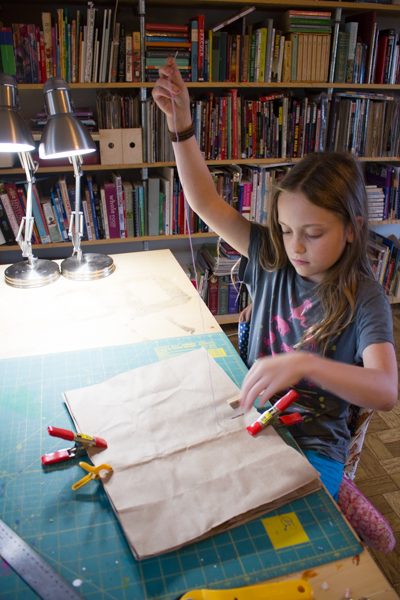
 1. Cut and trim your brown paper bags. You'll be using the front and back of each brown paper bag for this project--recycle or upcycle the sides and bottom. Cut out the front and back of each bag, then stack the sheets--we use four--and trim them to a uniform size. 


  2. Punch holes down the center of the sheets. With the sheets still stacked, find the exact center, lengthwise, and mark the line with your metal ruler. You will now need to poke holes down the center of your pages, using even spacing. Use your needle or an awl to make the holes. VERY IMPORTANT: You MUST have an odd number of holes! Hint: If the width of the pages is an even number (ours are around 16"), you can poke holes every inch and have an odd number. 


 3. Sew the spine. Use clothespins to clamp the pages together at top and bottom, just on each side of your column of holes. 


Thread a length of embroidery floss that's longer than double the width of your pages, and knot the end. Sew in one hole and out the next all the way up the pages,  and then all the way back down. 


 If you poked an odd number of holes like I told you to, you'll find that sewing back down will overlap the opposite sides of where you sewed up, making an unbroken line of stitching on both sides of the pages. 


 4. Knot the thread. When you get back to your starting point, knot the embroidery floss, then trim it and fold the book in half at the stitching. 

 This brown paper bag journal is a super simple DIY for the artist or writer in your family, especially if you embellish the front and back cover yourself. Kids can also make these in school or club meetings, and you can even ask parents to bring in the bags for the project--you know everyone forgets their cloth grocery bags every now and then!

Saturday, August 21, 2021

Easy Handmade Gift: Matted Photo in a Thrifted Frame

This tutorial was originally published on Crafting a Green World in 2016.

 Need a gift that's easy to make but still personal? A matted photo that you make yourself can be just the thing! 

You use a photo or artwork that lets your recipients know that you're thinking only of them, and yet the actual matting and framing of the photo takes less than an hour and costs less than five bucks. 

 Key to this project is the thrifted frame. If you've never gone thrifting for frames, I highly recommend it! Many people, when they get tired of what's inside the frame, just donate the entire piece, frame and all. Our local Goodwill stores have monthly 50%-off storewide sales, and whenever I go to them, I always look through their frames and take home the ones that I like. I generally repaint them for use in my own house, but this gold one that I pulled out of my stash (with the price tag on the back: $1.50!), even though I'd have painted it navy or slate for myself, will actually go perfectly well as-is in the recipient's home. That's one fewer step for me! 

 If you do want to refinish your frame, check out my round-up of the best methods. Scroll down to the paint and fabric tute to see how I refinish my frames 99% of the time. 

 The next thing that you need is a lovely paper to cover the thrifted frame's existing mat board. You're not making a piece that has to look perfect in a thousand years, so I don't worry overly much about the acidity of the papers that I use. This is a gift for your grandma or your girlfriend, not the Queen of England. 

In my own house, I have frames covered in dictionary pages, comic book pages, and wallpaper samples, but for this particular frame, I'm using handmade paper from a little book that has a looooong story, full of drama, from my wedding. So much drama that some of the pages ended up getting torn out. Ask me about it in the Comments and I'll tell you. Buy us a pitcher of margaritas, and I'll tell you some even worse stories of my wedding drama! 

 I decoupaged the handmade paper to the mat board, tearing the paper into strips and overlapping the edges into straight lines to make the piece look somewhat orderly. The handmade paper is neutral-toned, as well, so it doesn't distract from the photo. 

To attach the paper to the mat board, I just used double-sided tape. Now, tape is something that you DO want to be picky about, because a lot of tape is horrible and will begin to discolor your work within months, so it's best to have handy some kind of tape that says it's "document-friendly." 

 If you've got that document-friendly tape, you can also use it to attach the photo to the decoupaged mat board, but if you're worried, just use photo corners. 

That was such a beautiful road trip!

 Honestly, the biggest pain in the butt when using a thrifted frame is cleaning that glass! These frames have sat in someone's house for decades, sometimes, and I don't know what all they have on them, but it can be gross. I use straight vinegar in a spray bottle, scrubbed off with crumpled-up newspaper (this is also how I clean windows and mirrors), repeated until whatever gunk is all over the glass finally comes off. 

 The last thing that you have to do is simply re-assemble the frame, making sure that you have the hanger on the back correct. 

Wrap it up, add a pretty bow, and wait for the squeals of happiness when your thoughtful gift is opened!

Saturday, August 14, 2021

Scrapbook Paper Stationery Sets

This tutorial was originally posted on Crafting a Green World in 2016. 

 Whether you need a quick and easy handmade gift or you would rather not hit up the store just so you can send some thank-you notes, you'll find that it is super simple to make your own personalized, handmade stationery, entirely from your favorite scrapbook paper. 

 You will need: 

  scrapbook paper. I'm using 8.5"x11" scrapbook paper for the stationery in these photos, and I had very little waste left over. You can also, of course, use typing paper of the same size (perhaps with children's artwork on one side?), or even wrapping paper or thin cardboard food packaging, but keep in mind that your paper needs to be sturdy enough to be mailed, and if you choose something very thick, you'll need to account for that in your measuring. 

  measuring and cutting tools. I'm using a self-healing cutting mat, clear plastic ruler, and the same rotary craft knife that I almost cut off a chunk of my left forefinger with

  glue stick. It's basic, but really is the best supply for this job. 

 1. Make custom envelopes. If you have a size in mind for your notepaper, you can make custom envelopes that will fit the notepaper perfectly. Otherwise, there are loads of good envelope templates online. The envelopes that I'm making from my 8.5"x11" scrapbook paper are 4"x6", not including the flap. 

  2. Cut down a second piece of scrapbook paper to fit the envelopes. The matching notepaper should be twice the height of your envelope, and approximately 1/4" less in width. For my own pieces of notepaper, I cut 1/2" off of the width of my scrapbook paper, and then cut the remaining piece in half, giving me two pieces of notepaper that are 5.5"x8". 

 3. Fold each piece of notepaper in half. You can stack them together and insert them into your envelope, or make a second envelope to accommodate the second piece of notepaper. 

 To address your envelopes, put a white mailing label on the front of each envelope and write on that. Alternately, fold your envelopes so that the scrapbook paper is on the inside and the white side is facing out. If you buy a book of scrapbook paper, you'll find that it includes both similar patterns in different colorways and different patterns in the same colorway; either option would make a lovely, large set of handmade stationery to give as a gift.

Saturday, August 7, 2021

DIY Mason Jar Hanging Light Fixture

This tutorial was originally published on Crafting a Green World in 2017.

 I am a hipster cliche. Because Mason jar lights? They found me. They called to me. They spoke in my ear, and I heard, "Julie! You need some lighting to go above your new handmade headboard! You could put that light... in a Mason jar!" 

 And I said, "Why, yes. Yes, I could!" 

 To be fair, it's not like I don't already have a ton of Mason jars just lying around. I mean, we drink out of them. I do actually can things, on occasion. So actually, sticking a light bulb in a Mason jar is just about the cheapest and most efficient lighting solution. I didn't have to buy a shade or drill out a tea cup bottom or whatever else the cool people are doing (I won't even Google it, lest I then want to do it, too).

 And it looks awesome!

How to Make Hanging Mason Jar Lights

Here's what we needed to make our hanging Mason jar light: 

  hanging lamp cord kitThe kind that you need will have a lip that screws off and allows you to put a lampshade on it. Most kits that are intended to be decorative and not, like, a shop light will have this, because most people don't want to hang naked bulbs from their ceiling. 
  LED Edison bulbI know you love the look of the Edison bulb. I do, too! But conventional Edison bulbs are huge energy hogs, even hotter and more inefficient than old conventional bulbs. They're so hot that I don't even know if it would be totally safe to put one in a Mason jar and then light it up. Use an LED Edison bulb and go frown at all of those hipster restaurants that don't--they're heating up our planet! 
  Mason jar. I used a new wide-mouthed pint-and-a-half Mason jar from my canning stash, and an old lid and ring from my non-canning stash. 
  shelf brackets. These are what you screw into your wall to hold a flat shelf from underneath. We found a couple of matching ones in our garage, but if we hadn't, I'd have checked our local ReStore or Freecycle. 
  tools. Obviously. The only weird tools that you'll need are things that can make a hole in a Mason jar lid. For that, my husband used a screwdriver, a hammer, and pliers, although I really wanted him to use my tin snips or even my Dremel. 


1. Make a hole in the Mason jar lid and insert the pendant light fitting. See, doesn't it look messy when you don't use tin snips or a Dremel? Of course, you're not going to actually be able to see any of those untidy bits when you've put the mounting lip in the hole-- 


 --but still! It would have been tidier if it had been done with tin snips or a Dremel.


  2. Screw everything together. Now you should be able to add the ring for the Mason jar, the socket for the light, and then screw the light into the socket and the Mason jar onto the ring. 

3. Mount the wall bracket. This can go wherever you want your light to hang from, mounted just the way that you would if you were actually going to put a shelf on it. 


 4. Hang the light. Our particular shelf bracket had a groove in the bottom that worked nicely to hide the cord, but really we just wrapped the cord around the end, adjusted it so that the Mason jar pendant light hung where we wanted it to, and then fastened the cord in place using the magic of zip ties. 

 It's not a super polished look, but we aren't a super polished people, and it meets my dual purposes of giving off enough light to read by and looking pretty great. 

 Oh, and it makes me happy.