This tutorial was originally published on Crafting a Green World in 2016.

A brown paper bag journal is quick, easy, and makes a great writing and drawing surface! Grab a bag from the recycling bin and follow the easy instructions.
If you need a quick and easy notebook, the answer is no farther than the local grocery store on the day that you forget your cloth bags--this brown paper bag journal project is quick, easy, and makes a great writing and drawing surface!
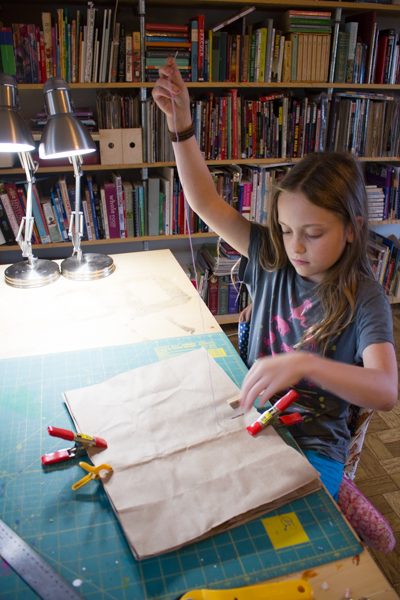
This brown paper bag journal is good and sturdy, so you can take it out on hikes or throw it in your backpack for when inspiration strikes. It's about as unpretentious as they come, though, so you don't have to worry about messing up your "nice" journals (which I hope you don't--that's what they're there for!). The brown paper takes a variety of media surprisingly well, and my family has found them to be especially great for themed notebooks and journals for specific projects--my kids made the ones in these photos to use as current event journals for the coming week.
Here's what you need to make a brown paper bag journal for yourself!
Brown Paper Bag Journal
two brown paper bags. This will make a medium-sized notebook of sixteen pages, although you can easily add a lot more pages if you use more bags. You may also have to use more bags if you don't want to include any of the store's graphics in your journal, but we just decoupage over it.
four clothespins. Or clamps, or paperclips.
embroidery thread and needle. This is about the perfect weight for the binding of these books--thread would be too thin, and twine too thick.

1. Cut and trim your brown paper bags. You'll be using the front and back of each brown paper bag for this project--recycle or upcycle the sides and bottom.
Cut out the front and back of each bag, then stack the sheets--we use four--and trim them to a uniform size.
2. Punch holes down the center of the sheets. With the sheets still stacked, find the exact center, lengthwise, and mark the line with your metal ruler. You will now need to poke holes down the center of your pages, using even spacing. Use your needle or an awl to make the holes.
VERY IMPORTANT: You MUST have an odd number of holes!
Hint: If the width of the pages is an even number (ours are around 16"), you can poke holes every inch and have an odd number.
3. Sew the spine. Use clothespins to clamp the pages together at top and bottom, just on each side of your column of holes.
Thread a length of embroidery floss that's longer than double the width of your pages, and knot the end. Sew in one hole and out the next all the way up the pages, and then all the way back down.
If you poked an odd number of holes like I told you to, you'll find that sewing back down will overlap the opposite sides of where you sewed up, making an unbroken line of stitching on both sides of the pages.
4. Knot the thread. When you get back to your starting point, knot the embroidery floss, then trim it and fold the book in half at the stitching.
This brown paper bag journal is a super simple DIY for the artist or writer in your family, especially if you embellish the front and back cover yourself. Kids can also make these in school or club meetings, and you can even ask parents to bring in the bags for the project--you know everyone forgets their cloth grocery bags every now and then!


No comments:
Post a Comment