Showing posts with label crafting for children. Show all posts

Wednesday, February 24, 2021

It Only Took Me Two Years to Make This Diagonal Denim Strip Quilt

 Because I get distracted...

I get so habitually distracted that one of my New Year tasks is to look through last year's planner and transfer all of my WIPs from the previous year to a new list in the front of my new planner. This year's WIP list holds 21 items, which... that's a lot of projects to have started and not finished...

But but BUT that list actually used to have TWENTY-THREE items, but I did finally update the kids' Girl Scout vests with their new badges and patches AND I finally made the broken dish pendant I'd been wanting.

Of course, Will's Girl Scout vest already needs another new badge sewn onto it, but whatever. Instead, let's focus on THIS awesome project that I knocked off my list this month!

Not gonna lie: I started this quilt for Syd, and this quilt for Will, AND a still-unfinished quilt for my bed two years ago, thinking that I'd give myself just loads and loads and loads of time to piddle my way through them by Christmas. I like to give everyone a cozy present on Christmas Eve, and homemade denim quilts would fit the bill just fine!

Yeah... no. I gave everyone giant fuzzy slippers instead. And THIS Christmas Eve I gave them all STORE-BOUGHT fuzzy blankets, gasp! I even had Will's quilt already completed by that time, but Syd's was still a pile of denim and flannel. 

Finally I decided that the quilts would make a cozy Valentine's Day present for the kids, so I buckled down and spent most of a day basically making Syd's quilt from start to finish:


For Will's quilt, I'd done horizontal rows, and I'd tried for an ombre effect, but I don't really love it. For Syd's quilt, I tried diagonal rows, and I love it so much that I feel a little guilty that Will's quilt isn't so good, yikes:


In case you ever come over to my house and wonder why I have literal masking tape on my literal family room floor, it's so that I can lay out a quilt whenever I want. I am literally just that classy!

And as always, back-to-front binding is THE way to go:


I am so pleased with how this quilt came out!


It's super cozy and warm, it's comfortingly heavy, it was dead easy to make because it doesn't even require batting, and because the entire top is upcycled jeans, the only costs were for the flannel backing, the thread, and the approximately one zillion jeans needles I broke sewing over those one zillion seams:


I'd say that diagonal rows are now my go-to denim quilt design, but the quilt that I'm planning for my bed is going to be a square, and I'm currently obsessed with the idea of sewing it in a log cabin design.

Maybe I'll even have it finished in time to show it to you within the next couple of years!

Saturday, December 19, 2020

How to Sew a Reversible Skirt

I originally published this tutorial on Crafting a Green World.

It's business on one side, and a party on the other!

Or in this case--it's Girl Scout khaki on one side, and pretty pink on the other!

My kiddo wanted a dressier version of her Girl Scout uniform, but I also know good and well that she is simply not going to wear a khaki skirt for any reason other than a dressy Girl Scout occasion. I'm not one to enjoy sewing something that will get little use, so yes, I made her the khaki skirt that she wanted, but I made it reversible, with some pink prints from my stash that I know she'll enjoy wearing every other day.

Want to make your own reversible skirt? It's not hard, and it's a great stash buster!

You will need:

up to 2 yards of two different fabrics. I'm afraid that I went overboard and sewed this skirt too large, but to be fair, Girl Scouts wear those khaki uniforms from the 6th grade until they graduate high school and bridge to adults. It was boring enough to pick out khaki fabric the first time--I don't want to do it every year until my kid graduates! This particular skirt used two fabrics that were 22" x 72", but I could have halved both measurements and still had a fine skirt for an eleven-year-old.

1/2" elastic

measuring and sewing supplies.

1. Measure and cut two identical skirt pieces. Each should be the desired length of skirt + 1.5" and the desired width (two to three times the wearer's waist measurement) + 1.5". To make sure that the two pieces are absolutely identical, I like to lay one on top of the other and cut them simultaneously.

2. Measure and mark the hem/waistline. You will overlap these skirt panels when you sew them together, with one skirt panel folded over the other to make the skirt's hem, and the other skirt panel folded over to make the skirt's elastic waistband casing. You will see, then, a different-colored bias hem on one skirt and a different-colored waistband on the other.

Measure and mark 1.5" from the bottom edge of the skirt panel that you'd like to use for the bottom hem, and 1.5" from the top edge of the skirt panel that you'd like to use for the elastic waistband casing.

3. Sew both skirts. Sew each skirt panel into a tube by sewing the short sides together and finishing the seams.

4. Sew the hem and waistband. Place the two skirt pieces wrong sides together, and overlap them by 1.5" inches. The skirt that will be folded over and sewn to make the bottom hem should overlap the other skirt piece by 1.5" at the bottom, and the skirt that will be folded over and sewn to make the elastic waistband casing should overlap the other skirt piece by 1.5" at the top--the marks that you made in step 2 should help you with this.

Fold the bottom hem up, crease it, then fold it again to the inside and edge stitch it, encasing the raw edge of the other skirt panel.

Turn the skirt inside out, then fold the top waistband hem up and crease it, then fold it over again and edge stitch it down, leaving an opening to insert the elastic.

Attach a safety pin to the elastic, feed it through, sew the ends together, and sew the opening in the casing closed.

And now you have a reversible skirt! You can use this method to alter the matching skirts from this tutorial, and outfit a whole troop of Girl Scouts.

Saturday, October 17, 2020

How to Remake a Puzzle

I originally published this tutorial on Crafting a Green World.

There are lots of cute ways to upcycle an old puzzle into something completely new, but what if what you'd really prefer is simply another puzzle?

I mean honestly, have you ever looked at the picture on the front of a puzzle and thought, "Huh. I could do better than that!"

Well, you absolutely can!

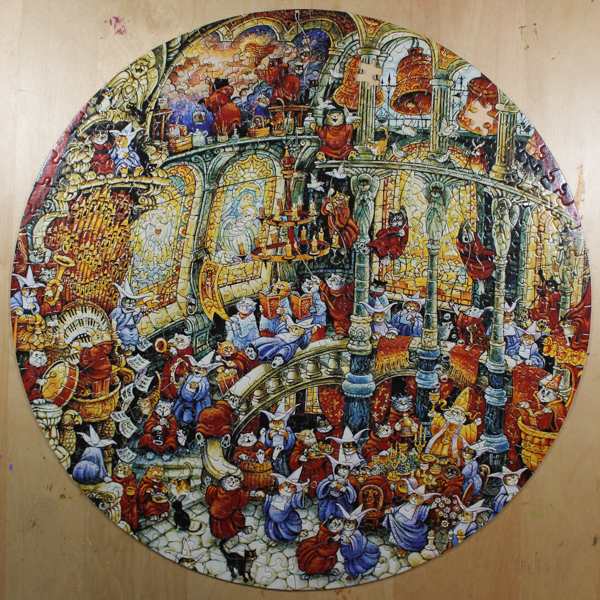
It's surprisingly easy and doesn't take a ton of artistic talent to remake a puzzle into one that's brand-new-to-you.  This is a great craft for kids or a great way to make an educational toy for a kid. Here, for instance, I've remade a very odd puzzle (I'll show you in a minute, but trust me--it's ODD!) into a puzzle of the digits of pi. What classroom wouldn't want to have that on the shelf in readiness for a rainy-day recess?

Here's how to remake a puzzle of your own!

Supplies Needed

An old puzzle to upcycle

I have a very firm Puzzle Policy, which consists of this: we buy puzzles only from thrift stores or yard sales, never spending more than a buck or two. We happily put together our puzzles, knowing that it's highly likely that there will be missing pieces. When there are, we don't care, because we still had the fun of putting together the puzzle and anyway, it only cost a couple of dollars; I'll recycle or upcycle that puzzle, then, with a clean conscience.

When the puzzle gods smile down upon us, however, it's a real treat, and then when I put the puzzle back in the box I'll securely tape it shut, tape on a note that reads "NO MISSING PIECES," and donate it to a thrift shop to move on to some other lucky soul. So even though my family loooooved putting together this very, very, VERY strange puzzle, it has two missing pieces, so recycled or upcycled it must be:

Acrylic paints and brushes

You'll be watering the paints down, so a little will go a long way.

Paint Pens

These can be pricey, but you don't have to buy a full set if you're planning on a limited color scheme. I got by using only black for this project.

Spray sealant (optional)

Aerosol sprays are the WORST, but if you feel like you have to seal your work--I would only if it's quite detailed and delicate--then you'd better use this instead of a brush-on sealant, which will go on too heavy and stick the puzzle pieces together.
Directions

1. Assemble the puzzle, turn it upside down, and make any necessary repairs. When my kids were younger and much more emotionally attached to their puzzles, I figured out how to make a pretty decent replacement for missing pieces--it's at least good enough to make the puzzle complete again, although of course you can tell the difference:

Here's my tutorial for how to repair a puzzle by recreating missing pieces. Give it a try!

2. Paint the puzzle with watered-down acrylic paint. Watercolors would work, but wouldn't be vibrant, and acrylic straight from the tube would be so thick that the puzzle pieces might stick together. Instead, use a paint palette to water down your acrylic paints, and use those to paint your puzzle.

Pro tip: to avoid the colors bleeding together, let an adjacent color dry before you paint right up next to it.

3. Add details with paint pens. Since the acrylics have been altered to behave more like watercolors, when you want to add detail to your painting, you'll want to use paint pens. These are spendy, but they're absolutely terrific for fine work, and you can add tons of detail that you'd otherwise need the tiniest paintbrush for.

After all the paint and glue has dried, the only thing left to do is work your brand-new puzzle!

As you can see, this puzzle is even more fun than working one whose only claim to fame is that you bought it from a store, and the more time that you put into it, the better it can look. I kept mine pretty plain, because my children are heathens and wouldn't appreciate it anymore if I'd spent fifteen more hours on it making it look cute.

You could add a ton more embellishments with the paint pens alone, and there's nothing to stop you from adding even more decorative elements, such as Swarovski crystals, glitter, or anything else that you fancy.

Saturday, October 3, 2020

How to Make Fabric Decoupaged Blocks

I originally published this tutorial on Crafting a Green World.

Don't let outgrown building blocks languish unloved in a back closet when there are so many beautiful ways to upcycle them!

I've been in the process of slowly upcycling my kids' old building blocks for years (I promise, there will still be more building blocks in the world when/if I have grandchildren!), and one of my favorite ways to upcycle building blocks is to turn them into holiday decorations using simple decoupage techniques.

I've already shown you how easy it is to decoupage blocks with paper, but you'll be pretty excited to know that decoupaging blocks with fabric is EVEN easier! Fabric is sturdier than paper, which means that you need fewer layers of Mod Podge to seal it, and the surface is so much more forgiving than paper, so you'll find that every Mod Podge layer looks nice and smooth, in stark contrast to all the fussing that one tends to have to do with paper decoupage.

For paper or fabric decoupage, the supplies are nearly identical. Here's what you need:

Supplies

  • Outgrown building blocks. I love the look of plain cubes, but you can decoupage any block shape.
  • Fabric, pencil, and scissors. You'll be fussy cutting your fabric to size, then trimming, if necessary.
  • Mod Podge and a foam paintbrush. Foam paintbrushes aren't as eco-friendly as natural hair brushes, but they apply the glue smoothly, and if you wash them well after each use they'll last forever.

Directions

  1. Prepare your fabric. If it's new fabric, there's no need to wash and dry it just for this project, but you should iron out any creases.
  2. Measure and cut the fabric. I like to fussy cut the fabric pieces for my decoupaged fabric blocks, so I use the block itself as my template, tracing around each side on the reverse of the fabric piece. You can do this with a pencil or piece of chalk, and if you cut INSIDE the lines that you drew, the piece will match the side of the block more closely.
  3. Glue the fabric to the block. Working on one side at a time, paint a layer of Mod Podge onto the block, carefully smooth the fabric piece onto that side, and then paint another thin layer of Mod Podge on top of the fabric. Let it dry completely before you glue another side--this isn't a hands-on time-consuming project, but it DOES take up a lot of resting time!

You might think that these cute blocks are only for decorating--and yes, they DO make super cute decorations!--but once they're sealed with Mod Podge, a kid can play with them just as they do any other blocks. I wouldn't let a kid who's still mouthing things have them, but any other kids would probably love having some fun, festive holiday elements added to their open-ended block play.

Sunday, July 5, 2020

How to Make an Upcycled Playing Card and Upholstery Sample Bunting

I originally published this tutorial on Crafting a Green World.

There's nothing like a bunting to make a festive occasion just that much more special. That's why my daughter wanted a bunting as part of the decorations for her recent Alice in Wonderland birthday party--and also, of course, she IS my daughter. It's possible that a love for buntings is expressed at the genetic level...

Knowing what I wanted to make, I sorted through my stash of potential crafting supplies that surely will be useful someday (this is also known as my "stash of trash") and hit the jackpot when I came across a partial deck of souvenir playing cards. You can't play a lot of games with a partial deck of playing cards, and you also can't recycle them--and if you're me, you apparently also can't bear the thought of simply tossing them into the waste stream, not when you might want to make a bunting out of them six years later!

The faces of the playing cards would work as-is in the bunting because playing cards are on-theme for Alice in Wonderland, but as for the backs... well, my daughter for some reason didn't want scenes from Yellowstone National Park in the 1980s decorating her party. Silly girl!

Instead, I turned to another super useful piece of trash, a giant book full of tacky old upholstery samples. These sample books are notorious for being snapped up at thrift stores by avid crafters with stars in their eyes, who then take them home and never, ever figure out a way to separate the samples from their glued-on paper backings.

There isn't a way, Friends. Stop breaking your hearts on the effort.

So you can't sew those upholstery samples into anything, because they have thick paper backings glued onto them (you'll never get that glue off! Stop trying!). What you CAN do, however, is cut and glue them, stencil and paint on them, and embellish the snot out of them. That's what my daughter and I did to make her upcycled playing card and upholstery sample bunting, and here's how we did it!

Directions

1. Cut Bunting Pieces Out Of The Upholstery Samples

Use a playing card as a template to trace the bunting pieces directly onto the back of each upholstery sample.

Cutting these pieces out is sort of a nightmare, at least for my own set of upholstery samples, because the glued-on paper backing doesn't cover the entire piece. I obviously can't use my fabric scissors to cut paper, and my paper scissors are too dull to cut fabric, so I had to use two different pairs of scissors for every piece, ugh.

2. Embellish as desired

The possibilities for embellishing buntings are practically infinite, but for this bunting, I wanted to spell out a welcoming message.

Stencils and paint to the rescue!

I have a very old-school Cricut on which I can cut letter stencils, but happily, a set of store-bought cardboard stencils that I already had on hand turned out to be perfectly sized for this bunting--yay! I traced each letter onto the front of an upholstery sample piece with black Sharpie.

Because this bunting isn't washable, you can use any kind of paint on it. My fabric paint is getting a little old, though, so I've been using it on any even remotely fabric-adjacent project lately so I can use it up and have an excuse to buy more.

3. Adhere The Upholstery Pieces And The Hanging Cord To The Playing Cards

You can use any type of hanging cord that you'd like for a bunting, from a kid-made yarn cord created on a knitting spool to store-bought bias tape. Bias tape actually would have looked really cute with this particular bunting, except that I filled nearly all of the available space with my letters, and bias tape would definitely have cut the tops off of some of them. Instead, I decided on simple brown twine, to be sandwiched between the upholstery fabric and the playing card.

You can also attach the two sides of the bunting pieces together in a number of ways. I seriously considered machine-sewing them together with a wide zig-zag stitch, but then my daughter happened by and got involved, and her solution to every problem is to hot glue it. So she hot glued it!

I wouldn't use a bunting that was hot glued outside in all weather, but it was perfect for a beautiful, mild birthday party day. Afterward, we hung the bunting in her bedroom, so that every time she looks at it she can remember what a wonderful time she had at her Alice in Wonderland birthday party!

P.S. Do you also have a book of wallpaper samples that you're wondering what to do with? You can make a bunting with those, too!

Thursday, June 18, 2020

How to Sew an American Girl Doll Face Mask with Ties


My kids don't even play with their American Girl dolls anymore, and I don't even care--I'm still sewing them matching outfits and adding cute DIY accessories to my dollmaking Pinboard.

It's not a non-possibility that when both kids move out one day I'll turn their bedroom into an American Girl doll world and set up a bunch of little handmade scenes that the dolls can prance through wearing their handmade clothing and accessories.

Just... come find me there sometimes and bring me snacks, okay?

Anyway, for obvious reasons I deeply needed to make the kids' American Girl dolls face masks that match the kids' own face masks that I made them. It took some fiddling to get those tiny pleats just right, but I'm super happy with the pattern now, so much so that I've also been selling American Girl doll masks in custom colors in my Pumpkin+Bear etsy shop, and I'm going to show YOU how to make them, too!

Here's what you need to make your own fabric face mask for an American Girl doll:

  • fabric. Unlike with my human face masks, it does not matter what kind of fabric you use for these face masks, because your doll doesn't care whether or not the fabric touching its doll skin is 100% natural. The important things are that the fabric is thin enough to pleat and can be ironed on hot. I HIGHLY recommend using up your fabric scraps for this project!
  • bias tape. I use a poly-cotton blend 1/4" bias tape for my human masks, and the great thing about it is that it also works perfectly for these doll masks. I wouldn't go any wider than this on the bias tape, because you want it to look proportional to the doll. 
  • matching needle and thread. I like a universal needle for sewing the mask fabric, and a jeans needle for sewing the bias tape.
  • iron
  • measuring and cutting supplies

1. Cut the fabric and bias tape to size. Cut two pieces of your fabric to 3.5"x3". Cut two pieces of bias tape 21" long. I really like this photo that shows all the cut fabric sizes for adult, big kid, little kid, and doll masks. The doll mask fabric is the tiny one at the bottom!


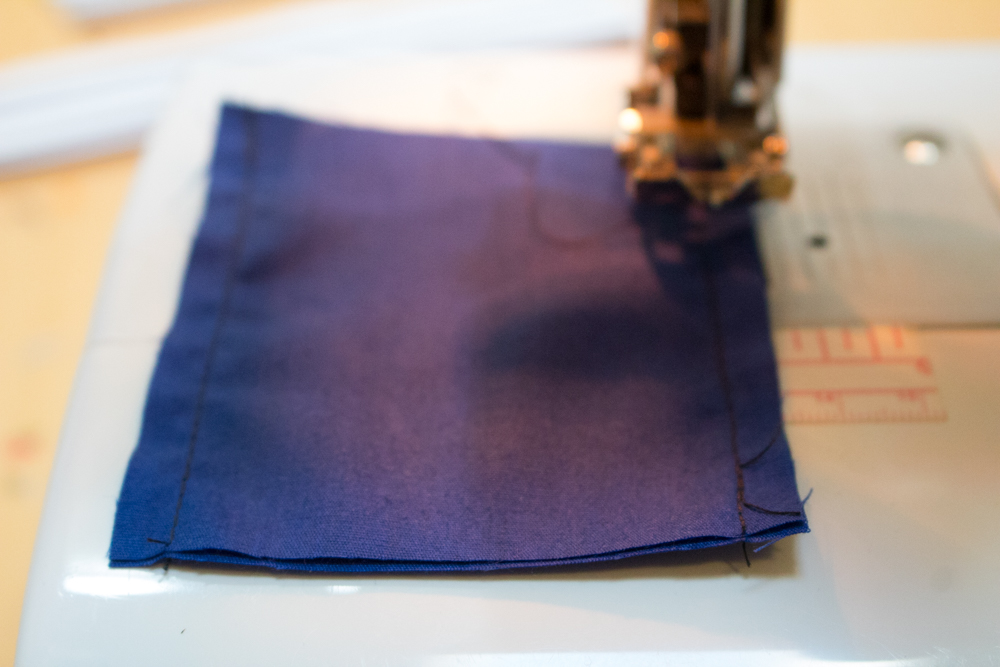
2. Sew the fabric. Put the two pieces of fabric right sides together, then sew down both 3.5" lengths with a 1/4" seam:


Turn it right side out and iron the seams to press them flat:


3. Pleat the mask. Because your piece is now approximately 2.5"x3.5", the pleats are a little fiddly to make. First, measure and mark a chalk line approximately 1/4" from the bottom of the fabric. Crease the fabric again a little more than 1/2" above that mark and fold the crease down to that mark. You'll make two more pleats above the first one, each a little more than 1/2" from the top of one pleat to the fold of the next. For your last pleat, take care to make sure that the fabric above the fold visually matches the width of the fabric below the bottom pleat, even if it means that the top pleat is a little uneven. 


Baste the pleats in place.

4. Attach the ties. Fold each piece of bias tape in half and iron the fold to crease it, marking the center. 

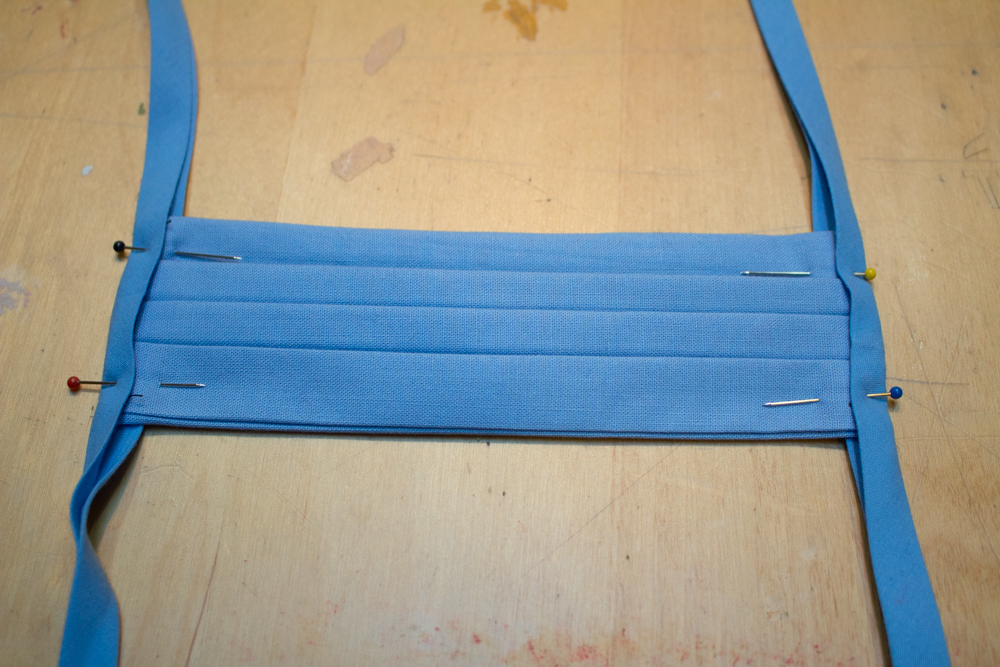
Center the bias tape on the middle pleat of the mask, then pin it well, encasing the raw edges of the side seams in the bias tape:


Sew down the entire length of the bias tape, sewing it shut and sewing it to the fabric mask.


Here's what the masks looks like when worn by my kiddos' American Girl dolls:


They're not too hard to tie onto the dolls--


--and I think the proportions look just right!


Want to make a human-sized face mask to match the doll masks? Here's how to make a fabric face mask for an adult, and here's how to make a fabric face mask in two children's sizes.


Whether you're a human or an American Girl doll, please stay safe!

Monday, June 15, 2020

How to Sew a Child-Sized Fabric Face Mask with Ties


Kids, especially, often don't like to have a lot of extra fabric on them--especially on their faces!--and so even though most adult-sized face masks with ties really would fit most kids, too, it can be nice to size their masks down for a better, less claustrophobic fit.

The most popular mask that I've sold so far in my Pumpkin+Bear etsy shop, actually, is my Big Kid face mask. It's more tween-sized, best fitting kids around the ages of 7-12, but as you can see in the photo above, the Big Kid mask is also a good size for my 14-year-old Syd. It's approximately 7" across the face, and expands to a maximum of 5" to cover the nose and chin.

Size down even more to make a Little Kid mask, which is approximately 6" across the face and expands to a maximum of 4" to cover the nose and chin. It's designed to best fit a kid around the ages of 2-7. With a little kid, especially, you can see how nice it might be to not have all the extra fabric of an adult mask on their face!

These masks are a little fiddly to sew, with the precise pleats and the narrow bias tape, but if you'll bring your sewing skills, I'll deliver your tutorial!

Here's what you'll need to sew one child-sized face mask with ties:

Here's an example of all the different mask starting sizes. The grey fabric at the top is an adult mask, the pink fabric below it is the Big Kid mask, the light blue fabric below that is a Little Kid mask, and the indigo fabric at the bottom is a doll mask.
  • 100% natural fabric. I've seen these masks made with cotton, silk, and linen. Jersey knit is tempting because it's so soft, but I worry that the weave is too loose for it to be an effective face mask. I've also seen masks made from upcycled denim, but to me that seems way to heavy to be right in front of your mouth. For a Little Kid mask, cut two pieces of fabric 6"x4". For a Big Kid mask, cut two pieces of fabric 7"x5". 
  • bias tape. I use a poly-cotton blend 1/4" bias tape, and I think it's perfect for these face masks. For both the Big Kid and Little Kid mask, you need two pieces of 1/4" bias tape, each 32" long. 
  • matching needle and thread. I like a universal needle for sewing the mask fabric, and a jeans needle for sewing the bias tape.
  • iron
  • measuring and cutting supplies
1. Facing the right sides of the fabric together, sew down the two long sides. Use a narrow 1/4" inch seam for both.


This essentially makes a tube. Turn it right sides out and iron to press the seams:


2. Pleat the mask. Put three pleats into the mask by folding the fabric down, then ironing it to crease it:


3. Baste the pleats. Baste the pleats on both sides of the mask:


4. Attach the bias tape. Fold each length of bias tape in half and iron it to crease it. Match the crease to the center pleat of the mask and pin it:


Sew down the entire length of the bias tape on both sides, stitching it to the mask:


If you want to sew a mask to exactly fit a kid, follow these instructions but measure the distance between the kid's jaws for the length and the distance from the bridge of their nose to the bottom of their chin for the width. These two kid masks, however, should fit all of your kittycats until they're quite grown up!


Six Months Ago: Topics in STEAM: Origami
Five Years Ago: Ballerina: Three Years
Eleven Years Ago: Makeup for Momma