Showing posts with label Halloween. Show all posts

Wednesday, October 28, 2026

The American Girl Dolls Have Brand-New Halloween Fits

Because if you're not sewing detailed Halloween costumes for American Girl dolls, are you even a perimenopausal empty nester?

Actually... can I still say that I'm an empty nester when I have my college graduate living at home? Does it even count as living at home when she spends all her time either outside the house making pizzas for below a living wage or in her room applying to every job available for early career scientists?

And while I'm on the subject, what's with every job available for early career scientists actually requiring 1-3 years of professional experience? I get that three years is still "early" in one's career, but there really ought to be something in the world that a brand-new college graduate can do other than Americorps, which, I might add, also does not pay a living wage!

So, maybe I'm light on the empty nest these days, but I am VERY heavy on the perimenopause, as my active and palpable continuous rage informs me, and for some reason there is nothing that calms my perimenopausal rage like sewing doll clothes, so leave me alone and let me have my peace.

This American Girl doll skeleton costume is a basic long-sleeved T-shirt and full-length leggings, but before I finished each garment I appliqued onto it the skeleton bones that Mr. Craft Knife designed for me. The bones are cut with my Cricut from white jersey knit (upcycled from an old T-shirt) fused with Heat n' Bond, and I ironed the bones to the garments and then messily top-stitched them down with a free-motion quilting foot:


I took a couple of tries at this costume, and my second version was nice enough that I felt okay sending it to my niece, but I think what I really need to do is give up on my dream of fabric applique and buy some heat-transfer vinyl for the bones. 

I LOVE fabric applique, but the heat-transfer vinyl that I used for this Jack-o-lantern T-shirt made the finished garment look soooo nice and tidy! 


Mr. Craft Knife also drew this cutesy Jack-o-lantern face--he made a spooky one, too, but I only had enough orange T-shirt on hand to sew one doll shirt, and the cutesy face won! 


This is my first time trying heat-transfer vinyl and I nailed it on the first try, which means that the next five times I use it something will go terribly wrong for reasons that I will not be able to determine. 

The Sweet Valentine Dress from Doll Fashion Studio is tied with the skeleton costume as my favorite of these Halloween outfits:


I bought this cartoon Haunted Mansion fabric as a remnant once upon a time (I miss you, Joann!!!) with no plans other than to enjoy how cute it is, and happily, it also turned out to be just enough fabric for this dress for my niece, who LOVES herself some Disneyland!


I love how simple and classic this dress design is, though, so... yeah, I already have two more dresses cut out and waiting on my sewing room table. 

And of course, it's not a complete set of Halloween outfits without a witch costume!


The cape is the fleece cape from Bombshell Bling. Sewing the stretchy velvet to woven quilting cotton wasn't the most fun, but I got it figured out and I'm pretty happy with it. The hat is a paid pattern from Pixie Faire, but I hesitate to recommend it because I had to alter it quite a lot to get the cone and brim to match. The geometry just wasn't geometry-ing!

While I was finishing up these outfits, I also whipped up a big doll mask order from my Pumpkin+Bear etsy shop, and so I decided to multi-task refreshing some of those stale listing photos while I photographed these outfits. 

And that's why some of my doll mask photos are now a little bit Halloweeny!


Oops, I missed a couple of threads! Oh, well--that's how my customer knows it's truly handmade, I guess.

Fun fact: etsy recently updated some of its policies to ban AI slop, but it's doing it by WAY overshooting what's actually necessary, to the extent that shops will now be required to include one completely unedited photo in every listing.

Like... what?

If I had to include one completely unedited photo in this blog post, here's what that would look like, lol!


At least in my case, the editing is what makes the photo accurately represent my product!

Ugh, whatever. It's not like life isn't already just an endless succession of nonsensical hoops to jump through, anyway.

Oof, that sounded mean and depressed--must be time to soothe my perimenopausal rage by sewing those doll dresses I cut out earlier. Orrrrrr I could go to the gym and yell at the college boy trying to hog the leg press. Doesn't even matter which one, because there's always someone!

P.S. Want to follow along with my craft projects, books I'm reading, road trips to weird old cemeteries, looming mid-life crisis, and other various adventures on the daily? Find me on my Craft Knife Facebook page!

Monday, October 19, 2026

How To Carve a Quilt Block Jack-o-Lantern

I originally published this tutorial over at Crafting a Green World.

Get ready to make your neighbors jealous, because you’re about to carve the craftiest Jack-o-Lantern on the block!


I love a Jack-o-lantern that shows off my personality, and now that I’m an perimenopausal empty-nester, that personality is apparently sewing, sewing, and nothing but sewing (Okay, I’ve also developed an interest in Civil War battlefields, but that one is so objectively cringe that I’m not ready to talk about it yet). Like, y’all. I used to like sewing back well enough when my kids were little, but now I am obsessed. I genuinely CANNOT STOP SEWING. I just keep thinking of new things I want to sew! I do not even have time to sew all the things I currently want to sew, and yet I keep on finding more things to sew!

ANYWAY, thanks to my possible midlife crisis that is resolving itself through sewing, obviously my Jack-o-lantern this year had to be sewing-themed. And the best way to make a Jack-o-lantern that looks like an obvious sewing project is to make it into a quilt block! Fortunately, carving a quilt block into a Jack-o-lantern is surprisingly easy, and absolutely much easier than a lot of more conventional Jack-o-lantern templates.

Materials


Here is everything that you need to carve your own quilt block Jack-o-lantern:

  • pumpkin. Of course! A real pumpkin is obviously the most eco-friendly, but you can also make a very realistic, carvable pumpkin from papier mache. Carvable store-bought pumpkins are generally not eco-friendly, but if you can find one of those second-hand, then at least you’re saving it from the waste stream!
  • pumpkin-carving supplies. Pumpkin carving is so much more comfortable with these janky-looking little plastic pumpkin carving sets! I did throw a tiny fit when my husband came home from the store with a cheap kit of plastic pumpkin-carving tools back when the kids were babies (I was DEEP into the “my babies shall not touch plastic” era), but I changed my tune as soon as I saw how genuinely easier it is to carve pumpkins with them, and we’ve used that same dang set every year for the past 20 years, so I should probably apologize to my husband at some point. I absolutely will not, but I should!
  • measuring and marking supplies. The thing that I like the most about these quilt block carvings is that you don’t need a template. You can measure out your template right onto the pumpkin using a ruler or tape measure, and mark it with a washable marker. If you want your marks to be less vulnerable, use a Sharpie, and then wipe off any extraneous marks with an alcohol wipe or hand sanitizer.

Step 1: Choose your quilt block and draw it onto the pumpkin.


A surprising number of quilt blocks work well as Jack-o-lanterns, including Nine Patch, Shoofly, Eccentric Star, and Bear Paw. The trick I use is to leave approximately .25″ between the pieces I want to cut away in order to preserve the sense of the pattern being pieced together.

Choose an simple quilt block pattern that is easy to calculate and draw onto a pumpkin. This Friendship Star pattern, for instance, is super easy to measure out, with a square in the center, surrounded by right triangles whose two adjacent sides are the same length as one side of the square.


You can use a reference book like 5,500 Quilt Block Designs for inspiration, and don’t be afraid to eyeball a design instead of painstakingly measuring it out. Jack-o-lanterns are supposed to look a little wonky!


Step 2: Carve your design into the pumpkin.


Carve your pumpkin by cutting through the lines that you drew. I don’t understand why those little saws work so well, but they do! They also make it a LOT easier to cut these precise lines, especially compared to my pre-kid giant carving knife method.

Be careful when carving out thin pieces–I usually do this with one hand stuck inside my pumpkin, bracing it from the inside. Putting a quarter-inch between pieces gives you plenty of cutting room in case you accidentally over-extend a cut, but in terms of the worst-case scenario, you can stick a piece back on with a toothpick!


When you’re finished with your design, pop a tea light inside (or do what we do and make a little hole in the back to stick twinkle lights through), put the top back on, and enjoy your new quilt block Jack-o-lantern!

I LOVE my quilt block Jack-o-lanterns, and I think they look so pretty lit up on my porch at night. Now, onto my next project: sewing an American Girl doll-sized black T-shirt and leggings set and appliqueing an even tinier skeleton onto it! Stay tuned!

P.S. Want to follow along with my craft projects, books I'm reading, road trips to weird old cemeteries, looming mid-life crisis, and other various adventures on the daily? Find me on my Craft Knife Facebook page!

Monday, November 24, 2025

Senior Pictures of the Jack-o-Lanterns, because the Real Senior in the Family Won't Cooperate

If YOU were a senior in college you'd let me take senior pictures of you, right? You'd let me coordinate cute outfits for you that go with the several picturesque locations I've planned out (I know where soooo many nice bridges are, for one thing!), and you'd be super into all the whimsical and flattering poses I've thought up, and you'd keep forever all the lovely photos I made of you as mementos of your magical senior year.

You'd definitely not be like my kid, who cares not for the frippery and folderol of the senior year season of life. Admittedly, she's stoked for some of her college's senior year traditions, like the few days between finals and graduation when apparently the seniors just get to run around campus, eat free snacks, and get their photos taken sitting behind the president's desk and standing on (GASP! The taboo of it!!!) the college's seal. You know, the one that you're not supposed to step on or you'll be cursed and won't graduate? I guess the curse can't take you after your final grades are in! 

But the year-long build-up to that last fun week? My college senior says no, thank you to that. She's got resumes to update and applications to fill out and comprehensive exams to study for and her last eight classes to pass. There is no room for whimsical nostalgia, much less a photo shoot that may or may not require several location changes and outfit changes and possibly more than one single instance of doing what her mother has asked her to do.

So sometimes you just have to pretend that you're taking senior pictures when you've got a kid pinned in your viewfinder, even if all you're actually doing is taking some snapshots while y'all carve pumpkins over Fall Break:


I love how ever since they were both little, one kid--the same kid each time!--has always tried to find the largest carving pumpkin in the pumpkin patch, and the other kid--also the same kid each time!--has always tried to find the smallest pumpkin that can still reasonably be carved.

I think this year is that kid's smallest pumpkin yet!

I don't know what kind of magic was used to make those cheapo pumpkin carving tools that you always see everywhere, but they randomly work great and last forever!

This weekend will mark our yearly tradition of finally kicking the Jack-o-lanterns over the edge of the wall so they can compost in peace under the bushes and we can put Christmas decorations there instead, so I thought I would memorialize their last week with us with a set of proper senior pictures just for them:


After this, they get to collect their free bagel, get their picture taken behind the president's desk, and finally stand on the school seal, and then it's off to new adventures!

P.S. Want to see what we're going to do with a bushel of apples, a gallon of cider, and two Jack-o-lantern pumpkins, one very large and one very weird? Follow along on my Craft Knife Facebook page, where cider cocktails and caramel apples are made, and teenagers are in charge of the applesauce!

Tuesday, November 18, 2025

10 Witch Hats for Halloween... Just Not Necessarily *This* Halloween

One improvement that I could easily make to my little hobby etsy shop is to anticipate seasonality.

Like, I'm literally the one who bitched every single year of my kid's Nutcracker years about why on earth the ballet department always acted like they had to reinvent the entire damn Nutcracker wheel every damn year. Y'all, you have done this thing before! Why is the children's dressing room never reserved and nobody has the elevator key and casting a dozen nine-year-olds in the same roles they held when they were eight takes three freaking weeks of daily emails saying that the casting will be out tomorrow? And yet here I am every year being all, "Oh, gorsh! Is Halloween month! Should I... make something Halloween for my etsy shop?" And then I have time to make maybe three things before Halloween is over.

Also me, sitting here on November 18 with nothing in my shop for Thanksgiving and nothing in my shop for Christmas

But you know what I DO have in my shop right now? The five handmade witch hats that I finished AFTER Halloween! The five that I managed to bust out before Halloween sold so quickly that I figured that this time I would get ahead of the game while I was thinking about it and my mind and my hands were already in witch hat mode.

I really like this hat that I fussy cut from a thrifted batik of the seven chakras:


I also got through quite a bit of previously thrifted formalwear for those pre-Halloween witch hats--


--as well as a successful experiment with facing a witch hat with burlap:

My big helper here just happened to be home for Fall Break right when I needed a witch hat model!

--but my absolute favorite hats, and the ones that I ended up making multiples of to get that jump on next Halloween, are these hats sewn from the last scraps of a vintage cutter quilt that I've had kicking around my fabric stash for over 15 years by now:


I'm a little sad to have used it all up with these hats, because I've never come across another old cutter quilt since, but I suppose that we mustn't hoard our resources, sigh.

It just sews up SO prettily!


These last four witch hats sewn from that vintage quilt are already listed in my Pumpkin+Bear etsy shop, because who am I to tell you no if you want to buy one in the off-season--


--but what I really should do, and what I am firmly telling myself TO do, is to sew a couple more hats from unique fabrics every month, so that by the time next autumn rolls around I'll be fully stocked with seasonal items.

But not this week. This week my goal is to figure out how to sew re-usable fabric chains, probably with Velcro fasteners, because I think it would make a really cool--and eco-friendly! And heirloom!--holiday decoration. And obviously I won't figure that out and have any sets finished until it's past time to reasonably decorate for Christmas, sooo... I guess I'm really committed to getting a jump on next year's holiday products!

P.S. Want to see what we're going to do with a bushel of apples, a gallon of cider, and two Jack-o-lantern pumpkins, one very large and one very weird? Follow along on my Craft Knife Facebook page, where cider cocktails and caramel apples are made, and teenagers are in charge of the applesauce!

Tuesday, November 11, 2025

It Took Me Eight Months To Cross-Stitch Two Things, But I Think I've Got the Hang of It Now!


Creepy Cross-Stitch: 25 Spooky Projects to Haunt Your HallsCreepy Cross-Stitch: 25 Spooky Projects to Haunt Your Halls by Lindsay Swearingen
My rating: 5 of 5 stars

I didn’t think that I wanted to learn how to cross-stitch, but apparently I just needed a gateway book. Because now that I’m two whole projects deep, I love it!

Although it did take me a while to get there… I actually checked this book out from the library early this year---like, pre-Valentine’s Day early--thinking it might be cute to do some of the projects and set them aside for Halloween decorating.

Yeah... no. I finished my first project from the book, a little ghost with a floral background, a couple of days before Halloween, and the process only really started to click in mid-October. But then I zipped through the finish, immediately started my second project, a Jack-o-lantern cauldron, and finished it a week later.


Here are the things I learned:

  1. The x’s touch each other. With my first stitches, I put the x’s next to each other, but not, like, in the same holes, and I had to sit there and stare at them for a while, comparing back and forth with the illustration in the book, before I finally realized how you’re supposed to place them.
  2. Counting is really, really, REALLY important, and also weirdly hard? My little ghostie is actually a huge mess, especially all those little flowers, because I absolutely could not figure out how to count all the little squares of dead space to the next flower. It took me forever to realize that the pattern has darker lines every five squares, which made the counting maybe 5% easier, but I still feel like I have to count the pattern squares about fourteen times, then the squares on the fabric about twelve times, then check back to the pattern to make sure it’s right, and then to the fabric again to make sure I wasn’t crazy the last time I counted. WHY IS IT SO HARD!!!!!
  3. You don’t actually have to use the exact colors of embroidery floss that the pattern calls for. With the first project, I bought all the exact correct colors and it was fine, but for the second project, I was all, “Aha! I can use these two random oranges that I already own!” So I only had to buy the greys, and I consider that a huge win.
  4. You ALSO don’t actually have to use the store-bought Aida that the pattern calls for. I HAAAAATE the feel of the black Aida I bought for the ghost (I also feel like it was stupid expensive, Michael’s!!!), although I’ve since learned that I could have soaked it in water to rinse away the sizing that was apparently making it so stiff. But anyway, I did my Jack-o-lantern cauldron on burlap, and I am obsessed with how it looks and feels. I might have to experiment with dyeing burlap, because a lot of the Creepy Cross Stitch projects definitely need to be stitched onto black.
  5. I am maaaaaaaybe too myopic to excel at cross stitch. I keep having to peer over my glasses and hold the fabric about two inches from my face, although I’m definitely getting better at not having to do that for EVERY stitch--just the tricky ones!

Here are the things I still don’t know:
  1. The embroidery hoop dented my Aida and made me afraid to keep using it, so I’ve just been sort of holding the fabric by hand. Are embroidery hoops a huge time-saver, and if so, how do you keep it from creasing your fabric?
  2. How do you pull a strand of embroidery floss from the skein without tangling everything? Is there a specific end you pull? My numerous skeins of tangled floss would like to know.
  3. I don’t understand how you’re supposed to figure out where to place your stitching on the fabric so that you’ve got enough room for it but you don’t waste a lot of fabric, either. I wasted a bunch of the black Aida by placing my little ghostie in the center, so now that I’ve cut it out I’ve got just a bunch of scrap Aida that’s only good for tiny projects, but I had to restart my Jack-o-lantern cauldron because I started it too close to the edge.

I absolutely want to make most of the projects in this book, but now that I’ve got two finished (that I need to figure out how to mount and display…), I’m going to take a little break from Halloween stitching and check out some other cross-stitch books from the library. So far I’ve got waiting on hold for me one with national park icons, a feminist one, a literary one, and a Star Trek one. I think I’m going to be spoiled for choice!

P.S. View all my reviews.

P.P.S. Want to see what we're going to do with a bushel of apples, a gallon of cider, and two Jack-o-lantern pumpkins, one very large and one very weird? Follow along on my Craft Knife Facebook page, where cider cocktails and caramel apples are made, and teenagers are in charge of the applesauce!

Friday, October 3, 2025

This Disney Children's Cookbook is Exactly the Right Level for My Kitchen Skills

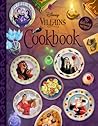
The Disney Villains CookbookThe Disney Villains Cookbook by Walt Disney Company
My rating: 4 of 5 stars

I am 49 years old, with what is apparently the cooking skill of someone at least 40 years younger, because this children's cookbook was EXACTLY my speed.

And I didn't even know that it was a cookbook for children when I checked it out of the library. What that says about me, I do not care to explore. But although I am mostly disinterested in cooking (if someone ever invents a middle-aged human chow with all the vitamins and nutrients needed by a perimenopausal woman, sold in 50-pound bags with instructions on the side about what size scoop you should dish out per meal, I will be incandescently happy and my life will immediately become 1000% easier), I DO love myself some thematically-appropriate novelty foods, and I thought this book might snooker me into actually, you know, using my stove this week.

Especially with the excuse to eat my dinner in front of a movie!

Alas for that last part, because this book's only flaw for me is that the recipes are VERY loosely associated with the Disney villain each claims to represent. I'll give it a point for the Spotted Scones to represent Cruella de Vil, because okay, chocolate chips are a cute idea for dalmatian spots and the book/movie IS set in England... but they don't actually represent Cruella, just the concept of the film. An actual Cruella recipe would be something like a black and white cookie. And the Black and White Bean Salad that comes later in the book and is also supposed to represent Cruella doesn't work, either, because black beans aren't really black.

The two recipes that my partner and I tried have even looser connections to their Disney villains. You're supposed to cut the Baguette Breakfast Beaks into triangles to represent Maleficent's raven familiar, but other than the fact that it's kind of gross to make an egg dish to symbolize a bird, cutting it into triangles is literally the only connection. And a baguette cut into triangles doesn't look like beaks? Captain Hook's Stuffed Shells is even worse, because even though the description notes that "Captain Hook and his crew would no doubt appreciate a warm plate of this ocean-themed dish," the absolute only ocean-themed part of it is the jumbo pasta shells. No nori, no seafood, no ocean colors, no crumbly textures to represent sand... just baked pasta with jumbo pasta shells.

Y'all, my grown-up autistic ass can barely accept this as even remotely on-theme. There's no way you're going to get a kid with any kind of neurological pathways to buy into it.

HOWEVER... the two recipes that my partner and I tried were DELICIOUS. And SIMPLE. And infinitely repeatable in a menu rotation. And super easy to riff on with whatever ingredients you have on hand.


The best part, though, is that the recipes are so clear and intuitive that you just have to make them while looking at the recipe exactly once, and then you can make them forever. The baguette bake is just beaten eggs, whatever veggies sound good, and a bunch of cheese baked in a hollowed-out baguette. I threw in some diced peppers and onion and chopped spinach and halved cherry tomatoes, my partner added bacon because otherwise he wouldn't be able to recognize the meal as food, and he and I killed an entire baguette's worth between the two of us. The stuffed shells is just a carton of ricotta, a beaten egg, whatever veggies and herbs sound good, and a bunch more mozzarella and parmesan layered casserole-style with cooked pasta and marinara sauce and baked. I threw in a ton of sauteed kale from my garden along with scallions and a shocking amount of fresh parsley, my partner added sausage, and my only regret is not going even harder on the greens because my partner and I FEASTED!


Seriously--if this is what cooking is actually like, then I can actually do it, and I actually enjoy it!

We watched Ted Lasso while we ate our stuffed shells, though, because that recipe is absolutely NOT Peter Pan-themed.

P.S. View all my reviews

P.P.S. Want to follow along with my craft projects, books I'm reading, road trips to weird old cemeteries, looming mid-life crisis, and other various adventures on the daily? Find me on my Craft Knife Facebook page!

Thursday, October 24, 2024

I Made a Little Quilt That Is a Ghost for The Little Ghost Who Was a Quilt

The best thing, for me, about having a small niece, is that I can still make all the cute children's things that I want to make, because I still have someone to give them to!

Honestly, I might actually make more things for my niece than I did for my own kids, if you don't count things like clothes or homeschool materials or collaborative crafts, because when my own kids were this little kid's age, I was too busy parenting little kids to get enough crafty time to actually make them cute things! My younger kid was four years old by the time I made her first quilt, oops!

So when I saw The Little Ghost Who Was a Quilt in a local bookstore a few weeks ago, and I was immediately charmed by it, and then immediately after that I wanted to make a little ghost quilt--I did!

Happily, the book's endpapers feature the quilt design of the titular little ghost, making it super easy to see what similar fabrics would look like. And even more happily, I did not have to buy a single thing to make this quilt! To be fair, a couple of the fabrics that I used are remnants that I'd previously bought with no purpose in mind, but everything else was honest-to-goodness scraps and stash, from the fabric for the top to the cotton batting to the cotton sheet I used as the backing.

All of the pieces are 5" squares. I wanted my quilt to be 10 blocks by 12 blocks, so I needed 120 blocks total. I sort of tried to keep the colors even between purple, aqua, and white, but it's a little blue-heavy. There are just a few grey blocks scattered in, because it turns out that I don't actually own very much grey fabric. The little ghost quilt in the book also has tan blocks, but for some reason I don't have ANY tan fabric, and anyway, I wasn't really feeling the tan colorway... which is perhaps one reason for why I don't own any tan fabric, lol!

To make the quilt, you lay out your pieces and rearrange them until you like the way they look as a whole, then stack them by rows, piece each row, then piece the rows themselves together, being quite fussy about lining up the corners:


Then you take up your entire family room floor making your quilt sandwich!


This is why I can never say that my creations come from a pet-free home, ahem. I would NEVER want my creations to come from a pet-free home!


I pinned my quilt quite well to the batting/backing, trimmed it out roughly, then quilted it via stitch in the ditch, earning myself yet another day of having a wonky back in the process. Why must quilting be so ergonomically incorrect?!?

Here's how it looks all nicely quilted and ready to be properly trimmed:


I got through trimming the batting before my supervisor came to check up on me:


I trimmed the backing to 1" wider than the quilt on all sides, then folded it in half twice, clipped it in place using every plastic sewing clip I own, and stitched it down:

Proper quilters use a blind stitch or another invisible stitch, but I'm happy with a plain old zig-zag.

And there's my little ghost quilt!

The lighting was soooo perfect right when I finished, but in the hour it took me to run out and do early voting, it got completely overcast. But I had to take my photos anyway, because Halloween presents are more fun if you can get them in the mail in time for the recipient to receive them before, you know, Halloween!

...and that's a bunch of cat hairs there on the purple block, sigh. I did wash it and dry it, and then go over it with the lint roller, before I put it in the mail.

Because you don't have to follow a pattern, just make sure that the pieces look cute together as a whole, this is actually one of the quickest quilts I've ever sewn:


I'm always especially pleased when I can work any of my favorite meaningful fabrics into a piece. Below, the smocked blue fabric used to be part of the only skirt that my older kid ever willingly wore. The silky white fabric to its right is actually from my wedding dress!


My favorite part, though, is that I used variegated thread to quilt it, and it looks so nice from the back!


Isn't it crazy that you can make something so substantial, and so pretty and perfect, entirely from materials you already have on hand? Historically, that's exactly what quilting should be, including reusing those bits of old clothes, and I LOVE that there's a children's book that encourages children to notice and care for the simple, unassuming gift of a patchwork quilt:


I didn't have any ghosts on hand to put into it, though, so that part's going to have to figure itself out later. 

P.S. Want to follow along with my craft projects, books I'm reading, road trips to random little towns, looming mid-life crisis, and other various adventures on the daily? Find me on my Craft Knife Facebook page!