Thursday, December 23, 2021

Pointe Shoes and Twinkle Lights

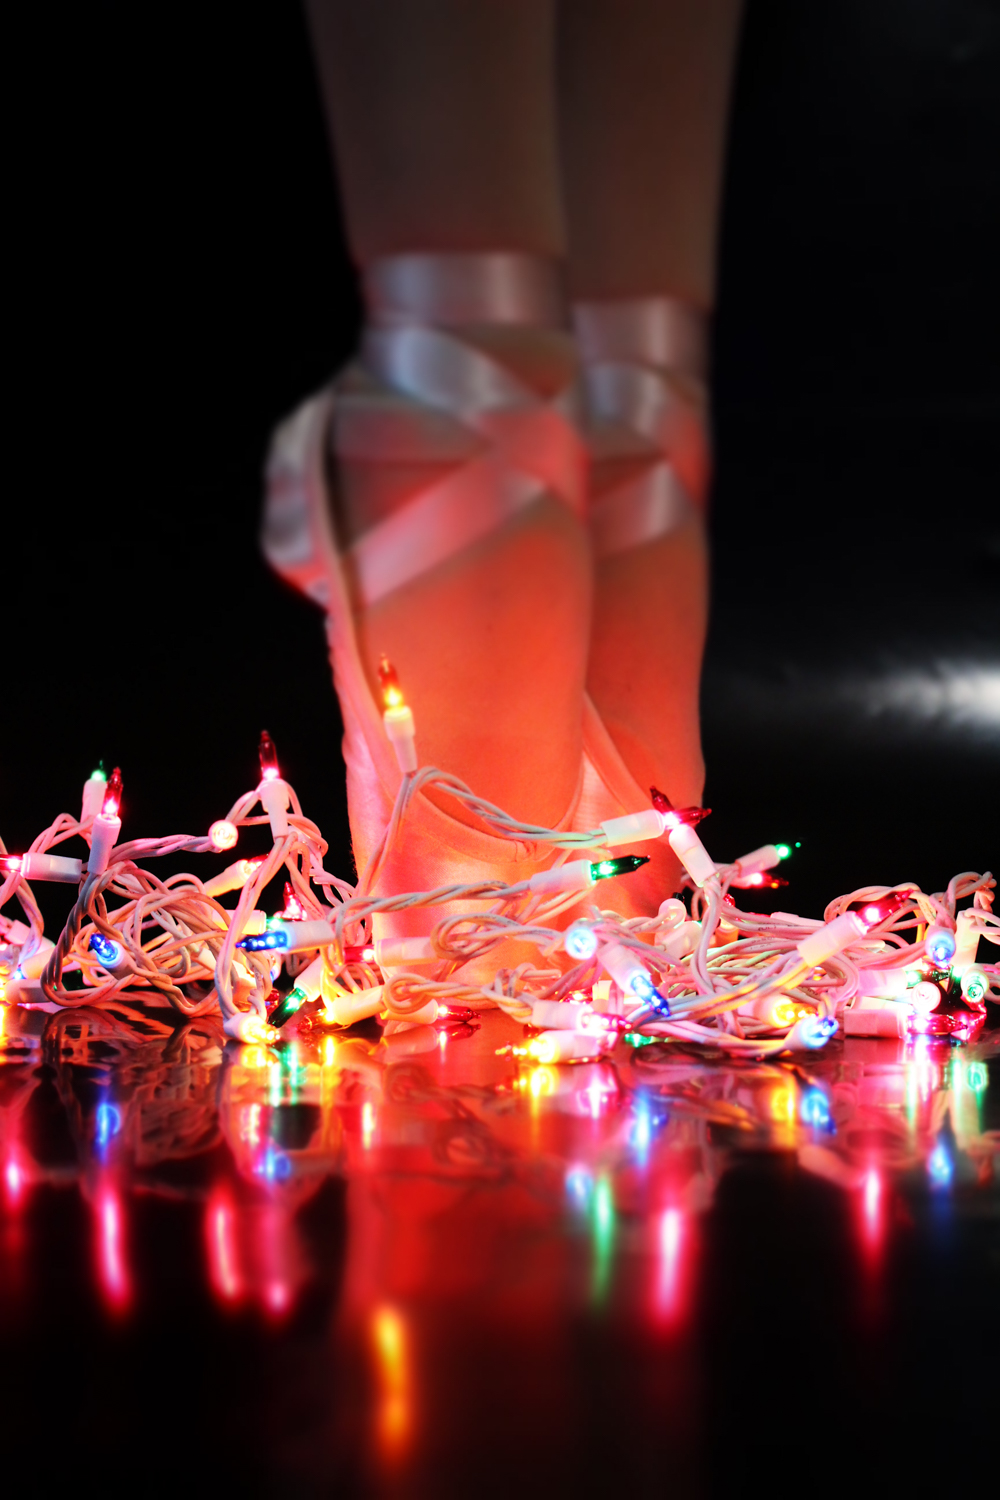
 The other day I bribed my favorite ballerina into indulging me with a holiday photo shoot:


Syd badly needs a new pair of pointe shoes (something to add to the holiday to-do list!), and that is always my favorite time to commemorate how a well-used pair is meant to look.

A photo shoot with Gracie is generally all the inducement Syd needs to submit to her own set of photos. For each of the next images, imagine me in Photoshop painstakingly lassoing and filling in about a thousand cat hairs from her marley. 

Ah, well... the marley needed a wash anyway!


We then tried to get some photos of Jones, but turns out he's terrified of roll-up dance floors and twinkle lights.

So then Will and I tried to get some cute photos of Luna, and, well...

Back to pointe shoes and picking animal hair out in Photoshop, shall we?


We're not really a Christmas card or family holiday photo sort of people, so I think this will do for commemorating the season!

Saturday, December 18, 2021

Sew an Easy One-Seam Skirt

This tutorial was originally published on Crafting a Green World in 2016.


 Remember my most favorite ever fabric print (that matches our favorite book series!), that Hobbit book cover panel that I turned into a fabric wall hanging

 There were actually TWO Hobbit book covers in that yardage that I bought! 

 The burning question that I asked myself then became: what ELSE can I do with this beautiful fabric to show it off to its fullest extent? 

 I think that this skirt fits the bill perfectly. It's made from that single panel, with a casing made from stash fabric, and its existence in my life is currently making me very, very happy. 

 Even if you don't have your own perfect panel, this skirt is super easy to make from one single length of fabric. You will need: 

  fabric. My Hobbit panel is 54"x22." Since the skirt is elastic-waisted, quite a wide margin of lengths will work well here. You will also need stash fabric for the waistband. 
  elastic. 

  1. Measure out your skirt. The selvage-to-selvage side will be the length of your skirt, so cut enough for the length that you want plus an inch or so for a bottom hem. The fabric's yardage will be the width of the skirt, gathered up by the elastic waistband. 


  2. Measure the waistband casing. The waistband casing should be twice the width of your elastic plus an inch for a seam, and the same length as your skirt's width. Fold the casing fabric in half lengthwise and iron to crease the fold.  


3. Sew the casing fabric to the skirt. Place the fabrics right sides together, and sew the casing fabric to the skirt. You'll be closing the casing and top-stitching it down after you sew the skirt's side seam. 

  4. Sew the skirt's side seam! I used a French seam for this, because I like the way that it encases the raw fabric edges and is so sturdy, but you can use your favorite seam. 

  5. Close the casing. Fold the casing back down along the crease line so that the wrong sides are together, then follow the exact same line of stitching to sew that side, too, to the front of the skirt. Leave an opening to insert the elastic later.  

Fold the casing up so that it's no longer folded against the skirt, then iron the raw edges down toward the skirt. Top stitch all the way around. Your casing should now look like the skirt's waistband, other than that hole you've left for the elastic. 

  6. Hem the bottom of the skirt. Use your favorite method. 

  7. Insert the elastic. Use a safety pin to help you feed the elastic through the casing, then sew the elastic together, sew the casing closed, and you're done! 

 I made this skirt for my younger daughter, but I really like the fact that since the width of the skirt is so generous, it really ought to fit her until she's an adult. I may have to replace the elastic a couple of times, but she should be able to walk around in her twenties in an awesome Hobbit skirt!


Tuesday, December 14, 2021

Cooking with Teenagers: Cloud Bread

 Your teenager has discovered angel food cake, only she calls it "cloud bread." 

And where did all the teenagers find out about angel food cake?

Tiktok, of course!


There are billion iterations of this recipe, all heavily borrowed (ahem) from each other, so I don't know which teenager was the first to post the recipe, but I'm pretty sure it was a teenager because they didn't put in any cream of tartar.

Teenagers rarely understand the point of cream of tartar.

Cloud bread is actually healthier than angel cake, as well, with no flour and quite a bit less sugar, although the sugar part may just reflect the fact that you're only using three egg whites, instead of the twelve that angel cake recipes usually call for. But egg whites and sugar... I mean, that's healthier than a lot of packaged breakfast foods! And I'm always nagging Syd to eat more protein, anyway, so cloud bread is basically the perfect food for her.

Syd and I also like the fact that it only takes a few minutes to make and get into the oven, and the way that you can spice and dye it any color you like. Here are a couple of different batches we've made recently:

Whipping the egg whites!

We use tapioca starch instead of corn starch in our recipes. I don't know why I got on that kick or if it's any better for you or the environment (for all I know, maybe it's worse for you!), but it works the same and it's, like, a tiny bit less Number 2 Field Corn in your system, so there you go.

Scraping it onto parchment paper

It's a lot tougher than you'd think to make it look smooth and loaf-like.

And look how soft and fluffy it turns out!

We were going for Christmas green with this batch. I don't think we nailed it...

It's sweet and light, a tiny bit sticky but still suitable for pulling off a bit and eating it out of hand. It does deflate a bit when cool (*cough, cough* needs cream of tartar *cough*), but since it's made from just three egg whites and some sugar, there's no need to leave any servings long enough to deflate.

Here's what else my teenagers and I cook together!

Saturday, December 11, 2021

How to Make a Fabric Wall Hanging

 This tutorial was originally published on Crafting a Green World in 2016.

If you're a fabric hoarder collector like me, then you completely understand that fabric is art. 

 That being said, of course there are times when you want to showcase that beautiful fabric of yours not on a body, or even on a quilt, but instead displayed on the wall like the art that it is. 

 Making a fabric wall hanging is a little more complicated than just nailing a length of fabric to your wall (that wouldn't work because the fabric would pull and warp), but it's actually not much more complicated. The trick is to attach the fabric to something that you CAN nail to the wall. 

 Here's how to make that fabric wall hanging happen! 

 You will need: 

  fabric. I'm using a panel that's 20"x54". It's a print of The Hobbit's book cover that I bought from Spoonflower, and it's my current Most Favorite Thing. Ideally, your fabric panel will have a margin of at least 2" at the top and bottom that you don't love. If not, then sew a narrow strip of fabric at the top and bottom. 

  wood. You'll need two thin boards, around 1"-2" wide and each a little longer than the fabric panel. I've still got a bunch of boards in the garage from when I tore out the closet in the kids' bedroom last year, so I cut one of those up for this project. 

 glue. You can use a variety of glue for this project, but hot glue is the least fussy. 

  1. Cut your panel to size. You need an extra 1"-2" at the top and bottom of this panel where you're going to attach it to the wood, but the sides of the panel can be cut flush to your pattern or hemmed to be so. Take care to cut the top and bottom of your panel completely parallel; otherwise, your panel will hang wonky!  

You can also starch the fabric at this step--here's how to make homemade fabric starch

  2. Prepare the wood. Because I'm cutting down an old board for this project, I also needed to sand it and stain it. You can paint your boards in a custom color, as well, or leave them natural. 

  3. Attach a hanger. Choose the board that will be on top, then attach the hanging hardware to it. There are several ways to do this. You could nail on a picture hanger or wire, attach an old belt, or do as I've done and drill a hole at each end of the board. 

After the fabric is mounted to the board, thread a length of clothesline or paracord through each hole, back to front, and knot it in the front. 

At the back, hot glue the cord from the place where it emerges from the hole straight up to the top of the board--this will keep it from flipping the board sideways when you hang it. 

  4. Attach the fabric to the wood. This part is a little fiddly, because you want your panel to hang straight and even. Going in small sections, glue the top two inches of the top of the panel to the back of top board. Be careful not to stretch the fabric as you work, and take care to keep it level. 

 Repeat for the bottom of the fabric and the bottom board. 

 Your fabric wall hanging is going to look great wherever you put it, but when you're tired of it, just cut it away from the boards and make it into something else!

Friday, December 10, 2021

Our Favorite Christmas Books, Movies, and Music

Lord of the Rings is absolutely a Christmas book if you read it out loud in front of the tree at Christmas-time! Also, it has amazing food descriptions.

 Alright, Friends! Need something to watch or listen to while you craft all the Christmas crafts?

The kids and I have got you covered!

BOOKS


  • The Best Christmas Pageant Ever, by Barbara Robinson. I don't know if this is a genuine classic, of if it's on my mind every year because of how much I loved watching the movie version on cable. It was also my town's Christmas play one year when I was little, and I remember getting Papa to drive me to the children's auditions so that I could make a total ass of myself in the middle of a high school gymnasium.
  • A Christmas Carol, by Charles Dickens. This is one of the books that we do as a family read-aloud in December. 
  • I Spy Christmas. Are kids still obsessed with I Spy books? I keep our old copy of this in storage with the ornaments and decorations, and every year it's just as fun as it was when the kids were tiny and obsessed with all things I Spy.
  • The Night before Christmas, by Clement Moore. We've got an old picture book version of this that the kids were OBSESSED with one December when they were small. Ever since, Matt still reads it aloud to them every Christmas Eve.
  • The Nutcracker, by E.T.A. Hoffman. It's oddly difficult to find an unabridged edition of this book, but the story is so weird that it's worth it!
  • The Polar Express. One Christmas, many years ago, the kids went outside on Christmas morning to find on the driveway a bell that must have fallen off of Santa's sleigh. Every year, when the kids put it on the Christmas tree, one of them shakes it near my ears and insists that SURELY I MUST HEAR IT RINGING?!? Alas, however, I do not. It's clearly broken, and I don't know why they insist on pretending that it isn't...


MOVIES

  • A Garfield Christmas Special. I have a weird attachment to made-for-TV Christmas specials, the cheezier, the better. The kids love Garfield, too, AND Jon is from Indiana, so this is for sure a legit choice for holiday viewing.
  • Star Wars Holiday Special. Don't watch this. Even if you love Star Wars, don't watch this. I put it on one year as a whim when Will was requesting "weird" Christmas movies, and now we're locked into watching it every year. 
  • White Christmas. I have no idea when we started the yearly tradition of watching this, because it's not even that uniformly good, and we've been watching it every year since way before the kids should have been interested. But now we've got a billion inside jokes from this movie that we literally say all year, and it would be unthinkable to skip it.


MUSIC

Syd colored these ornaments at a public library Nutcracker event when she was... two, maybe? I laminated them, and every year it gives me the greatest pleasure to find them in our ornaments bin, laughingly praise Syd's artwork, and watch her hang them on the tree.

  • Caga Tio. When the kids were preschool and early elementary, I used to sign us up for a lot of mail exchanges with other kids around the world. The kids did postcard exchanges, Artist Trading Card exchanges, state culture swaps, and a holiday card exchange in which a child from Catalan sent us the most bafflingly-illustrated homemade Christmas card that turned out to be a drawing of Caga Tio. A parent had clearly translated the kid's accompanying letter for her, making heavy use of what I assume is a vernacular dictionary, because the letter described the beloved Catalonian Christmas tradition of Shit a Log, including the lyrics to a favorite folk song that went something like, "Shit a log, shit a log, shit out something nice for me!" Reading this kid's letter was just about the best moment of Will's life to date.
  • "Christmas Tree Farm." It's one of Syd's oldest videos, and also my favorite! 
  • French Christmas Songs. The kids think it's very annoying that I'm always trying to add the French language sort of atmospherically into their subconsciouses, but I persist in turning this playlist on while we do holiday crafts. 
  • My Favorite Christmas Songs. This is my playlist of my Christmas favorites. Don't be surprised if it hits pretty much like one of those "Rockin' Christmas" CD collections. I have very little taste!
  • The Nutcracker. I mean, of COURSE! We don't necessarily listen to this all December, but from November until the curtain drops on Syd's final performance of the season, I wouldn't be surprised if I have this on every single day--I get REVVED UP with excitement for The Nutcracker! 
Is it just me that's having a hard time believing it's nearly Christmas, or getting into the "Christmas" "spirit?" I mean, it's 50 degrees and raining outside right now. Will and I have spent the entire morning finishing up her college applications to Swarthmore and Yale, with a billion more to do, it feels like, before January 1. College applications feel like they are sucking up all my focus and sapping my festive energy.

This weekend, though, I vow to start taking my own list seriously. Perhaps it will be a White Christmas family movie night, with popcorn, homemade chicken alfredo pizza, and white chocolate fondue for dessert. Or maybe it will be the night I force everyone to get into their jammies, hand them thermoses of hot chocolate and bags of popcorn, and we drive around town looking at Christmas lights while listening to my holiday playlist. Or we'll do Cards Against Life Day, where we half-watch the Star Wars Christmas Special while playing endless rounds of Cards Against Humanity using our decks of mostly made-up cards. 

Ugh, that means I definitely have to go grocery shopping first. Why does emotional labor always include an annoying dose of physical labor, as well?

Wednesday, December 8, 2021

The Kid and I Made a Duct Tape Dressform


You might remember that Syd has a passion for fashion design, yes?

She and I are especially happy that now she's homeschooling again, she's once again got plenty of time to dive into all these big passions of hers. Along with her academic work and her everyday art projects, I've been encouraging her to design and make some bigger, more ambitious art projects. The planning and troubleshooting are great skills to practice, and the projects, themselves, are always sources of inspiration for Syd to teach herself something new. The four-foot-tall acrylic painting on canvas that now hangs in our front hall taught Syd not just a billion more things to know about acrylic painting, but also got us discussing and making decisions about how artists obtain and use reference images, and what's acceptable professionally versus academically.

So when Syd started thinking about planning her next Trashion/Refashion Show design, I started thinking about ways to make the project even more open-ended for her. We decided that one good way to help her elevate the sophistication of her designs is to make her a custom dress form.

And what should we make this custom dress form out of?

DUCT TAPE!!!!!

We used this Etsy Labs tutorial as our spine, but I got the expanding foam idea from this tutorial.

I bought this set of duct tape way back when the kids and I were making duct tape wallets and I wanted them to have a lot of color options:

Five years later, I still have some remnants of the least popular colors from that set left. I've been using them whenever I need duct tape, of course, but this project used up every single last little bit, and I'm pretty thrilled to 1) have had just the random supply that I needed when I needed it, and 2) have all those rolls of duct tape GONE!

Syd put on a baggy old T-shirt, and we had a hilarious time wrapping her in tape. That morning was definitely a contrast in homeschooled kids--Will, hard at work on her calculus homework, and Syd, hard at work on being mummy-wrapped in tape. 

Side note: personally, I find the calculus easier to mentor. Will's kind of homeschool work is easy for me to identify as "proper" work, and I have really been struggling to find my legs homeschooling an art kid whose schoolwork looks so different. She's over there bopping along, listening to a podcast and drawing in her sketchbook, working hard on improving her draftsmanship or whatever, and I'm over here trying equally hard not to nag her about reading the rest of her biology chapter, or working on her poetry essay. Anyway...

After we finished wrapping the kid in duct tape, I cut it off her and we taped it back together and stuffed it full of newspaper and expanding foam.

Three expanding foam pro tips:
  1. Buy the kind that says minimal expanding, or it'll expand so much that it will warp the dress form.
  2. Resign yourself to using the entire can at once. I used half a can, then cleaned it off according to the directions and set it aside. But when I came back to it, I couldn't for the life of me get it going again! I had to go buy another can, and they're not the cheapest thing at Menard's. This time, though, when I got through half a can and felt like the dress form was done, I handed the rest of the can off to Matt and was all, "Pretty please go wander around outside and fill in cracks and stuff." I think the chicken coop will be insulated exceptionally well this winter!
  3. Do NOT be this kind of fool:

You know I'm not squeamish about getting my hands dirty, and I have zero problems walking around for days with hands stained by fabric dyes, permanent markers, or other colorful mishaps. But not only did this stuff NOT come off for many, many, many days, but it also irritated my skin the entire time, and when I got desperate and tried applying straight acetone, I irritated my skin even more. 

Just... wear gloves, you know? Not that hard. Please remind me of that often.

It actually wasn't a bad thing that I ended up using two cans for this project, because the waiting period allowed me to see what spots still needed a little more foam after the previous batch had fully expanded. 

I wasn't sure if sometime Syd would want to do more with the dress form's neckline, so I left it unfinished but later put a piece of cardboard over it to keep the newspaper stuffing inside:


Once upon a time I bought a yard sale dress form that hasn't ever gotten much use because it's never mimicked the size of anyone I'm sewing for, but it does have an excellent stand that works perfectly for this project!


That wider PVC pipe goes through the dress form and is adhered inside with expanding foam, so it can't be removed. The narrow PVC pipe fits inside that wider one, and over the metal rod of the stand, so it can be removed if Syd wants to work with the dress form on a table top. But Matt also cut it so that when you put it on the floor stand, it exactly matches Syd's height!

And yes, I've made her pose for MANY photos with her dress form twin. It's hilarious.

Saturday, December 4, 2021

Make Sea Glass in a Rock Tumbler

This tutorial was originally published on Crafting a Green World back in 2016.

Yes, you can 100% make sea glass in a rock tumbler. It's super easy, and it comes out straight-up looking like sea glass. 

Here's how to do it.

How to Make Sea Glass in a Rock Tumbler

You will need: 

  rock tumbler. You want a good-quality metal one, something along the lines of the Thumler's Tumbler that we own. Good rock tumblers are pricey, but they make a great gift for a science-minded kid, so much so that if you don't have a science-minded kid of your own, someone you know probably has one and may in fact have a rock tumbler that you can borrow. 
  filler. This takes up the spaces between the glass pieces. You can use either ceramic media or plastic beads, both of which can be re-used. 
  coarse grit. Unlike rock tumbling, which requires coarse grit, fine grit, pre-polish, and polish, making sea glass in a rock tumbler only calls for coarse grit
  broken glass. You don't want anything too thin, like microscope slides, because the rock tumbler will abrade it so that it's too thin to be useful. I had great luck with vintage glass bottles, however. 
  hammer and towel. Gotta break that glass somehow! 
  tile nippers. These aren't necessary, but if you want to shape or trim your glass at all, you need them.

 1. Break some glass. As I mentioned before, I'm using vintage glass bottles to make sea glass, because that's what I have a million of and need to find more things to do with. I'm primarily choosing either the glass bottles that were broken when I found them, or that are of unimportant provenance. I clean up and polish the nice vintage glass bottles and display them around my house, even though I've frankly got too many of those, as well. 

 ANYWAY... my preferred method of breaking a glass bottle is to wrap it in a towel, set it on my driveway, then whack it with a hammer. From the mess of broken glass, I pick out the nice pieces that I want to tumble. I really like bottle necks and bottle bottoms (ahem...), and also the side pieces if they've broken into a shape that I think will look nice when tumbled. 


 Use the tile nippers to trim a piece of broken glass into a more interesting shape, or chip off the edges around a bottle's bottom. 


  2. Set up the rock tumbler. Use these instructions to make your tumbled glass. Note, however, that the instructions explicitly tell you not to use glass bottles. My experience is that you can, although you still want to avoid any glass that's too thin. A Coca-Cola bottle should work. A spaghetti sauce jar probably won't. 

 3. Check your work. When you open up your rock tumbler after five or so days, the inside will look like this:  


Instead of sifting out the tumbled glass, I pick it out of the matrix and examine it. A couple of times, a piece has cracked and needs to be set aside. Sometimes, a piece is perfect just the way that it is and I love it. Most times, though, the tumbled piece is almost perfect, but still needs some refining. For that, get the tile nippers back out. 

 For instance, after examining that bottle neck in the above photograph, I decided that I'd like it better if it was trimmed even closer to the edge, so I did: 


 4. Go for round #2. Pop any glass that you've trimmed, and enough new pieces to maintain the level in your tumbler, back into the barrel with the same grit and filler material. Give it a go for another five or so days, and then take a look. 

Repeat until you're happy!