Showing posts with label nature crafts. Show all posts

Sunday, September 12, 2021

How to Make a Teacup Candle

This tutorial was originally published on Crafting a Green World in 2016.

If made correctly, a teacup candle is beautiful, useful, and endlessly refillable. You'll love its warm light and gentle scent, and you'll enjoy your teacup candle far more than you would a boring old store-bought container candle. 

 You will need: 

  beeswax or soy wax. I use beeswax, but soy wax is an excellent substitute. Just don't use paraffin! 

  wax-only crock pot or double boiler and repurposed glass jar. I thrifted a small crock pot years ago to use just for my beeswax crafts, and it's still going strong! As an alternate, you can use a double boiler and melt your solid wax in any old glass jar inside of it. 

  vintage teacups. Use only teacups that have no visible cracks or hairline cracks in the body of the cup; chips at the rim and broken handles should be okay, but use your own judgment. 

  hot glue gun and glueYou could use epoxy glue if you don't have a hot glue gun, but hot glue really is the best choice here. 

  pencil, tape, and clothespins. You'll use these only to hold your wicking in place, so feel free to find substitutions. 

  wicking. You can buy wicking constructed specifically for container candles, or use your own stash wicking that's appropriate for the diameter of the candle that you're making, or for a smaller diameter candle (this is called underwicking). 

 1. Examine your teacup for flaws. Your teacup should be able to withstand the candle burning, but an older teacup that has flaws might not. Check your teacup carefully for any cracks or crazed glazing; a couple of chips on the rim or a broken handle shouldn't matter, but any flaws on the body of the cup might affect its structural integrity. 

  2. Melt your wax. Using your crock pot or double boiler, melt enough solid wax to fill your teacup most of the way. I pour my leftover beeswax into novelty silicon trays and then store it in a glass jar, so that's why my wax is adorable. 

  3. Measure and glue down the wicking. Measure out a length of wicking about twice the depth of your teacup, then dispense a dollop of hot glue in the bottom center of the teacup and press one end of the wicking into it. 

 4. Brace the wicking. Tape the other end of the wicking to a pencil or chopstick, then wrap the wicking around it until it's nice and straight and taut. To keep it that way, I like to pin a clothespin to each end of the pencil, then brace them against something--here, I'm using my scissors--to keep the entire contraption from shifting.


5. Pour in the wax. Using a ladle, carefully pour melted wax into the teacup, trying your mightiest to keep it from sloshing against the sides of the cup.

To keep the wax from shrinking away from the sides of the cup as it hardens, pour about 1/3 of the wax into the teacup, let it set, then another 1/3, let it set, and then the last 1/3.

6. Trim the wick. Cut the wick just above the top of the wax, and reserve the excess wick for another project.


Teacup candles make excellent handmade gifts, especially for those people who you don't otherwise know what to give--teachers, hostesses, your great aunt, etc.

Or, you know, yourself. You get to have a teacup candle, too!

Friday, September 10, 2021

So Many Little Pieces of Trilobites (and Crinoids, and Horn Corals!)


Will has been loving the geology unit of the Earth Sciences class she's been taking at our local community college this semester, and one day recently it inspired us to drag out our HUGE collection of rocks, fossils, and shells to admire. 

Will has always been interested in rocks and fossils, in particular, and we've collected them together as long as we've been homeschooling, but rarely have we had the attention span to really sit down to clean, organize, identify, and display them. Oops!

Fortunately, our current mania has lasted long enough for us to get the entire collection organized, much of it loosely identified, and our favorites set aside for display. We've been filling up several Riker mounts that I bought way back in 2015 (so I'm also stoked to have a good chunk of closet space freed up!), and are DIYing display cases for our larger specimens.

I have one entire Riker mount reserved solely for my favorite finds from our two family trips to Penn Dixie in 2010 and 2018. I spent an episode of Double Love carefully cleaning them in the bathroom sink with an old toothbrush, and once they were all spiffed up and pretty, I took their pictures!

This is my favorite specimen. It's part of a trilobite's cephalon!

Here's an excellent horn coral.

I think this is part of a trilobite's axis?

Check out my crinoid crown! I am so proud of this fossil because I own zillions of crinoid stem fossils from hunting here in Indiana, but this is one of my only crowns.

I've got almost the entire trilobite in this fossil mold!

Here are some crinoid stems to go with my crown!

I really like the combination of the trilobite and brachiopod fossils here.


I think this is a Bryzoan!

I love my trilobite faces.

Here's my finished Penn Dixie Riker mount:


I've got a handful of fossils that I want to keep but not display (so much for reclaiming ALL that closet space!), a couple of matrices that I want to investigate further, and a few fossils that I might try putting in my Pumpkin+Bear etsy shop to see if the same people who are interested in rainbow candles and mathematical quilts might also be interested in fossils.

And if Will and I are planning our list of colleges to visit around nearby sites for rock and fossil collecting, that's nobody's business but the homeschoolers'! 

Friday, August 13, 2021

Creeks and Fossils: Earning the Girl Scout Cadette Eco Trekker, Senior Eco Explorer, and Ambassador Water Badges


With a multi-level Girl Scout troop, activities tend to snowball. I'm absolutely of the mindset that not everybody has to earn a badge for everything, but... to be honest, I'm actually not so much of that mindset in practice, not with my older Girl Scouts. It was different when they were Brownies and Juniors, we met up more often, and they were all eager beavers who could be counted on to also earn a ton of badges outside of meetings. 

Now that they're all big kids, we don't meet up as often for badgework. The kids are all too busy with all their other kid stuff! Combine that with the fact that older Girl Scout badges are more work and take longer to earn, and these busy kids don't really earn them on their own at home, anymore, either. 

So when we do make the time to meet together, in an activity that the kids have chosen and are enthusiastic about, then yeah, I want them all to be able to earn a badge for their work.

And because they're at three different levels, that means three different badges.

For this meeting, the activity that the kids were enthusiastic about was finding fossils in our local creek. One of our troop co-leaders is an expert in local fossils and spends much of her free time looking for them in the many creeks around town, so she and her Girl Scout took charge of the fossil activities. I added in water activities to fill in most of the rest of the steps to earn the Cadette Eco Trekker, Senior Eco Explorer, and Ambassador Water badges, and the kids collaborated on the activity for Step 5 for each badge.

Field Trip to a Local Creek: Cadette Eco Trekker Badge Step 1

I didn't discover creek stomping until I moved to this little Indiana town, but now it's one of my favorite activities. When my kids were small, I'd put them into their swim trunks and we'd all go down to our favorite creek. We probably never walked more than half a mile in either direction down the creek, but still we could stay there for most of the day, me reading on a bank while the kids splashed and fought and caught crawdads and minnows and filled their pockets with fossils and geodes.  

It turns out that going to the creek with teenagers is much the same!

Lesson on Fossils and Geodes: Senior Eco Explorer Badge Steps 1-2, Ambassador Water Badge Step 1

My co-leader gave the kids a lecture on crinoids, the main fossil that we find locally. She showed them images of what crinoids looked like when they were alive and examples of fossils from her extensive collection. She can look at a fossil and tell you exactly what part of a crinoid it is, which is a super cool superpower!

Afterwards, the kids played in the creek and hunted for fossils and geodes:


I'm really glad that I remembered to bring my rock hammer, because it was a hit (ba-dum-dum!)! Everybody likes bashing open a geode and seeing what magic is inside.


Stream Health Assessment and Water Quality Testing: Cadette Eco Trekker Badge Steps 3-4, Senior Eco Explorer Badge Steps 3-4, Ambassador Water Badge Steps 3-4

I get bored with the similar structure of Girl Scout badges, but it sure does help with a multi-level troop! Steps 3 and 4 of each badge ask the Girl Scout to explore and work on an ecosystem issue; for the Ambassadors, the issue must be water-related.

To complete these steps, I taught the troop how to conduct a visual stream assessment, combining this worksheet with this contextual information. We talked about floodplains, channelizing, banks and erosion, and habitats for macroinvertebrates. Our town just experienced a major flood, and its impact on numerous local businesses has been in the news, so we also discussed how proper stream management is crucial not just for the sake of the natural environment, but also for urban infrastructure. One of the flooded businesses is located directly on the floodplain of a creek, and our entire downtown, which flooded so quickly that patrons were trapped in bars and restaurants, sits directly on top of another creek that was closed in and covered by a heavily-trafficked street. The flash flooding was a big disaster, with one person dead and one business still closed due to the damage; if the city had respected the creek's floodplain and maintained its riparian buffer zone, it likely wouldn't have been so dangerous or caused so much damage.

If you want to add more context, particularly regarding your area's overall watershed, these topographic maps are a great resource. 

A visual assessment is a great way to monitor a stream's overall health, but you can't get the whole picture with just your eyes alone. I wanted the kids to get some experience conducting chemical analyses, so I walked them all through how to collect water samples, then we reconvened under a nearby picnic shelter and I taught them how to do several of the tests from my favorite water monitoring kit:


With the supplies that I had left after Will's APES labs, the kids were able to test for dissolved oxygen, fecal coliform, nitrate, and pH. While we did the tests, we discussed the importance of dissolved oxygen, the fine line that is nitrate, and how fertilizer and sewage runoff are so dangerous partly because they're so nutritious for bacteria and algae, which will consume all the dissolved oxygen if they grow too much, and that will suffocate all the rest of the life in the stream. 

Both the dissolved oxygen and nitrate results for our stream were shockingly low, and I am VERY curious about that!

Make an Art Project: Ambassador Water Badge Step 2

Fortunately, my co-leader is also an artist who works with fossils, and so she was able to set the kids up to make absolutely beautiful collages with some of their fossils and cool rocks:


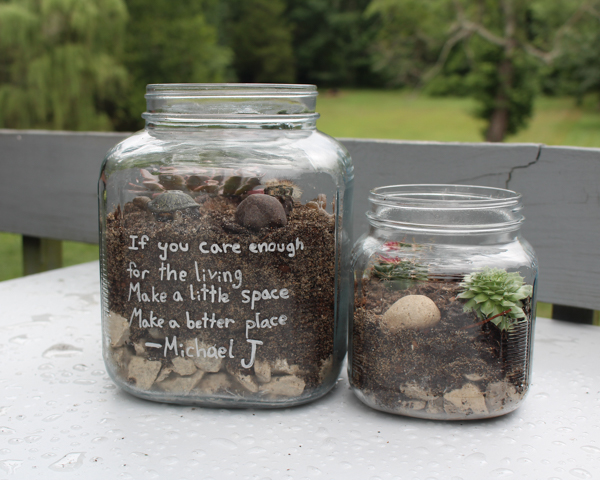
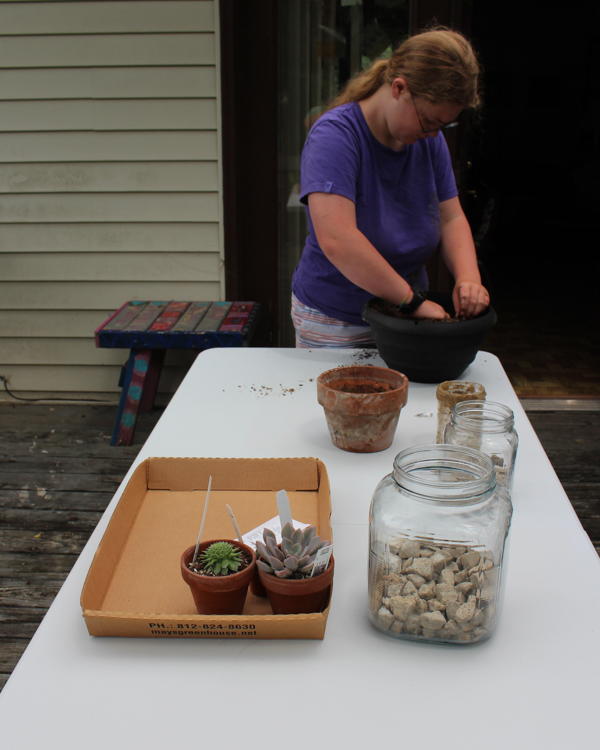
The kids had a fabulous time with this activity as they explored aesthetically-pleasing ways to display their collections. Some kids made collages in pendants, some made collages in frames, and some organized their collections in little bottles. They all turned out so cute!

Share What You Learned: Cadette Eco Trekker Step 5, Senior Eco Explorer Step 5, and Ambassador Water Badge Step 5

All the badges we covered have, for their final step, an activity that encourages the kids to pass on their knowledge, teach someone, educate, inspire, etc. Girl Scouts really encourages kids to find their voices, and older kids, especially, are often asked to try their hands at mentoring or teaching.

The kids in my troop each completed this final step independently, although we talked about possible avenues for sharing while they worked on their art projects, and they edited a Google Doc of ideas and possible scripts together. We brainstormed possibilities like writing a letter to our local Parks and Recreation Department informing them of the results of our water quality testing, writing a letter to the newspaper, making a flyer or brochure and displaying it or passing it around, writing a Google Maps review of the park with our water quality test results included, and other ideas. When we meet again, they can share what they shared!

When I teach kids, I always wonder if the info stuck. Did they learn anything, or were they just along for the ride? Did they understand the importance of dissolved oxygen and nitrates, or were they just dropping tablets into water and looking at the pretty colors? After all, I know well that a polite, biddable kid can act like they're 100% with you, doing everything you ask, with their eyes glazed over and cartoons playing in their head.

HOWEVER... this morning, my kids and I spent a couple of hours at a local park, hanging out with friends while Will completed a science lab (nectar guides for the win!). On the walk back to the car, we went across a pedestrian bridge over one of our town's many, many creeks. I stopped to look down at the water, and the kids stopped with me.

"Hmmm," one said. "This creek has definitely been channelized. And it doesn't have a very good riparian buffer zone."

"It's got fish, though, so it must have some habitat for macroinvertebrates."

"It could just be a hardy species."

"Look at that bank erosion!"

Yeah, I think they earned that Girl Scout badge!

Saturday, October 24, 2020

How to Make a Fairy Garden

A fairy garden is easy to make, and nope, it actually doesn't require any of those porcelain or plastic store-bought fairy garden accessories.

After all, the fairies don't go to Hobby Lobby for their furniture--they MAKE it!

Fairy gardens also don't have to be as elaborate as the ones that you see showing off all of their store-bought fairy accessories. Sure, a fairy garden wonderland is cute, but not everyone likes "cute."

But I promise everyone can like a fairy garden!

All you really need to make a fairy garden are a couple of small plants and suitable potting soil, a container, and appropriate handmade, found, recycled, or natural embellishments. The fairy garden becomes a magical place based on these elements alone... that's kind of WHY it's magical, you know? Simplicity is, indeed, beauty.

So scavenge up some recycled and natural materials, and let's make a fairy garden!

1. Prepare an appropriate growing environment for your plants. This step is the key to the entire fairy garden--you need the right plants, the right container, and the right soil. Make a garden that looks pretty but doesn't take care of your plants the right way, and it'll be dead within the month.

I like to start with the container. For the set of fairy gardens that I made last week, I knew that I wanted to use some old glass storage jars whose lids are... well, I don't know. Maybe the fairies took them.

For a glass container like that, I didn't want plants that would spread a ton, or get too bushy. Moss would have been cute, or a little bonsai, but after wandering around the greenhouse, and learning that they were randomly out of the venus flytraps that I'd REALLY wanted, I decided that a little desert fairy garden would be cute, like a fairy terrarium.

That meant succulents and cacti! Succulents and cacti both need a lot of drainage, so I put in a bottom visible layer of gravel (you could use aquarium gravel for this, or decorative river rocks, or shells, etc.), then the kid helped me mix up an appropriate potting soil for succulents and cacti--basically, potting soil plus playground sand plus peat moss or perlite. I'm ashamed to say that I used peat moss, even though I loathe buying it because its harvesting is VERY problematic, because I couldn't find the alternatives that I wanted and I needed to get the fairy gardens finished so that they could be birthday presents.

Rushed shopping and crafting is often not eco-friendly shopping and crafting, dang it.

2. Add potting soil and plants to the container. Just like in a real garden, bigger plants go in the back and smaller plants go in the front, and offsetting them to each other allows them all to be seen.

As you place the plants, begin visualizing what fairy garden embellishments you want to add, so that you'll be sure to have room.

3. Decorate your fairy garden. This is the fun part! To decorate your garden, check out these handmade fairy garden decorations for inspiration, or look around your home and yard and repurpose found items. Since my kids have been small, they've adored using their little toy animals as fairy garden decorations, and dollhouse furniture also often works well.

As you're embellishing, don't forget the container itself! One of our fairy garden birthday presents needed to be Michael Jackson-themed, and I thought about making Shrinky Dinks or polymer clay models, but it turned out that a relevant quote from one of his songs, written on in paint pen, was all that was really needed to make it perfect.

If you give your fairy garden as a gift, don't forget to include care instructions for the plants, and the appropriate fertilizer, if necessary. Giving the recipient a bottle of distilled water, a little bottle of liquid fertilizer, and a handwritten sheet of when and how much to water can be all the difference between a birthday present that's a huge hit and one that's an eventual source of guilt and self-recrimination.

Looking for more fairy garden inspiration? Check out my kid's junkyard fairy garden here, and this super easy, super magical chia sprout fairy garden that's perfect for preschoolers.

Saturday, September 19, 2020

How to Make Realistic Felt Leaf Silhouettes

I originally published this tutorial on Crafting a Green World.

If you're in the mood to decorate your home for autumn, there's no better inspiration than the real leaves right outside!

You can bring them inside and they'll last for a while, preserve them and they'll last for longer, or you can use them as templates to make these easy and beautiful felt leaf silhouettes that will last as long as you like.

Supplies


Leaves

My kids and I have used both completely fresh leaves and pressed leaves. It's more difficult to trace an accurate outline of a leaf when it's fresh, but it does turn the project into one that can be done in less than an hour, instead of one that requires cooling your heels for a few weeks while your leaves are in the leaf press.

Cardstock, Pencil, Scissors, Chalk.

You could trace your leaf directly onto the felt, but I like to trace my leaf onto card stock, cut it out, and then use that template on the felt. It's an extra step, sure, but it's much easier to make more leaves using a single card stock template than it is a slippery leaf.

Felt

You can go two ways with your felt choice, and both are eco-friendly. Wool felt is a natural material, and Eco-fi, the most readily available type of felt found in big-box craft stores, is a recycled material, made from post-consumer plastic bottles. I own and use both types, although I do prefer the weight of my wool felt for this particular project.

Embroidery floss and needle (optional)

Sometimes, I enjoy embroidering the veins on my leaves.

Instructions

1. Go out and collect some leaves! Although this makes an especially fun autumn project, you'll likely want green leaves still on their trees. Give them a look over to make sure that they're whole, but don't freak out over small irregularities. One of the things that makes this particular leaf project so nice is that since you're copying actual leaves, each leaf will be different. None of that militant uniformity that you get from artificial greenery!

2. Press the leaves, if you're going that route. Even if you don't put them in a leaf press, you might decide, midway through trying to trace your first curvy, fiddly leaf, that you want to press your leaves for just a couple of hours, at least. Leaves are NOT perfectly flat like paper.

3. Trace the leaf onto card stock and cut out. Felt can hold a lot of detail, so really dig in and try to include as many of the interesting edge details that you can. Cut out the cardstock template, and if you're into it, now is a great time to stop, ID your leaf, and write its ID on the card stock. That way you'll know if you're making a felt red maple or silver maple leaf!

4. Trace the card stock leaf onto felt using chalk. I like using chalk because it shows up well on felt, can be brushed off or washed off with a little water, and is generally a LOT easier to find than the water-soluble marking pencil that I own but loathe because chalk works so much better.

5. Cut out the leaf silhouette from felt. You'll want fabric scissors for this, and even tiny thread scissors, if you've got them. The smaller and sharper the scissors, the easier it will be to capture all the details.

You can simply enjoy your felt leaf silhouettes as-is, or fancy them up with embroidery or fabric paint. You can string them into a garland, or tack them together to make a bunting. Add a loop and use them as name tags on gifts or as Christmas tree ornaments.

What will YOU do with your felt leaves?

Saturday, August 22, 2020

How to Make Stamped Clay Seed Bombs

I originally published this tutorial on Crafting a Green World.

I used to think that seed bombs do not work, full stop.

And to be fair, I had a good reason for my opinion, because most of the seed bomb tutorials that you see online just do NOT work! Here's why:

  • If the seed bomb is too big, it's not going to be able to dissolve in good time and release the seeds.
  • If the seed bomb recipe calls for too much liquid, the seeds will germinate prematurely and then die.
  • If the seed bomb recipe calls for too many seeds, they'll crowd each other out before they can grow.
  • If the seed bomb gets tossed out at anything other than JUST the right time, it won't get the proper amount of rainfall required to dissolve the bomb and nurture the seeds.

When there are so many things wrong with so many of the seed bomb tutorials that you see, it's easy to think that the whole concept is a bad one.

But done properly, and distributed carefully, seed bombs CAN work.

Here's what you'll need to do it right.

Ingredients & Supplies

  • Air dry clay. I'd suggest something non-pigmented and natural-looking, not something like Model Magic, which is super fun and my kids play with it but I have NO idea what it's made of. If you don't know what it's made of, you certainly don't want it in your garden!
  • Seed starting mix or other potting soil. Your favorite seed starting mix will work well here, but any kind of nutritious potting soil will do.  And again, avoid potting soils with "moisture retention beads" or "water crystals" included; those are just fun names for the same kind of polymer that's used in disposable diapers. You don't want that in your garden, either!
  • Native seed mix. Not all greenhouses are ethical providers of native seeds, so check with your local native plant society before you buy a packet. Better yet, save your own seeds from your favorite native plants and use those.
  • Small stamp. A regular scrapbooking stamp is exactly what you need. Scrapbooking used to be big business, so you should be able to find any stamp design you can dream of.

Directions

1. Get your hands dirty

Pinch off an amount of clay the size of a large marble--remember that the best seed bomb is a SMALL seed bomb, so don't overdo it.

2. Roll the clay into a ball between the palms of your hands

Might as well go ahead and get a little dirtier! Use the tip of a finger to make an indentation in the clay ball, and fill the indentation with as much potting soil or seed starting mix as will fit.

3. Add the seeds

Be very stingy with the number of seeds that you put in your seed bomb because you don't want them to crowd each other out of existence. Three to four seeds is plenty!


4. Seal the potting soil and seeds inside the bomb

Pull the sides of the seed bomb over the top to seal in the potting soil and seeds, then roll it around your palms again to make it back into a nice, smooth sphere.

5. Stamp the top of the seed bomb

Press hard with the stamp; you'll slightly flatten the seed bomb, but will make your stamped impression stand out nicely.

6. Let air dry

Let the seed bombs air dry for at least as long as the package of air-dry clay instructs. Thanks to the potting soil center, the seed bomb might take even longer to dry.

When the seed bombs are dry, you can store them in the same cool, dry, dark spot where you store the rest of your garden seeds. To use them, toss them onto the ground whenever the growing conditions outside match the seed packet's specifications AND there's a lot of rain in the forecast for the next week or so.

Another option is to simply press a seed bomb down into the dirt in your garden or a flowerpot and water regularly. I planted a seed bomb in a pot in my windowsill just for fun (I don't think the native plants will last inside all winter, but it's worth the experiment), and look how cute my little seedling babies are, growing out from under the safety net of their seed bomb!

My watering can didn't exactly mimic the right rainfall conditions to properly dissolve the clay exterior of the seed bomb, but even so, it was enough to get a couple of sturdy little seeds germinated and growing happily.

Imagine how happy they'll be when I toss them around the garden!


Saturday, August 15, 2020

How to Remove Wax from a Jar Candle

I originally published this tutorial on Crafting a Green World.

Here's a shout-out to my fellow VERY thrifty crafters!

I like to do a lot of wax crafts, but beeswax is expensive, and lacking my own set of beehives, my budget can't quite keep up with my habit.

Fortunately, I also have a lot of jar candles around the house, some homemade (with more lovely beeswax!) and some gifted or store-bought (with various qualities of wax, but often most likely the cheapest). When these candles burn down there's always still some wax left at the bottom and around the sides of the container. Reclaiming that wax is a simple process, and when I'm done, I have all-new wax to craft with!

It's worth it even to reclaim that cheap wax of unknown (but probably petroleum-based) provenance. You can use it to make fire starters, or dye it and use it to make wax seals. Perhaps you have an origami boat that you'd like to waterproof?

The possibilities for reclaimed beeswax or soy wax are endless, of course, including remaking your own jarred or poured or dipped candles.

And don't forget that you can also reuse the jar that the candle came in! I'll show you how to get it squeaky clean near the bottom of my post.

Supplies

Here's what you need to reclaim the wax from your jar candles:

*Save yourself some trouble and hit up your nearest thrift shop for the cheapest crock pot on the shelf, and then use it only for crafting. I bought this crock pot from Goodwill for $1.50 probably a decade ago, and it works perfectly for me and then lives out in the garage when I don't need it.

Directions

1. Cover your work surface with newspaper, then ready your crock pot.

Because I promise you that you do NOT want to spill melted wax all over your kitchen. Just... you really don't.

2. Add the jar candle containers and water to the crock pot.

Oh, if only it were so easy! So here's the thing: those nearly empty jar candle containers are going to want to FLOAT, dagnabit. It's super annoying, and also, you really don't want to get water in the containers with the beeswax.

What you have to do, then, is wedge the containers in so that they can't float away. Setting a ceramic plate on top of them works well, as does filling Mason jars with water and setting them in the crockpot to take up all the rest of the available space.

3. Melt and pour.

After everything is wedged tightly into place, all you have to do is turn your crock pot on and wait for the wax to melt. I like to pour the melted wax into silicone molds, not only because the wax slips out so easily when it's cooled, but also because afterward, you have lots of manageable little blocks of wax that it's then easy to melt again and use for all your projects.

Often, your melted candle wax will have soot or wick fragments in it. If so, pour it through a layer of cheesecloth to catch the impurities.

4. Store reclaimed wax separately.

It's worth it to always store this reclaimed wax separately from your other wax stash. If you have no idea what type of wax you've reclaimed, you obviously don't want to mix it in with your lovely soy and beeswax, but even if it's soy or beeswax that you've reclaimed, you still don't want to simply add it back to your stash. Reclaimed candle wax is fine for making more candles, but I certainly wouldn't want to use it for the skin care products that I also make using beeswax.

Now, what about those reclaimed jar candle containers? Even with the wax melted and poured out of them, you'll notice that they're still waxy. The trick to getting them squeaky clean is to completely immerse them, right side up, in a large pot of water. Make sure there's plenty of water covering the top of the containers. Heat the pot of water on the stove, and when the water temperature reaches the melting point of the wax that the candle containers once held, the remaining wax will melt and float to the top of the water.

You have to play around with this method a bit and keep a good eye on the pot, because your wax of unknown provenance is going to melt at an unknown temperature, and if you have several candle containers in the pot, you're probably going to be dealing with a different melting point for each of them. But when all the wax has finally melted and floated up to the top of the water, you can take the pot off the burner and let the water cool.

Skim the solidified wax off of the cooled water and toss it, and then you're free to check out your former candle containers. They'll likely still be sooty and need a good scrub-up, but after that, they're ready to reuse or upcycle.

Might I suggest that you use them to make another jar candle?

Saturday, June 20, 2020

How to Dry Flowers in the Microwave


I originally published this tutorial on Crafting a Green World.

Have you ever gone out to collect flowers and then wanted to make some beautiful craft with them RIGHT THEN, but were kind of over the impulse by the time you finished drying and pressing them weeks later?

Unless your attention span is really, really, really short, that won't happen when you use my full-proof method of drying flowers in the microwave. Pop a flower in and two minutes later you'll be crafting away!

This method works with both flowers and leaves--it's particularly great for making leaf collections and saving wildflowers, especially with kids (although preserving leaves with beeswax is also really fun!).

Supplies & Tools

You likely have everything that you need to dry flowers already in your house. Here's what it takes:

Microwave

I know that a lot of y'all don't use microwaves for your food, and that's cool, but you're not going to eat these flowers. If you don't own a microwave, ask a friend if you can come over and dry flowers in theirs for a few minutes.

Unglazed Terracotta Dish Or Tile

You can find one of these at your local hardware or garden store, or in a store like Restore that resells such supplies. I'm using a large terracotta plant saucer that in its free time sits underneath my fern.

Paper Towel Or Paper Napkin

I know, this supply is also pretty gross and environmentally unfriendly, but it's also necessary. The good news is that you can use the same quadruple-folded paper towel or paper napkin for all your flowers, only changing it if it gets stained.

Glass Bowl Or Plate With A Flat Bottom

This is actually the trickiest supply to source, because the glass bottom needs to be flat so that it presses against the flowers. Most plates and even bowls have a bottom lip that makes that impossible.

I make do with a couple of glass food storage containers, but what I wouldn't give for a flat piece of glass that better matched my plant saucer! You could also upcycle picture frame glass or glazed tiles for this--just make sure that there's no metal at all in what you use, since you'll be nuking it in the microwave!

Directions

1. Set up the plant saucer and paper towel.

Make sure the plant saucer is clean and dry, then cover the bottom with four layers of paper toweling.

The paper towel layers keep the flowers from sticking to the unglazed terracotta, and they also pad the flower a bit as it dries, so that it doesn't crumble to bits between the heavy top and bottom layers that it's sandwiched between.

2. Arrange the flowers and leaves in a single layer on the paper towel.

I actually think that it's really hard to arrange flowers in a way that will look attractive when they're dried and pressed flat, so don't be afraid of trial and error here.

3. Cover all of the vegetation with a piece of flat glass.

Don't mash it down or try to manually flatten the flower; just set the glass on top of it.

4. Microwave it!


Set the saucer down in the microwave, and microwave at full power for 20-30 seconds. A delicate, thin flower will be completely dry in 20 seconds, but a juicier flower will take a bit longer.

If you've got something thicker, like a Bachelor's Button or Black-Eyed Susan, microwave it for 30 seconds and then check on it, then microwave it again in increments of 20 seconds, checking each time to see if it's dry. When the flower feels stiff and no longer damp, it's ready! If the petals start to brown then you've microwaved it for too long--try again with another flower, but dial it back by several seconds.

You guys, this method of drying flowers is so easy and fun! My kids and I can go from taking a walk in the woods to making bookmarks out of the flowers that we picked on that walk on the same day. Our leaf collections are EPIC. I actually went looking for more crafts to do with dried flowers the other day, I had such a lovely surplus.

If that surplus lasts long enough, I'll come back in a couple of months and talk to you about making dried flowers into Christmas ornaments!

P.S. Yes, you can use this same method to dry herbs, as well, but if you're feeling wary of microwaves, remember that you DO want to eat your herbs.