Showing posts with label homeschool science. Show all posts

Sunday, March 5, 2023

DIY Density Discovery Bottles

The bottle on the left contains marbles, corn syrup, colored water, glitter, and canola oil. The bottle on the right contains colored water and canola oil, and I've just shaken it.

This tutorial was originally posted on Crafting a Green World way back in 2015!

Use any old water-tight bottles you have on hand to create density discovery bottles for your budding scientist. 

Other than playground sand, which is apparently pig-filthy and will make your ocean in a bottle look polluted, there are a lot of simple, easy, around-the-house ingredients that will encourage babies through big kids (and even adults!) to be excited science explorers.

Glycerin falls through the colored water and rests below.

Discovery bottles put interesting ingredients into a clear, sealed bottle for easy exploration to create a liquid density experiment

Although many bottles use colored rice or beans that a kid can shake or shift to find toys hidden inside, density discovery bottles rely on the interesting property of a substance's relationship between its weight and its volume. Two substances with very different densities will not mix, or they'll mix and then settle. 

 And yes, you've seen this while cooking, but my dear Watson, have you ever really observed the phenomenon? Put it in a clear bottle, and you'll be able to. 

 Although you'll want to make these discovery bottles for babies, it's otherwise a very kid-friendly project, accessible even to toddlers. It calls for loads of hands-on, messy exploration, and your kids could easily spend hours at it--my two big kids went back and forth to it all day, then kept their most interesting creations to study the next day, as well.

DIY Discovery Bottles

You will need: 
  •  containers. Any clear jar or bottle with a tight-fitting lid will do, although I'd avoid glass, since this project is intended for children. That being said, of course, my children, who are 9 and 10, did much of their exploration in large test tubes. The bottles that we kept, however (the test tubes have long been rinsed and put away), are simply clean plastic peanut butter jars with the labels removed. 
  • eye droppers, funnels, measuring cups, a kitchen scale, and other useful tools. These will periodically need to be rinsed or washed off as you work. 
  • hot glue. If you're going to keep any discovery bottle for further play, you'll really want to glue the lid on. Really. Glue it on BEFORE your kid goes to stand on the carpet with it. 
  • interesting substances. There are so many options here, and they're all going to be found inside your house. Look around for anything that's colorful, and anything that is thin and watery or thick and sticky, but also just grab stuff, and let your kids sort out their physical properties. Here are some ideas:
    • alcohol. Rubbing alcohol or vodka and plenty of headspace will allow you to freeze your bottles so that you can observe the effect.
    • corn syrup. If you can stand to buy it (you don't have to eat it, but your purchase does support big farming), this this one is a must-have. It's very dense but still flows, and it's clear, so you can really see what's going on with it.
    • craft sand. This is apparently a clean sand, but I don't know where it comes from or how it's processed, and I don't own any, so I didn't use it. Sand, nevertheless, would be a VERY interesting substance to include.
    • dish soap. Leave plenty of headspace, and your bottle will have an interesting effect when shaken.
    • glitter. Not only is the glitter pretty, but depending on the substance, it will fall, float, or mix.
    • glycerin.
    • marbles. These will fall interestingly through the various densities of substances, especially the corn syrup.
    • oils. Unfortunately, the least eco-friendly oil--mineral oil--is also the most awesome for this project, since it's clear. Buy a bottle for the sake of Science if you can stand it, because it's worth the ability to really see the plane of interaction between oil and another substance, but otherwise use any other cooking oils.
    • vinegar.
    • water. Dye your water with liquid watercolors or food coloring so that you can see it better as it flows among the other substances.
The tutorial for this project is so simple that it isn't even a tutorial at all: all you have to do is play and explore! 

Colored water, dropped from a test tube, sits on top of corn syrup and below mineral oil.

Since my kids were doing this for Science, I required them to keep notebooks that recorded what substances they were mixing, their reactions, and their comparative densities based on these reactions. They played and explored forever in this way, and it was refreshing to see that even in a kid-land that includes, in my opinion, too much Minecraft and My Little Pony, they were thrilled by something as simple as dropping drops of colored water into a test tube half-filled with clear mineral oil. Have you ever tried that? It IS pretty great. 

Corn syrup, itself, is also pretty great. You could fill a bottle only with corn syrup and interesting little objects--marbles, glitter, dice, clean shells--and simply watching each object fall slooooooowly through the corn syrup is quite fascinating. An observant kid (and they're all observant) will notice that the object even leaves a little trail through the corn syrup as it falls. 

Or, fill your bottle half with corn-syrup and half with colored water. Add oil. Add glitter. 

Another never-fail option is simply colored water and oil. You can't dye oil, so if you're not using a clear oil, the trick is to dye your water a color that complements the yellowy, greeny oil that you've chosen. Blue, green, orange... there are a lot of colors that work. Regardless, the colored water and oil behave VERY interestingly together, so you don't want to pass this combo up.

Liquid starch is dropped through mineral oil, glitter, and colored water.

Play around with substances and mixtures to your heart's content, but when you've found a combination that you love, wipe down the bottle's rim and lid with a soapy washcloth and dry it well, then run a line of hot glue completely around the inside of the lid and screw it on the bottle. 

After it's screwed on, you can run another line of hot glue around the bottom of the lid if you're feeling paranoid--and with who knows what inside that bottle, feel free to feel paranoid. 

 Set these discovery bottles on a shelf somewhere that's convenient for you or a kid to return to whenever you want to give them a shake or a turn and watch the pretty colors and interesting interactions. 

Although you'll have used shelf-stable substances, you'll also want to check on them every now and then, and if you see any sign of bacteria growth, obviously pour them out, wash the bottle, and pitch it into the recycling. 

Sunday, February 26, 2023

Ocean in a Bottle Pinterest Fail

This post was originally published on Crafting a Green World way back in 2015!

My journey began with a super-cute Pinterest craft project: the ocean in a bottle. 

To make the ocean in a bottle, you--in theory--add sand, blue water, oil, and seashells to an upcycled bottle. The sand settles on the bottom, with the seashells resting on top, then the blue water, then the oil, looking just like a lovely little beach scene. Tilt the bottle, and the oil and water react to make rolling waves. 

Fun, right? It's also--in theory--an excellent demonstration of density, the relationship between a substance's mass and its volume. 

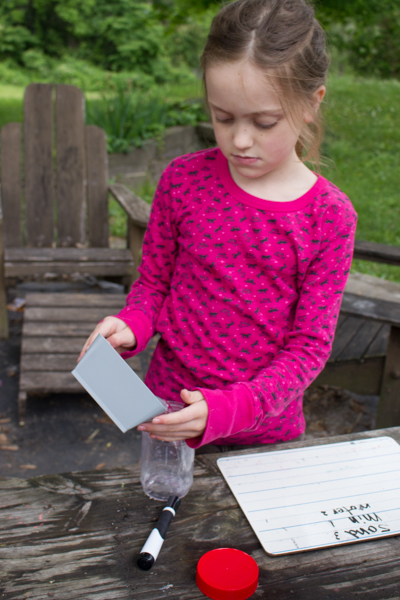
My children are studying density right now, so I set this ocean in a bottle project up for them on a recent school day. I gave them clean peanut butter jars, the three substances of sand, water, and oil, and asked them to make a prediction about the relative density of each substance. 

Next, I had the kids measure the density of each substance. Density equals mass divided by volume, so density is easy to measure simply by weighing an exact volume of a substance. Since the kids were comparing densities, they used a balance scale to weigh a half-cup of each substance--and they were each surprised to learn that a half-cup of water weighs more than a half-cup of oil! Yay, math! Yay, science! 

Based on their weight and volume measurements, the kids then revised their comparative density predictions to oil, then water, then sand. 

I instructed them to pour a half-cup of each substance into their peanut butter jars and observe. I waited for the squeals of happiness. I waited... 

"Um..." my older kid said. "Is it supposed to look like muddy water?" 

Well, no, not so much. And yet... yeah. Muddy water with oil on top. Huh. 

I guess that whoever made this project and put it on Pinterest used, like, sanitary, hypo-allergenic, clean sand. I used, like, SAND sand. Sandbox sand. And did you know that sandbox sand is apparently pig-filthy? The sand itself may settle in the bottle, but the filth mixes in with the blue water, turning it a nasty, muddy, green-ish brown. Dirty water in a bottle. Or maybe polluted ocean in a bottle. Either way, it wasn't *exactly* the adorable craft project that I'd intended. 

Fortunately, the kids, themselves, couldn't care less--they were having a fabulous time exploring with water, oil, and sand, and had no expectations of what the final product should look like. Muddy water with oil on top? Fine! Now let's scoop out a pile of sand and pour oil on it! And then stir it with sticks! And then dump it in water! 

And that's pretty much how all our projects end up, so no disappointment there. The good news is that now that I've figured out what NOT to use--sand, dirt--I've got a good idea about what TO use, and as a different project on a different day, I set the kids up creating their own density discovery bottles out of all kinds of cool ingredients. I'll show those to you soon! 

P.S. If you've got any cool discovery bottle combos that we should try, tell me in the Comments below. Science is depending on you! 

Photo credit: cute ocean in a bottle image via Education.com

Thursday, February 16, 2023

So Many Cooks in the Kitchen: All the Ways We've Homeschooled with Educational Cooking Projects

King cakes from scratch!

 As I was writing the other day about my kid's experiences with baking throughout her childhood, I got interested in trying to remember what-all we actually had cooked together as part of her homeschool education. 

Spoiler alert: it's been quite a lot!

Projects like these have been such a part of the pattern of our days that I couldn't remember off-hand more than a few notable ones: the cookie map of Ancient Egypt. The cookie Solar System. Mason jar butter. Experimenting with yeast.

Fortunately, THIS is why I've been a blogger for 15-odd years--it's so I don't have to lose my precious memories because of my terrible memory!

I had SO much fun going through my blog archives to find all the times we incorporated a specific cooking project into our homeschool. I didn't count the times that we did stuff solely for fun (even though that's all educational, too!), like our cookie bake-offs and our dyed rainbow waffles and cupcakes, or the food that we made together just as part of life, like yogurt popsicles and applesauce and endless DIY pizzas and quick breads. In this master post, I'm just counting specific projects that we did that were for specific topics of study. I wish I could go back and do them all over again with those magical little kids!

ART


  • sculpture: bread sculptures. Bread dough is edible clay! It's also interesting to kids to see the transformation in their sculpture that comes from baking the bread. Of course, bread dough is just one more interesting sculpture medium that all kids should be exposed to, along with all kinds of clays and papier mache and anything combined with a good hot glue gun. You could also incorporate bread sculptures into subjects like math and literacy, sculpting bread dough snakes into shapes and letters and baking them into breadsticks. 

GEOGRAPHY


  • Japan: homemade mochi ice cream. Try making your own awesome Japanese treat! Cooking and tasting Japanese cuisine is a great way to build context in a kid who loves anime and manga. If kids are interested, the library usually has kid-friendly cookbooks of Japanese cuisine, and I feel like most places have Japanese restaurants. It's a great segue into a study of Japanese culture. 

  • local geography: locavore food prep challenge. Kids learn first-hand about the local food movement and what foods are grown and currently being harvested in their location as they collect ingredients and make a dish consisting entirely of local foods. If kids are really interested in local foods, you can spend spring through fall visiting every u-pick farm in driving distance, and look for places like independent dairies, local breweries, honey farms, and other local food providers who offer tours and workshops. Learning how to preserve those food products is a great next step! You can do also similar cooking challenges anywhere--collect ingredients and make a fun meal at an Asian or Mexican grocery; set a budget for kids to shop for a meal at the grocery store and then cook it independently; find all the Fair Trade items, etc. Even younger kids can play by finding foods with specific colors or something new they want to taste or something that starts with a certain letter, etc.

  • New Orleans, Rio de Janeiro, Venice: king cake. Mardi Gras/Carnival is a great time to dip into a geography unit study of New Orleans, Rio de Janeiro, and/or Venice. Not only is there the local cuisine of each area, but also the local music, the costumes, the dances, the parades--so much for every sense! If kids love that kind of thing, there are all kinds of nation- and region-specific holidays you can explore throughout the year to build geography and cultural knowledge. If kids just like baking, you can actually learn quite a lot of American history just through baking cakes!

  • map skills: cookie map. This is one of my favorite homeschool projects to do with young children. We've made cookie maps of every place imaginable, from the United States as an Independence Day project to various countries that we've studied to places that illustrate historical events. Kids can use frosting and candies to embellish the map and add features, and can make flag labels out of paper and toothpicks. The possibilities are endless! 


  • Taiwan: bubble tea. If your kid is into bubble tea, this could be the first restaurant-quality food that they learn to cook at home, because it's a SUPER accessible recipe. It fits great into a unit study of Taiwan or the entire continent of Asia, or expand the geographic interest by making or tasting special drinks from all over the world while studying those places. Take it in a new direction with more exploration of the mathematics of spheres or the science of polymers. Boba is also another preschool-friendly sensory material, although it's a choking hazard for under-threes. 

HISTORY


  • Ancient Mesopotamia: Gingerbread Cuneiform. See what it's like to write cuneiform... and then see how delicious it is to eat it! Other great Ancient Mesopotamia enrichment activities could include building models of a ziggurat or the Temple of Ishtar and listening to The Epic of Gilgamesh. Take the gingerbread cuneiform in a different direction by having a kid use the stylus to draw maps or diagrams or spelling words, or premake a gingerbread moveable alphabet to practice word building.

  • Neolithic Great Britain: gingerbread Stonehenge on a cookie cake. Kids get their hands on this Neolithic henge monument by building it in gingerbread on a cookie cake base. This one is mostly just for fun, so it would be a good thing to make as a little celebration when finishing up the relevant unit study. It also almost certainly ties into ancient astronomy, so you have a ready segue into the history of science. Gingerbread is also just a great structural material, so you could have a go at building pretty much any architectural creation with it--how fun would a gingerbread Eiffel Tower or Egyptian Pyramid be for Christmas-time?!?

  • Ancient Greece: cookie and Jello map. Here's your assurance from me that your kids' cooking project does not have to look perfect, or even attractive... or even not gross. I think this cookie and Jello map of Ancient Greece that the kids made looks SO gross, but they put a ton of research into it, worked really hard on it, and learned what I wanted them to learn. And they said it was delicious! 

  • pioneer studies: Mason jar butter. You'll probably come to this project inspired by reading Little House in the Big Woods or visiting a living history museum. It's an especially good activity when it's miserable outside, because it gets little bodies moving and occupies them for quite a while--and then you can have a snack! Contextualize the activity by visiting a humane dairy farm or getting a 4-H kid to let you milk their cow, or doing other living history projects. It pairs well with the picture book Fry Bread, which also includes a cooking project!

LANGUAGE AND LITERATURE


  • J.R.R. Tolkien: Lord of the Rings feast. Themed dinner and movie nights are my absolute favorite thing! After we read each of the books in the Lord of the Rings trilogy together (Matt has read SO MUCH TOLKIEN out loud in his life!), we had a movie night with a themed dinner to watch the associated film. It's very fun for kids to remember their favorite details from the book and figure out recipes to represent them. Sometimes they like to make foods written about in the book, like seed cakes or rabbit stew, and sometimes they like to make foods that represent other part of the book, like these Ring of Power doughnuts, above. You can make a themed dinner about ANYTHING, and it's always educational for the kids to research what they want to make, shop for the ingredients, and cook it.

  • children's books: Amelia Bedelia Bakes Off. The kids thought that Amelia Bedelia was SO FUNNY, and I still remember how absolutely thrilled my kid was when we finished Amelia Bedelia Bakes Off, she turned the page, and found a recipe there for Amelia Bedelia's cake! All praise to that author, because my kid could make the cake right then, using ingredients we already had on hand. Making recipes from children's books is such a great literacy connection. It builds context to the real world, and it makes reading feel even more fun than it already is. We also own and have really liked cooking from the Green Eggs and Ham Cookbook and The Little House Cookbook--any literary cookbook written around a children's book is probably going to have kid-friendly recipes.

   MATHEMATICS


  • fractions: Rice Krispy Treat fractions. Make Rice Krispy Treats, pour into a square or round cake pan, then when they're set have a lot of fun cutting them into various fractions. You can use any food that can be set in a round or square pan, but Rice Krispy Treats work particularly well because they cut cleanly without a lot of crumbling. Combine it with all the other hands-on ways that you can explore fractions, because it builds a kid's number sense by seeing the same concept illustrated multiple ways. Rice Krispy Treats are also a good sculpture tool for all kinds of art and model-making projects.

  • geometry: heart-shaped cake. Making a heart from a square and circle is a neat little trick--and it's delicious! You can extend the geometry play with paper geometric figures that kids can pattern and make pictures with. If you're feeling really ambitious, you could then bake a cake of whatever picture they've created with their shapes!

  • logic: edible chessboard. My kid and I baked this blondie and brownie chessboard during a time when chess was of high interest to her, and it was so fun! There was some good patterning and ordering involved, but things really got wild when we started removing squares from the board and figuring out how to play around them. Kids who like puzzles and games or are at all creative or mathy can get really into chess, and there are a lot of kid-friendly chess enrichment activities around. These two matching brownie and blondie recipes would also lend themselves to even more fraction exploration, patterning, and, if you frost them with letters, moveable alphabet play.


  • telling time: clock cake. This is more fun than educational, but it does require practical knowledge of how a clock face is organized and the ability to write the numbers. You could expand this lesson by cutting the cake to demonstrated elapsed time, or instead writing fraction divisions on it. 

PRACTICAL LIFE


  • reading comprehension/following directions: Jello. As soon as a kid can read pretty well, I think it's so educational for them (and SO fun for you to watch!) to be given any variety of easy-prep packaged food and encouraged to read the directions and make it all by themselves. Jello is perfect for this because the only cooking required is hot water, and it's very hard to mess up Jello! Instant puddings, canned biscuits and sweet rolls, and boxed cake mixes are also easy enough for a young independent reader to make.

  • how it's made: homemade peanut butter. This requires a high-powered blender, but kids find it fascinating to see how easy it is to make their own nut butter. My kid did not prefer this freshly-blended, peanuts-only peanut butter (even though the peanut butter I bought her at the time was also peanuts-only, sigh), but found it VERY fun to blend other delicious things into it. You can blend in honey, maple syrup, jam, and even more creative ingredients like spices and whole fruits. Cinnamon honey peanut butter was DELICIOUS! If a kid gets into the "how it's made" part, they might LOVE the TV show, much of which is free on YouTube. If they get into the blender part, introduce them to making their own smoothies and hummus and other nut butters. Blenders are VERY fun!

SCIENCE


  • astronomy: cookie Solar System. This is an all-day or multi-day project, but it is SO MUCH FUN! It requires calculation, geometry, a lot of research, and a lot of problem-solving, but the result is a tasty collection of cookie planets with correct relative size. My kids had a lot of fun reading about each planet so they'd know what color scheme to frost it and how many mini M&M moons to give it. It goes great with any other Solar System activities, many of which are equally hands-on. If you get a good cookie recipe that doesn't spread, you can also bake cookies to represent mathematical concepts like arrays and area models and larger map projects--can you imagine an entire cookie map of the world, with a different cookie for each continent?!?


  • cell cycle: states of meiosis cookie models. Reinforce the stages of meiosis by building an edible model. You can turn just about any diagram into a cookie or cake model with enough creativity! Plant and animal cells also lend themselves well to being made of cookies or cake, and I have seen an AWESOME cake model of a World War I trench.

  • fungi: yeast bread. The day that my kid learned that yeast is alive is one of my favorite days of homeschooling. She was so interested that we put aside whatever else we'd been planning to do and instead did some experiments with yeast, watched an educational video about fungi, looked at yeast through the microscope... and baked yeast bread! This would be a great intro to all kinds of kid-friendly yeast baking projects, including collecting wild yeast and making sourdough. 

  • chemistry: gelling and spherification. Learn how polymers work by creating gelatin juice spheres. Other hands-on ways to explore polymers include making milk plastic and slime. Or continue with edible states of matter by playing with non-Newtonian fluids, densities in liquids, and ice. These taste-safe spheres also make a good sensory material for babies on up! 

  • polymers: authentic homemade gummy candies. If you've got a kid who adores gummy candy, don't fall for those DIY kits or tutorials that essentially use just unflavored gelatin and juice or Kool-Aid. They do not taste like authentic gummies, and your kid will not be fooled! You really can make authentic gummies, though, that really do taste awesome, and your kid can get some hands-on experience working with polymers while you're at it! Kids who like this might enjoy other DIY food kits. There are SO many, from growing your own mushrooms and window gardens to making your own cheese and chocolate and gum.

  • properties of matter: density cake. This an easy and kid-friendly recipe that kids can run when they're learning about the properties of matter and density. Kids can do some similar experimentation to make a liquid density tower, although that one's not edible. If mix-ins seem to encourage your kids to try new foods, you can expand that into all kinds of bake-offs and cooking play. 
I wish I'd taken better photos of the kids doing all this magical cooking, because I'd love to write a book of educational cooking enrichment projects, but now I don't have anymore mini models! Maybe my teenager could help me with some illustrations to use instead...

Wednesday, December 14, 2022

DIY Borax Crystal Ornaments


This is such a fun and easy project that sneaks a bit of STEM into holiday crafting.

A few days ago, Will and I were in the mood to do a quick Christmas craft. We'd just cleaned the house for guests, so I didn't want to drag out a ton of crafting supplies, and we were already busy, so I didn't want to start something time-consuming and fussy.

Our solution: borax crystal ornaments!

The hands-on time commitment for these ornaments is just a few minutes, although be aware that the crystals will need to be left alone to grow for several hours, and preferably overnight. However, if you've got a countertop or table that doesn't get bumped every five minutes like my countertops and tables do, ahem, you can start this project in the morning and then check back in on it throughout the day to marvel at your crystal's growth!

To make your own lovely borax crystal ornaments, you will need:

  • borax. I use this sometimes as a laundry booster, so I have it on hand with my cleaning supplies. If you don't already own it, research its cleaning properties and you might find that you'll be happy to have it on hand, too!
  • pipe cleaners. I also have these on hand, although now that the kids are not so much kids anymore (sob), I suppose the time is coming that I'll have used up my last pipe cleaner and will have no need to buy more. Okay, that just got real sad...
  • popsicle stick and thread. You don't need to use these specific materials, just something that you can tie to the pipe cleaner and something that you can rest on top of the container. 
  • container. To avoid having to rinse a crust of borax crystals out of a jar, I cut the top off of some of the one-liter flavored sparkling waters that Syd and I are unfortunately obsessed with. Such wasteful packaging! Such delicious water!
  • water and spoon.
  • measuring cups. You'll need one-cup and a quarter-cup measuring cups.
And here's how to make your borax crystal ornaments!

1. Bend a pipe cleaner into a fun ornament shape. It needs to be small enough that it won't touch the sides or bottom of the container that will hold it, but otherwise you can create any shape that you like. The liter bottles that Will and I used were on the narrow side of the spectrum, so after some trial and error Will eventually hit on a spiral design that fit perfectly with plenty of room to spare AND looks utterly magical when crystalized!

You can crystalize two or three ornaments at once with the borax solution we use, and with Will's design we were able to do two spirals per container.

When you've got a design that you like, tie your thread to it, leaving plenty of length to wrap around the popsicle stick later.


2. Put water to boil, and while you're waiting, measure out 1/4 cup of borax and pour it into the bottom of the container you'll be using to grow your borax crystal ornaments.

When the water boils, measure out two cups and pour it into the container, then stir the borax well to create a saturated solution. The boiling water shrunk our plastic bottles a bit, but fortunately they remained usable.

3. When the solution is still, drop the ornament into the container and adjust the depth at which it sits by wrapping the string around the popsicle stick. The ornament shouldn't touch the sides or bottom of the container, and should be fully submerged. You can pour more hot water into the container to submerge the ornament, if needed, because this solution already has WAY more borax than required.


And don't forget that if there's room in your container, you can crystallize multiple ornaments at once!


4. Leave the ornaments alone to crystallize. Over the course of a few hours, they'll go from looking like this--


--to looking like this:


5. After about 24 hours-ish, remove the ornaments and let them air dry on a clean towel.


When they're completely dry, knot the string into a loop and hang them on the tree!

I don't know if these ornaments will last from year to year, but I do plan to store them and see. They're definitely much sturdier than the washing soda crystals that Will and I also tried; those didn't cover the pipe cleaner very well, and they started getting crumbly just a few days later:

Washing soda crystals look interesting through a microscope, but they don't make good ornaments.

If you want to turn this into a whole homeschool unit study (here's the very fun crystals unit study we did a few years ago!), here are some ideas:
  • Make those washing soda crystals, and whatever other easy crystal recipes you can find. Compare and contrast!
  • Try crystallizing objects other than pipe cleaners. Will and I did this, and we found that shells worked okay and wood worked less okay and was a pain in the butt to make sink. Give a kid enough containers, and I'm sure they could have all kinds of fun scrounging around the house and yard for objects to try!
  • Look at the finished crystals through a microscope. My kids LOVED this kid-friendly USB microscope when they were younger. 
  • Model crystal shapes. These models are more challenging (click on the broken image to be taken to the pdf model), while these are simpler. Copy them onto pretty cardstock, or draw your own decorations, and they'd also make lovely ornaments!
  • Read about crystals. These are some of the books about crystals that my kids enjoyed when they were younger:

If you need to sneak in a media component to get your kids interested, Frozen and The Dark Crystal have fun crystal references, although The Dark Crystal will also scare the snot out of your younger kids.