Showing posts with label cooking. Show all posts

Tuesday, December 14, 2021

Cooking with Teenagers: Cloud Bread

 Your teenager has discovered angel food cake, only she calls it "cloud bread." 

And where did all the teenagers find out about angel food cake?

Tiktok, of course!


There are billion iterations of this recipe, all heavily borrowed (ahem) from each other, so I don't know which teenager was the first to post the recipe, but I'm pretty sure it was a teenager because they didn't put in any cream of tartar.

Teenagers rarely understand the point of cream of tartar.

Cloud bread is actually healthier than angel cake, as well, with no flour and quite a bit less sugar, although the sugar part may just reflect the fact that you're only using three egg whites, instead of the twelve that angel cake recipes usually call for. But egg whites and sugar... I mean, that's healthier than a lot of packaged breakfast foods! And I'm always nagging Syd to eat more protein, anyway, so cloud bread is basically the perfect food for her.

Syd and I also like the fact that it only takes a few minutes to make and get into the oven, and the way that you can spice and dye it any color you like. Here are a couple of different batches we've made recently:

Whipping the egg whites!

We use tapioca starch instead of corn starch in our recipes. I don't know why I got on that kick or if it's any better for you or the environment (for all I know, maybe it's worse for you!), but it works the same and it's, like, a tiny bit less Number 2 Field Corn in your system, so there you go.

Scraping it onto parchment paper

It's a lot tougher than you'd think to make it look smooth and loaf-like.

And look how soft and fluffy it turns out!

We were going for Christmas green with this batch. I don't think we nailed it...

It's sweet and light, a tiny bit sticky but still suitable for pulling off a bit and eating it out of hand. It does deflate a bit when cool (*cough, cough* needs cream of tartar *cough*), but since it's made from just three egg whites and some sugar, there's no need to leave any servings long enough to deflate.

Here's what else my teenagers and I cook together!

Wednesday, July 7, 2021

She Earned Another Made-Up Badge: The Girl Scout "Homesteading" Badge


When my Girl Scouts were younger, I'd hear the leaders of older Girl Scouts gripe about the small selection of badges available for Cadettes, Seniors, and Ambassadors. I didn't get it at the time, because goodness, there were more badges around than my Brownie and Junior could ever possibly earn, and a whole slew of retired badges and fun patches, to boot!

But now that I have a Senior and an Ambassador Girl Scout, I see that the problem isn't so much the smaller selection, because there are still more official badges than my kids could do during their time in Girl Scouts, but the variety. Kids are always going to be super excited about some stuff and not excited at all about other stuff, but if you take out the not-so-exciting badges from the official GSUSA line-up... well, those gripey leaders had a point.

So I've been happily, unabashedly letting my entire troop remix or just plain make up badges. GSUSA doesn't have a current older-level basic camping badge, so I bought a set of retired Camping IPs and we made up the requirements to earn it. GSUSA doesn't have a badge for encouraging kids to have an immersive experience with books, so when a subset of my troop was into Percy Jackson, we bought a made-up Percy Jackson badge and made up the requirements to earn it. GSUSA doesn't have a travel badge for Ambassadors, so I'm right now in the process of collecting some retired Traveler IPs and later this year... yep, we'll make up the requirements to earn it!

Will is interested in various homesteading skills at the moment. Some much older retired badges do cover some of those skills, but there was nothing that was affordable, not too precious to put on a busy Girl Scout vest, and covering the skill set that interested Will the most. However, we thought this made-up badge would work quite well as a Homesteading badge, so I bought it--and we made up the requirements to earn it!

And here they are!

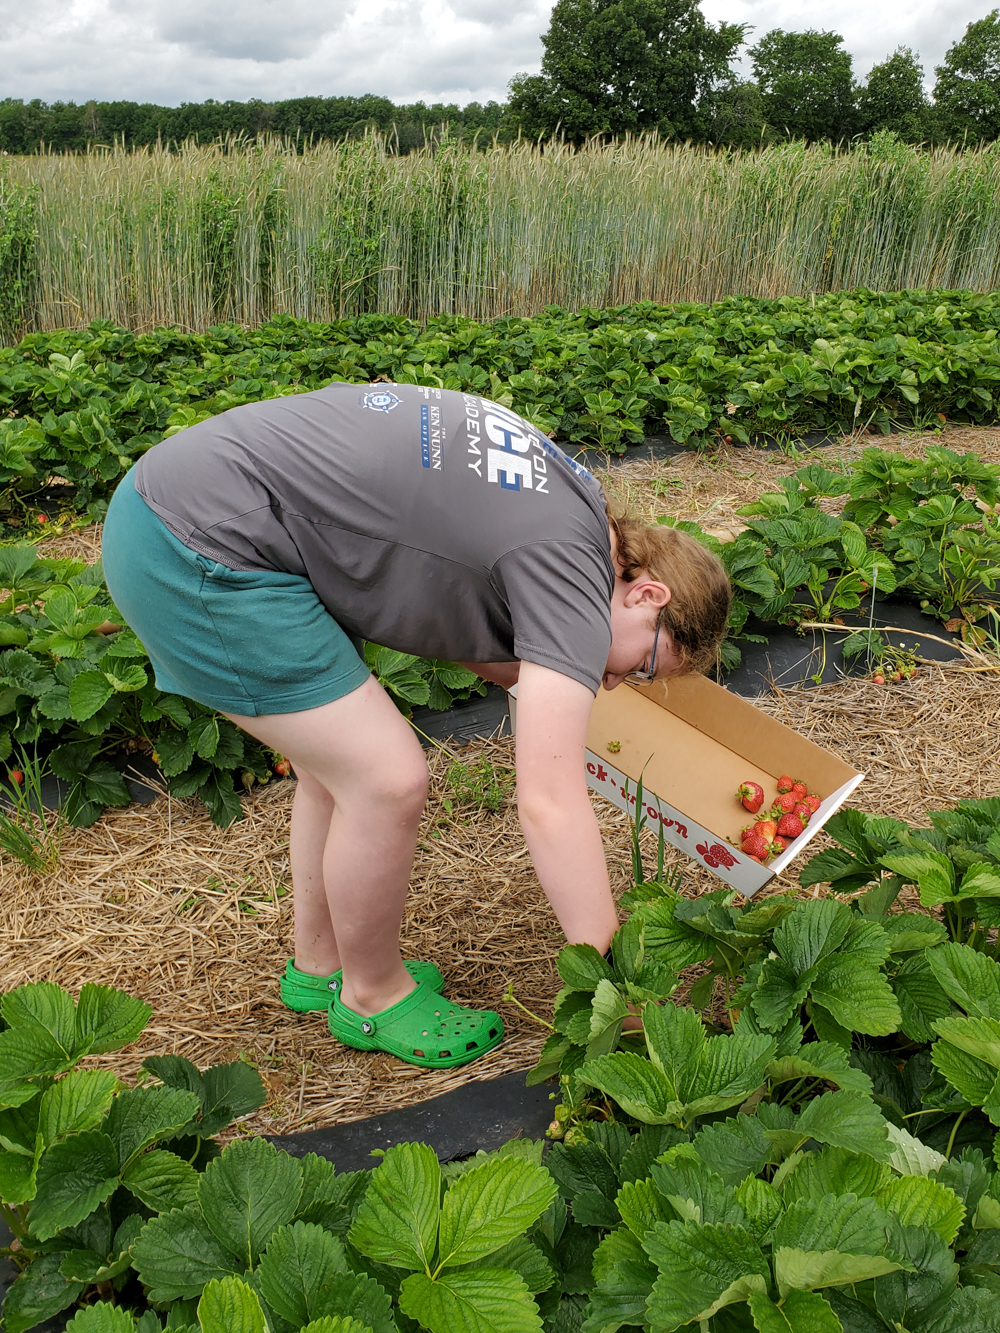
1. Research the square-foot gardening concept. Create and grow a square-foot garden for one season. 

For this step, I gave Will several cinderblocks, bags of soil, and newspapers, and showed her how to make a quick-and-dirty raised bed garden. She raised herself a fine crop of strawberries in it!

Other possibilities for this step were creating and growing container gardens, or helping an adult build a cold frame and using it to grow out-of-season greens.

2. Learn how to make your own jam. 

What to do with that fine crop of strawberries? Make jam, of course!

For this step, I taught both kids how to make freezer jam and cooked, canned jam, and the additional trick of laying out washed, topped strawberries on a cookie sheet, freezing them, and then tumbling them into a larger freezer container. Since they're already frozen, they won't stick together in that larger container, and you can just scoop some out whenever you want smoothies or muffins.

It's that life hack that has become an unconscious standard practice!

3. Learn how to use the dehydrator. 

I'd thought that Will might like to learn how to dehydrate her own dried fruit and fruit leather, but instead she ended up helping me deal with a sudden bounty of herbs and greens. I'm going to be really happy this winter that I have so much raw kale in the freezer and all those jars of dehydrated kale and dehydrated oregano in the pantry. 

Other possibilities for this step were learning how to make pickles or sauerkraut, both of which are super easy to do, and my kids LOVE them. 

4. Carve something useful from wood.

Here's Will at our most recent troop camping trip working on her wooden spoon:

She used her pocket knife while at camp, but mostly she used this wood carving kit that is probably the best gift the Easter Bunny's ever brought the kids!

She carved herself a quite serviceable spoon, lightly polished with olive oil and beeswax and absolutely perfect for all of our rustic culinary adventures. 

Other possibilities for this step were learning how to knit or crochet and making a washcloth to prove it!

5. Learn how to make cold-process soap from scratch.

This was definitely our most time-consuming project! I came into it with a big head on my shoulders, having made cold-process soap a few times before, and having taught Syd to make it just a few years ago, but I definitely got knocked down ALL the pegs when our first TWO batches of soap didn't turn out!

What I finally learned after doing the Googling that I should have done in the beginning is that it was my decade-old lye's fault. And now I own a brand-new five-dollar giant bottle of lye, so I guess my goal is to use it up in soapmaking sometime BEFORE the next decade...

Well, we got a good start this summer!


Will made a lovely soap with olive oil, coconut oil, and powdered milk--


--and that lye, of course! Check out its pH, because you KNOW we never pass up a chance to test some shocking pH:


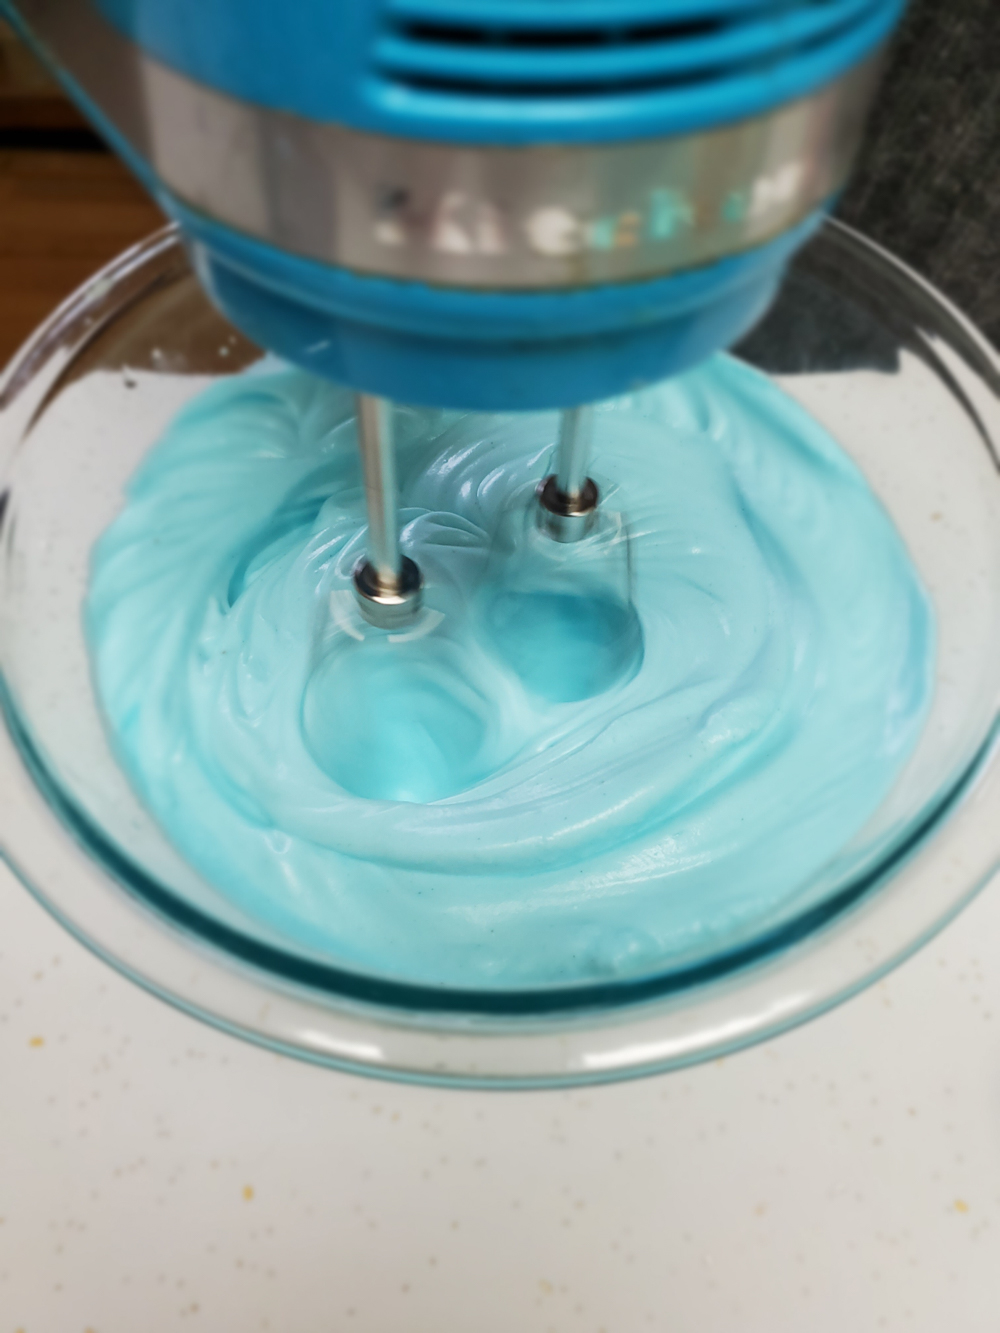
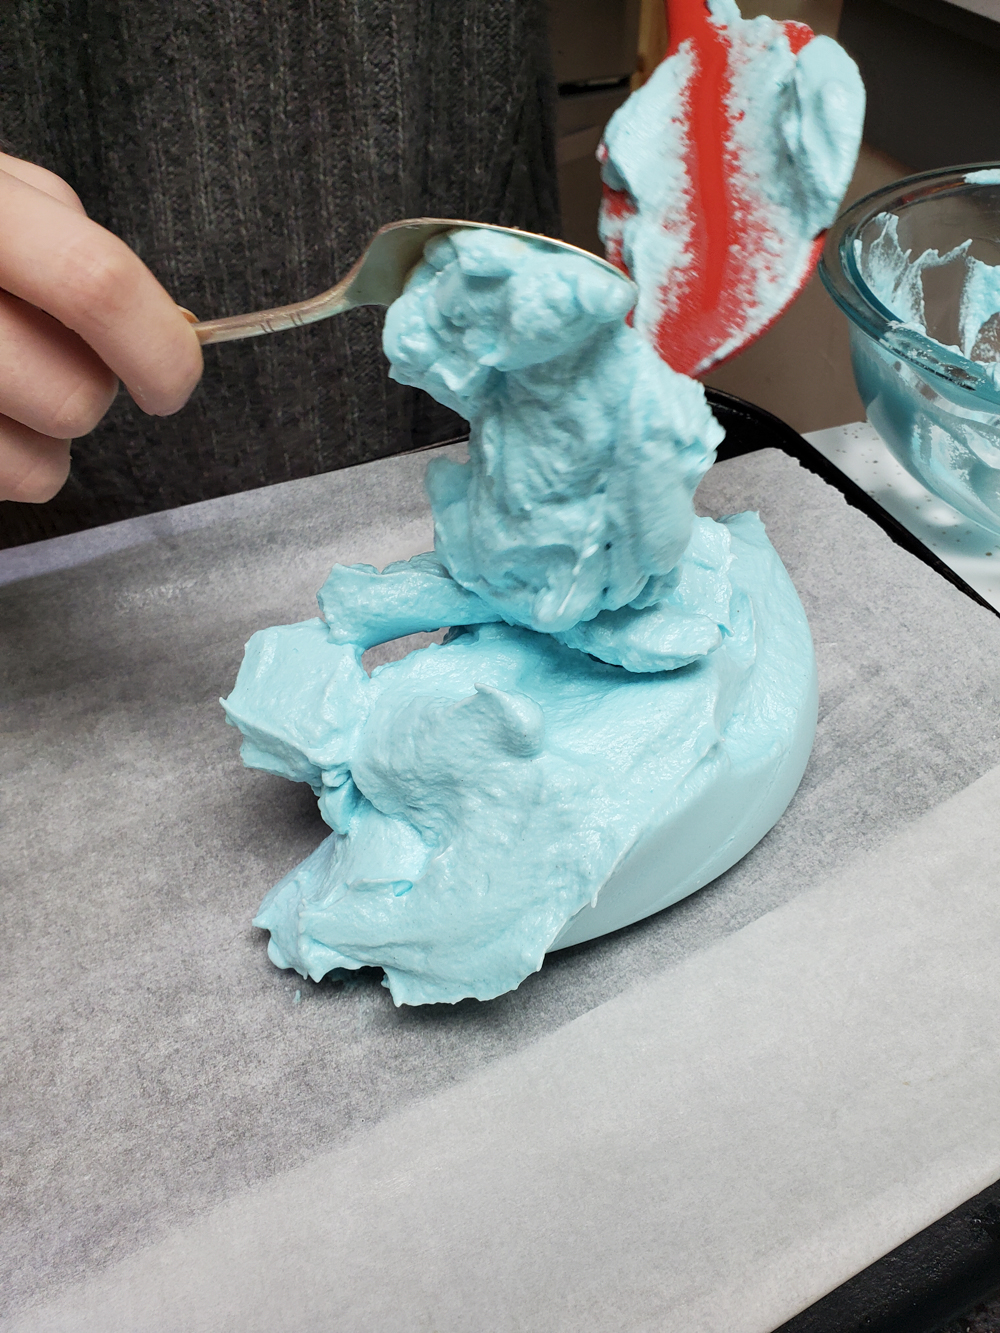
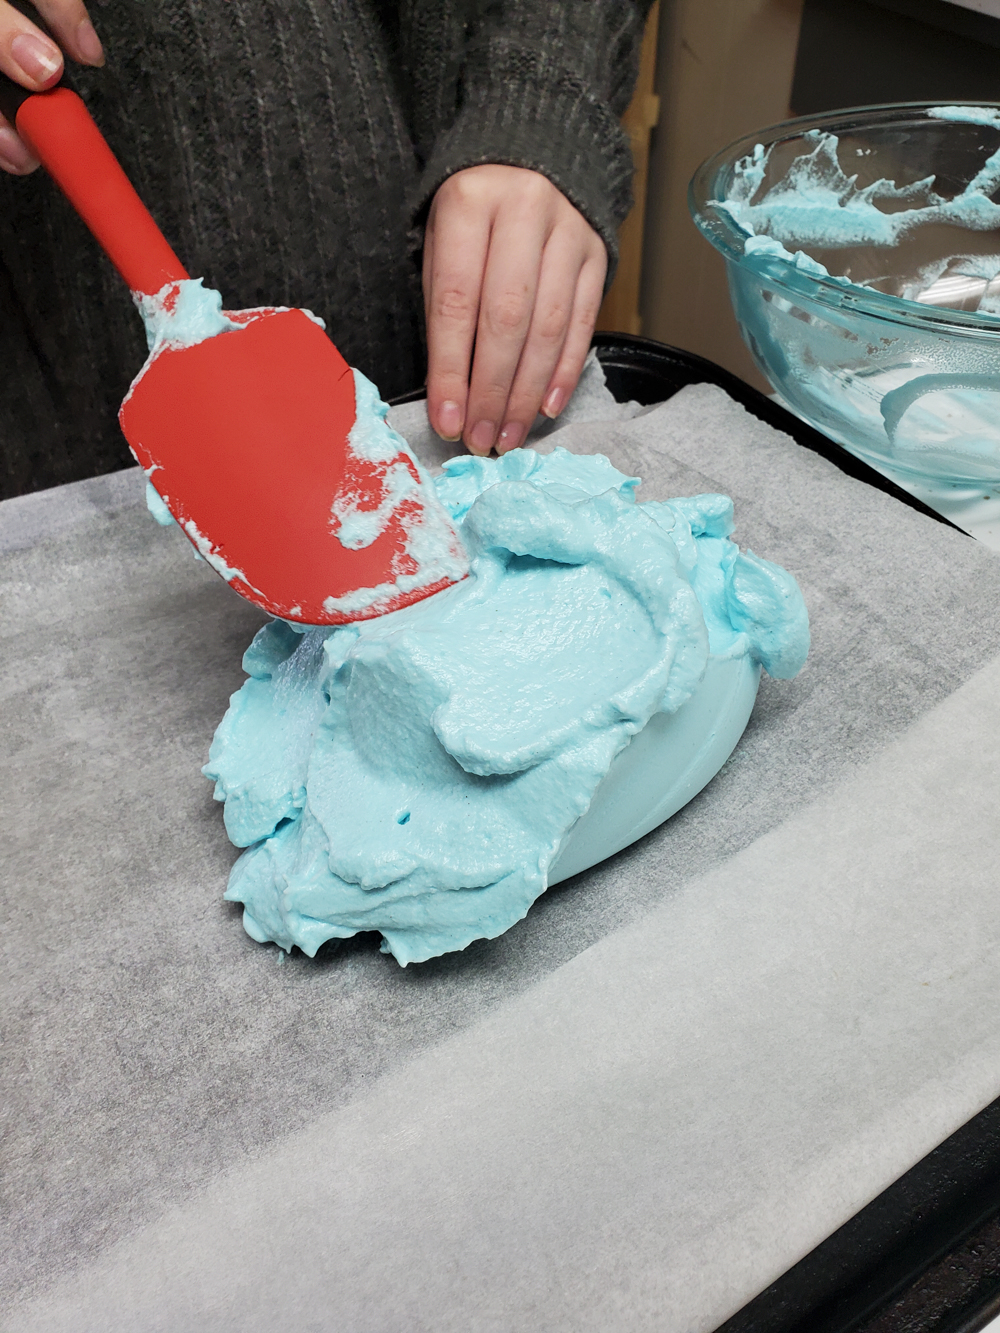
If you don't try to use sus lye, cold-process soap actually IS very simple. It's mostly stirring--


--until you reach trace--


--pouring it into an empty oatmeal canister to finish saponifying--


--removing it from the container when it's hardened and slicing it--


--and then leaving it to cure, every so often admiring how beautiful it is:


Isn't it gorgeous? It's actually inspired me to want to try some different recipes, but I've got to figure out what I'd put it in, because that was our only oatmeal container!

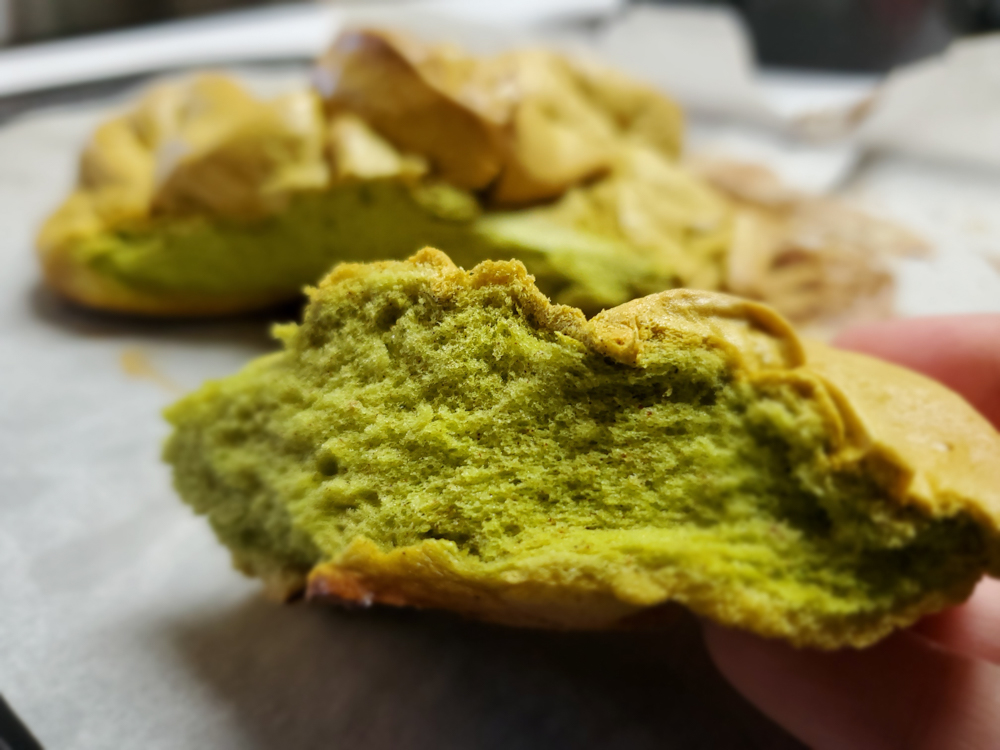
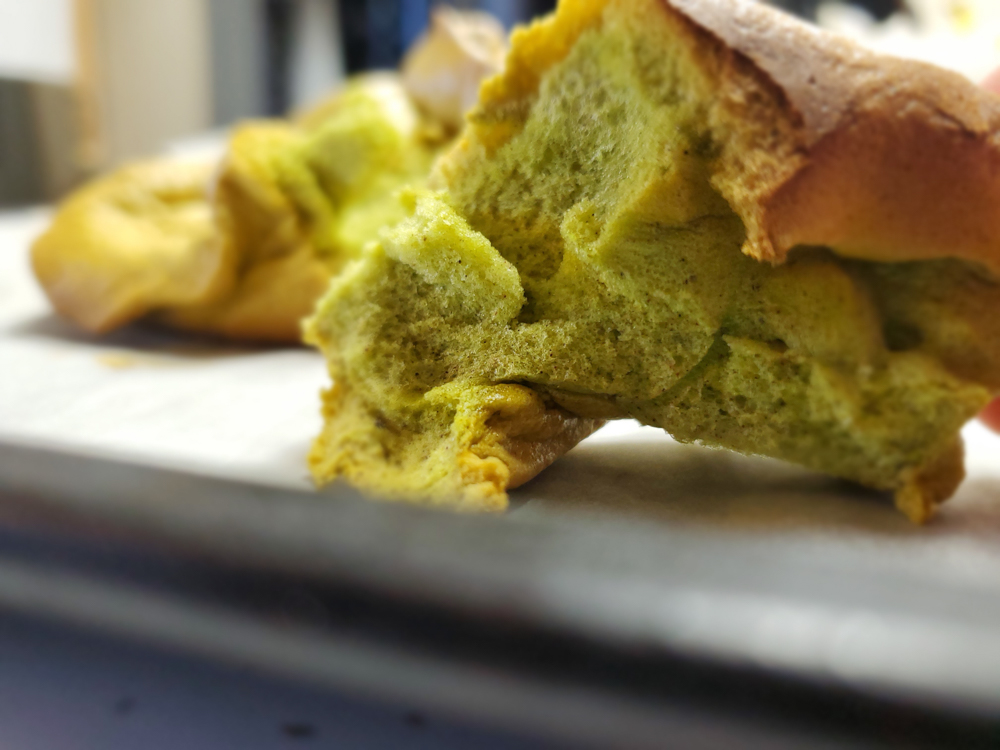
6. Bake bread from scratch.

Have you noticed yet that most of Will's activities are ones that are suspiciously very helpful to ME?!? Mwa-ha-ha! But yeah, I hate to cook, so I am always looking for ways to encourage someone else to cook instead of me. I taught Will to make this no-knead bread, which also happens to be the easiest, most delicious bread in existence, so now that she knows how to make it, I hope she makes it for us lots!

Other possibilities for this step were learning about rain barrels and helping her dad reinstall and maintain ours, or letting me teach her how to sharpen knives. I would appreciate having someone else around who can sharpen knives, but it's also nice to eat homemade bread that I didn't have to bake myself!

7. Level up your animal husbandry skills.

I left this option kind of open, mostly because there are, in my opinion, SO MANY animal husbandry tasks that need to be done around here! The pets are about as feral as the kids!

Will chose to focus on her chickens. She spent a lot of time making a nursery area to keep the pullets away from the big chickens (they defeated her gatekeeping system almost immediately, but so far the big chickens just seem to ignore the little ones), and then giving the whole flock more entertainment options for those days when she doesn't allow them to free-range. Got to be unpredictable so you foil the foxes!

And that's how Will spent part of her summer learning some very useful skills! Now she can start and grow a garden, preserve what she grows, bake herself delicious bread, make herself gourmet soap, and carve the spoon she can use to spread that homemade jam on that delicious bread.

OMG and now I'm realizing that I should totally go and have her do exactly that! If you can celebrate completing a badge by eating bread and jam, then you really HAVE made up the perfect badge!

Monday, July 5, 2021

From Strawberries to Jam


This kid's Happy Place is a berry patch, any berry patch:


For a kid like that, then, summer is a glorious time to be alive and in a u-pick strawberry patch. It's an all-you-can-eat strawberry buffet, with take-home containers handily provided for you!


For some reason, I didn't pick up enough cardboard trays for us each to have our own (???), and so here I am, staining my T-shirt like a boss:


It was really gorgeous weather on this day. Just a few weeks later would find me at the u-pick blueberry patch at the exact same time of day, about to pass out from the heat, but on this morning the overcast skies and the rain that would start to fall just a few hours later (and not let up for days) kept the temperature just about perfect.


The fact that this was one of our first field trips of summer vacation made it even more precious. Spending time with both my kids at the same time, on a weekday morning of all things, is something that I very much missed during the school year.

And now that they're older, I can sit on my butt in the middle of a strawberry patch taking cute pictures on my phone... and strawberries still get picked!!!


We left for home with over eight pounds of picked-by-us strawberries (and some pepper, tomato, and chard plants... oh, and some flowers!), and to be honest, we probably could have eaten all eight pounds fresh--I mean, we also came home from the blueberry patch with over eight pounds of picked-by-us blueberries, and all that's left of those after a week are a half-gallon of frozen berries waiting to be made into muffins--but Will is working on a homesteading project, and so I wanted to teach both kids how to make jam.

And a mess. Because we mostly made a mess:


I taught the kids how to make both freezer jam and cooked, canned jam. I'd never actually made freezer jam before, and so when we did, and I tasted our finished jam, I accidentally unlocked a core memory: Mama made freezer jam every year, and froze huge batches of it in little plastic butter tubs. I liked toasted Wonder bread with lots of butter and strawberry jam on it the best, but I also liked to eat it with Papa's buttermilk biscuits. I never helped make it, or was even in the kitchen, really, when it was being made, and I couldn't have told you that it was even specifically freezer jam that I was eating all those years ago, but one spoonful of this homemade strawberry freezer jam that I made with my kids and I was back in my childhood kitchen, sitting in the breakfast nook and eating toast and jam for breakfast.

I wonder what sensory cues my kids will one day experience that will take them right back to their childhood homes... and to me? Not gonna lie, it's probably going to be something like the scent of Pizza Rolls in a half-broke oven, or chicken strips in the air fryer. Vinegar and tea tree oil in a spray bottle, maybe. An Arctic Monkeys song on the radio. Overhearing a stranger say "Bless their heart" right before proceeding to talk trash about someone. Walking into the house of a new friend and seeing that they've got too many books on their bookshelves. 

Whatever brings them back for that second, to this childhood home and to me, I hope it feels precious to them, too. I hope it's as sweet as the taste of strawberry freezer jam eaten in my kitchen with my daughters, and my kitchen with Mama and Papa, both all at once and 40 years apart.

P.S. Check out my blog on Facebook!

Thursday, June 24, 2021

Cooking with Teenagers: Homemade Ice Cream Sandwiches


Sugar is the best way to bond with teenagers. Maybe that's my own sweet tooth talking, or my unhealthy Southern "food is love" dysfunction, but my teenagers and I have a lot of happy moments together making weird, sugary treats and then consuming them.

Considering how many other moments we have together that consist of them being mad at me for, like, existing, I am happy to indulge my sweet tooth and pass along one of my many specific food dysfunctions if it means peace and pleasant memories!

As are most of these projects, homemade ice cream sandwiches were originally Syd's idea. This kid has a sweet tooth bigger than mine, and she's far more creative than me, too. This sometimes results in some unholy, sugar-drenched concoctions, but she hit this one out of the park.

The base for these homemade ice cream sandwiches is, of course, homemade cookies. As far as we can tell, you can use any homemade cookie recipe, although soft cookies work best. Crispy cookies get messy when you bite into them with that layer of ice cream in between, and since you'll be eating them nearly frozen, thinner cookies work better than thick ones. 

Here are the cookies we've tried and like best:

You can also use any ice cream that you want for these ice cream sandwiches. For Will's birthday last year, I bought her this ice cream maker--


--and we use the snot out of it all year round!

And yes, I did buy a second bowl, because I am just that extra. And also, some of us have very different taste in ice cream (meaning they don't like chocolate?!?), and with two bowls we can make two different batches one after the other without having to wait for a bowl to re-freeze.

Our favorite part of making homemade ice cream is adding mix-ins, but you could do the same thing with store-bought ice cream by letting it soften a bit, stirring in your mix-ins by hand, and then putting it in a larger container to accommodate the additional volume.

When you assemble these ice cream sandwiches, you can also add lots of other gourmet components. We've rolled the edges in sprinkles or chocolate chips, frosted the cookies, etc. My absolute favorite combination is to bake peanut butter cookies and make chocolate ice cream with mini peanut butter cup mix-ins. Then when I assemble the sandwich, I spread peanut butter on the bottom of one cookie, jam on the bottom of the other, and put the chocolate ice cream in the middle. 

It's absurdly indulgent, and absolutely delicious! 

The project as a whole is time-consuming, but most of that time is just waiting for stuff to freeze. The process goes basically like this:
  1. Make the homemade ice cream, then put it in the freezer to harden.
  2. Bake the homemade cookies, then spread them out on a cookie sheet and put them in the freezer, too.
  3. When both components are frozen, assemble the sandwiches. Take each pair of cookies out of the freezer only long enough to assemble the sandwich and wrap it in plastic wrap, and then immediately return it to the freezer. I keep an open Ziplock baggie in the freezer while I'm doing this so I can just pop the finished ice cream sandwiches into it as they're finished.
Confession time: this Mother's Day, I was feeling very bummed out. As a person whose love language is, ashamedly, Gift-Giving, I was sad and disappointed that nobody got the magical unspoken memo that it would be nice to plan out a day all about Making a Fuss Over Me. My feelings were hurt when no presents appeared, and no special activities were announced, and then to make myself feel worse I got on Facebook and looked at all the other magical Mother's Day celebrations happening out there on social media. Glad y'all are having such a great day, Everyone! I'm sitting over here eating a sandwich that I made myself and it turns out we don't even have any chips!

So there I was, sort of bumming around the house feeling bored and unloved, when out of nowhere Syd was all, "Let's make ice cream sandwiches!"

And so we did! We baked the cookies, we churned the ice cream, we assembled the sandwiches while listening to music. It took the entire day, off and on. 

I think it was while we were finishing up the ice cream, and Syd was thoughtfully polling me about my preference of mix-ins, that I realized what she was doing: she was deliberately making sure that I had an excellent time. We were making my favorite cookies and my favorite ice cream with my favorite mix-ins. We were listening to music that I liked. I was being steered towards all the fun parts of of the project, and she was the one digging out the correct measuring cups and looking through the entire pantry for the vanilla. 

A better Mother's Day present couldn't be found than getting to experience what a kind, compassionate kid I have. And maybe I have, indeed, passed down my "food is love" and "sugar heals all wounds" guiding principles, but just know that when I tell you that food is love and sugar heals all wounds, THIS is what I mean. I mean that making food together is a great way to demonstrate our love for each other, and that making and eating something sweet with your teenager is a great way to have, in fact, a magical Mother's Day.

P.S. Here are a few of the other ways that my teenagers and I bond together over food!
And here's my Craft Knife Facebook page, where you can often see the cooking with sugar happen in near-real time!

Saturday, April 10, 2021

Make a Pegboard Cookie Cutter Holder

 This tutorial was originally published on Crafting a Green World.

Trying to store a bunch of cookie cutters is the pits. For several years, I'd been using a drawer underneath our kitchen table to hold our cookie cutters, because that's where they all seemed to fit on the day that I first unpacked them. Of course, we've acquired more cookie cutters since then, dragons and castles and Girl Scout trefoils, and not only did they no longer really fit, but the kids were unconcernedly smashing them in their overarching goal of simply getting that drawer closed again whenever they dared to open it

 Also, we had to dig through the whole thing just to find, say, the big snowflake, or to see if we had a star that would make a good size for a cookie wand topper. 

 Fortunately, our kitchen also has a large, accessible, and out of the way space above the kitchen cabinets. My husband and I turned the whole area into an easy open storage system just for cookie cutters, and I couldn't be happier with it. 

 Here's what you need to make your own! 

  pegboard. Pegboard, otherwise known as perforated hardboard, is a decently eco-friendly choice of material. It's generally made of sawmill waste or other residual wood fibers, is adhered with resin, and doesn't tend to contain formaldehyde. That being said, it's a good rule of thumb to always know the provenance of your materials, so that you can double-check that you approve of the manufacturer of the specific pegboard that you're looking at. 

  pegboard pegsYou can buy all kinds of cute varieties of peg; just make sure that you're buying the correct size for your pegboard. 

  wood glue (optional). I had this at hand,  but my dowel pins fit so snugly that I didn't need them. In fact, I had to use a rubber mallet to tap the dowel pins into the pegboard, they fit so well. 

  paint. Spray paint is not great for the environment, but I'm selective in my use of non-eco-friendly materials, and painting all of those little dowel pins and all of that square footage with all of those little holes? Yeah, I used spray paint. To make the project more eco-friendly, choose a brush-on zero VOC paint, perhaps with a paint sprayer

  wall hanging supplies. We tapped in nails at the corners of each pegboard, but you use the method that you prefer. 

 1. Cut the pegboard to size. Adjust your sizing a little so that you cut between the rows and columns of perforations. We had to piece together three sections of pegboard to cover the entire space that I wanted, so we had the additional annoying job of trying to cut the pieces so that the holes would line up perfectly across them. If you can accurately bisect the rows and columns, it works, but ours were a little uneven, so I just hung them to be even, and I didn't care if their tops didn't perfectly line up. 

  2. Add the pegs. Take your time so that you can figure out a pattern for the pegs, then push them in so that the back of each peg is flush with the back of the pegboard. I actually brought some cookie cutters out to the driveway so that I could test how they'd look with various spacing. 

 3. Paint the pegboard. I did my painting out on the driveway while my kid was running a bake stand out by the road and the drive-in next door had just opened for the evening--it was an absolute circus. Pro tip: if you want everyone in the universe to look at you, paint something weird in your driveway and then get people to drive by. Bonus points if you're also taking pictures as you work, because that's apparently also REALLY interesting to look at. 

 4. Mount the finished cookie cutter holder. This was too high for me, so my husband did the mounting while I stood below and assured him that he was NOT lining the perforations up correctly. I'm the only person who can tell, though, so whatever. 

 I LOVE our cookie cutter holder! 

The cookie cutters would look tidier if I'd hung them all myself, but the kids actually really wanted to do it, and who am I to stand in the way of a child wanting to do a chore? It reassured me, as well, that both kids can reach even the tallest cookie cutters with our step stool, so they can still bake independently. And we're all baking more, for the time being, while the ability to see what cookie cutters we have is still a novel thing, and the kids have rediscovered cute shapes that they'd forgotten we had. 

 It may not be great for our ideally anti-consumerist stance, however, as the kids have also figured out what cookie cutters we DON'T have and apparently desperately need. We don't have a dog cookie cutter, for instance, nor a cat one. The horror! It's possibly time to try out that DIY cookie cutter tutorial that I've been eyeing for a while now...

Monday, March 29, 2021

Cooking with Teenagers: Fancy Coffee Drinks

 Sometime during the pandemic, one of my kids became a coffee drinker.

She's a teenager, so it's not, like, "real" coffee, or rather, not anything like the black coffee that I drink out of my French press every morning. Instead, her mid-morning coffee break consists of a carefully crafted beverage that does contain a goodly amount of either instant coffee or cold-brew, but also has so much sugar and milk in it that when she sometimes makes me a cup, too, because she's a generous kid, it tastes exactly like coffee candy in liquid form.

I don't know, you guys. Was I supposed to forbid her coffee until she's all grown up? I feel like maybe I was, but ugh. There is just so much to remember about being a parent! 

Anyway, it's more fun to find fancy coffee drinks on social media and make them with her.

You guys! I know this half-drunk mess in a Mason jar does not look appetizing, but it is that whipped coffee all the...

Posted by Craft Knife on Friday, April 24, 2020

Whipped coffee was definitely our gateway drink.

As much as I have the sinking sensation that I ought to be discouraging my growing child from polluting herself with caffeine, it IS pretty fun to have the love of fancy coffee drinks in common with her, and I do keep an eye out for delicious-looking recipes to try with her.

I mean, I would NEVER go to all the trouble to make myself, alone, a fancy coffee drink, not when black coffee is so quick and easy and gives me that same knot of anxious energy in the pit of my stomach. But when I make a fancy coffee drink with my teenager? Well, that's just us bonding!

Here's the latest recipe that we tried:

@cowlover3000

this is how i make the starbucks brown sugar shaken espresso yes i use a pasta jar for my coffees ##starbucksdrinks ##starbucksrecipes

♬ original sound - robyn

We made it a little too sweet--


--but look how deliciously frothy it got! Definitely going to try the shaken coffee method again:


And look how it encourages the teenager to drink her (free public school) milk! Yay, calcium!


Ooh, this was another really good recipe:

@littlebeancoffee

Reply to @ashleypummel I added peppermint because I’m still in a holiday mood 😍🎄##coffee ##frappuccino ##mocha ##starbucks ##christmas ##fyp

♬ The Girl - City and Colour
I even bought peppermint syrup for this! Syd doesn't always love chocolate, so for hers we used this salted caramel sauce instead of chocolate (and skipped the peppermint, I think? Peppermint and salted caramel don't seem like they'd be friends), although now that I'm thinking of it I bet we could substitute homemade dulce de leche. 

And because I was IN A MOOD, I found a totally different recipe that told me how I could make homemade whipped cream in my cocktail shaker, and then I did it, and then our gorgeous chocolate peppermint/salted caramel coffees were both beautiful AND delicious!


The mess that they made in the kitchen was less so...

But whatever. One thing that I now know about pandemics is that they leave plenty of time for housecleaning!

P.S. If you're doing a better job of keeping your teenagers away from caffeine than I am, I highly recommend DIY hot chocolate bombs as another great cooking with teenagers project!

Monday, March 15, 2021

Girl Scout Cookie Recipes: Samoa Cheesecake


In between selling over 1,500 Girl Scout cookies so far this season, Will has been helping me with the other project that I always start to crave at the first of every year: making recipes using Girl Scout cookies!

This Samoa Cheesecake is literally just a traditional cheesecake recipe with a food processor full of Samoa cookies substituted for graham crackers. I think I overbaked the crust and therefore made the caramel in the cookies pretty stiff, but otherwise they were a perfect substitute:

I had intended to top the cheesecake with dried coconut flakes and drizzled caramel, but as you can see, people started digging in before I got to it!

Cheesecake is my favorite dessert, but this is the first time I have ever made it myself--for some reason, I had it in my head that cheesecakes are fiddly and difficult to make, but this cheesecake was super easy! It wasn't too sweet, although next time I'll DEFINITELY add the coconut and caramel, because "too sweet" isn't actually a problematic descriptor for me. The Samoa crust was chewy due to the caramel, and it was VERY yum. 

Want to make more recipes using Girl Scout cookies? A few years ago, I created a whole list of Girl Scout cookie recipes!

Thursday, December 17, 2020

DIY Hot Chocolate Bombs, Because Bonding with Teenagers. And Also Chocolate.


"I just don't know why my body is falling apart this year," I say to no one as I sip my pre-dinner hot chocolate...

Or, you know, eat my after-breakfast cookie...

Seriously, I don't even know if what I'm consuming at any given moment is a depression snack, pandemic snack, or holiday treat. Some ever-evolving combination of all-three, I'd guess.

I blame it entirely on my children. If it was just Matt and I, our kitchen would contain nothing but lunch meat, sliced bread, apples, peanut butter, and store-brand Pizza Rolls. Well, and alcohol, because we have nobody but ourselves to blame for 5:00 Cocktails and Crossword Puzzles. But with one kid who's an adventurous eater, one kid who seems to cruise Instagram Reels looking for the latest on-trend cooking project, and my parental obligation to feed them vegetables and protein and, like, calcium and whatever,  and make a pandemic suck as little as I'm able to while everything is sucking SO MUCH...

Let's just not think about it right now. Instead, let's make hot chocolate bombs with Syd!

These turned out so perfect and so cute, and were super easy, too! I highly recommend them as a fun project to bond with your kid, and they would definitely make good handmade holiday gifts.

You will need:

  • chocolate or candy for melting. I used straight chocolate chips, because apparently I'm basic, but Syd, who's weird in that she loves hot chocolate but hates "food" chocolate, used candy melts and they worked just as well. As a bonus, she used Funfetti candy melts, and the resulting hot chocolate bomb is ADORABLE.
  • basting brush. We have a silicone one that we got god knows where, considering how anti-silicone I used to be when it came to food-related items, but dang, is it easy to clean after getting melted chocolate ALL over it!
  • hot chocolate mix. Use some kind of powdered mix. Most years, I make my own from cocoa powder, sugar, and powdered milk, but not gonna lie--this year, we're drinking a store-brand mix and honestly, the kids probably like it better.
  • marshmallows. You've gotta have some mini marshmallows or it ain't a real hot chocolate bomb!
  • silicone or other flexible mold. This item seems to be the sticking point for most people to be able to make hot chocolate bombs. Silicone sphere molds are hot sellers right now! You don't have to have that exact item, however. Here's a short round-up of stuff that you might have that would work equally well:

The only two qualities that your mold requires are that it 1) is flexible, so you can peel it away from the chocolate shell without cracking it, and 2) is large enough that it can hold the hot chocolate mix and a few marshmallows.

1. Make your candy shells. Melt your chocolate chips or candy melts in the microwave, because you're still being just that basic. Stop to stir them every 20 seconds or so until they're nice and liquid.

Using a basting brush, coat two identical molds with the melted chocolate. Syd got hers right the first time, but I had to put a second coat on my shells because I made them too thin the first time. To be honest, I got overexcited and probably made them too thick that second time, but they still dissolved in the hot milk.

After you've coated the molds, put them in the refrigerator for about five minutes, until they've solidified and feel cool to the touch. At that point, you should be able to carefully peel the mold away from the chocolate. It's a little fiddly, so if it cracks just try again until you've got the hang of it. 


2. Fill one half of the mold with hot chocolate mix and marshmallows. Pile it in and mound it up, if you need to, because when you fuse the two parts of your hot chocolate bomb together it will have twice the space inside.


3. Fuse the two halves of the hot chocolate bomb. You can do this a couple of different ways. On TikTok, everyone seems to like to hold one half of the hot chocolate bomb edge-down on a hot surface, then stick it to the other half, but Syd and I both first used a knife to trim away any jagged bits from the edges of both mold halves, then we simply stuck them together and painted more melted candy across the seams until they were fused together and all sealed up. Since you only have to put the molds in the freezer for a few minutes before you can fill and seal them, the candy we'd originally melted to make the shells was still liquid enough that we could also use it to paint the seam closed, and it was super easy.


And look how cute they look! At this point, you could drizzle the finished hot chocolate bomb with more melted chocolate, then add sprinkles, more mini marshmallows, or crushed peppermint, but Syd and I both decided that our hot chocolate bombs were pretty enough as-is (and anyway, we were ready to drink them!).


To use the hot chocolate bomb, you just literally pour hot milk over it. But make the milk really, really, REALLY hot! The hotter it is, the easier the hot chocolate bomb's shell will melt, and anyway, you're going to sit there and admire the whole thing for a few minutes before you even think about drinking it, and nobody likes lukewarm hot chocolate.


Check out how delightful it is!

If you've got teenagers AND the opportunity to make them squeal with happiness, take that opportunity!