Monday, February 7, 2022

Earning the Girl Scout CSA Think Like a Programmer Journey (with Actual Programming!)


None of my Girl Scouts, including my own kids--and especially including me!--have ever been super enthused by the Girl Scout Journeys. Some are definitely better than others, and Will, who's obsessed with earning badges and awards, always completes the three Journeys needed to Summit at every level, but I'm not gonna lie--my favorite thing about the Think Like a Programmer Journey is how fairly quick and straightforward it was.

Technically, you can complete the Think Like a Programmer Journey without touching a computer, as its focus is on teaching the process of computational thinking that programmers use, not on actually, literally programming. But incorporating actual, literal programming made the Journey a LOT more interesting to the kids, and added additional STEM enrichment into our school days.

As the intro to the Journey, we watched this Code.org video about how computers organize, process, and represent information:

We discussed a couple of ideas related to this video: 1) the importance of programming solutions that are workable and understandable to the user (not just the programmer), and 2) computational thinking as a method of problem-solving that breaks down problems to manageable bits and works towards solutions that are beneficial to the user--not just the programmer!

These ideas are applicable to Girl Scouts in a lot of ways, particularly in the ways that we try to be of service. Because Girl Scouts often requires Girl Scouts to create and enact service projects in order to earn awards--or even badges, sometimes!--it can be VERY tempting to get some of these service projects done in ways that are expedient for the Girl Scouts, and not necessarily in ways that best serve the beneficiaries. It never hurts, then, to have a reminder that the beneficiaries of our projects are the ones who need to be able to understand and work with our solutions--and in a real way, not just the kind of surface level that could earn a kid a Journey but that we all know good and well isn't going to result in any kind of lasting change for the better.

To that end, the kids started a working doc in which they practiced coming up with needs/problems and proposed solutions for various user groups. They worked in the document periodically throughout this Journey, and if you read down their lists you can actually see them begin to be more thoughtful and detailed, and to think more deeply and specifically about the real needs and problems of their user groups. 

I'd actually anticipated that something on this list would eventually inspire their TAP, but nope! If only life/Girl Scouts was that easy!

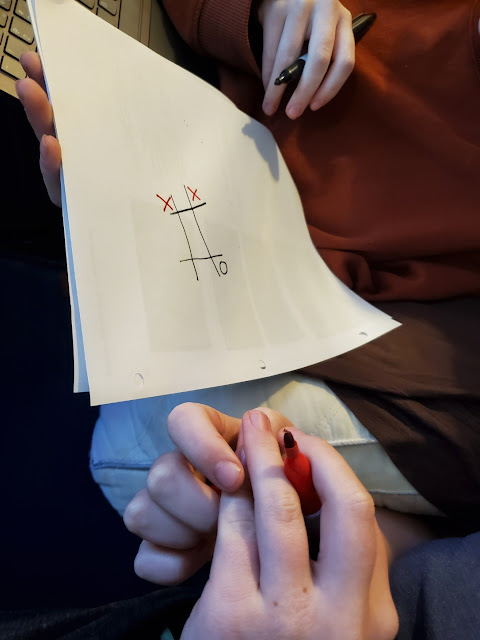
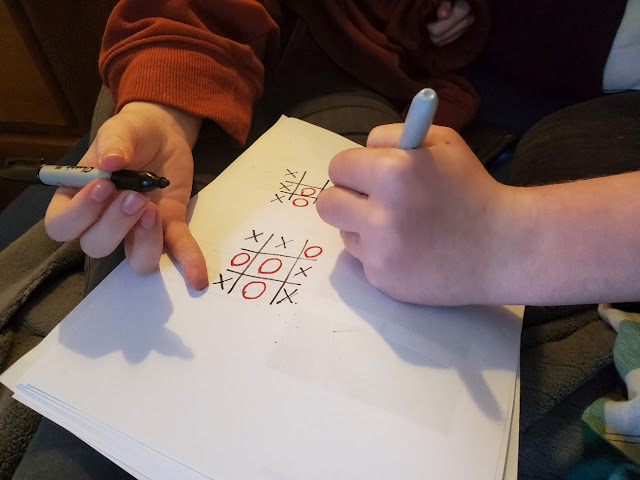
On another day, the kids and I explored how language choice affects the value of a solution. Fortunately, I've been telling the kids for their entire lives (usually after they've smugly corrected someone's grammar, but sometimes right before I correct their own grammar, ahem) that "effective communication is good communication." In other words, if you get your point across, that's good communication, whether you've gotten your point across using invented spelling because you're newly literate or lots of gestures combined with a very limited vocabulary because you're in Quebec trying out your Parisian French 101 on a French-Canadian hotel clerk.

Ahem.

The point is that a programmer is in charge of figuring out the most effective way to organize and represent knowledge and information, and any method of effective communication is fair game. 

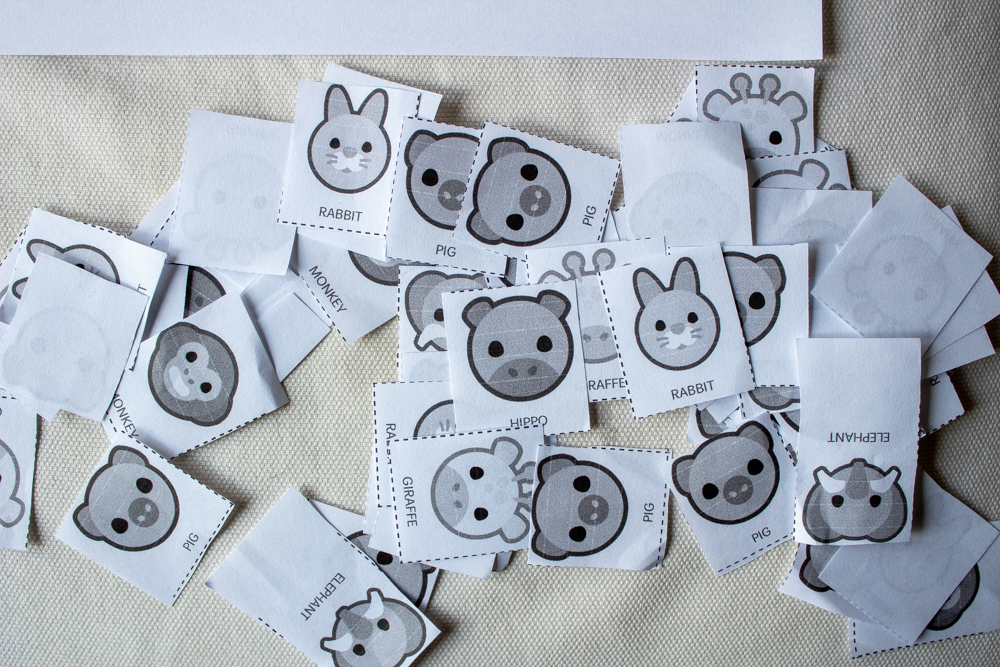
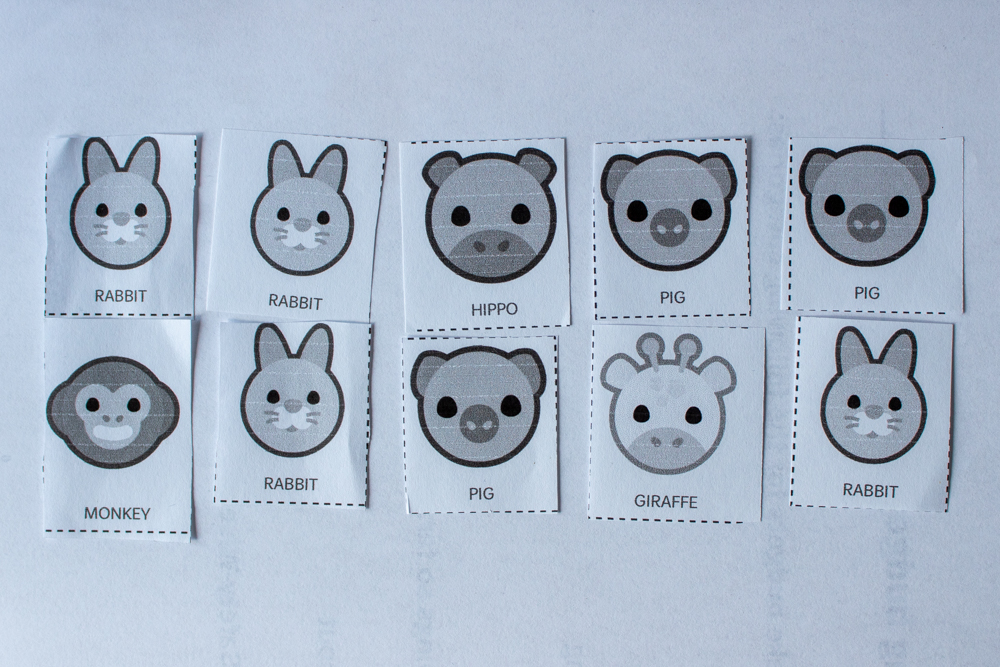
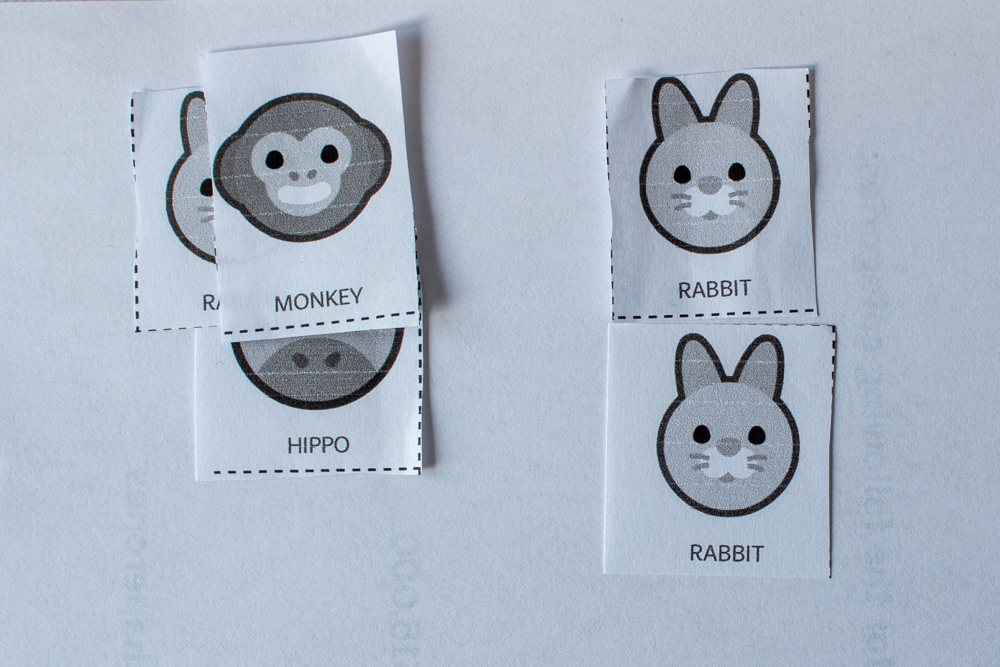
To practice this, the kids tried out the Representing the Alphabet Activity for the CSA Think Like a Programmer Journey in the Volunteer Toolkit. 

I wouldn't usually do all this printing and cutting for a single activity, and I did think about trying to substitute LEGOs, but whatever:

I really like how each kid chose to represent her word using a completely different method. Syd's uses a vertical two-animal pair to represent each letter--


--while Will's relies on a very precise arrangement of stacked papers:


And yet they were both able to read the other's words without struggle! Yay for good communication!

Before sending the kids to work on their user groups doc some more, I helped them make the connection that they can approach a problem the same way they approached a message to be decoded--by working backwards and illuminating the underlying algorithm. If only every problem had its handy-dandy decoding sheet all written out for us!

Another day's lesson was also a real-life programming activity: binary!!! I got out the white board to teach the kids how to read and count in binary, discussing, as well, some other number systems that use different bases. The Sumerians, for instance, used a sexagesimal system!

To make sure they grasped the concept, I gave the kids this set of binary puzzles to work. One of them needed a couple of tries, but in the end they both mastered Base 2! That meant that I could tell them that these ones and zeros are also called bits, and you can use a bitmap to visually represent the information encoded in binary... or you can use it to make a picture! We Google Imaged some examples of bitmaps, then the kids used the Pixelation widget on Code.org to make their own. They enjoyed the open-ended free play of creating black and white and color pixel images, while practicing their binary and learning hexadecimal. 

Our special activity for this Journey was building a computer from a kit:


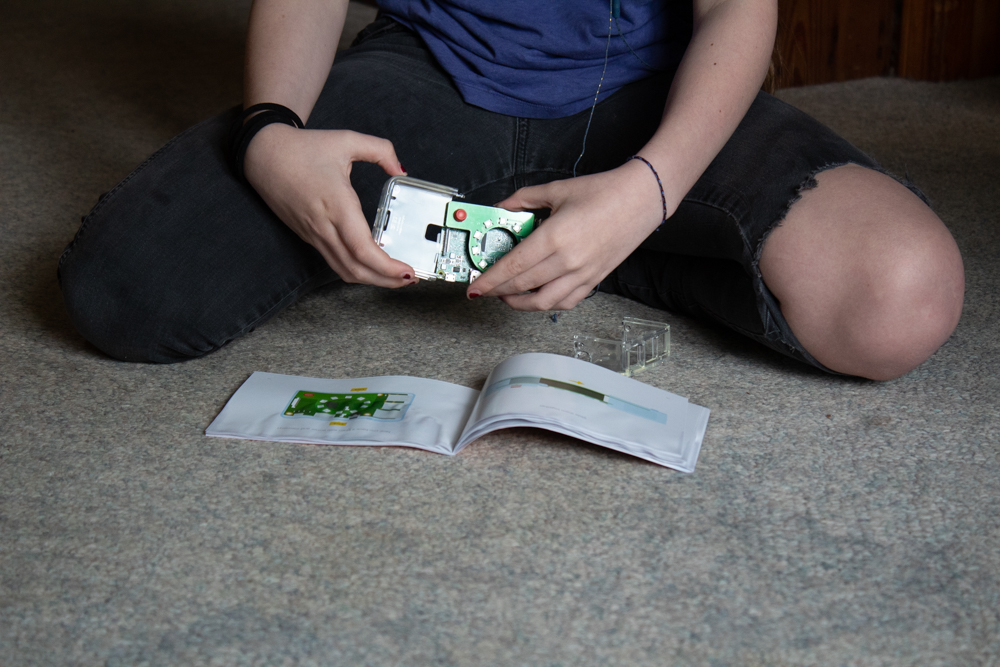
The Kano kit is a super fun walk-through of assembling the parts of a computer, then setting it up. It's got Raspberry Pi to support more sophisticated programming activities, or a variety of add-ons that you could purchase to give a younger kid different coding experiences. 

After building the computer, we used another computer analogy to think about user-centered needs. If every need/problem is an output, then the reasons why a problem is happening or a need is occurring are the inputs. You can decode the problem the way that we decoded the animal alphabets, trying to figure out the inputs. When you think you understand the input, you can work towards a solution that changes that input and produces a better output.

The kids did some more programming in later days--Will made me a table tennis game, for one!--and played with our Turing Tumble, but once kids understand the concept of computational thinking, they're actually ready to use computational thinking to solve a community problem.

The kids' TAP dealt with the deficit of good educational materials to teach the Robotics badges, especially to younger levels. When we were learning the parts of a robot, the kids made their own graphics, diagrams, and definition cards, but it's probable that most troops wouldn't have that kind of time. But those visual, tactile learners still need to learn the material!

To solve the problem, the kids created this set of educational materials that can be presented online or printed. 

Click here for the complete Robot Slide Deck.

If printed, they can be copied at different sizes and the definitions can be used to label the robot graphic. It's a pretty nifty plan, and you can tell that a couple of homeschooled kids who've had a heavily Montessori-inspired education created it!

Saturday, February 5, 2022

Kid-Made: How to Make 3D Glasses


Got some scratched sunglasses, or an old pair of prescription glasses with a cracked lens? Pass them over to your kids, because this is a project just for them! Here's how to make 3D glasses from an old pair of frames.

How to Make 3D Glasses

These DIY 3D glasses are an excellent kid-build, and really fun for kids to play with afterwards. Here's what your kid should do to make them: 


1. Remove the lenses from the frame. You may have to help your kid bust the plastic lenses out of plastic sunglasses (or just give her a hammer!), but all old prescription frames should require are a teeny-tiny screwdriver and the assertion of your kid's fine motor skills: Screw the little screws back into the frame after the lenses are removed. Save those lenses for telescope-making! 


2. Trace each lens onto colored cellophane. Colored cellophane is the real trick pony here! Have your kiddo trace around the outside of the lens, so that it will fit over the frame, not inside it: The traditional order is red for the left lens and blue for the right, but there's nothing to prevent an interested kid from experimenting--how would a yellow/blue combo work? A purple/green? 

3. Glue the cellophane to the front of the frames. Hot glue can be a little messy (as you can tell from the pic of the finished glasses!), but it holds well and dries quickly, perfect for my kid who likes to see results right away! 


4. Play with drawing. Let the kid choose marker colors that closely match the cellophane, then experiment with drawing images that will be perceived as three-dimensional. My kiddo first tried taping two markers together, but now prefers to simply hold the two together. You can also play with drawing the red and blue lines not as parallels, but as different elements of a single drawing--this works especially well if you draw a 3D cube, for instance, making some lines blue and some lines red. Your kiddo can also experiment by trying different papers--plain typing paper, graph paper, or graph paper with red or blue lines. 

5. Troubleshoot. After making a set of glasses using a single layer of colored cellophane for each lens, my kiddo spent some time goofing around with the extra cellophane pieces and discovered that doubling or tripling each piece, to make the color darker, improved the 3D effect, so she glued a couple more layers of cellophane to each lens, and now her 3D glasses REALLY pop.  Another variable that might make a difference is marker color. Play around with brands of markers or shades of color to see what works the best. 

Because there are so many interesting variables to explore, this is a terrific STEM-enrichment activity for an interested kid, and could also make a stellar Science Fair project. Just have your kid write up her hypothesis and procedure for how to make 3D glassses, paste up a diagram of an eyeball, draw a couple of pictures to look at through the glasses, and BOOM! Blue ribbon.

Wednesday, February 2, 2022

Cooking with Teenagers: Rice Krispy Treats as a Coping Mechanism

The kids and I have been spending almost all of our school days in the kitchen for the past month, after a quick New Year job of retiling the main shower turned into a month so far of workers with power tools and a fondness for the Steve Miller Band demolishing and rebuilding quite a lot of our main bathroom, walk-in closet, and family room. 

All we've got left is replacing the bathroom floor, and drywalling and painting the family room and bathroom--oh, and retiling the shower!

It turns out that when you're hanging out in the kitchen all day every day, feeling discombobulated and edgy because you hate having strangers (even strangers with terrific taste in music) in the house and you hate having all the furniture and crap from half the house moved into the other half of the house to make it all messy and you especially hate having all your books disorganized on the floor and you REALLY especially hate when a worker comes in and asks you a trick question like which way do you want the new bamboo floor boards to run or how you want the bathroom floor tiles laid out as if you even know something like that (do you want to know my secret trick? I ask the guy what he thinks, and whatever he says, that's what I tell him we should do)...

Yeah, when you're doing all that, and you've got a constant backache from sitting on an uncomfy kitchen stool and you're also, you know, still stressed out about getting Covid, you and your teenagers sometimes get the brilliant idea to buy a bunch of sugar cereal and spend half an afternoon making gourmet Rice Krispy Treats.

Pro tip: the absolute best Rice Krispy Treat recipe is literally the one on the back of the Rice Krispies box. It's important to add extra mini marshmallows in with the cereal, though:


We made a standard version, then we made a version with red food coloring and red sprinkles, then we made a version with peanut butter cereal, then we made a version with peanut butter cereal, m&ms, and chocolate chips, then we made a version with Fruity Pebbles and Froot Loops. These are all that are left at the moment, though:


Like, I know you CAN do some super educational stuff with Rice Krispy Treats, but tbh I mostly just keep thinking about that time that we took Luna to the Kentucky Horse Park and it turned out that she was terrified of draft horses, so every time she saw one and opened her mouth to bark I stuffed her face full of peanut butter instead.

In other news, I just found this on my public library's website:

Because the way things are going, we've got at LEAST another month of distracting ourselves with sugar ahead of us...

Monday, January 31, 2022

Homeschool AP Environmental Science: Water Quality Monitoring Using the Creek Critters Citizen Science App


What, you mean you didn't spend YOUR New Year's Eve looking for aquatic macroinvertebrates in a local creek in order to evaluate its water quality?

I'm just kidding, y'all. The only reason WE spent part of our New Year's Eve looking for aquatic macroinvertebrates in a local creek is that we'd already procrastinated on this particular lab for so long that now it was winter, but I noticed on my weather app that the temperature was going to get up into something like the lower 50s on that day. Will and I weren't sure if any colleges would ask to see her lab notebooks when they evaluated applications, but we figured we might as well jump on finishing up any labs we could, just in case they did. 

Joke's on us for procrastinating, though, because this lab was FUN! Like, legitimately FUN! I'd do this lab again in a heartbeat, air temperature in the lower 50s or not. 

Will and I used this Creek Critters app to guide us through the lab. I bought a little aquarium net (which Amazon tells me I bought back in September, in case you were wondering how long we'd been procrastinating on this lab!), but otherwise we already owned the small clear container, larger clear container, and plastic spoon that were all we needed to complete the lab.

Here's where we conducted our lab:

This is the same little creek between two parks that my Girl Scout troop did our chemical water quality analysis this summer, so it was interesting to compare the results between the two types of monitoring.

You do get your feet wet during the collection part of this lab, but only by a couple of inches. Then you take your stuff back to shore, sit somewhere dry, and start identifying creek critters!

When you see a likely-looking critter, you use the plastic spoon to transfer it to a very small clear container:

And, of course, you put a little creek water in with it so it's comfy:

Then you peer nearsightedly at it for a good, long while:

The best part about the Creek Critters app is that it walks you through identifying your critter:

You also don't have to try to count the number of fingernet caddisflies, or whatever, in your sample; just find one, then move on to identifying something else:

Like an aquatic sowbug, perhaps!

Here are all the creek critters that Will found in our sample:

And yep, that water quality result is POOR. On the one hand, that does match with the chemical water quality analysis that my troop did last summer, but on the other hand, I have a theory that there might be aquatic macroinvertebrates that simply aren't there in the winter?

So I guess we DO get to do this lab in the spring, after all, because obviously we've got to take another sample so we can compare our results! 

Saturday, January 29, 2022

How-to: Kid-Decorated Bean Bags from Stash Fabric


This tutorial was originally published on Crafting a Green World way back in 2013!

Got some stash light-colored fabric? 

 Got a bored kid? 

 These bean bags don't take much material, so any light-colored fabric from your scrap bin is great for this project. Your kiddos will have a fabulous time decorating them with fabric pens or fabric paints, and when they're done, just a few straight seams and a handful of beans turns them into a super-fun soft toy. 

 Kid-decorated bean bags make great gifts for children to help make for other children--perfect for all those summer birthday parties that you're constantly shuttling them off to. They'll keep them busy creating on a rainy day, and the finished bean bags are soft enough that a hurled one has a good chance of not knocking over something delicate and expensive in your living room. 

 Here's how to make your own: 

  1. Cut scrap fabric to size. We'll be following along with my original stenciled bean bags tutorial to make these kid-decorated ones, so I'm using my standard 4.5" square template. You can go larger, though, if you've got some larger scraps and you don't want to create waste by trimming them. Just stick to a square shape, and feel free to experiment! 

  2. Back with freezer paper, or starch the heck out of it! Stiffening the fabric is really essential to making this a kid-friendly project--kids don't like shifty, squiggly surfaces, and trying to use fabric markers to draw a detailed portrait of the cat on an un-stiffened piece of cotton is just a recipe for a tantrum. And don't you have enough of those already? 

 You can saturate the fabric with spray starch (have you tried homemade spray starch?), but my quicker, simpler solution is to iron freezer paper to the back of my fabric. It gives each square the sturdiness of paper, and my kids have no problems working on that surface. 


 3. Let the kids loose! I have a large selection of Jacquard fabric paint, Tee Juice markers, and Crayola fabric crayons, and I set my kids free with all of them. My kiddos LOVE to use the fabric paints and fabric markers, but I can't ever get them to try out the fabric crayons (too fussy!). 

 Whichever medium you use, let it dry and cure for at least 24 hours before the next step. 


  4. Sew the bean bags. Follow my stenciled bean bags tutorial, or just wing it--it's not rocket surgery. You could use your own dried beans, but if you're going to purchase dried beans for these bean bags, though, go ahead and purchase white beans. It doesn't make a ton of difference, but especially if you're using thinner fabric and haven't covered the surface completely in paint, the white beans look a little nicer inside the bean bags than pinto beans do. 

 Your kiddos can start playing with their bean bags as soon as you've finished sewing them. If you'd like to give them as a gift, it just takes another ten or so minutes to also sew up a nice drawstring bag to package them.

Wednesday, January 26, 2022

Girl Scout Senior/Ambassador Programming Robots Badge: Play Tic-Tac-Toe with a Computer


Computers playing games is the theme used to introduce Girl Scouts to the Ambassador Programming Robots badge, and it's a pretty brilliant theme! There are all kinds of great pop culture references to game-playing computers, and kids have all kinds of experiences playing against computers in all kinds of games. 

The first thing we did for this Journey is, obviously, watch Wargames! Happily, it's currently free with ads on YouTube:


I LOVE Wargames as the ultimate computer hacker, retro, semi-apocalyptic vision of what living with all-powerful computers can be and the importance of careful programming. 

It also has the ultimate pro tip for how to butter your corn on the cob. Watch for it, and thank me later.

Deep Blue and Watson are real examples of computers learning how to play games, and fortunately, there are also tons of easily available videos covering the process of creating, programming, testing, and troubleshooting the computers. Here are two of the several that we watched:


There's so much more to get into, though, if your kids are interested. You can replay those literal chess games, following the algorithms or going off on your own, or talk about Jeopardy game theory--all of that is not just super interesting, but increases a kid's appreciation of all the variables that go into creating a computer program that can not only mimic game play, but win it!

After all that, what better way to model this process of teaching a computer how to play a game than by playing that Wargames gold standard, Tic-Tac-Toe?

First, the kids and I all played a few (million) games of Tic-Tac-Toe, because Tic-Tac-Toe is never not fun.

Next, I reviewed the concept of the algorithm, and then modeled playing Tic-Tac-Toe while following a set algorithm... a program, doncha know?

Then, I challenged each of the kids to create an algorithm for winning a game of Tic-Tac-Toe. The rules are to create a step-by-step program that they must follow exactly when playing an opponent, but they may use "OR" and "IF...THEN" commands. 

And then... we played! 


Yes, Will's algorithm is written in red Sharpie on her arm. No, I don't know why.


We tried some various permutations of a computer playing against a person, two computers playing each other, playing X vs. O, etc.:


Syd's algorithm gave her a sneaky advantage, as she insisted that in order to correctly follow the program, the computer MUST play X:


Gives one a bit of a hometown advantage, I do believe!

The ultimate lesson, of course, is the same one that Joshua learned during Wargames--you can't really bank on winning Tic-Tac-Toe. Especially if you're the human playing against the algorithm, you can use your own creativity and spontaneity against the program. 

If you want to write a program, then, you need to write it with these caveats in mind: 1) A computer can only do what you've programmed it to do, and 2) humans don't have programming, so they can do literally ANYTHING.

If you want to offer another type of model to help kids develop a more nuanced definition of programming, you can also show them mathematical map coloring. A strategy is just another term for "algorithm," so kids could also develop their strategy for four-color map coloring, then test it, problem-solve it, give it to another kid to beta test, etc.

P.S. If you want to sneak in some high school English credit, have your kid read Ender's Game and write a paper comparing it to Wargames. They both came out at about the same time, with a historical background of the Cold War. They're both about gamifying war by manipulating beings who do not have the lived experience to throw off these manipulations, and they both question how the use of technology affects culpability. Powerful stuff, and issues that it's really good for teenagers to explore.

P.P.S. I'm overly attached to my Craft Knife Facebook page, and I post there way too often. Come find me!

Monday, January 24, 2022

Homeschool Reading and Rhetoric: Poetry Tea


The funnest part of homeschooling is... making things fun, I guess? At least, my favorite part is having an idea for something super educational that I think the kids will like, then doing it and finding out that it IS super educational, and the kids love it!

It is such with Poetry Tea. 

Studying poetry doesn't have to be a chore, and to be honest, I think most homeschoolers probably use this Brave Writer invention to make it super fun. As with most homeschooling topics, though, most of the cute tips and tricks and ideas are geared towards younger learners. I'm living proof, though, that Poetry Tea is also an excellent way to incorporate poetry into a high school curriculum!

In anticipation of Poetry Tea, I ask both the kids to choose a poem that they will read aloud, and to let me know its title and author. Once upon a time, I had high hopes of the kids flipping through the several poetry anthology books that I have in the house, but what they actually do is just hit up the Poetry Foundation website. Or choose something random by Shel Silverstein. 

After the kids have told me their poetry picks, I research until I've got a low-key sort of lesson plan that I can sneakily tack onto one of their poems. For our September Poetry Tea, for instance, the younger teenager chose a Shel Silverstein poem (of course), but the older teenager chose a William Blake poem (probably because it's short. Brevity is a uniting theme in all their poem choices...). 

I can work with William Blake!

The older teenager's poem was "Ah! Sun-Flower." I found an analytical breakdown of the poem to walk through with the kids, including an explanation of the poem's structure and form and a list, with definitions, of all the literary devices used in the poem. All those key terms become spelling/vocabulary words for them to memorize afterwards. 

I also read through this William Blake biography so I could pull out things the kids would find interesting (visions of God! An obsession with Gothic art!), and so we could discuss how his background and experiences might have informed the choices that he made as an artist and a writer. I know that authorial intent isn't exactly the most highly approved method of literary analysis, but I was a Medievalist in grad school, and dang if we weren't all about looky-looing into how the background and experiences of those long-ago writers informed the choices they made!

And happily, one of the cool things about William Blake is that he WAS a writer AND an artist, so I could also sneak in some art history and art analysis. Blake even illustrated his own poetry--including "Ah! Sun-Flower"!


The illustrations don't add a ton to one's understanding of the poem, but you can still discuss his technique, use of color, workflow, etc. 

I printed color copies of the above Blake facsimile, and the two below, so we could examine them during our Tea:


I also planned out a reading of "London" as MY poem, and an analysis of it that would place it into conversation with "Ah! Sun-Flower."

To be honest, though, all of the fun, for the kids, of Poetry Tea is the adventure of trying out a different tea shop each time. The kids enjoy trying different teas, and there's always some kind of tasty snack that I can treat them to, and, you know, there's always some kind of hijinks or haphazard chaos that ensues. This particular Tea's hijinks included, but were not limited to, the following:
  1. The younger teenager drove there and the older teenager drove back, both on their pretty new learner's permits. We encountered a small driveway! And a small parking lot! And a narrow parking space that needed backing out of! And about forty roundabouts! 
  2. The food and the drinks at this particular tea shop were terrible. TERRIBLE! Nobody but the older teenager liked anything they got, and just between us, that's only because the older teenager is about as picky as a goat. My matcha tea was powdery, and the younger teenager's scone was basically, like... also powdery? I want to scrape off my tongue just thinking about it, shudder.
  3. The place did, however, have an awesome selection of board games, and we played several rousing rounds of this very fun children's tea party game (ooh, I think it's this one!)--


--before I could even remotely consider redirecting them to the poetry that was the actual purpose of our visit.

I usually give the kids an assignment or two to complete afterwards; after this Poetry Tea, they got their list of literary and structural terms to memorize, and they each had to choose a different William Blake poem and write me an analytical essay about it.

We usually spend about an hour goofing off, drinking tea, and reading and discussing poetry. The actual poetry reading and discussion is probably less than half that, but considering how much you can get done with a 1:2 teacher:student ratio, that's probably more than you'd reasonably be able to cover in a week of public high school classes. I mean, consider how each student researched and selected a poem to read aloud; read aloud their poem; discussed every poem as a group, listened to a brief lecture on the biography of William Blake; discussed that biography, with special attention to building context between other current and former areas of interest; analyzed two poems line-by-line; listened to, discussed, and analyzed line-by-line the teacher's choice of poem; compared/contrasted two William Blake poems; viewed, critiqued, discussed, and analyzed the author's illustrations of his poems, and received, discussed, and had the opportunity to ask questions about their next assignment. And that's not even including all the soft skills of driver's ed, tea shop etiquette, carrying on an interesting and polite conversation, and trying new food/drinks.

It happened that I was finishing up the course descriptions section of the older teenager's transcript around this time, so I popped William Blake into her course resources for Honors English 12:

Because I don't usually write myself a syllabus or firm lesson plans for these Poetry Teas, it's super important to put the poems we covered into the kids' resource list soon afterwards, or I'm likely to forget that we ever did it, and there is NOTHING that we do for high school that I don't put onto the kids' transcripts somewhere!

Teenagers march on their stomachs, but if you've got younger learners, you probably want some more hands-on and engaging resources to make Poetry Tea fun. Here are some options!
  • Poetry prompts are fun for all ages--even adults!
  • Poetry journal. This is another clever idea for all ages. It would be fun to have kids write or even just paste each poem into the journal to create their own anthology. 
  • Copywork. My kids really liked copywork before they realized that it was, ahem, work. This could go well with a short poem in its entirety, or maybe just a rhyming couplet or special stanza of a longer poem. 
  • Response activities. Tangled poems, reassembled poems, and after poems!
  • Art projects. Illustrations, collages, and ripped poetry are fun and artistic responses. 
  • Song and poem pairings. I LOVE having the kids listen to music on various themes, and I love this idea to pair selected songs and poems.
  • Shel Silverstein resources. In case you, too, end up reading a Shel Silverstein poem every month!
  • Block building. This would be awesome fun for the super young kid, and I don't think you need to confine yourself only to Humpty Dumpty, either. All poems are fun to knock down!
  • Memorization. Some kids find this really fun, and it's a good way to build up their stamina for memorizing information.
And here are some of our favorite poetry resources:
P.S. Want to follow along with my craft projects, books I'm reading, dog-walking mishaps, encounters with Chainsaw Helicopters, and other various adventures on the daily? Find me on my Craft Knife Facebook page!

Saturday, January 22, 2022

Tutorial: Stenciled Bean Bags

 This tutorial was originally published on Crafting a Green World way back in 2010!

I like to make educational toys for my girls--matching games from their artwork, file folder games, extension activities for the books they read, anything that will allow them to incorporate what I want them to learn into the pleasures of their lives. These particular bean bags were inspired by my three-year-old, who hasn't yet memorized her numbers. Sure, she can count on her fingers and plays a mean game of Uncle Wiggily, but sit down long enough to figure out the difference between a 5 and a 9? Eh. Why not just call everything an 8? 

 The beauty of the stenciling, however, is that you can put anything that you want on these bean bags--kids' names, states and capitals, letters (I really want to make this alphabet bean bag set), or instructions for the craziest Game Night game ever! Here's how to make them: You will need:
  • fabric scraps measuring at least 4.5" square. I used quilting cotton, but canvas, upholstery remnants, felt, and even vinyl would work, although you might need to modify your stenciling method with a different fabric
  • sewing machine with a medium-weight universal needle and matching thread. I top-stitched around these puppies twice to make them secure, so I'd advise a thread that will blend, not fetchingly contrast, with your fabric here.
  • dried beans. I used pinto beans, which were the cheapest, and used about three pounds of dried beans for 30 bean bags. Any dried legumes, rice, or even cherry pits would also work.
  • freezer paper, sponge brush, and professional-quality fabric paint for freezer paper stenciling
1. Cut out two squares of 4.5" fabric for each bean bag that you want to make. 


 2. It's easy to paint the stencils on your fabric before you sew it together. I used my Cricut to cut the stencils directly into my freezer paper, and I stenciled the positive image of each number on one side and the negative image on the other side. If you haven't tried freezer paper stenciling before, it's easy--check out my freezer paper stencil tutorial for more tips and tricks. 

 3. Making sure that the stenciled images on each fabric square are aligned in the same direction, face the two sides of each bean bag together and sew around 3 and one-half sides--you're going to leave yourself an opening half of one side long for stuffing your bean bag. 

 4. Clip the corners of each bean bag to reduce bulk, then turn them right side out, using a chopstick or dull pencil to push the corners out nice and sharp. 

 5. Top-stitch twice around three sides of each bean bag--don't top-stitch around the side that has the opening, because you'll do that one after the bean bag is stuffed. 

 6. Fill each bean bag with dried beans. I like mine nice and stuffed, but in order to top-stitch easily and neatly close your opening, leave a least an inch's room at the top. 


 7. Top-stitch the side with the opening twice. This will neatly close the opening and give that side the same sturdiness as the other sides, while allowing it to match, as well. 


 Now they're ready for tossing!

Thursday, January 20, 2022

Homeschool Astronomy: Spectroscope Lab

 Will completed this Astronomy lab as part of the chapter on radiation in her astronomy textbook. It was cheap, it didn't require much setup, it was simple to complete, and, most importantly--it was fun and interesting!

Spectroscope Lab

Materials:

Pre-Lab Work (Answer these questions in your Astronomy Lab Notebook):

  1. Complete the online spectroscope lesson.
  2. List the colors, from longest to shortest wavelength, as observed in the solar spectrum. What do the dark lines in the absorption spectra of stars indicate?

Procedure:

  1. Aim the spectroscope at a variety of light sources:
    1. LIGHT SOURCES TO TEST (list the exact sources that you test in your Astronomy Lab Notebook):
      1. desk lamps
      2. computer screens
      3. television screens
      4. sun (don't look directly at the sun)
      5. light bulbs
      6. candle light
      7. flame from the stove
  2. For each light source, draw a box that models the spectroscope's display.
  3. Use colored pencils to draw the spectrum that you see for each light source. Include the numbering.
  4. Using the data you gathered, give more information about each light source. Can you name the type of light bulb, or discuss its energy efficiency? Can you name any elements or chemicals in the flame sources?

Post-Lab Questions:

  1. Which colors/wavelengths of light had the most energy? Which had the least?
  2. What color of light do you think would be most useful for a plant doing photosynthesis, and why?
  3. Which color of light would be most useful as a source of energy for a solar power plant? Why?
  4. Give an idea for an experiment that tests any of these concepts further. You may not describe the same experiment with different materials.
Will was able to do this lab independently, without needing me for an extra set of hands. Here she is observing the spectrum of candlelight:


And here's part of her lab report!

I used to have such high hopes for this kid's handwriting. And I kid you not--it has taken until literally last year to get it this legible. It's my biggest homeschool failure.

We could do even more cool spectroscopy with a good chemistry setup, but it's looking like chemistry will be the one science that we don't DIY during Will's high school years.

Other than, you know, the time we made rocket candy for her sixth grade science fair, or put sulfuric acid on limestone for geology, or all the other chemistry-adjacent stuff that I probably should have been tallying up for at least a credit's worth of high school chemistry by now...

P.S. If you want a ready-to-use version of this lab, here's a Google Doc of the Spectroscope Lab assignment sheet.

P.P.S. Come find me over on my Facebook page, where I often talk about the labs and experiments that we're doing as we're doing them!