During the first year of the pandemic, back when we were all home all the time, Matt helped the kids do a HUGE clean-out of old toys from their playroom. I about wrung his neck when I saw the size of their donation pile, then hid in the bathroom and sobbed for a dramatically long time, then barely spoke to him for most of a week, and yet of course it had to be done sometime.
Although I don't know why it couldn't wait until after I've died of old age, but whatever. If the guy couldn't stand sharing his work-from-home office space with a billion toys that hadn't been played with in years, then he couldn't stand it, I guess. Or they're all just heartless and have no souls with which to appreciate the precious childhood memories locked into those toys.
ANYWAY!
Souls or not, they knew better than to so much as lay one finger on the things that I've made for the children over the years. Which just means that now, of course, I've got to take those precious memories--I mean stuff, of course it's all just stuff, ahem--off the shelves with my own hands and put it all away somewhere.
I dealt with the kids' play silks first, keeping only the ones that still looked pristine or that the kids had helped me make, washing them and hanging them out to dry and then folding them up and sealing them away in plastic.
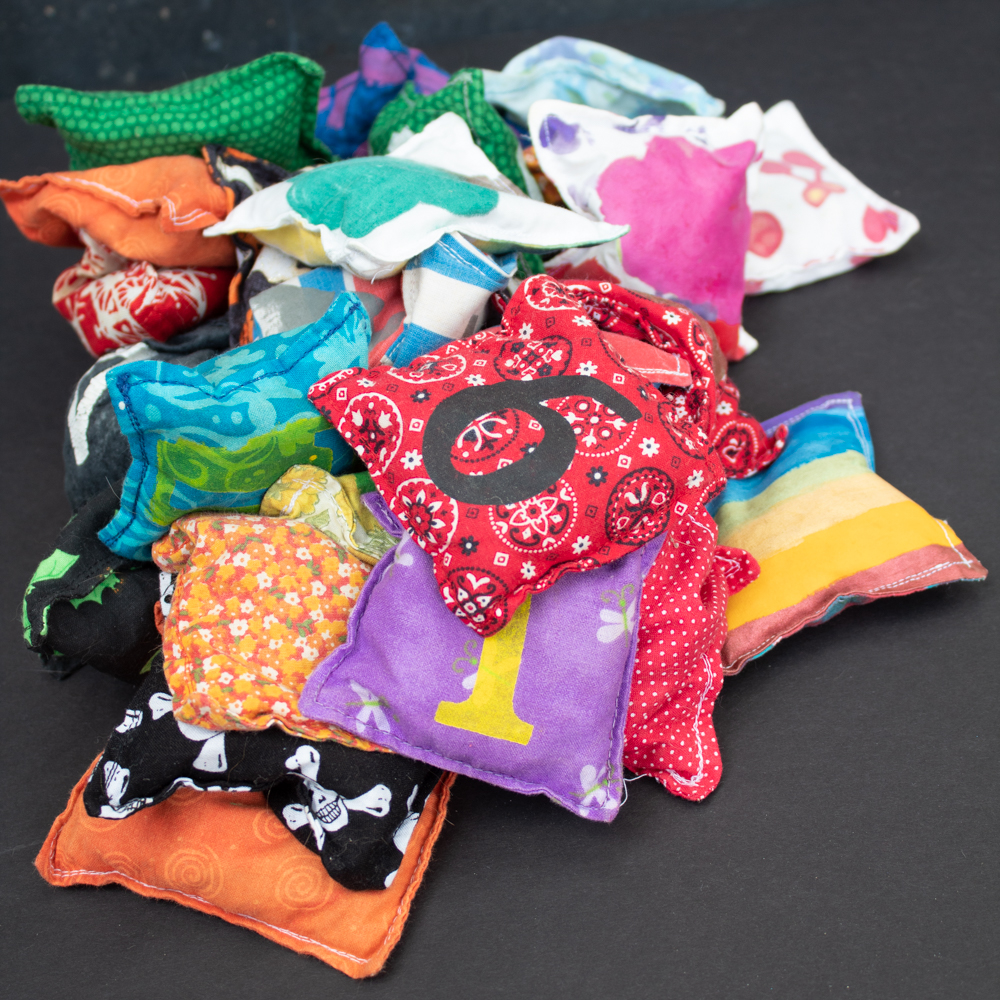
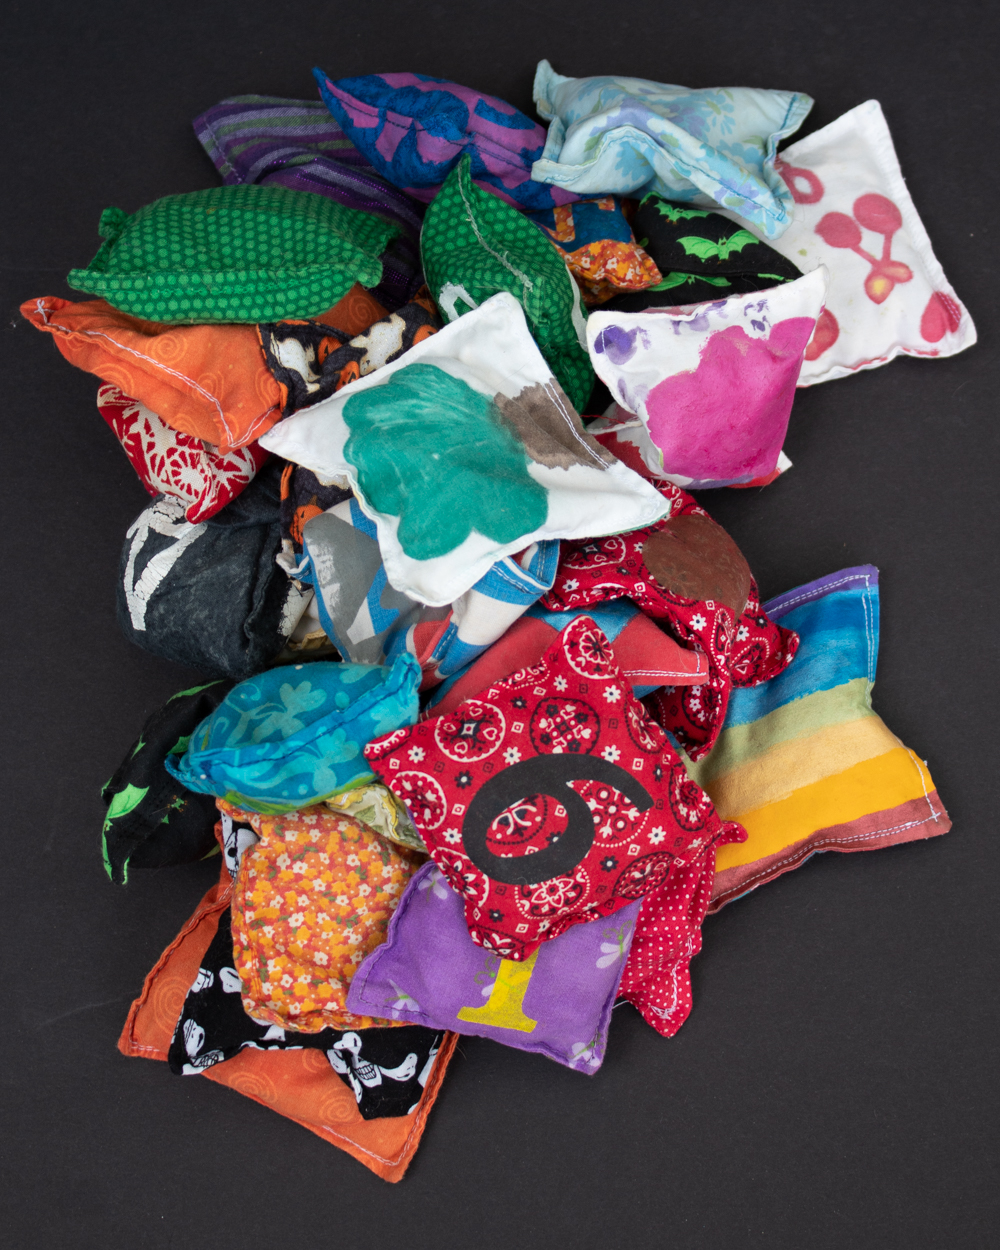
Next, Syd helped me deal with the kids' HUGE collection of bean bags. The kids adored bean bags for a ton of years, and every so often I'd make them a new set. Rainbow bean bags. Stenciled bean bags. Halloween bean bags. Bean bags with their art on them.
Again, we kept only the ones that are still perfect and the ones that the kids did the decorating for. That still resulted in quite a stash!
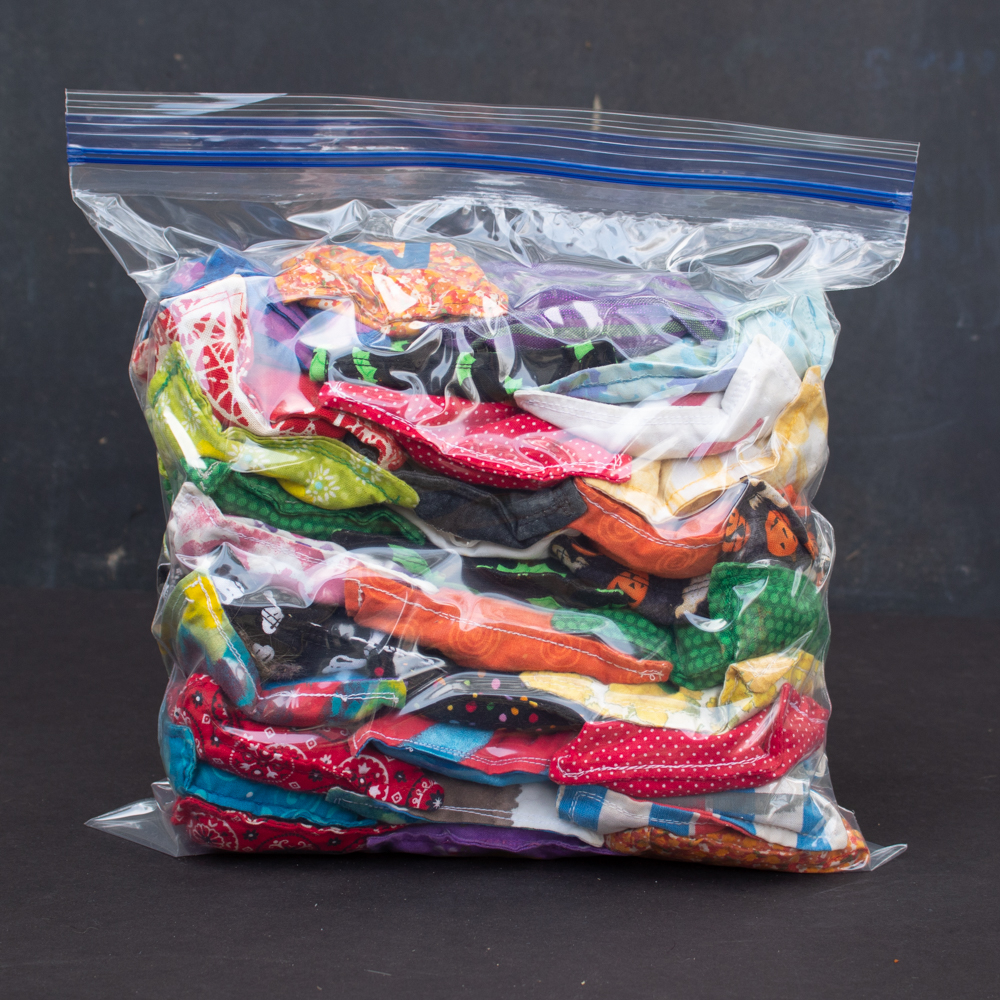
Bean bags don't wash, so I only had to air them out (okay, and photograph them!) one more time before putting them in plastic:
I hope the kids appreciate all the extra room they've now got for their boring teenager stuff, humph! And next we've apparently got to go through their nearly infinite supply of small plastic animals (I'd say we should have bought stock in Schleich, but they're pretty much all secondhand), because who needs an entire wall of toy animals when you're a teenager?
I mean, I probably only have to store them away until both kids move out, and then I can get all of my favorite toys of theirs back out and remodel their room into a shrine to their childhoods...
This tutorial was originally posted on Crafting a Green World back in 2013.
There's nothing like hopping out of the pool and into a comfy, soft, bounteous towel.
But big beach towels are hard for little kids to manage, and that bleached, dyed terrycloth can be scratchy and harsh on damp, delicate skin.
It's an organic terrycloth hooded towel to the rescue!
This hooded towel isn't for babies--if you start with your own organic terrycloth fabric, you can sew this hooded towel with proportions perfect for big kids. Organic terrycloth won't add any extra chemicals to your kiddo's tender skin, and it's softer than those cheap-o novelty beach towels.
And just in case there's any doubt who that awesome hooded towel belongs to, there's plenty of room on the back for a monogram, done superhero-style in the case of my superhero-loving kiddo, who's decided that her hooded towel does, indeed, look a LOT like a superhero's cape.
Need a superhero cape/hooded towel for your own kiddo? Read on for the tute:
1. Take your kiddo's measurements, and figure out yardage. First, measure your kiddo's height--look how she's grown!
Your hooded towel will be in the shape of a square turned diagonally, so this height measurement will be the diagonal length of the square. To calculate the length of each side of the square, use the Pythagorean theorem, in which c equals the diagonal and both a and b equal the lengths of the other two sides of the right triangles made from the square with that diagonal.
No, you don't want to do that math? Fine, use this square calculator, but don't forget that your geometry teacher TOLD you you'd need the Pythagorean theorem one day!
Using the Pythagorean theorem, and then rounding up to the next inch, I discovered that each side of my square needed to be 36" (do not include a seam allowance here or anywhere else on this project); this was a yay, because it meant that I could sew the entire hooded towel for my seven-year-old from one yard of organic natural terrycloth.
Now, measure the top of your kid's head from front to back; this will be the altitude of the right isosceles triangle that makes up the hood. To cut a right isosceles triangle to this altitude, fold the remaining terrycloth to the bias, measure the altitude, and cut.
Fold the terrycloth to the bias to measure the altitude of the triangle formed by the fold.
2. Make homemade bias tape. Cut printed or undyed organic flannel on the bias at a width of 4", then make bias tape out of it.
You will need enough bias tape to cover the perimeter of your square and the base of your triangle.
3. Sew bias tape to the hood. Just sew the bias tape to the base of the triangle; the other two edges of the hood will be covered later.
Sew bias tape to the base of the triangle forming the hood, then pin the raw edge of the triangle to one corner of the towel.
4. Attach the hood to the towel. Line up the two raw edges of the hood with the two raw edges of one corner of the towel. Pin well.
Sew the bias tape around the perimeter of the towel.
I basted the applique to the towel’s back, then went back over it with a satin stitch.
6. Applique the hooded towel. Your hooded towel is perfectly serviceable at this point, but it might still need some personality. You can cut a monogram, or really anything that you wish, out of flannel, center it onto the back of the hooded towel, and applique it on using your machine's satin stitch.
NOW it's got some personality!
Syd and Matt helped me make the BEST Christmas gift for our favorite baby.
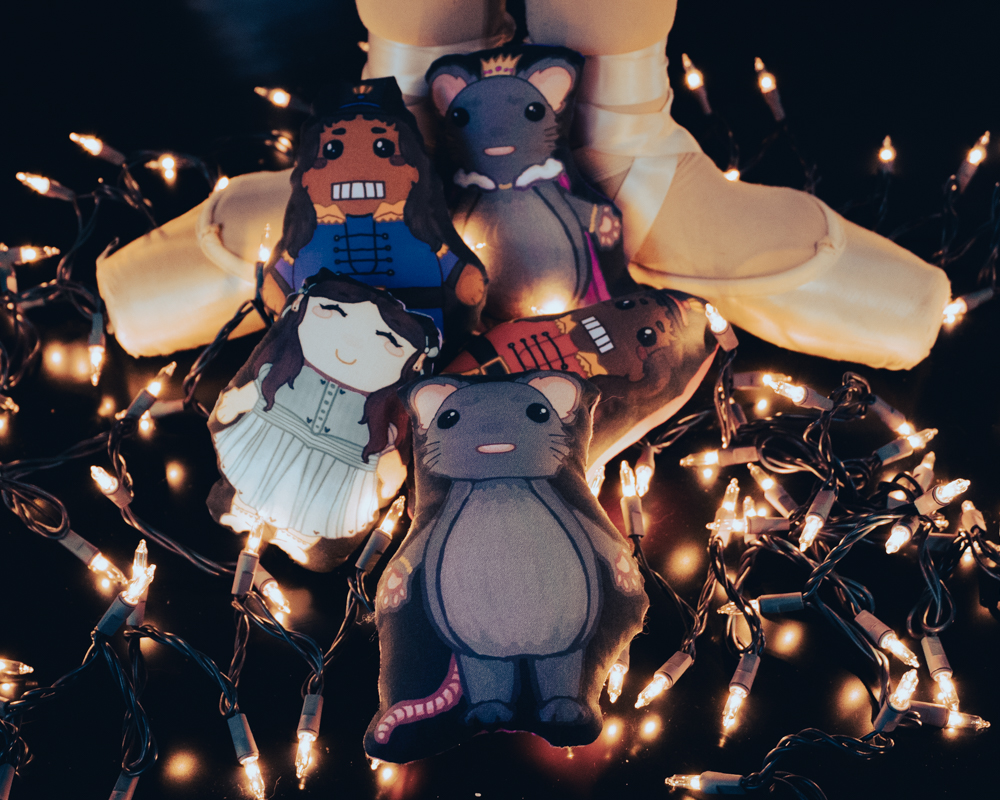
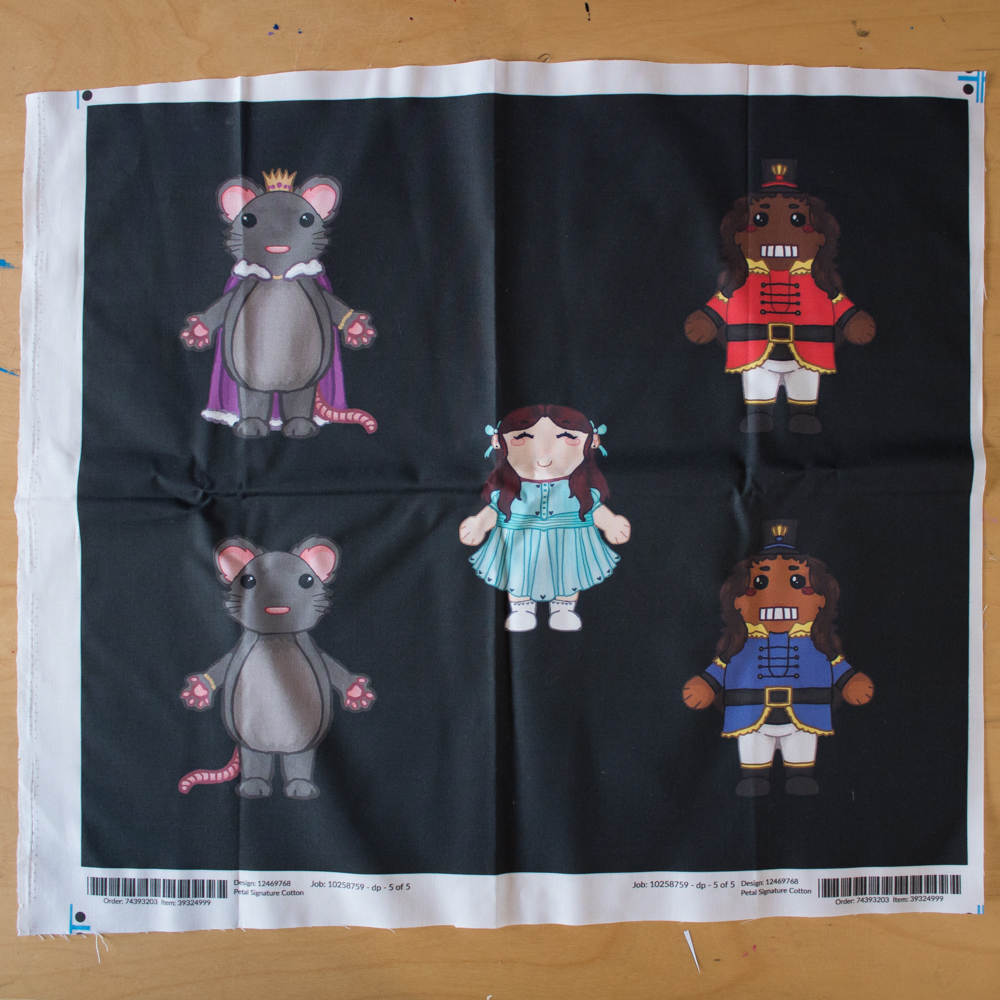
I wanted to make our favorite baby a set of Nutcracker-themed stuffies to go with a board book retelling of The Nutcracker that I'd bought for her (Will's bookstore scratch-off birthday present has been a great excuse for me to do a bunch of shopping in local independent bookstores), but I couldn't find ANY patterns for anything close to what I had in mind...
... so I commissioned my favorite artist to make some!
Syd drew me five Nutcrackers on her Wacom, and then I commissioned my favorite graphic designer to lay them out in just the right way that I could have them printed as a fat quarter from Spoonflower:
And then I took over doing some actual work myself!
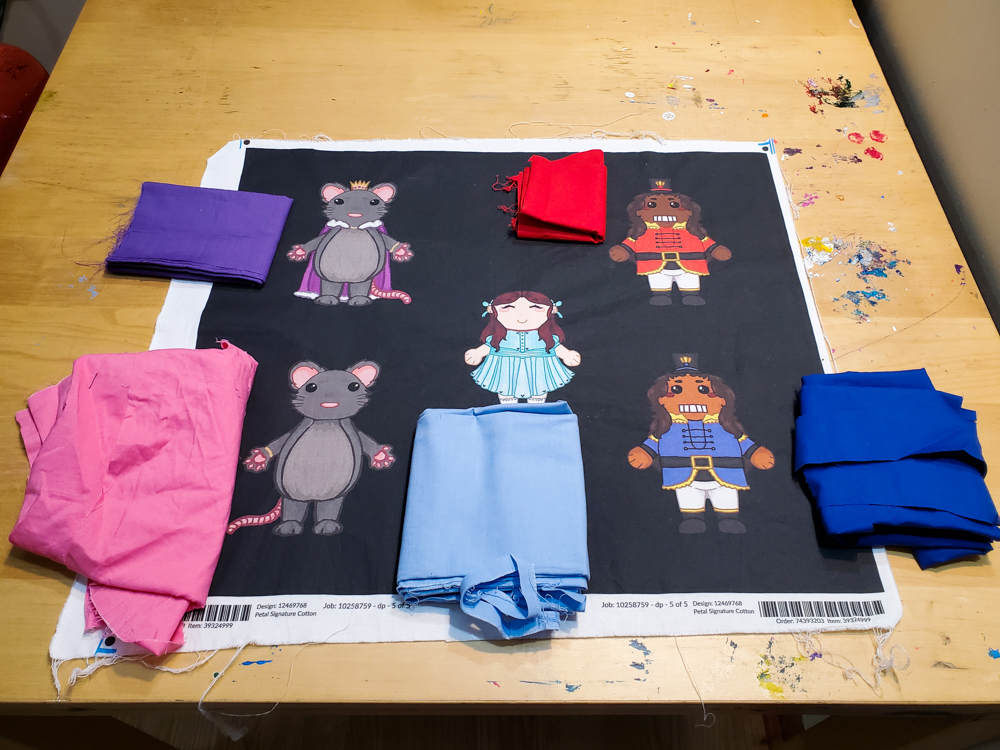
I matched each character up with a complementary color of solid cotton from my stash--
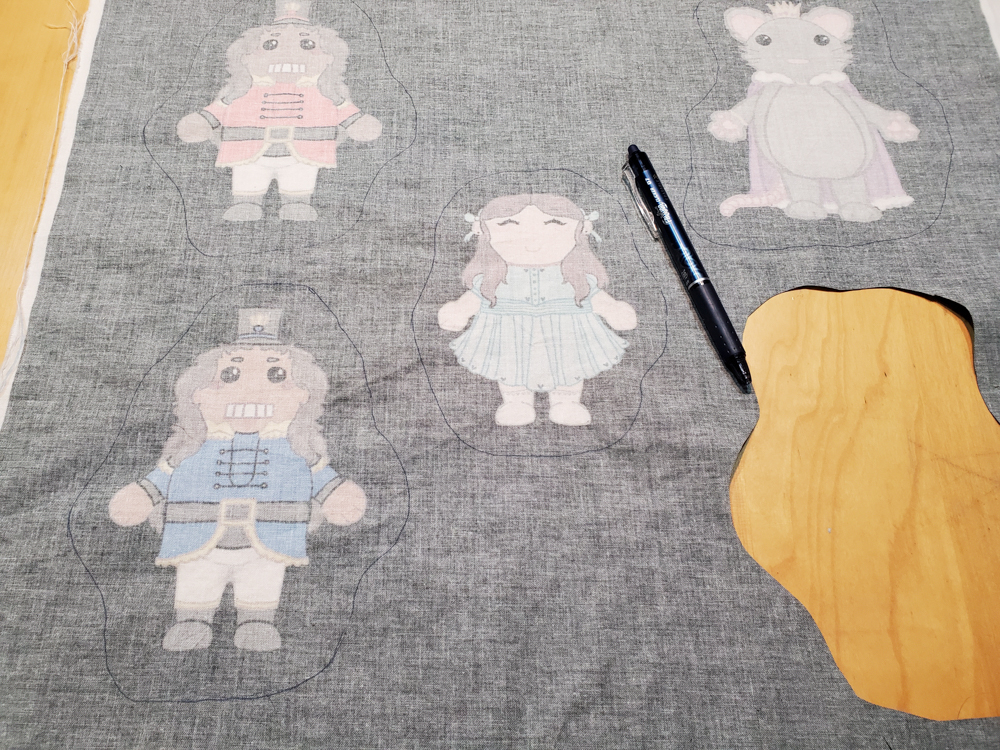
--drew a simple outline around each character (Frixion heat-erasable pens for the win!) and cut them out--
--and finally put each one right sides together with its backing fabric, sewed it most of the way around, turned and stuffed it, and ladder-stitched the opening closed.
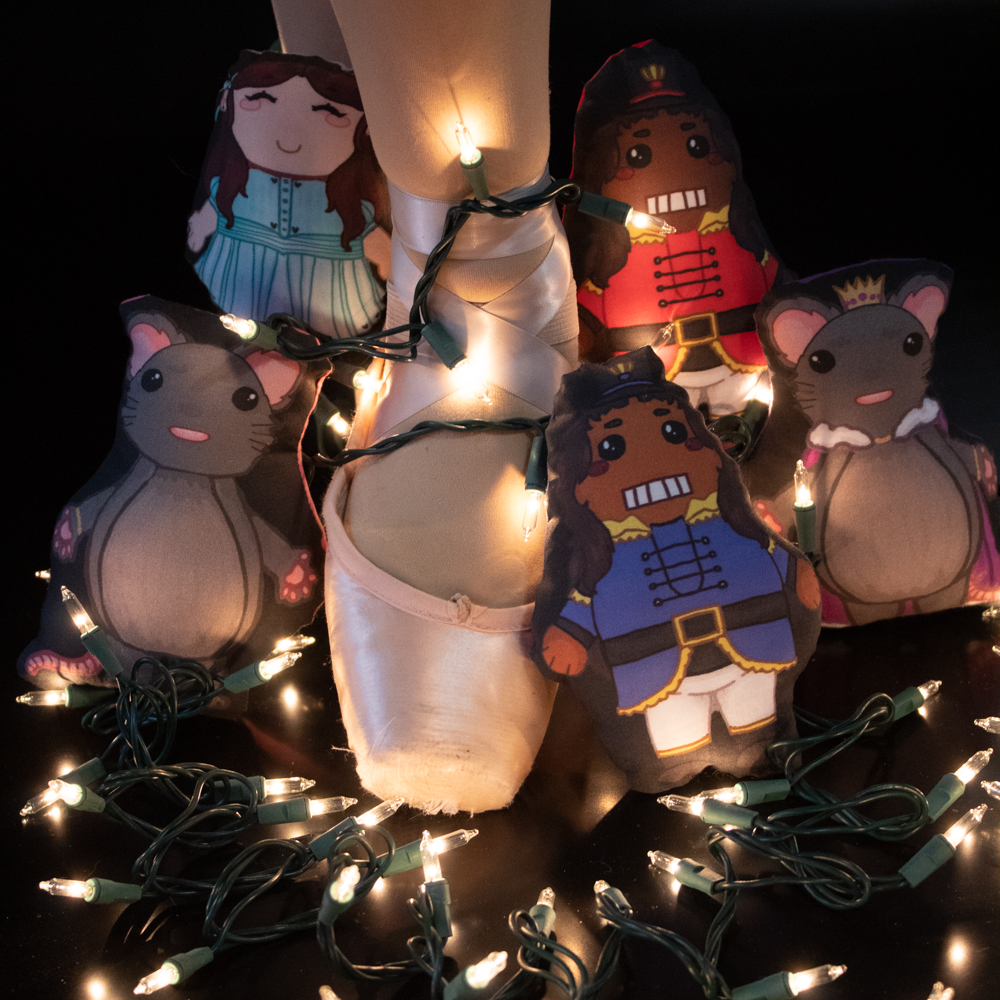
I am delighted with our little set of Nutcracker stuffies--
--and I think they're the perfect size to cuddle or play imaginary games with.
Since I had to mess around with Spoonflower so much to figure out how to format Syd's design and get it published to the site, I went ahead and did the whopping four extra steps required to actually list our design for sale!
You can find our Nutcracker stuffie patterns here. The set is ideally printed as a fat quarter, but if you buy a full yard you *should* be able to get four sets? I'm in the process of testing that theory out as we speak, because I want to have a few finished sets on hand to list in my Pumpkin+Bear etsy shop, so I'll let you know! I also have an eye towards asking Syd to make one more character for the set--perhaps Fritz or the Sugar Plum Fairy?--and maybe I'll find some copyright-free graphics of Nutcracker sheet music that Matt can also make into a fabric print. I think it would be fun to back the stuffies with that instead of having to find your own backing fabric.
I have several different cold-process soap recipes that I want to try, but we don't really *need* several simultaneous batches of soap, nor do I really have the space to store several simultaneous batches of soap... so somehow I've convinced myself that it makes the most sense if I get to make a new batch of cold-process soap every time we finish a canister of oatmeal.
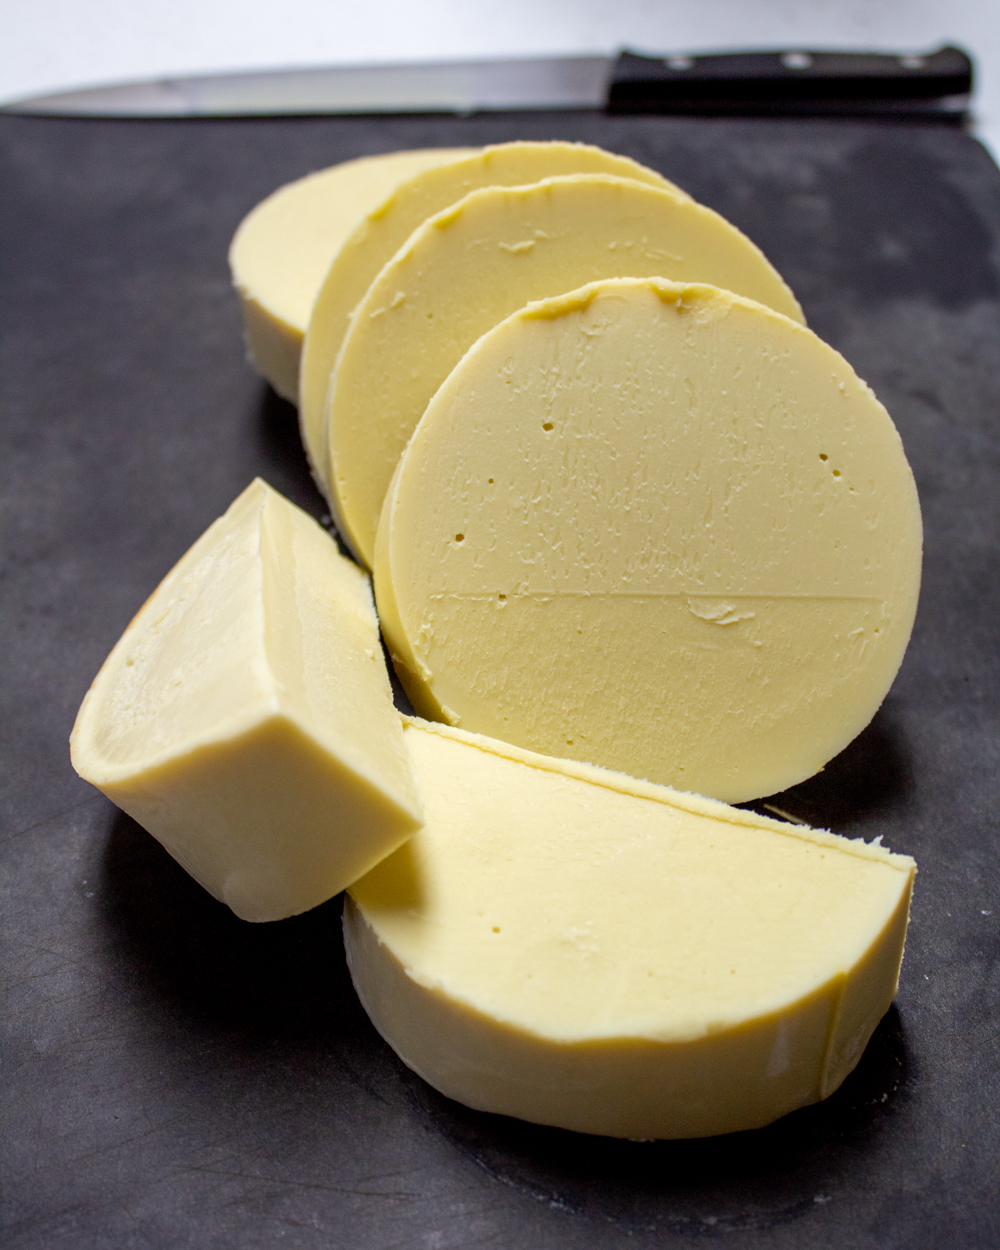
Seriously, though--that waxed cardboard oatmeal container is the perfect size and shape for a batch of soap!
This is eucalyptus olive oil soap, and it smells AMAZING.
Back when Will was earning the Girl Scout Homesteading badge (don't worry if it doesn't sound familiar to you--we made it up!), I checked out every single soapmaking book from every single library I have access to, and I fell in love with this one:
Olive oil is the base for all the soaps in this book, and the variety of recipes comes from playing around with different natural additives, many of which I already own. It turns out that I really like olive oil soaps, and I REALLY like soapmaking recipes that call for a fairly limited number of ingredients, especially not fourteen different oils! Olive oil soaps are also supposed to be pretty hard, and I like how long each bar of soap lasts.
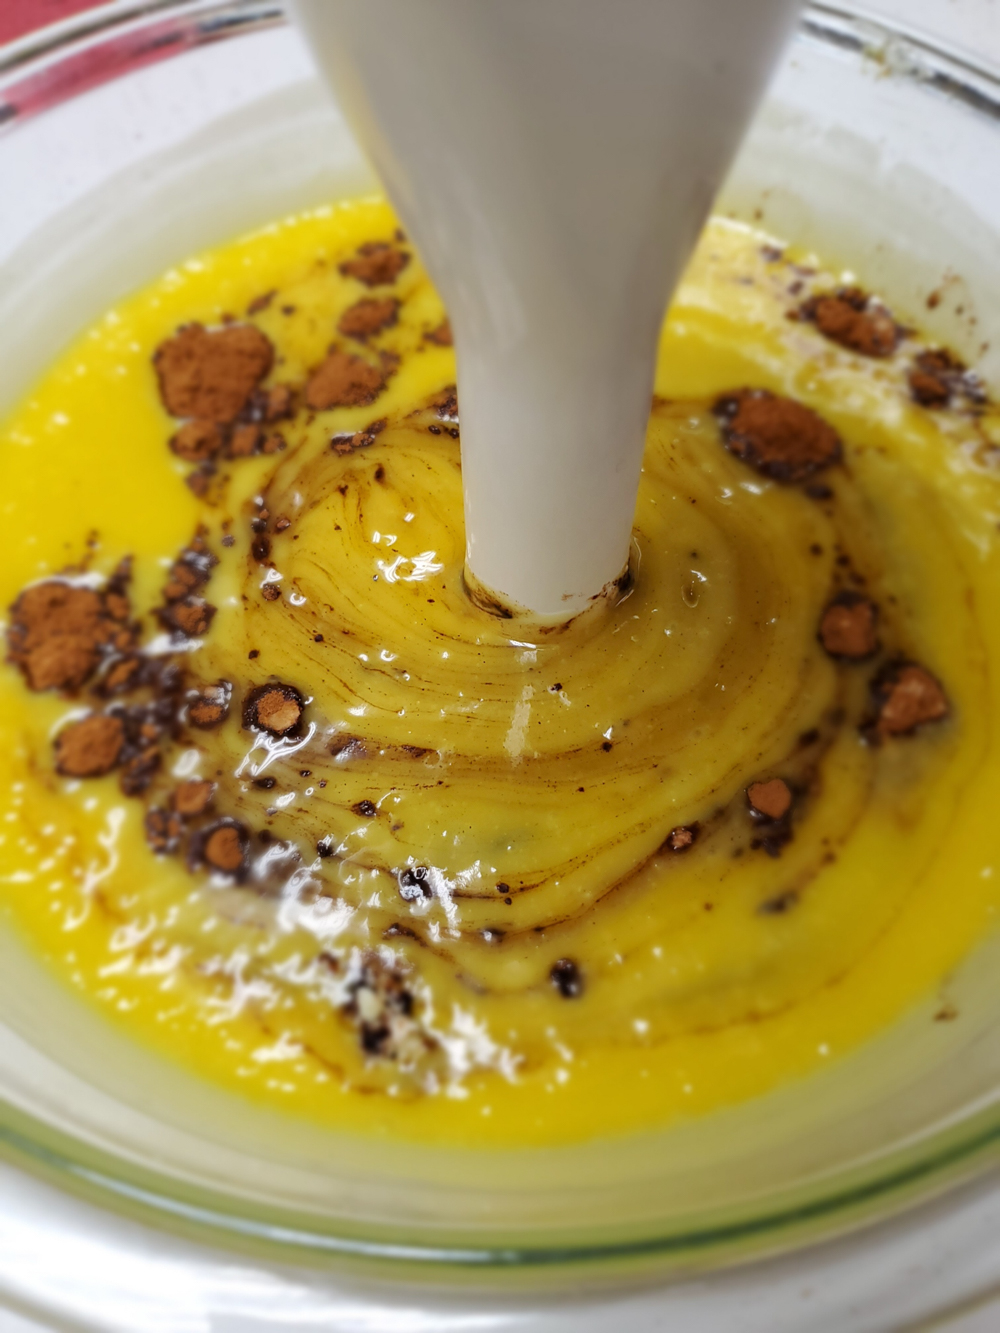
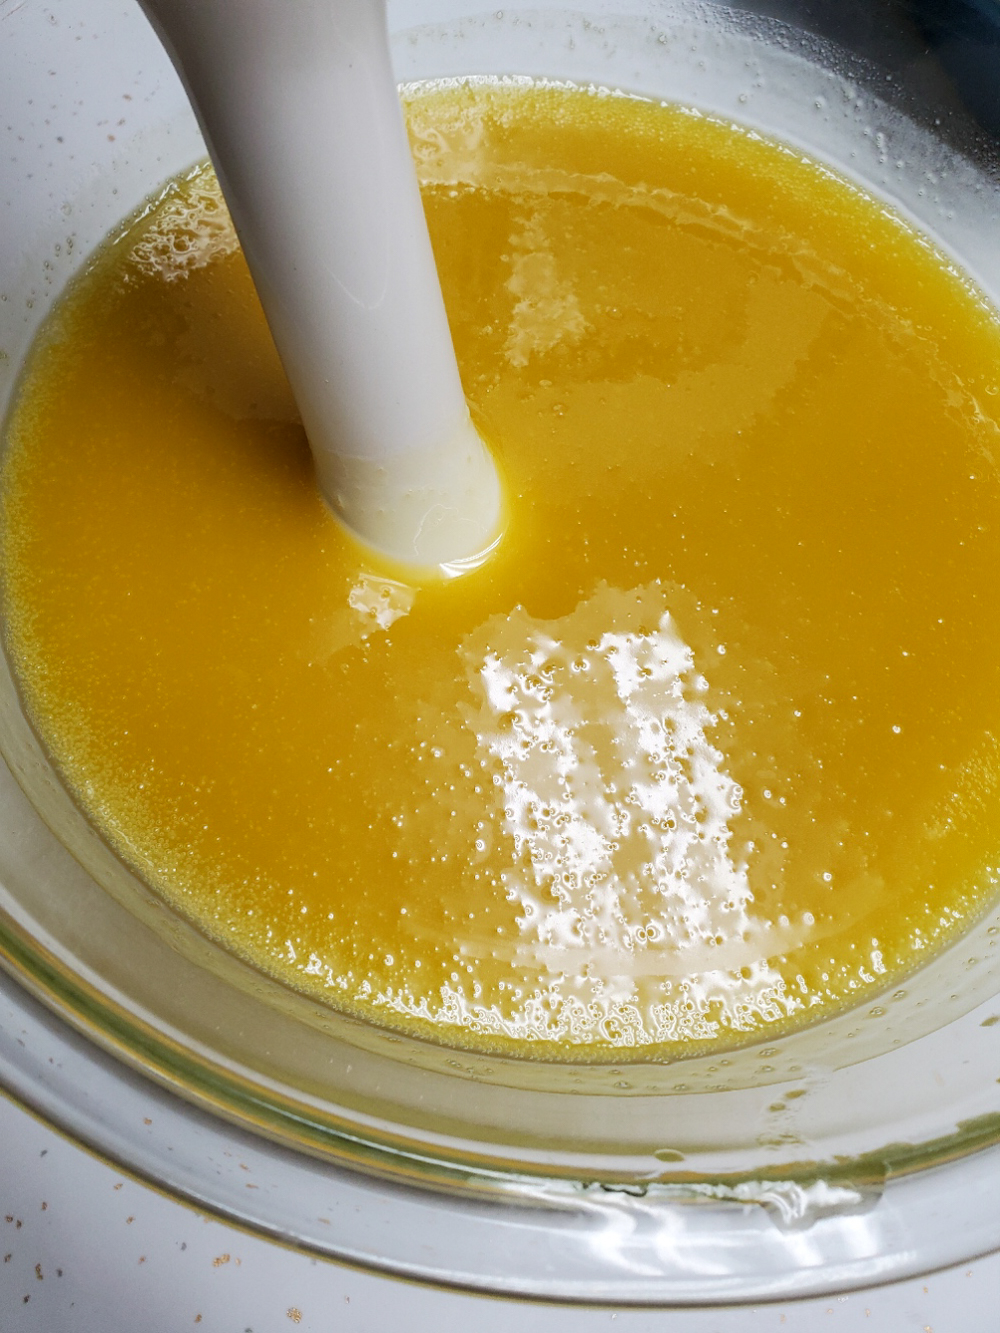
So far, I've made the basic olive oil soap twice--once just the way the recipe was written, and once with eucalyptus essential oil added. It was super easy to plug the soap recipe into this essential oil calculator and get the correct amount of eucalyptus oil to add, and I'm SUPER happy with how scented the soap is! It's all sliced and curing on the ledge behind my bathroom counter right now, and the whole bathroom smells delightfully refreshing. No clogged sinuses for me! Syd and I made the rosemary soap with similarly pleasing results, and today, thanks to cooking the last of our oatmeal for breakfast on Monday, I made the cinnamon soap in the 45 minutes between finishing hand-sending course descriptions to each of the colleges Will is applying to NOT through the Common App and getting the kids to help me clean the house:
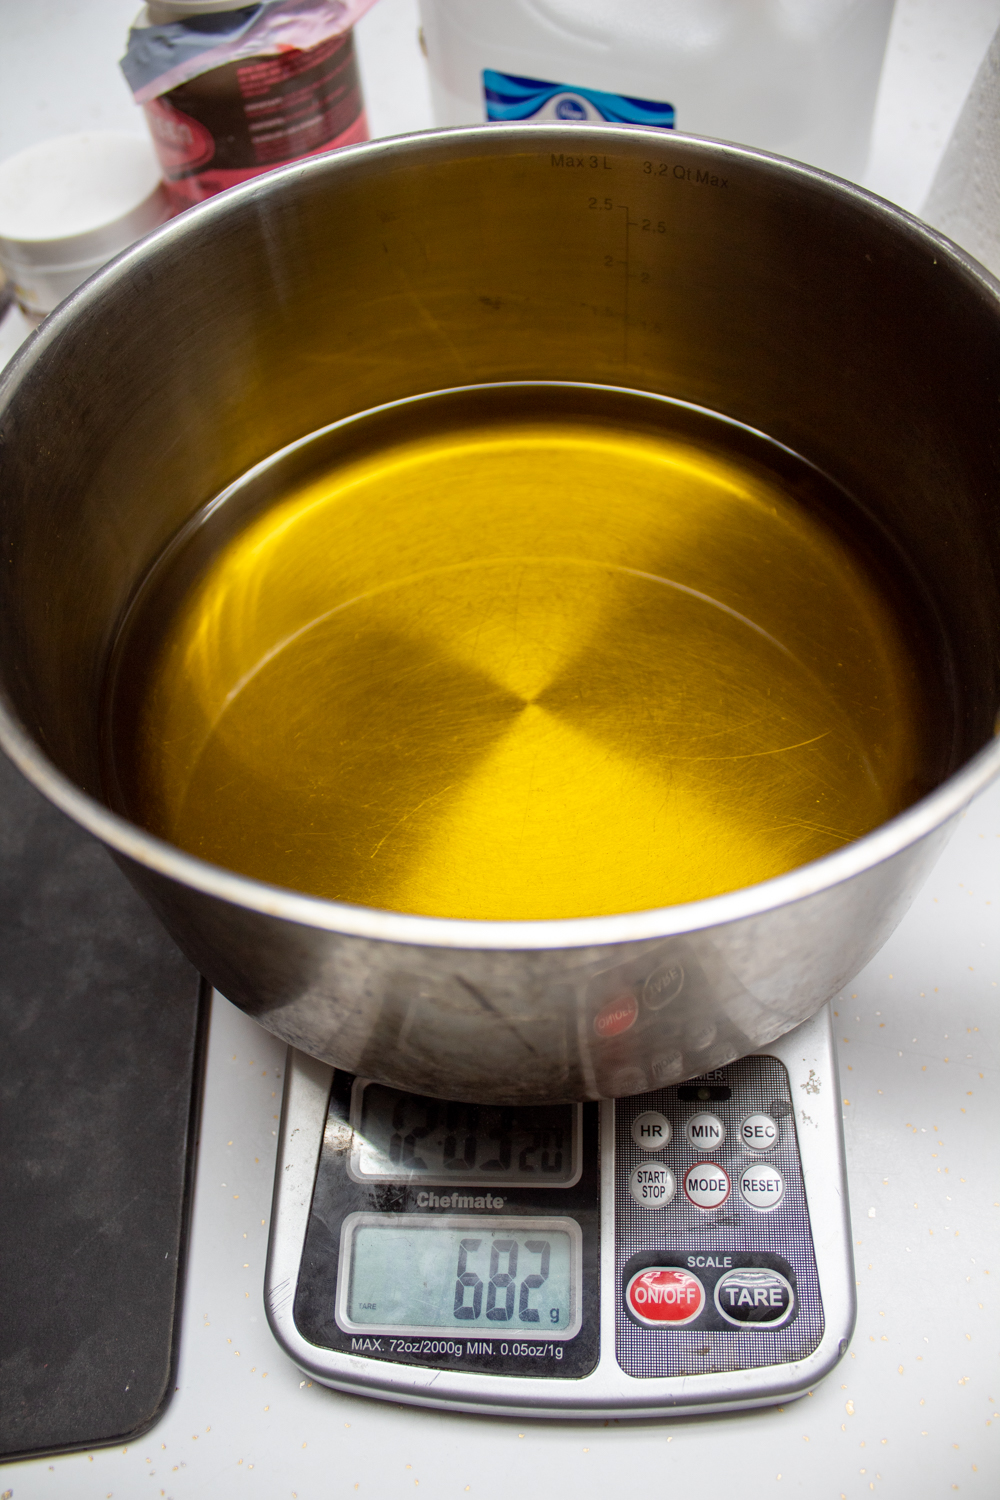
SO much olive oil! The recipe also calls for cocoa butter, ground cinnamon, and a teeny bit of cinnamon leaf essential oil. Cinnamon leaf essential oil is a skin irritant, but you can use it at 1% in soap since it gets rinsed right off.
I wish I'd taken another photo after I stirred in the cinnamon--this will be my first dark brown soap!
I currently have a lot of bottles of essential oils with miniscule amounts in them, so I'm thinking that my next batch of soap will involve some serious essential oil calculator machinations and odd combinations--does cedar wood and lemongrass sound good to you? Or maybe rose absolute and jasmine?
This day was a day for wandering far and wide! Will and I had a bit of a lie-in while Matt and Syd ventured out for the best bagels in Harlem, and to play another game of "Dunkin roulette" at the eponymous coffee shop on the corner. We stopped there every morning of our trip, and the rules of the game seemed to be that you give your order to the barista, and then she makes you something random and you drink it.
Syd did not enjoy this game because she's very particular, and the barista especially horrified her one morning by serving her HOT matcha, which she loathes, but I kind of liked not knowing how many shots of espresso or what kind of milk was in my own morning coffee.
Once we were all finally up and dressed and caffeinated, with our tummies full of bagels, we went out for the day. We briefly hopped off the subway so we could see our first real, live Banksy--
--and then we were right back again--
--where, you'll be pleased to know, Will's NYC dream came true:
Then it was back on the subway for a long, long time--
--all the way down to the bottom bit of Manhattan and the Staten Island Ferry:
Is riding the free Staten Island Ferry back and forth from NYC to New Jersey and back the absolute most touristy thing one can do?
Possibly, but it also gives you a terrific view of the Statue of Liberty!
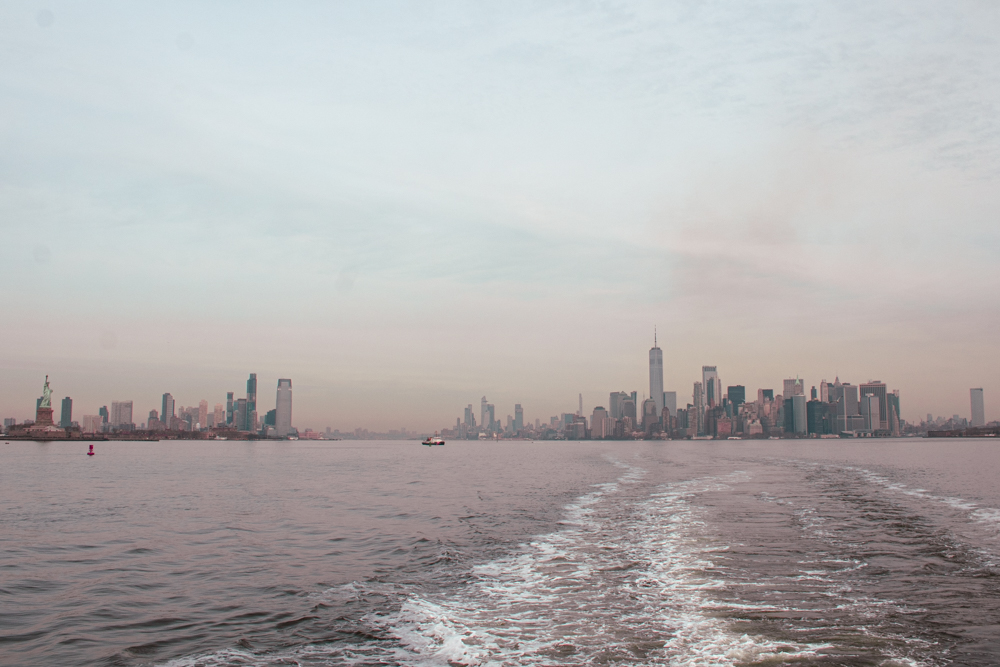
And the views of the Manhattan skyline, air pollution highly evident, are a big part of the fun!
Even if you plan to ride the ferry right back again, you have to disembark in New Jersey and hop on a different ferry that's ready to go. Matt used his time on the first ferry, though, to scope out the best views, so when we all got back on again he knew exactly where to lead us so I could take the best photos of my unwilling children with the skyline and the Statue of Liberty over their shoulders:
And another view of the Statue of Liberty! I 10/10 recommend the Staten Island Ferry for the free views without the fuss of actually visiting Ellis Island--although I DO want to do that someday!
In all our trip planning for NYC, Will was really just excited about seeing the vermin, so here she is feeding leftover bagel--which is very bad for them!--to a seagull:
She attracted so many bird friends that I bagged it and took the rest of my photos of her from a VERY safe distance...
After a delicious lunch (for us and the birds!) of bagels, we walked the Battery north to Castle Clinton. I had planned to explore Castle Clinton and have the kids earn their Junior Ranger badges there, but even though the place is technically open, it's really actually closed and pretty much just serves as the open-air ticket window for the Ellis Island ferry:
When Matt asked about it, though, a ranger did pop into the office and bring back Junior Ranger books and badges for the kids. Syd looked at me hopefully when she saw the badges already in my hand, but I still made the kids look over the two or three displays that we were able to access and fill out their books, anyway:
And then Ranger Google helped them with the rest of their books!
So, I don't think that we left Castle Clinton with any particular insight as to its merits or claims to fame (other than the fact that it was an aquarium for a time, which...), but regardless, Junior Ranger badges achieved, we headed northeast for some more sightseeing on foot:
I had been vaguely leading us more or less to the Wall Street bull statue, thinking we might as well check it off our list, but this is as close as we got to it:
You guys, people are standing in line BEHIND the bull, because they all want to pose for photos squatting underneath the bull's butt! That's... not what I'd expected. Hard pass.
We didn't really have an agenda for the rest of our day, but I knew that if we simply walked north up Broadway we'd definitely pass stuff we wanted to look at, so that's what we did!
We passed Trinity Church, where Eliza and Alexander Hamilton are buried, but the area is under construction and you can't access the cemetery, boo. I'd sort of had it in my head that we'd walk as far as the African Burial Ground National Monument, but instead we diverted and visited the World Trade Center Complex to see the memorials:
The sun was setting on our last full day in NYC and the kids still had some spending money burning holes in their pockets (Thank you, Grandparents!), so we took the subway back to Bryant Park's Winter Market. Will bought a new best friend--
--and so did Syd:
Syd had some dumplings--
--while Will had a cookie:
I had a hot apple cider and a gingersnap, both of which will remain unphotographed because my hands were full!
The remaining hours of our trip were that unremarkable combination of packing, eating the weird combo of all the last bits of groceries (chicken strips and leftover take-out pizza and Matt's regret that he'd bought whole jars of peanut butter and jelly that we for sure weren't going to be able to finish), subway stations and Grand Central Terminal--
--and the airport shuttle and security theater and the sunset over the East Coast--
--and the hassle of dealing with overly-gregarious and WAY too hyped for the time of day fellow riders of the airport shuttle and the hour-long drive on top of it AND the detour to pick up the dog from the sitter that make you especially happy to finally walk in your own door, be furiously greeted by the cats who are outraged to tell you that STRANGERS ENTERED THE HOUSE AND PLAYED WITH THEM WHILE YOU WERE GONE, take a shower in your own bathroom, dry yourself off with your own towels, put on clean pajamas that don't smell like Saturday's spilled coffee for a change, and eat... well, it was more take-out pizza.