Monday, October 12, 2020

To the Apple Orchard: The 2020 Pandemic Edition


The pandemic has changed most of our anticipated fall adventures (Will and I should be just about packed for Florida by now, with a zillion SWAPS ready for the Girl Scout Convention and handmade Mickey ears ready for Disney World), but one adventure that thankfully stayed the same is our autumn trip to the local apple orchard.

Per usual, this kid picked approximately one apple--


--and then headed off out of sight with her bestie:


Fortunately, this other kid of mine is still willing to hang out with her parents in an apple orchard. It IS the best way to get the sweetest apples that only live way up high, after all!


Unfortunately, I think we hit up the apple orchard a little late this year (and to be honest, we almost didn't make it on this day, either--there was exactly one hour of work that I'd wanted the kids to do before we left that they refused to do, so I got pissed and flipped the breaker FOR THE ENTIRE HOUSE until they did it, and it still took until significantly after noon for the work to get done. The good news is that we saved on a few hours of electricity, I guess!), and so there were only slim-to-none pickings left. 


But every single apple that was left on a tree in early October, after a cold snap?

We picked it!


I'm pretty sure that the person who enjoys this yearly trip the most is Luna. The first time we took her to the apple orchard with us was the first time that we discovered that Luna LOVES apples, and since then, every time we go she acts like she's come to a wonderland full of yummy treats that fall from the sky and then lie on the ground waiting for her to eat them.

I mean, she's not wrong...


This trip is also one of the very few times a year that I can convince the entire family to sit still and let me take their photos together.

Well, almost the entire family...

She's chomped another apple off the ground and is running off with it so we can't make her share.


Syd and I saw a TikTok that claimed that if you hold your camera upside-down when taking someone's picture, the picture will have a cool and unusual perspective. I don't think it really works, though:


The apple orchard is extra efficient because the kids can also pick out their Jack-o-lantern pumpkins there:


One kid always picks out the biggest pumpkin she can find--this year, her pumpkin weighed 25 pounds! The other kid always manages to get painfully attached to the weirdest pumpkin in the patch. Can you tell which one the kid below is?


Just as we were finishing up our apple cider slushies, apple turnovers, and elephant ears, the sun FINALLY came out, and I was thisclose to making everyone tromp back into the trees for a set of photos taken with proper lighting, but first we took a swing through the general store for cider and another peck of apples, and while we were in there a mask-less child coughed directly on Will--like, DIRECTLY ON HER. FROM APPROXIMATELY SIX INCHES AWAY. WITH NO ATTEMPT TO COVER ITS MOUTH--and I freaked out and hauled Will away from the family by her elbow while they gave me the stink-eye as if *I* was the one acting crazy and Will loudly protested, because of course she was utterly oblivious and also thinks I'm just crazy in general.

So that kind of killed the mood, and I lost my urge to Fight for the Perfect Photos, and instead we headed home, because even during out favorite time of year, at one of favorite places in the world, doing one of our favorite holiday traditions, it turns out there's still a pandemic going on.

P.S. Want to see what we're going to do with a bushel of apples, a gallon of cider, and two Jack-o-lantern pumpkins, one very large and one very weird? Follow along on my Craft Knife Facebook page, where cider cocktails and caramel apples are made, and teenagers are in charge of the applesauce!

Saturday, October 10, 2020

How to Upcycle a Crystal Head Vodka Bottle into a Sugar Skull Candle Holder

I originally published this tutorial on Crafting a Green World.

Y'all, I drank some vodka so that my kids and I could make this project. Friends, I am always working for YOU!

It's October. You need a sugar skull candle holder.

There are skull-shaped vodka bottles for sale in liquor stores.

Let's play!

Supplies

To make your own sugar skull candle holder, you will need:

  • Skull-shaped glass bottle. I'm using empty Crystal Head vodka bottles (hiccup!), but there are other skull-shaped glass bottles around.
  • Rust-Oleum Paint+Primer spray paint, heirloom white. I don't love spray paint, obviously, because it's not eco-friendly, BUT this exact color in this exact brand is the perfect bone color.
  • Paint pens. We used both Sharpie and Beric paint pens. I, personally, preferred the narrower tips of the Beric pens, but both brands show up well and don't flake off or smear.

Directions

  1. Clean and paint the skull-shaped glass bottle. There's a neat trick that you can do to paint a bottle: stick a pole in the ground, upend the bottle over the pole, and get the whole bottle, top, and bottom, in one go! I, however, didn't feel like digging around for a pole, so I just turned the bottles upside-down after they dried and sprayed on another coat. No big deal.
  2. Decorate the bottles with paint pens. Have a lot of fun with this! Draw patterns and designs or focus on one big concept; either way its going to look absolutely awesome.

This is a great project for a kid to do if they can treat paint pens respectfully. Teach them all about the Day of the Dead, let them look at lots and lots of images of real sugar skulls, and then let them be as creative as they like.

If you want to seal your sugar skull candle holder with a clear sealant, you can, but in this case, I don't really think it's necessary. I also didn't want to make my own sugar skull candle holder shiny.

The Crystal Head vodka bottle fits a standard-sized taper candle, and I'd recommend cutting a cardboard circle out of recycled food packaging to fit around the candle so that you're not in any danger of wax dripping onto your beautiful creation.

P.S. Want to make a REAL sugar skull? Check out my walk-through here!

Thursday, October 8, 2020

Constellations on My Kitchen Shelves

 Remember how I tried to improve my kitchen shelves by sewing fabric baskets to hide all the crap that we shove on them, but that just made me see how ugly the shelves just... ARE?

Laboring under the delusion that paint and wallpaper are cheap ways to spruce up a space, I decided to spruce up this particular kitchen space by painting and wallpapering it. 

Like, for REAL painting and wallpapering it. As in, not using whatever paint I happened to find in the garage, but deliberately shopping for and purchasing brand-new paint. Not "wallpapering" by decoupaging my favorite comics or Harry Potter paperbacks all over the shelves, but purchasing actual, legitimate, real-live wallpaper.

Will volunteered to assist me with taping off the shelves. Thank goodness for that kid!


I painted the trim around the shelves, permitted Matt to talk me down from the wallpaper of cartoon T-rexes eating tacos, and instead bought this constellation wallpaper, on account of my mid-life crisis has turned out to consist of taking up once again my childhood love of astronomy.

In retrospect, I wouldn't pay this much for wallpaper again. I underestimated the square footage of what I needed to cover, and so instead of having a nice, big surplus of wallpaper to use on other projects, I had thankfully enough wallpaper to cover the shelves, but only enough extra to cover a couple of tin cans, so I guess look forward to my upcoming tutorial on covering tin cans with wallpaper to use as utensil holders!

Also, as I was painting the trim, I noticed that the super old paneling on the kitchen walls is peeling away, so... that's cool, I guess.

ANYWAY, here are the shelves all nicely painted and wallpapered!


Pretend like you don't see any bubbles in that wallpaper, please. It's important that you do this for me. Instead, feel free to notice the peeling paneling below the shelves. What on earth am I supposed to do about that?!?

Next up, Matt has plans to build a roll-out shelf next to the refrigerator--something like this! His hobby is mixing cocktails, so he can put all of his bulky bottles of alcohol and mixers there instead of in the kitchen nook, and wouldn't it be absolutely wonderful if he could also fit some of the crap that we now toss on top of the refrigerator so I can't reach it? Even better, perhaps he could fit some of the things that I've thrown in those fabric storage baskets, so that there would be fewer baskets in the nook and you could actually see that expensive wallpaper!

I'm also toying with the idea of thrifting some fabric and putting up a curtain to block the view of the messy hallway from the kitchen, and the view of the messy kitchen from the hallway. It would involve putting a couple of holes in the expensive wallpaper that I JUST put up, though, and I'm afraid that it would look tacky, as well. I don't always have a clear visual idea ahead of time about what's going to look tacky or not...

What do you think, guys--are you on Team Curtain or Team View into the Messy Next Room?

Tuesday, October 6, 2020

Homeschool AP Human Geography: DIY Large-Format Maps for Reference

I wasn't super excited when the older kid chose to study AP Human Geography this year, but it is actually a fascinating subject, and now I'm stoked that we get to learn it!

When the kid decides what she wants to study, I generally go into research mode so that I can at least figure out a spine and a logical progression of knowledge/skills. It's more involved when it's an AP course, because we know she'll be tested on a specific knowledge/skill set, but still, this basic research method works. 

As I was reading through other instructors' AP Human Geography syllabi, I came across a reference map project that I shamelessly stole.

In this project, the instructor has her students print outline maps of various regions of the world, and then label them according to her criteria. Not only can these maps then serve as reference and study material, added to when necessary, but also, a kid is going to memorize a LOT of that information just through the acts of researching it and then labeling the maps with it. The big kid, especially, learns very well through this kind of activity.

Although the instructor had her students use 8.5"x 11" outline maps, you all know that I have my own personal free, custom-sized map-printing website with which I am obsessed. Obviously, then, I printed 4x4 maps of all the regions using Megamaps.

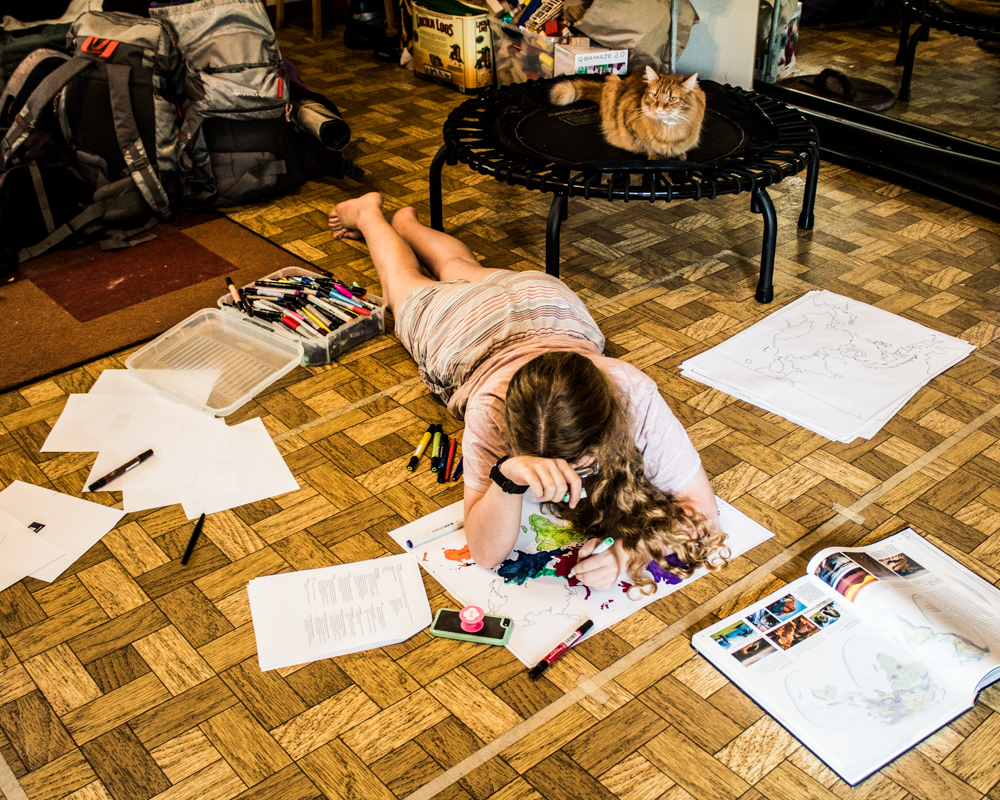
And then the big kid and I spread out across the floor and assembled them!

I have the perfect method to assemble these maps so that they stay together but there's no tape on the front. You don't want your maps to fall apart, but you also want to be able to write and draw on them! What you do is first glue them together with a glue stick on their overlapping edges, and then immediately flip each one over and run Scotch tape along all the seams on the back. It is THE perfect method, and I expect you to do it only this way from now on.


When we had all the maps assembled, the kid spent a few days labeling each one:

So excited to label them that we couldn't even unpack from our camping trip first!


I think these maps turned out to be absolute masterpieces:


They're not as perfect as a ready-made reference map, of course, but they're plenty accurate enough to serve the kid's purpose of studying AP Human Geography, and I love the thoughtful care that she put into her work:


That's a lot of geography learning that took place during this one project! I'm especially excited about the Africa map, as that one can do double-duty for the kid's African Studies class that she takes at our local university.

While I was printing these maps, I did print the giant-sized world map to replace the giant kid-made map of Europe that's been on our wall since the big kid took AP European History. I'm probably going to hold off on assembling, mounting, and having her label it, though, because surely the kid is sick of map labeling at the moment. Better to hold off until the spring, perhaps, and then use it as a review before the actual AP exam.

OR should I pay the little kid to paint us a world map mural, and then we can label that? A kid-created map mural might have an unwholesome amount of dragons and sea beasts, of course, but that just improves a map's overall accuracy, you know.

P.S. Want to see more dragons and sea beasts and maps and murals? Check out my Craft Knife Facebook page, where I post resources, WIPs, DIYs, and pictures of my cat.

Saturday, October 3, 2020

How to Make Fabric Decoupaged Blocks

I originally published this tutorial on Crafting a Green World.

Don't let outgrown building blocks languish unloved in a back closet when there are so many beautiful ways to upcycle them!

I've been in the process of slowly upcycling my kids' old building blocks for years (I promise, there will still be more building blocks in the world when/if I have grandchildren!), and one of my favorite ways to upcycle building blocks is to turn them into holiday decorations using simple decoupage techniques.

I've already shown you how easy it is to decoupage blocks with paper, but you'll be pretty excited to know that decoupaging blocks with fabric is EVEN easier! Fabric is sturdier than paper, which means that you need fewer layers of Mod Podge to seal it, and the surface is so much more forgiving than paper, so you'll find that every Mod Podge layer looks nice and smooth, in stark contrast to all the fussing that one tends to have to do with paper decoupage.

For paper or fabric decoupage, the supplies are nearly identical. Here's what you need:

Supplies

  • Outgrown building blocks. I love the look of plain cubes, but you can decoupage any block shape.
  • Fabric, pencil, and scissors. You'll be fussy cutting your fabric to size, then trimming, if necessary.
  • Mod Podge and a foam paintbrush. Foam paintbrushes aren't as eco-friendly as natural hair brushes, but they apply the glue smoothly, and if you wash them well after each use they'll last forever.

Directions

  1. Prepare your fabric. If it's new fabric, there's no need to wash and dry it just for this project, but you should iron out any creases.
  2. Measure and cut the fabric. I like to fussy cut the fabric pieces for my decoupaged fabric blocks, so I use the block itself as my template, tracing around each side on the reverse of the fabric piece. You can do this with a pencil or piece of chalk, and if you cut INSIDE the lines that you drew, the piece will match the side of the block more closely.
  3. Glue the fabric to the block. Working on one side at a time, paint a layer of Mod Podge onto the block, carefully smooth the fabric piece onto that side, and then paint another thin layer of Mod Podge on top of the fabric. Let it dry completely before you glue another side--this isn't a hands-on time-consuming project, but it DOES take up a lot of resting time!

You might think that these cute blocks are only for decorating--and yes, they DO make super cute decorations!--but once they're sealed with Mod Podge, a kid can play with them just as they do any other blocks. I wouldn't let a kid who's still mouthing things have them, but any other kids would probably love having some fun, festive holiday elements added to their open-ended block play.

Wednesday, September 30, 2020

Homeschool History: Make a Gingerbread Stonehenge on Top of a Cookie Cake

This is what happens when you write lesson plans while you're hungry.

Chapter 2 of the high school kid's astronomy textbook covers the history of astronomy, and we've done some really cool projects to extend that information or contextualize it--with even a couple more planned, because I freaking LOVE the history of astronomy.

The most elaborate of these projects--so far--has been making a gingerbread Stonehenge, something that I have wanted to do approximately all my life. 

Modeling is a great way to help a kid really dig into the geography and physicality of an artifact, as well as encourage them to look more closely at it. I mean, yes, you probably know what Stonehenge looks like more or less, but how many stones are there actually? What is their exact configuration? How many are currently standing? What, exactly, do we think it looked like when first constructed?

Making a model, whether it's out of clay or gingerbread, means that you've got to put the research in to answer most of those questions, and the answers will likely stick in your memory, too.

The gingerbread is just the bonus!

For this project, I first made this M&M cookie cake. I've baked this cookie cake a few times, and although it's not my favorite cookie recipe, it IS a reliable and tasty-enough cookie cake, which is why I keep it in my repertoire. But if anybody knows a reliable cookie cake recipe that also tastes so super amazing, please let me know! We eat a lot of cookie cakes over here!

For the gingerbread, I used the construction gingerbread recipe from Serious Eats. This is what we used for our thousand and one gingerbread cookies--and houses!--last Christmas, and anyway, Serious Eats would never steer me wrong. I made royal icing using this Wilton recipe, which is convenient since that's the brand of meringue powder I own! Even halving the recipe I made WAY too much, but the recipe claims that you can freeze it, so, remembering last Christmas Eve when I forced everyone together to decorate cookies at 6:00 pm and THEN realized that we were out of powdered sugar, I was pretty stoked to freeze the rest. Cross your fingers that it's still delicious at 6:00 pm on Christmas Eve!

Add some green cream cheese frosting to the top of the cookie cake (I thought about floating the idea to the high school kid that we pipe it on using the pastry tip that looks like grass, but even I know when I'm going too far. Sometimes), and it was ready for Stonehenge!


The high school kid decided independently how to size and cut her Stonehenge pieces, and she did a terrific job, considering that when she had all of Stonehenge laid out on the cookie sheet, there was just enough leftover for a couple of gingerbread people (which I also froze, because you CANNOT have too many Christmas cookies to decorate!). 

If we had this project to do over again, I'd encourage her to use royal icing to place the gingerbread on the cookie cake before frosting it--maybe that piping bag would have been the best idea, after all! The toughest part was definitely making the stones stand up on the cookie cake, but fortunately that royal icing made easy work of placing all the cross-pieces:


I LOVE how Stonehenge turned out. It's delicious, historically not entirely inaccurate, and delightfully festive for the time more or less around the autumn equinox.


I'm not going to guarantee that we're not going to make another one for the Winter Solstice.

If you're interested in a more sustained study of Stonehenge, check out my other favorite resources!

Next up: the high school kid and I follow in Galileo's footsteps and observe the nightly positions of Jupiter's moons!

P.S. Want to follow along with my craft projects, books I'm reading, road trips to weird old cemeteries, looming mid-life crisis, and other various adventures on the daily? Find me on my Craft Knife Facebook page!