Showing posts with label homeschool STEM. Show all posts

Monday, February 7, 2022

Earning the Girl Scout CSA Think Like a Programmer Journey (with Actual Programming!)


None of my Girl Scouts, including my own kids--and especially including me!--have ever been super enthused by the Girl Scout Journeys. Some are definitely better than others, and Will, who's obsessed with earning badges and awards, always completes the three Journeys needed to Summit at every level, but I'm not gonna lie--my favorite thing about the Think Like a Programmer Journey is how fairly quick and straightforward it was.

Technically, you can complete the Think Like a Programmer Journey without touching a computer, as its focus is on teaching the process of computational thinking that programmers use, not on actually, literally programming. But incorporating actual, literal programming made the Journey a LOT more interesting to the kids, and added additional STEM enrichment into our school days.

As the intro to the Journey, we watched this Code.org video about how computers organize, process, and represent information:

We discussed a couple of ideas related to this video: 1) the importance of programming solutions that are workable and understandable to the user (not just the programmer), and 2) computational thinking as a method of problem-solving that breaks down problems to manageable bits and works towards solutions that are beneficial to the user--not just the programmer!

These ideas are applicable to Girl Scouts in a lot of ways, particularly in the ways that we try to be of service. Because Girl Scouts often requires Girl Scouts to create and enact service projects in order to earn awards--or even badges, sometimes!--it can be VERY tempting to get some of these service projects done in ways that are expedient for the Girl Scouts, and not necessarily in ways that best serve the beneficiaries. It never hurts, then, to have a reminder that the beneficiaries of our projects are the ones who need to be able to understand and work with our solutions--and in a real way, not just the kind of surface level that could earn a kid a Journey but that we all know good and well isn't going to result in any kind of lasting change for the better.

To that end, the kids started a working doc in which they practiced coming up with needs/problems and proposed solutions for various user groups. They worked in the document periodically throughout this Journey, and if you read down their lists you can actually see them begin to be more thoughtful and detailed, and to think more deeply and specifically about the real needs and problems of their user groups. 

I'd actually anticipated that something on this list would eventually inspire their TAP, but nope! If only life/Girl Scouts was that easy!

On another day, the kids and I explored how language choice affects the value of a solution. Fortunately, I've been telling the kids for their entire lives (usually after they've smugly corrected someone's grammar, but sometimes right before I correct their own grammar, ahem) that "effective communication is good communication." In other words, if you get your point across, that's good communication, whether you've gotten your point across using invented spelling because you're newly literate or lots of gestures combined with a very limited vocabulary because you're in Quebec trying out your Parisian French 101 on a French-Canadian hotel clerk.

Ahem.

The point is that a programmer is in charge of figuring out the most effective way to organize and represent knowledge and information, and any method of effective communication is fair game. 

To practice this, the kids tried out the Representing the Alphabet Activity for the CSA Think Like a Programmer Journey in the Volunteer Toolkit. 

I wouldn't usually do all this printing and cutting for a single activity, and I did think about trying to substitute LEGOs, but whatever:

I really like how each kid chose to represent her word using a completely different method. Syd's uses a vertical two-animal pair to represent each letter--


--while Will's relies on a very precise arrangement of stacked papers:


And yet they were both able to read the other's words without struggle! Yay for good communication!

Before sending the kids to work on their user groups doc some more, I helped them make the connection that they can approach a problem the same way they approached a message to be decoded--by working backwards and illuminating the underlying algorithm. If only every problem had its handy-dandy decoding sheet all written out for us!

Another day's lesson was also a real-life programming activity: binary!!! I got out the white board to teach the kids how to read and count in binary, discussing, as well, some other number systems that use different bases. The Sumerians, for instance, used a sexagesimal system!

To make sure they grasped the concept, I gave the kids this set of binary puzzles to work. One of them needed a couple of tries, but in the end they both mastered Base 2! That meant that I could tell them that these ones and zeros are also called bits, and you can use a bitmap to visually represent the information encoded in binary... or you can use it to make a picture! We Google Imaged some examples of bitmaps, then the kids used the Pixelation widget on Code.org to make their own. They enjoyed the open-ended free play of creating black and white and color pixel images, while practicing their binary and learning hexadecimal. 

Our special activity for this Journey was building a computer from a kit:


The Kano kit is a super fun walk-through of assembling the parts of a computer, then setting it up. It's got Raspberry Pi to support more sophisticated programming activities, or a variety of add-ons that you could purchase to give a younger kid different coding experiences. 

After building the computer, we used another computer analogy to think about user-centered needs. If every need/problem is an output, then the reasons why a problem is happening or a need is occurring are the inputs. You can decode the problem the way that we decoded the animal alphabets, trying to figure out the inputs. When you think you understand the input, you can work towards a solution that changes that input and produces a better output.

The kids did some more programming in later days--Will made me a table tennis game, for one!--and played with our Turing Tumble, but once kids understand the concept of computational thinking, they're actually ready to use computational thinking to solve a community problem.

The kids' TAP dealt with the deficit of good educational materials to teach the Robotics badges, especially to younger levels. When we were learning the parts of a robot, the kids made their own graphics, diagrams, and definition cards, but it's probable that most troops wouldn't have that kind of time. But those visual, tactile learners still need to learn the material!

To solve the problem, the kids created this set of educational materials that can be presented online or printed. 

Click here for the complete Robot Slide Deck.

If printed, they can be copied at different sizes and the definitions can be used to label the robot graphic. It's a pretty nifty plan, and you can tell that a couple of homeschooled kids who've had a heavily Montessori-inspired education created it!

Saturday, February 5, 2022

Kid-Made: How to Make 3D Glasses


Got some scratched sunglasses, or an old pair of prescription glasses with a cracked lens? Pass them over to your kids, because this is a project just for them! Here's how to make 3D glasses from an old pair of frames.

How to Make 3D Glasses

These DIY 3D glasses are an excellent kid-build, and really fun for kids to play with afterwards. Here's what your kid should do to make them: 


1. Remove the lenses from the frame. You may have to help your kid bust the plastic lenses out of plastic sunglasses (or just give her a hammer!), but all old prescription frames should require are a teeny-tiny screwdriver and the assertion of your kid's fine motor skills: Screw the little screws back into the frame after the lenses are removed. Save those lenses for telescope-making! 


2. Trace each lens onto colored cellophane. Colored cellophane is the real trick pony here! Have your kiddo trace around the outside of the lens, so that it will fit over the frame, not inside it: The traditional order is red for the left lens and blue for the right, but there's nothing to prevent an interested kid from experimenting--how would a yellow/blue combo work? A purple/green? 

3. Glue the cellophane to the front of the frames. Hot glue can be a little messy (as you can tell from the pic of the finished glasses!), but it holds well and dries quickly, perfect for my kid who likes to see results right away! 


4. Play with drawing. Let the kid choose marker colors that closely match the cellophane, then experiment with drawing images that will be perceived as three-dimensional. My kiddo first tried taping two markers together, but now prefers to simply hold the two together. You can also play with drawing the red and blue lines not as parallels, but as different elements of a single drawing--this works especially well if you draw a 3D cube, for instance, making some lines blue and some lines red. Your kiddo can also experiment by trying different papers--plain typing paper, graph paper, or graph paper with red or blue lines. 

5. Troubleshoot. After making a set of glasses using a single layer of colored cellophane for each lens, my kiddo spent some time goofing around with the extra cellophane pieces and discovered that doubling or tripling each piece, to make the color darker, improved the 3D effect, so she glued a couple more layers of cellophane to each lens, and now her 3D glasses REALLY pop.  Another variable that might make a difference is marker color. Play around with brands of markers or shades of color to see what works the best. 

Because there are so many interesting variables to explore, this is a terrific STEM-enrichment activity for an interested kid, and could also make a stellar Science Fair project. Just have your kid write up her hypothesis and procedure for how to make 3D glassses, paste up a diagram of an eyeball, draw a couple of pictures to look at through the glasses, and BOOM! Blue ribbon.

Wednesday, January 26, 2022

Girl Scout Senior/Ambassador Programming Robots Badge: Play Tic-Tac-Toe with a Computer


Computers playing games is the theme used to introduce Girl Scouts to the Ambassador Programming Robots badge, and it's a pretty brilliant theme! There are all kinds of great pop culture references to game-playing computers, and kids have all kinds of experiences playing against computers in all kinds of games. 

The first thing we did for this Journey is, obviously, watch Wargames! Happily, it's currently free with ads on YouTube:


I LOVE Wargames as the ultimate computer hacker, retro, semi-apocalyptic vision of what living with all-powerful computers can be and the importance of careful programming. 

It also has the ultimate pro tip for how to butter your corn on the cob. Watch for it, and thank me later.

Deep Blue and Watson are real examples of computers learning how to play games, and fortunately, there are also tons of easily available videos covering the process of creating, programming, testing, and troubleshooting the computers. Here are two of the several that we watched:


There's so much more to get into, though, if your kids are interested. You can replay those literal chess games, following the algorithms or going off on your own, or talk about Jeopardy game theory--all of that is not just super interesting, but increases a kid's appreciation of all the variables that go into creating a computer program that can not only mimic game play, but win it!

After all that, what better way to model this process of teaching a computer how to play a game than by playing that Wargames gold standard, Tic-Tac-Toe?

First, the kids and I all played a few (million) games of Tic-Tac-Toe, because Tic-Tac-Toe is never not fun.

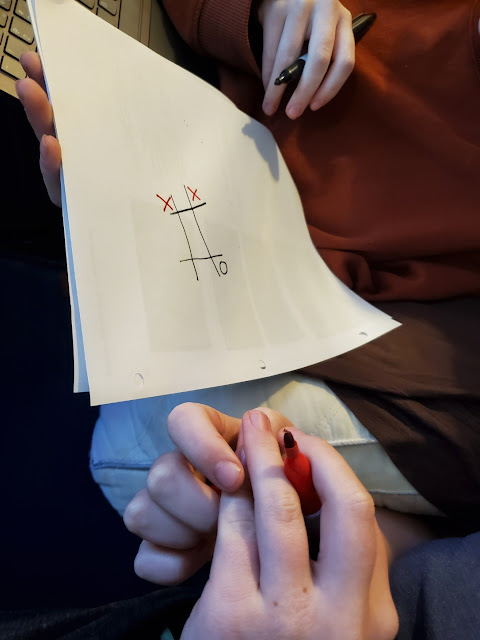
Next, I reviewed the concept of the algorithm, and then modeled playing Tic-Tac-Toe while following a set algorithm... a program, doncha know?

Then, I challenged each of the kids to create an algorithm for winning a game of Tic-Tac-Toe. The rules are to create a step-by-step program that they must follow exactly when playing an opponent, but they may use "OR" and "IF...THEN" commands. 

And then... we played! 


Yes, Will's algorithm is written in red Sharpie on her arm. No, I don't know why.


We tried some various permutations of a computer playing against a person, two computers playing each other, playing X vs. O, etc.:


Syd's algorithm gave her a sneaky advantage, as she insisted that in order to correctly follow the program, the computer MUST play X:


Gives one a bit of a hometown advantage, I do believe!

The ultimate lesson, of course, is the same one that Joshua learned during Wargames--you can't really bank on winning Tic-Tac-Toe. Especially if you're the human playing against the algorithm, you can use your own creativity and spontaneity against the program. 

If you want to write a program, then, you need to write it with these caveats in mind: 1) A computer can only do what you've programmed it to do, and 2) humans don't have programming, so they can do literally ANYTHING.

If you want to offer another type of model to help kids develop a more nuanced definition of programming, you can also show them mathematical map coloring. A strategy is just another term for "algorithm," so kids could also develop their strategy for four-color map coloring, then test it, problem-solve it, give it to another kid to beta test, etc.

P.S. If you want to sneak in some high school English credit, have your kid read Ender's Game and write a paper comparing it to Wargames. They both came out at about the same time, with a historical background of the Cold War. They're both about gamifying war by manipulating beings who do not have the lived experience to throw off these manipulations, and they both question how the use of technology affects culpability. Powerful stuff, and issues that it's really good for teenagers to explore.

P.P.S. I'm overly attached to my Craft Knife Facebook page, and I post there way too often. Come find me!

Thursday, January 20, 2022

Homeschool Astronomy: Spectroscope Lab

 Will completed this Astronomy lab as part of the chapter on radiation in her astronomy textbook. It was cheap, it didn't require much setup, it was simple to complete, and, most importantly--it was fun and interesting!

Spectroscope Lab

Materials:

Pre-Lab Work (Answer these questions in your Astronomy Lab Notebook):

  1. Complete the online spectroscope lesson.
  2. List the colors, from longest to shortest wavelength, as observed in the solar spectrum. What do the dark lines in the absorption spectra of stars indicate?

Procedure:

  1. Aim the spectroscope at a variety of light sources:
    1. LIGHT SOURCES TO TEST (list the exact sources that you test in your Astronomy Lab Notebook):
      1. desk lamps
      2. computer screens
      3. television screens
      4. sun (don't look directly at the sun)
      5. light bulbs
      6. candle light
      7. flame from the stove
  2. For each light source, draw a box that models the spectroscope's display.
  3. Use colored pencils to draw the spectrum that you see for each light source. Include the numbering.
  4. Using the data you gathered, give more information about each light source. Can you name the type of light bulb, or discuss its energy efficiency? Can you name any elements or chemicals in the flame sources?

Post-Lab Questions:

  1. Which colors/wavelengths of light had the most energy? Which had the least?
  2. What color of light do you think would be most useful for a plant doing photosynthesis, and why?
  3. Which color of light would be most useful as a source of energy for a solar power plant? Why?
  4. Give an idea for an experiment that tests any of these concepts further. You may not describe the same experiment with different materials.
Will was able to do this lab independently, without needing me for an extra set of hands. Here she is observing the spectrum of candlelight:


And here's part of her lab report!

I used to have such high hopes for this kid's handwriting. And I kid you not--it has taken until literally last year to get it this legible. It's my biggest homeschool failure.

We could do even more cool spectroscopy with a good chemistry setup, but it's looking like chemistry will be the one science that we don't DIY during Will's high school years.

Other than, you know, the time we made rocket candy for her sixth grade science fair, or put sulfuric acid on limestone for geology, or all the other chemistry-adjacent stuff that I probably should have been tallying up for at least a credit's worth of high school chemistry by now...

P.S. If you want a ready-to-use version of this lab, here's a Google Doc of the Spectroscope Lab assignment sheet.

P.P.S. Come find me over on my Facebook page, where I often talk about the labs and experiments that we're doing as we're doing them!

Monday, September 27, 2021

Homeschool Astronomy Chapter 3: Radiation, the Information from the Cosmos

Chapter 3 of Will's Astronomy textbook is titled, "Radiation: Information from the Cosmos." This chapter was especially fun because after, you know, reading the chapter and answering all the questions in the Chapter Review and doing all the actual book learning, we got to play with lots of toys!

Well, after also studying a few more supplementary resources:

Laser Khet is a game that's probably more thematically related to our later unit on telescopes, as it models how visual information is transmitted via mirrors, but I like it better as a sort of sensorial study of the way that wavelengths reflect off surfaces at interesting angles. You can see these reflections in the interactive virtual prism, above, and in the real-world prism exploration that Will also did for this chapter, but I like the challenge here of working out the angles in your head and problem-solving and testing predictions, etc.


And it's also a fun game and you get to play with lasers!


In an extension activity that involves both reflection and refraction, here's Will's further exploration of prisms, including an experiment she created, performed, and wrote up in her Astronomy Lab Notebook.

We've owned this spectroscope since our solar eclipse study, so Will was able to play around with it, then use it to conduct another experiment:


This is also when we made the wave machine that still lives in our family room. Especially when used in combination with the electromagnetic spectrum poster, it's a terrific model of how electromagnetic radiation travels. Just between us, though, I'm a little sad that I didn't give Will fresh popsicle sticks (not ones formerly used as plant markers) for this project, or even spend time with her dying the sticks with liquid watercolors or otherwise prettifying them, because this ugly-ass wave machine with various types of kale written on each stick is basically the focal point of our entire house now, and everyone who comes over looks at it and plays with it.

As a final activity for this chapter, Will explored how radiation is interpreted by coders in a way that makes it visually meaningful and easier to analyze at a glance. She further extended this work in the textbook's next chapter, which is fully focused on spectroscopy.

And then we'll move onto comparative planetology!

Thursday, August 31, 2017

Sun and the Solar Eclipse Study: Solar Power


For the month before the solar eclipse, the kids and I completed an intensive science unit on the sun and the solar eclipse, and it was awesome! Even though I LOVED astronomy as a kid, I'd been having trouble interesting the kids in the study (they are very much attached to the life sciences...), but this event turned out to be the perfect incentive to interest them, and they picked up a lot more than we'd started out intending to.

We used the NASA Eclipse Activity Guide as a spine--I used their main science activity and instructor's information for each lesson, but I added readings from library books, videos from YouTube, and arts and crafts activities for the little kid. I had to buy a few special supplies, such as our first spectroscope and a digital outdoor thermometer, but most of the required materials were readily available.

We completed most of the units in the order suggested by the Eclipse Activity Guide, or at least we intended to... the sun has its own agenda, so it was actually a Saturday when we did some of this particular unit on Solar Power; it had been overcast for most of the week, so when the sun rose bright and shining that day, I was not going to waste its power!

The kids and I read and discussed part of this non-fiction children's book on solar power, then watched this TED-Ed video that shows how solar panels work, and Bill Nye's simpler explanation of the same subject. We've never lived in a house that got enough sun to be worth putting solar panels on it, so I'm always impressed to see solar panels in action. And after watching the TED-Ed video, I now actually understand how they work!

The activity that goes with this lesson in the NASA Eclipse Activity Guide is making and using a solar oven. The kids actually did this for a couple of days, re-engineering their first efforts when they didn't get great results with their first solar ovens. The basic model that the activity guide instructs them to build is a not incredibly efficient compilation of pizza box, aluminum foil, and plastic wrap:


These didn't really heat up the quesadillas and s'mores well, so the next day the kids reworked them with some stash mirrors (managing to break fully half of them, so I guess that's some more junk out of my storage space!). The second versions worked a little better, but if I had this unit to do again, I'd take the time to pull up some hardcore solar oven plans, get out the woodworking tools, and make a "real" solar oven with the kids, one that we could use over and over again to ACTUALLY cook our food...

Oh, well. I'm sure the subject will come up again some other time!

To make this study more suitable for the older kid, I added selections from Khan Academy to her requirements, wherever they applied. For this solar power unit, she also completed the Energy lab, which covers solar power and other energy sources, with an emphasis on sustainability.

To make the study more suitable for the younger kid, I added hands-on activities to her requirements, although they were tempting enough that the older kid often joined in. And when we made sun prints for this unit, the whole family joined in!


We are absolutely going to put building blocks on sun print paper again for math one day--I can't believe that I didn't get a good photo of the finished print, but the dark print where the bottom of the block sat, plus the lighter print made from its shadow, formed a beautiful and realistic-looking cube on the sun print paper. It was astonishing.

If we'd completed this study over a longer period of time, it would have been interesting to try to arrange a field trip to a solar park, or a lecture from a member of one of our local non-profits that try to encourage people to use solar power. We could have made a more elaborate solar oven, and experimented with sun printing onto fabric. The kids could have measured our house's energy expenditure, and done some problem-solving to reduce our usage. I could have bought them some solar panel kits and let them make themselves some solar-powered toys and gizmos.

But for our brief look, we now know about solar power, solar panels, and some uses for solar energy. And now I know how a solar panel works!

P.S. Want to follow along with my craft projects, books I'm reading, road trips to weird old cemeteries, looming mid-life crisis, and other various adventures on the daily? Find me on my Craft Knife Facebook page!

Monday, February 1, 2016

An Ode to Geomags


Note: No, there are no weekly work plans this week! Near the end of last week, I began to suspect that in my own desire to stay busy to distract myself from my grief over Pappa, I've been over-scheduling the children, as well. I mean, I certainly have less time to feel sad when there's a full day of schoolwork every day AND an hours-long field trip AND a playdate AND a class or extracurricular to drive to AND some time spent shilling for cookie orders on the way there or back.

And the children, my good sports, did actually manage to get most of their schoolwork done, even so, but I began to see them gently reacting to my over-planning in probably the best way that a child can: with play. I'd go to tell them that it was time to begin schoolwork for the day, to find one or both deeply immersed in their toys, and I'd back off. Hours later, there they'd still be, happily playing. You know that I rarely disturb a focused child, so it was certainly the most efficient and least confrontational way for them to get more time for themselves.

We're going to keep that up this week, I think. I'm still going to require the kids to do their math every day, and work on their memory work (Mandarin started again last week!), and I have a selection of odd little projects--another Nature documentary that I've been wanting them to watch, thank-you letters for Christmas presents, extension recipes from Your Kids: Cooking, homemade Valentines for an exchange next week, etc.--of which I'll ask the children to choose one and I'll choose one for them each day, and, of course, there are still plenty of extracurriculars and loads of Girl Scout cookie selling, but ideally, this project-focused week will give us a chance to rest, reset, and refocus on next week.

One of the toys that was played with the most last week was the Geomags. I think that I've written about these before, and that's because they're perennial favorites, one of the few toys that have been loved right out of the box and universally for years.

They're pricey as hell, but totally worth it for us, since they're also played with so well. Every now and then, I'll add to the kids' collection for some holiday or other--the younger kid, for instance, received the pink Geomags set one Christmas, and I think another Christmas brought them the professional set. Here's basically what we have so far:


Several weeks ago, the kids became interested in using the Geomags to build anti-gravity and "perpetual motion" machines, inspired in great part by this anti-gravity spinner and this perpetual motion machine. The younger kid worked on building a triangular prism that would sit suspended inside this cube construction--


--while the older kid actually got her anti-gravity spinner to work!


The kids are both also really interested in building pyramids--when we first got these Geomags, and for years afterwards, they'd build a simple pyramid that they could transform into a "scooter dog," and they'd make it and then play pretend games with it. I haven't seen scooter dog in a long time, but I have seen several of these lying around:


Another interesting thing that I've noticed lately is the younger kid's desire to sort the metal marbles on top of the colored panels. I'm not sure what she's exploring with this, but she does it over and over, so something fascinating must be going on with it in her brain:


For the kids' next birthdays, I'm pretty sure that I'll be giving at least one of them a new Geomag set, as I've been noticing that the kids have sometimes been using ALL of the Geomags in their constructions. Here are my top contenders:


Right now, coloring books are also on the birthday wish-lists, as right this second, finished with two brief playdates with friends (while their moms and I sorted Girl Scout cookies) and our volunteer gig, procrastinating on her math, and about to be asked to help me make dinner, the younger kid is once again sitting at the table, listening to Harriet the Spy on audiobook and coloring.

She's just as busy as she needs to be.

Friday, June 12, 2015

Kitchen Science: Density Cake


You'll excuse me, I hope, if this reads as a bit scattered today, but I bolted awake before dawn this morning to a phone call telling me that the big kid's chicks were at the post office waiting for us!

The kids and I took a field trip to the fire station a few months ago, and during that trip a firefighter lectured us on the importance of middle-of-the-night fire drills, because when people are awakened from a sound sleep, they awake confused.

Friends, I awoke confused.

I tossed the room looking for my pants, gave up (I found them a bit ago, tangled in the sheets), couldn't find new pants, found pants, forgot where I put my phone down, spent ages looking for it, found it, woke the kids, remembered that the brooder wasn't completely set up, had a right panic about it, couldn't get the heat lamp at exactly the perfect height to emit exactly the perfect temperature and was completely unable to troubleshoot this, tried many things, gave up and went to lie down for a few minutes, remembered the ladder and dragged it in from the garage to serve as a heat lamp stand, couldn't find the address of the post office, set the phone down and lost it again, etc.

Fortunately, by the time the kids had found a height that worked for the heat lamp and got the brooder temperature approximately correct, the fog of sleep had somewhat lifted from my brain (the coffee that I drank as the kids worked was crucial to this process), and I only had to go to the wrong building, call the post office and get directions to the right building, and then go in the wrong doors of the right building once before I successfully located our chicks.

They're safely home now, drinking and eating and bopping around their brooder, and I've declared today a Chick Holiday, because who can be expected to do math and spelling and history when there are FIFTEEN CHICKS BEING CUTE?!?

Therefore, the science project that I'm going to tell you about actually occurred earlier this week. I'd told you that we were finished exploring density for a bit after the Great Density Experiment, but then I realized that the kids had really only explored the density of liquids, so I thought that I'd set up just one last little project so that they could note to themselves that density also applies to solids.

The goal of this experiment is to determine which cake toppings are less dense than cake, and which are more dense. Instead of measuring mass and volume to determine this, the kids let the substances themselves illustrate their density, by placing all toppings on top of the cake, baking it, and then examining it to determine which toppings fall to the bottom of the cake and which toppings stay up top.

To do this experiment, you will need:
  • cake mix. The kids are capable of making cake from scratch, but that's another project in itself, with different variables (Did the kid put in enough baking powder and soda? Did the kid put in the correct amount of flour?), so to make sure that the cake itself would be a neutral substance, I let the kids pick out a boxed cake mix.
  • toppings. Guide the kids just enough to make sure that they're choosing substances that will float and substances that will sink.
  • paper to record the experiment. Lab notebooks would be ideal, but I'm still working the kids up to those.
  1. Have the kids prepare the cake mix and put it in the baking pan.
  2. Lay out all possible toppings. The kids used frozen tart cherries, candy-melt wafers, caramels, chocolate chips, almond slivers, pecan pieces, M&Ms, and dehydrated marshmallows.
  3. Have the kids grid out the cake on a piece of paper, and as they place the ingredients, they should record each location on their grid, along with their hypothesis of the substance's behavior during baking. The grid will look like this:


Pop the cake in the oven and bake it according to package directions. When it's finished, you can evaluate your hypotheses based on observation--


--and core samples:


I was pleased that the kids hadn't correctly predicted the behavior of every single substance, because surprises are fun. And the little kids who came over to play "mud kitchen" with my own little kid that afternoon quite enjoyed helping us eat our density cake!

P.S. Want to follow along with my craft projects, books I'm reading, homeschool projects, road trips, and other various adventures on the daily? Find me on my Craft Knife Facebook page!