Showing posts with label crafting for children. Show all posts

Sunday, January 16, 2022

How-to: Organic Terrycloth Hooded Towel with Applique


This tutorial was originally posted on Crafting a Green World back in 2013.

There's nothing like hopping out of the pool and into a comfy, soft, bounteous towel. But big beach towels are hard for little kids to manage, and that bleached, dyed terrycloth can be scratchy and harsh on damp, delicate skin. 

It's an organic terrycloth hooded towel to the rescue! This hooded towel isn't for babies--if you start with your own organic terrycloth fabric, you can sew this hooded towel with proportions perfect for big kids. Organic terrycloth won't add any extra chemicals to your kiddo's tender skin, and it's softer than those cheap-o novelty beach towels. 

And just in case there's any doubt who that awesome hooded towel belongs to, there's plenty of room on the back for a monogram, done superhero-style in the case of my superhero-loving kiddo, who's decided that her hooded towel does, indeed, look a LOT like a superhero's cape. 

 Need a superhero cape/hooded towel for your own kiddo? Read on for the tute: 

1. Take your kiddo's measurements, and figure out yardage. First, measure your kiddo's height--look how she's grown! 

Your hooded towel will be in the shape of a square turned diagonally, so this height measurement will be the diagonal length of the square. To calculate the length of each side of the square, use the Pythagorean theorem, in which c equals the diagonal and both a and b equal the lengths of the other two sides of the right triangles made from the square with that diagonal. No, you don't want to do that math? Fine, use this square calculator, but don't forget that your geometry teacher TOLD you you'd need the Pythagorean theorem one day! 

Using the Pythagorean theorem, and then rounding up to the next inch, I discovered that each side of my square needed to be 36" (do not include a seam allowance here or anywhere else on this project); this was a yay, because it meant that I could sew the entire hooded towel for my seven-year-old from one yard of organic natural terrycloth. 

Now, measure the top of your kid's head from front to back; this will be the altitude of the right isosceles triangle that makes up the hood. To cut a right isosceles triangle to this altitude, fold the remaining terrycloth to the bias, measure the altitude, and cut. 

Fold the terrycloth to the bias to measure the altitude of the triangle formed by the fold.

2. Make homemade bias tapeCut printed or undyed organic flannel on the bias at a width of 4", then make bias tape out of it. You will need enough bias tape to cover the perimeter of your square and the base of your triangle. 

3. Sew bias tape to the hood. Just sew the bias tape to the base of the triangle; the other two edges of the hood will be covered later. 

Sew bias tape to the base of the triangle forming the hood, then pin the raw edge of the triangle to one corner of the towel.

4. Attach the hood to the towel. Line up the two raw edges of the hood with the two raw edges of one corner of the towel. Pin well. 

Sew the bias tape around the perimeter of the towel.

5. Sew bias tape to the towel. Sew bias tape entirely around the perimeter of the towel, mitering the corners (here's how to miter corners with bias tape). When you come to the hood, you'll be encasing both the raw edges of the towel and the raw edges of the hood with that bias tape. 


I basted the applique to the towel’s back, then went back over it with a satin stitch.

6. Applique the hooded towel. Your hooded towel is perfectly serviceable at this point, but it might still need some personality. You can cut a monogram, or really anything that you wish, out of flannel, center it onto the back of the hooded towel, and applique it on using your machine's satin stitch. NOW it's got some personality! 

Monday, May 10, 2021

Two Free Pairs of Bike Shorts Were Living in My Fabric Stash


Syd mentioned that she needed a new pair of comfy, stretchy exercise shorts for dance class, so into my fabric bin I dove!

I knew I had some spandex fabric leftover from our DIY leggings kick of three years ago, but just between us, I suspected that there wouldn't be enough spandex left to sew anything, because we hit that leggings kick pretty thoroughly!

I'd forgotten, though, that noses had been snubbed at the camouflage spandex that I'd bought, foolishly thinking that the kids would find it cute. They did NOT find it cute back in 2018, but it turns out that in 2021... well, it's still not their favorite print, but it's certainly good enough for a couple of pairs of bike shorts. I'm a little disappointed that there is just no way to match thread to the camouflage fabric, but it doesn't bother me so much that I'd put forth any effort to find a solution, either (edit: apparently, this is the solution. Now I know, at least!)

Syd's grown enough that now I can use my favorite Patterns for Pirates leggings pattern for her as well as Will. I love the fit of these leggings, the range of sizes in the pattern, and the customization options. Home-sewn leggings are still more expensive than store-bought, fast fashion leggings (and honestly, at the moment our local Goodwills are also absolutely stuffed with LulaRoe leggings, too, so you don't even have to go the fast fashion route to find cheap leggings), but the leggings that you sew yourself using a free pattern from the fabric that's just been sitting in the bottom of your fabric bin for the past three years?

Well, those are basically free leggings, and well-sewn, free bike shorts exactly when you need them, no trip to the store required, is way better than sweat shop clothes!

Monday, May 3, 2021

Unseasonable Craft Alert: I Sewed Next Year's Easter Presents Because Reasons

The reason being that I figured out exactly what I SUPER wanted to sew for my baby niece for Easter far too close to Easter to actually sew it, but I was so excited about it that I didn't want to set the idea aside for the ten months that it would take me to be bored of it when I remembered it again and not want to do it.

Because you might as well sew what you're excited to sew when you're excited to sew it!

Even if it will sit in your closet for the next ten months until you can mail it off to your niece at a seasonally appropriate time.

I'm especially excited about this fabric Easter basket, because I made it from the vintage quilt top that I have had in my stash for... a decade, perhaps? Shamefully, I don't even remember where I got it! Either someone once upon a time gave me their old quilt top, or I scored it from some upcycling center or freecycling meet-up, but ever since then, it has sat in the back of my fabric stash. I'd notice it when I was digging for something specific, and feel kind of guilty because surely there is SOME cool thing I could be making from someone's vintage charm quilt top!

Turns out that the cool thing? Is Easter baskets.


The Easter eggs took a lot of fiddling to get right, and I learned a lot about fabric grain and stretch as I did so. Say yay to the self-taught sewer figuring shit out on her own!


I finally decided that I prefer canvas to quilting cotton, both for the interesting texture and because I think the Easter eggs hold their shape better (I'm using pre-printed fabric, but you could also sew these in plain canvas and then decorate them with paint and markers!). When I make another set, though, I think I'm going to also experiment with interfacing to make the eggs even more absolutely perfect than they already are:


As usual, I had some buddies helping me out with these photographs. We are all loving the newly sunny and warm days!


If you want a set of your very own, I've now got a listing for these Easter egg softies and their vintage quilt basket up in my Pumpkin+Bear shop on etsy:


I'll make you your own set, though, because this particular set has one particular kid's name already on it, and it's going to spend the next ten months in my closet waiting for the perfect time for me to give it to her!

P.S. Want some other Easter crafts and projects that you can do, seasonably appropriate or not? Here's my massive list of all my favorite Easter craft tutorials.

P.P.S. Want to follow along with my craft projects, books I'm reading, road trips to weird old cemeteries, looming mid-life crisis, and other various adventures on the daily? Find me on my Craft Knife Facebook page!

Wednesday, February 24, 2021

It Only Took Me Two Years to Make This Diagonal Denim Strip Quilt

 Because I get distracted...

I get so habitually distracted that one of my New Year tasks is to look through last year's planner and transfer all of my WIPs from the previous year to a new list in the front of my new planner. This year's WIP list holds 21 items, which... that's a lot of projects to have started and not finished...

But but BUT that list actually used to have TWENTY-THREE items, but I did finally update the kids' Girl Scout vests with their new badges and patches AND I finally made the broken dish pendant I'd been wanting.

Of course, the big kid's Girl Scout vest already needs another new badge sewn onto it, but whatever. Instead, let's focus on THIS awesome project that I knocked off my list this month!

Not gonna lie: I started this quilt for the younger kid, and this quilt for the older kid, AND a still-unfinished quilt for my bed two years ago, thinking that I'd give myself just loads and loads and loads of time to piddle my way through them by Christmas. I like to give everyone a cozy present on Christmas Eve, and homemade denim quilts would fit the bill just fine!

Yeah... no. I gave everyone giant fuzzy slippers instead. And THIS Christmas Eve I gave them all STORE-BOUGHT fuzzy blankets, gasp! I even had the big kid's quilt already completed by that time, but the little kid's was still a pile of denim and flannel. 

Finally I decided that the quilts would make a cozy Valentine's Day present for the kids, so I buckled down and spent most of a day basically making the little kid's quilt from start to finish:


For the big kid's quilt, I'd done horizontal rows, and I'd tried for an ombre effect, but I don't really love it. For the little kid's quilt, I tried diagonal rows, and I love it so much that I feel a little guilty that the big kid's quilt isn't so good, yikes:


In case you ever come over to my house and wonder why I have literal masking tape on my literal family room floor, it's so that I can lay out a quilt whenever I want. I am literally just that classy!

And as always, back-to-front binding is THE way to go:


I am so pleased with how this quilt came out!


It's super cozy and warm, it's comfortingly heavy, it was dead easy to make because it doesn't even require batting, and because the entire top is upcycled jeans, the only costs were for the flannel backing, the thread, and the approximately one zillion jeans needles I broke sewing over those one zillion seams:


I'd say that diagonal rows are now my go-to denim quilt design, but the quilt that I'm planning for my bed is going to be a square, and I'm currently obsessed with the idea of sewing it in a log cabin design.

Maybe I'll even have it finished in time to show it to you within the next couple of years!

P.S. Want to follow along with my craft projects, books I'm reading, road trips to weird old cemeteries, looming mid-life crisis, and other various adventures on the daily? Find me on my Craft Knife Facebook page!

Saturday, December 19, 2020

How to Sew a Reversible Skirt

I originally published this tutorial on Crafting a Green World.

It's business on one side, and a party on the other!

Or in this case--it's Girl Scout khaki on one side, and pretty pink on the other!

My kiddo wanted a dressier version of her Girl Scout uniform, but I also know good and well that she is simply not going to wear a khaki skirt for any reason other than a dressy Girl Scout occasion. I'm not one to enjoy sewing something that will get little use, so yes, I made her the khaki skirt that she wanted, but I made it reversible, with some pink prints from my stash that I know she'll enjoy wearing every other day.

Want to make your own reversible skirt? It's not hard, and it's a great stash buster!

You will need:

up to 2 yards of two different fabrics. I'm afraid that I went overboard and sewed this skirt too large, but to be fair, Girl Scouts wear those khaki uniforms from the 6th grade until they graduate high school and bridge to adults. It was boring enough to pick out khaki fabric the first time--I don't want to do it every year until my kid graduates! This particular skirt used two fabrics that were 22" x 72", but I could have halved both measurements and still had a fine skirt for an eleven-year-old.

1/2" elastic

measuring and sewing supplies.

1. Measure and cut two identical skirt pieces. Each should be the desired length of skirt + 1.5" and the desired width (two to three times the wearer's waist measurement) + 1.5". To make sure that the two pieces are absolutely identical, I like to lay one on top of the other and cut them simultaneously.

2. Measure and mark the hem/waistline. You will overlap these skirt panels when you sew them together, with one skirt panel folded over the other to make the skirt's hem, and the other skirt panel folded over to make the skirt's elastic waistband casing. You will see, then, a different-colored bias hem on one skirt and a different-colored waistband on the other.

Measure and mark 1.5" from the bottom edge of the skirt panel that you'd like to use for the bottom hem, and 1.5" from the top edge of the skirt panel that you'd like to use for the elastic waistband casing.

3. Sew both skirts. Sew each skirt panel into a tube by sewing the short sides together and finishing the seams.

4. Sew the hem and waistband. Place the two skirt pieces wrong sides together, and overlap them by 1.5" inches. The skirt that will be folded over and sewn to make the bottom hem should overlap the other skirt piece by 1.5" at the bottom, and the skirt that will be folded over and sewn to make the elastic waistband casing should overlap the other skirt piece by 1.5" at the top--the marks that you made in step 2 should help you with this.

Fold the bottom hem up, crease it, then fold it again to the inside and edge stitch it, encasing the raw edge of the other skirt panel.

Turn the skirt inside out, then fold the top waistband hem up and crease it, then fold it over again and edge stitch it down, leaving an opening to insert the elastic.

Attach a safety pin to the elastic, feed it through, sew the ends together, and sew the opening in the casing closed.

And now you have a reversible skirt! You can use this method to alter the matching skirts from this tutorial, and outfit a whole troop of Girl Scouts.

Saturday, October 17, 2020

How to Remake a Puzzle

I originally published this tutorial on Crafting a Green World.

There are lots of cute ways to upcycle an old puzzle into something completely new, but what if what you'd really prefer is simply another puzzle?

I mean honestly, have you ever looked at the picture on the front of a puzzle and thought, "Huh. I could do better than that!"

Well, you absolutely can!

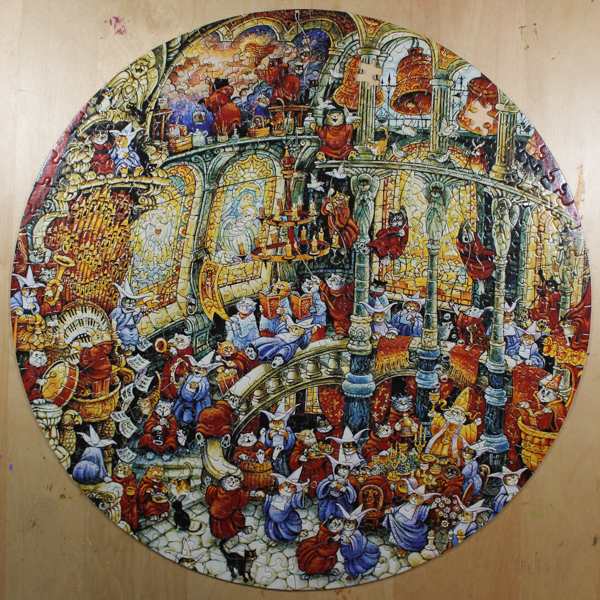
It's surprisingly easy and doesn't take a ton of artistic talent to remake a puzzle into one that's brand-new-to-you.  This is a great craft for kids or a great way to make an educational toy for a kid. Here, for instance, I've remade a very odd puzzle (I'll show you in a minute, but trust me--it's ODD!) into a puzzle of the digits of pi. What classroom wouldn't want to have that on the shelf in readiness for a rainy-day recess?

Here's how to remake a puzzle of your own!

Supplies Needed

An old puzzle to upcycle

I have a very firm Puzzle Policy, which consists of this: we buy puzzles only from thrift stores or yard sales, never spending more than a buck or two. We happily put together our puzzles, knowing that it's highly likely that there will be missing pieces. When there are, we don't care, because we still had the fun of putting together the puzzle and anyway, it only cost a couple of dollars; I'll recycle or upcycle that puzzle, then, with a clean conscience.

When the puzzle gods smile down upon us, however, it's a real treat, and then when I put the puzzle back in the box I'll securely tape it shut, tape on a note that reads "NO MISSING PIECES," and donate it to a thrift shop to move on to some other lucky soul. So even though my family loooooved putting together this very, very, VERY strange puzzle, it has two missing pieces, so recycled or upcycled it must be:

Acrylic paints and brushes

You'll be watering the paints down, so a little will go a long way.

Paint Pens

These can be pricey, but you don't have to buy a full set if you're planning on a limited color scheme. I got by using only black for this project.

Spray sealant (optional)

Aerosol sprays are the WORST, but if you feel like you have to seal your work--I would only if it's quite detailed and delicate--then you'd better use this instead of a brush-on sealant, which will go on too heavy and stick the puzzle pieces together.
Directions

1. Assemble the puzzle, turn it upside down, and make any necessary repairs. When my kids were younger and much more emotionally attached to their puzzles, I figured out how to make a pretty decent replacement for missing pieces--it's at least good enough to make the puzzle complete again, although of course you can tell the difference:

Here's my tutorial for how to repair a puzzle by recreating missing pieces. Give it a try!

2. Paint the puzzle with watered-down acrylic paint. Watercolors would work, but wouldn't be vibrant, and acrylic straight from the tube would be so thick that the puzzle pieces might stick together. Instead, use a paint palette to water down your acrylic paints, and use those to paint your puzzle.

Pro tip: to avoid the colors bleeding together, let an adjacent color dry before you paint right up next to it.

3. Add details with paint pens. Since the acrylics have been altered to behave more like watercolors, when you want to add detail to your painting, you'll want to use paint pens. These are spendy, but they're absolutely terrific for fine work, and you can add tons of detail that you'd otherwise need the tiniest paintbrush for.

After all the paint and glue has dried, the only thing left to do is work your brand-new puzzle!

As you can see, this puzzle is even more fun than working one whose only claim to fame is that you bought it from a store, and the more time that you put into it, the better it can look. I kept mine pretty plain, because my children are heathens and wouldn't appreciate it anymore if I'd spent fifteen more hours on it making it look cute.

You could add a ton more embellishments with the paint pens alone, and there's nothing to stop you from adding even more decorative elements, such as Swarovski crystals, glitter, or anything else that you fancy.

Saturday, October 3, 2020

How to Make Fabric Decoupaged Blocks

I originally published this tutorial on Crafting a Green World.

Don't let outgrown building blocks languish unloved in a back closet when there are so many beautiful ways to upcycle them!

I've been in the process of slowly upcycling my kids' old building blocks for years (I promise, there will still be more building blocks in the world when/if I have grandchildren!), and one of my favorite ways to upcycle building blocks is to turn them into holiday decorations using simple decoupage techniques.

I've already shown you how easy it is to decoupage blocks with paper, but you'll be pretty excited to know that decoupaging blocks with fabric is EVEN easier! Fabric is sturdier than paper, which means that you need fewer layers of Mod Podge to seal it, and the surface is so much more forgiving than paper, so you'll find that every Mod Podge layer looks nice and smooth, in stark contrast to all the fussing that one tends to have to do with paper decoupage.

For paper or fabric decoupage, the supplies are nearly identical. Here's what you need:

Supplies

  • Outgrown building blocks. I love the look of plain cubes, but you can decoupage any block shape.
  • Fabric, pencil, and scissors. You'll be fussy cutting your fabric to size, then trimming, if necessary.
  • Mod Podge and a foam paintbrush. Foam paintbrushes aren't as eco-friendly as natural hair brushes, but they apply the glue smoothly, and if you wash them well after each use they'll last forever.

Directions

  1. Prepare your fabric. If it's new fabric, there's no need to wash and dry it just for this project, but you should iron out any creases.
  2. Measure and cut the fabric. I like to fussy cut the fabric pieces for my decoupaged fabric blocks, so I use the block itself as my template, tracing around each side on the reverse of the fabric piece. You can do this with a pencil or piece of chalk, and if you cut INSIDE the lines that you drew, the piece will match the side of the block more closely.
  3. Glue the fabric to the block. Working on one side at a time, paint a layer of Mod Podge onto the block, carefully smooth the fabric piece onto that side, and then paint another thin layer of Mod Podge on top of the fabric. Let it dry completely before you glue another side--this isn't a hands-on time-consuming project, but it DOES take up a lot of resting time!

You might think that these cute blocks are only for decorating--and yes, they DO make super cute decorations!--but once they're sealed with Mod Podge, a kid can play with them just as they do any other blocks. I wouldn't let a kid who's still mouthing things have them, but any other kids would probably love having some fun, festive holiday elements added to their open-ended block play.

Sunday, July 5, 2020

How to Make an Upcycled Playing Card and Upholstery Sample Bunting

I originally published this tutorial on Crafting a Green World.

There's nothing like a bunting to make a festive occasion just that much more special. That's why my daughter wanted a bunting as part of the decorations for her recent Alice in Wonderland birthday party--and also, of course, she IS my daughter. It's possible that a love for buntings is expressed at the genetic level...

Knowing what I wanted to make, I sorted through my stash of potential crafting supplies that surely will be useful someday (this is also known as my "stash of trash") and hit the jackpot when I came across a partial deck of souvenir playing cards. You can't play a lot of games with a partial deck of playing cards, and you also can't recycle them--and if you're me, you apparently also can't bear the thought of simply tossing them into the waste stream, not when you might want to make a bunting out of them six years later!

The faces of the playing cards would work as-is in the bunting because playing cards are on-theme for Alice in Wonderland, but as for the backs... well, my daughter for some reason didn't want scenes from Yellowstone National Park in the 1980s decorating her party. Silly girl!

Instead, I turned to another super useful piece of trash, a giant book full of tacky old upholstery samples. These sample books are notorious for being snapped up at thrift stores by avid crafters with stars in their eyes, who then take them home and never, ever figure out a way to separate the samples from their glued-on paper backings.

There isn't a way, Friends. Stop breaking your hearts on the effort.

So you can't sew those upholstery samples into anything, because they have thick paper backings glued onto them (you'll never get that glue off! Stop trying!). What you CAN do, however, is cut and glue them, stencil and paint on them, and embellish the snot out of them. That's what my daughter and I did to make her upcycled playing card and upholstery sample bunting, and here's how we did it!

Directions

1. Cut Bunting Pieces Out Of The Upholstery Samples

Use a playing card as a template to trace the bunting pieces directly onto the back of each upholstery sample.

Cutting these pieces out is sort of a nightmare, at least for my own set of upholstery samples, because the glued-on paper backing doesn't cover the entire piece. I obviously can't use my fabric scissors to cut paper, and my paper scissors are too dull to cut fabric, so I had to use two different pairs of scissors for every piece, ugh.

2. Embellish as desired

The possibilities for embellishing buntings are practically infinite, but for this bunting, I wanted to spell out a welcoming message.

Stencils and paint to the rescue!

I have a very old-school Cricut on which I can cut letter stencils, but happily, a set of store-bought cardboard stencils that I already had on hand turned out to be perfectly sized for this bunting--yay! I traced each letter onto the front of an upholstery sample piece with black Sharpie.

Because this bunting isn't washable, you can use any kind of paint on it. My fabric paint is getting a little old, though, so I've been using it on any even remotely fabric-adjacent project lately so I can use it up and have an excuse to buy more.

3. Adhere The Upholstery Pieces And The Hanging Cord To The Playing Cards

You can use any type of hanging cord that you'd like for a bunting, from a kid-made yarn cord created on a knitting spool to store-bought bias tape. Bias tape actually would have looked really cute with this particular bunting, except that I filled nearly all of the available space with my letters, and bias tape would definitely have cut the tops off of some of them. Instead, I decided on simple brown twine, to be sandwiched between the upholstery fabric and the playing card.

You can also attach the two sides of the bunting pieces together in a number of ways. I seriously considered machine-sewing them together with a wide zig-zag stitch, but then my daughter happened by and got involved, and her solution to every problem is to hot glue it. So she hot glued it!

I wouldn't use a bunting that was hot glued outside in all weather, but it was perfect for a beautiful, mild birthday party day. Afterward, we hung the bunting in her bedroom, so that every time she looks at it she can remember what a wonderful time she had at her Alice in Wonderland birthday party!

P.S. Do you also have a book of wallpaper samples that you're wondering what to do with? You can make a bunting with those, too!