Showing posts with label PE. Show all posts

Thursday, December 23, 2021

Pointe Shoes and Twinkle Lights

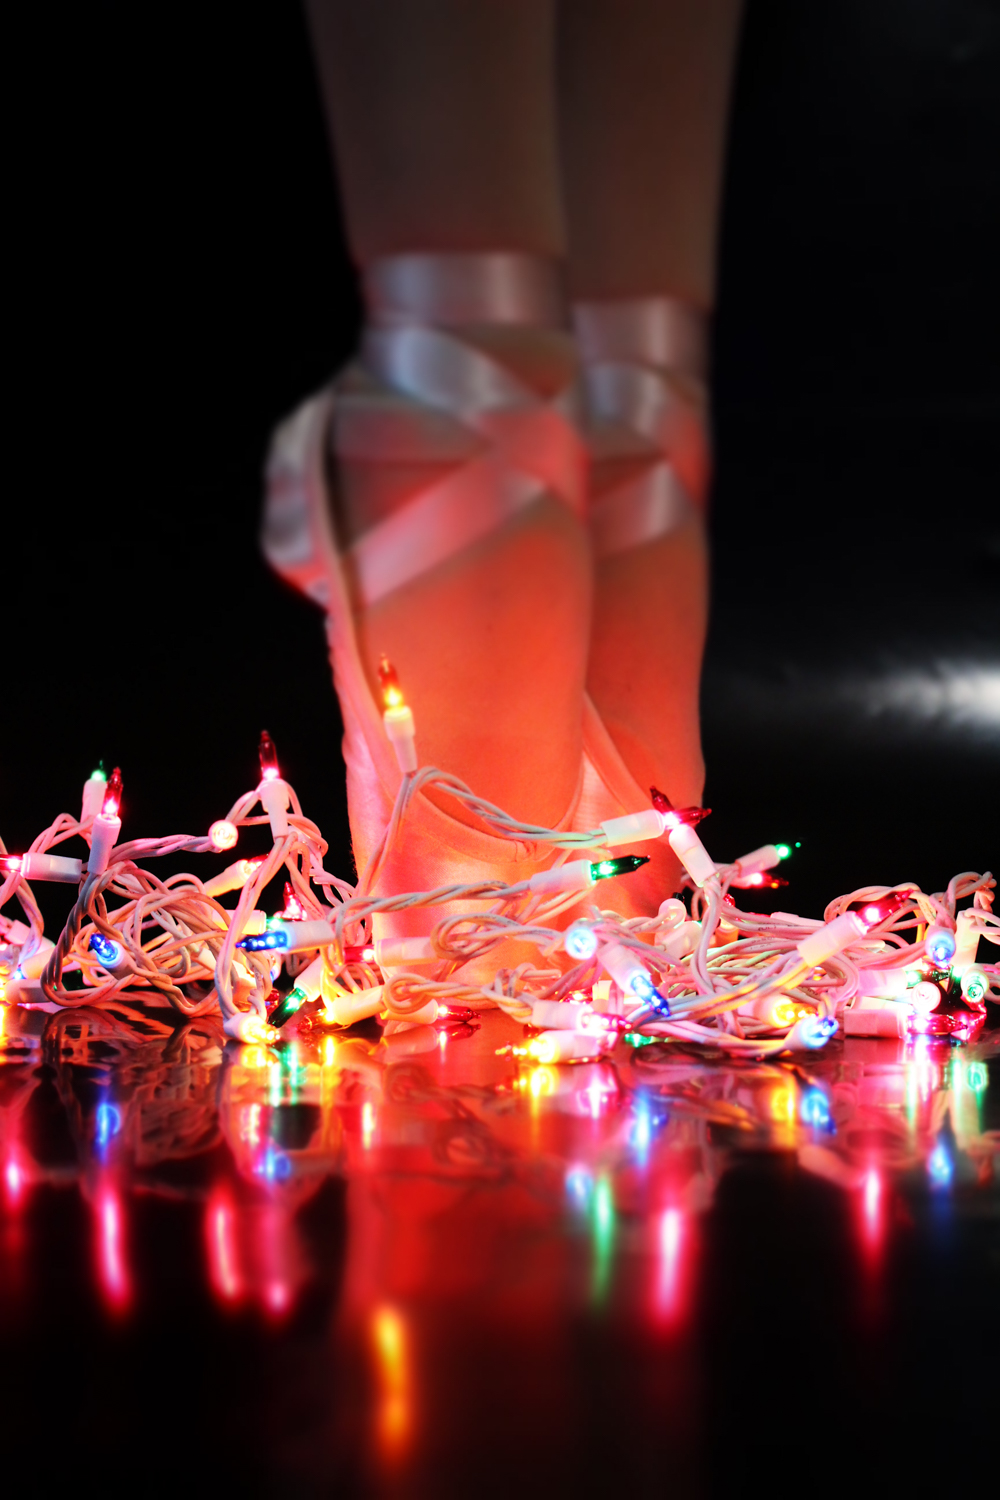
 The other day I bribed my favorite ballerina into indulging me with a holiday photo shoot:


Syd badly needs a new pair of pointe shoes (something to add to the holiday to-do list!), and that is always my favorite time to commemorate how a well-used pair is meant to look.

A photo shoot with Gracie is generally all the inducement Syd needs to submit to her own set of photos. For each of the next images, imagine me in Photoshop painstakingly lassoing and filling in about a thousand cat hairs from her marley. 

Ah, well... the marley needed a wash anyway!


We then tried to get some photos of Jones, but turns out he's terrified of roll-up dance floors and twinkle lights.

So then Will and I tried to get some cute photos of Luna, and, well...

Back to pointe shoes and picking animal hair out in Photoshop, shall we?


We're not really a Christmas card or family holiday photo sort of people, so I think this will do for commemorating the season!

Monday, October 25, 2021

Ice Cream, Hamburgers, and Jug Rock

I guess one thing that the pandemic has reminded me of is how to travel small. I very much miss all the big trips that I haven't taken, especially the missed opportunities to travel with my kids while I still have them, but these tiny travels make memories, too, and are very easily done during that one day a week when no kid has ballet or community college class or a horseback riding lesson or work or volunteer obligations.

We've been using the Southern Indiana Ice Cream Trail as a chance to travel small. Matt plans out one or two stops whenever we've got a completely free day, and I figure out a nearby random tourist activity.

Like Jug Rock! It apparently has its own mascot!

Jug Rock is a freestanding rock formation made of sandstone, and is apparently the tallest of its kind east of the Mississippi:


Clamber all around it so you can work up an appetite, then head over to Bo Mac's Drive-In for ice cream!

I had possibly the most delicious ice cream of my life: a peanut butter crunch blizzard:

Luna seems to have also quite enjoyed the last lick of Will's blueberry blizzard:


Syd, though, chose not just an ice cream but also a "red cream soda," a new-to-her beverage with a charming name and delightful color. I didn't remember ever having tasted red cream soda before, either, so I tasted hers... and found myself suddenly very small, sitting in the Fellowship Hall of Midland Heights United Methodist Church, drinking red cream soda from a bottle while I waited for Mammaw to get out of Bible Study.

I guess Big Red is the flavor of my childhood!

Matt loves the ice cream trail so much that the kids and I made him a DIY hamburger trail, with all the best burgers the southern half of Indiana has to offer. After our ice cream breakfast, then, we drove to another small town, picnicked on take-out hamburgers in the park, then did some more small town sightseeing:

Luna hilariously did not know what to think of this giant water wheel:

We walked along the river, found an old-school playground with both a teeter-totter and spring riders, all of which have long been removed from all our local playgrounds. 

If only we'd found a metal slide and a merry-go-round, we'd have been in vintage playground heaven!

I was chilling on a metal glider, digesting my hamburger and lazily watching the kids teeter-totter, feeling sleepy and dreading the hike back to the car, when Matt, who always has too much energy, came back from walking further down the river path and told me that there was a cemetery off in the distance.

I got my energy back!

Jasper, this little town with the hamburgers and the water wheel, has a large population of people with German heritage, and so Will and I had a fabulous time wandering around this cemetery overlooking the river and finding all the old headstones written in German:


Afterwards, we walked back to the car, where I declared that this time I really was tired, but THEN we drove by a labyrinth so Syd and I jumped out of the car and walked that, and she found a hat, and then we finally drove home while listening to horror movie retellings on my newest favorite podcast--

--because it's October!

Ice cream for breakfast, hamburgers for lunch, an unusual rock formation, a working water wheel, an old-school playground, an even older cemetery, driving practice for both the teenagers, the unlocking of a core memory, new family memories added to the collection, and home before dark: it was a perfect day of small travel!

P.S. Here's another cool Indiana trail if that's a thing you, too, like to do.

P.P.S. Check out my Craft Knife Facebook page for more photos of Luna eating ice cream!

Wednesday, June 9, 2021

I Took Nine Teenagers Camping, and We Had a Fabulous Time


I know that I say that every age with my kids and my Girl Scouts is my favorite, but these teenaged years really are my favorite!

Well, at least with my Girl Scouts. My own actual teenagers definitely have their moments...

Teenaged Girl Scouts, though? They are amazing. They're old enough to be independent, but young enough to play. They're old enough to follow directions, but young enough to still be enthusiastic about the arts and crafts projects that call for them. They're old enough to learn new advanced skills, but young enough to bravely try them out without self-consciousness. They're old enough to get along even with kids who aren't their besties, but young enough to still enjoy making up games and playing together. They're old enough to handle free time, but young enough to still enjoy spending that free time messing around down at the creek.

Troop Leader Brag Time: I recently had the PERFECT camping trip with nine of my teenaged Girl Scouts and two co-leaders. Everybody got along. Everybody was enthusiastic about all of our planned activities, and nobody complained of boredom during our downtime. All the adults took turns planning and running various activities, so nobody had too much work and everybody had plenty of breaks. All of our projects worked pretty much as planned. It didn't rain. Everybody ate, and everybody liked the food. The kids, both experienced and novice campers, all learned something new, and they all earned two badges and a fun patch. Nobody got injured bigger than a first-aid kit could handle. 

It was absolutely magical. 

Earning badges while camping is actually a bit of a challenge when you've got a larger troop of older Girl Scouts. All the camping-specific badges for older Scouts assume that you have a small troop of experienced campers. They're for things like backpack camping, survival camping, camping in unusual conditions such as snow or while mountain-climbing, etc. Those are all amazing skills to have, and older Scouts should definitely be able to work towards accomplishing them, but in order to take 13 kids on a Leave No Trace backpack camping trip in a state park or forest a driveable distance from my house, I'd have to take them in two separate groups on two separate weekends and convince at least one of my co-leaders to do the same. The logistics alone... just... well, I'm not going to rule a trip like that out, but let's just say there are logistics.

Also, I do tend to have a reliable group of the same kids who always sign up for troop camping trips, but I also tend to have a couple of less-experienced campers who get lured into every trip, which is AWESOME. I adore camping, and I adore taking kids camping, and every time a kid who'd describe herself as a non-campers gets snookered into coming camping with me I do a happy dance. But the thing about camping is that, in order to have a safe and enjoyable experience, you have to have a progression of skills. You can't take a kid who's never been camping backpack camping as her very first camping experience, or at least I wouldn't if I wanted her to ever want to come camping with me again! A kid who's only ever been car camping also needs to learn some skills before she goes full-on survival camping. 

This particular trip was a combo cabin/tent camping trip at an in-state Girl Scout camp, and I used it to ensure that every kid who attended left with the same basic camping skill set. They should feel confident cabin camping, car camping, and tent camping, and should have a very short learning curve to master just a few additional skills for backpack camping, survival camping, and camping in unusual conditions. To do that, I pulled out a couple of retired Girl Scout badges and IPs, and adjusted their requirements to achieve what I wanted.

Cadettes earned the retired Advanced Outdoor Cooking badge and the Cadette First Aid badge (and our Girl Scout camp's fun patch). Seniors and Ambassadors earned the retired Camping IP and the First Aid badge at their level (and the Girl Scout camp's fun patch). Everyone was offered the same activities, of course, regardless of if it was required for one of their particular badges, and anyone was welcome to opt out of any of the activities and have unstructured free time, instead, with the understanding that opting out of an activity required for one of their badges meant they wouldn't earn that badge.

Cadette Advanced Outdoor Cooking


For the retired Cadette Advanced Outdoor Cooking badge, we did the following activities:

  • Demonstrate the ability to start a fire. Most of my troop knows how to start a fire, but some kids didn't, and this is a super important skill to be confident about. The best way to teach it is hands-on: I had the kids arrange themselves around our (thankfully generously-sized) fire pit, and I gave them each a box of matches and an egg carton fire starter. I spoke very briefly about how to start a fire and what to use and how to safely collect those items, we went over fire emergencies and I gave them a quick First Aid badge lecture on first aid for minor burns, and then I set them free to either learn or practice.
No matter how old they are, no matter how many times they've done it before, EVERY kid I've ever met loves to start a fire. The egg carton fire starters burn for a good ten minutes, so there's a lot of room for troubleshooting a poorly-set fire, and the more experienced kids automatically assisted the less confident ones in a way that was really sweet to watch.

And when everyone had built a fire, all the little fires were safe and sound in the fire pit, ready for our Dinner Prep Patrol to combine them into one big fire for hot dogs and s'mores!

  • Learn and practice stick cooking. I was about 95% confident that every kid had roasted hot dogs and marshmallows on a stick before, but you never know! It's an easy dinner for the first night, and it gives me the chance to make sure everyone knows how to sanitize their roasting stick before use, not stab each other with burning metal, and clean their stick of sticky marshmallow afterwards.
  • Learn and practice the three-tub method of dishwashing. Knowing how to wash dishes when you don't have a sink is crucial to your ability to keep yourself healthy, clean, and well-fed while camping. I demonstrated this method after dinner the first night, and for each meal afterwards the Clean-up Patrol set up the three tubs and washed the cooking and serving dishes, and everyone else washed their own dishes. By the time we went home, everyone had plenty of practice!
  • Learn and practice pie iron cooking. This is a car camping staple, and a great way to make a regular backyard fire night fancier and more interesting. It's also an easy way to trick a hot breakfast with plenty of filling protein into teenager tummies! Since there would be people around our campsite for the whole day and a campfire is everyone's favorite part of camping, the Breakfast Prep Patrol started another big campfire for us (practicing those fire-starting skills!) and everyone had the opportunity to make themselves a grilled sandwich for breakfast, choosing among lunch meats, cheeses, peanut butter, jelly, and fruit. If you've never had a grilled peanut butter, jelly, and banana sandwich for breakfast, you should try it! I'll even let you sneak in some chocolate!
  • Build and cook with tin can stoves and buddy burners. A tin can stove and a buddy burner are great tools to take on a backpack camping trip. They're light, portable, and will cook your food and boil your water almost as fast as a store-bought backpacking stove. And they're made entirely from literal trash!
This is a fairly time-consuming project, and it takes a LONG time for the wax to harden, so we made our stoves and buddy burners before lunch and used them to cook dinner. If you're going to make them while you're camping, you also need a campsite with electricity, as I brought both my crafts-only crock pots and used them to melt the wax for the buddy burners.

We followed my tutorial for making a tin can stove and buddy burner, and before we got started I gave a brief First Aid badge lecture on first aid for a cut or puncture. Amazingly, nobody needed to practice the first aid they'd learned during this project, although I had everyone use the manual can opener on my pocket knife and so I dulled it horribly and it definitely needs some first aid now.


For dinner that night, everybody heated up chili on their tin can stoves and used it to make either walking tacos or chili dogs. The placement of these stoves was very problematic, as the fire pit area was clearly not designed to accommodate nine tiny and hot stovetops. Fortunately, nobody stepped on a stove and nobody fell into the fire, so that's as much as anyone could ask!

I'd wanted everyone to have the chance to use their tin can stoves to make pancakes the next morning, but most of the kids had early pick-up times and I was afraid that the wax in their buddy burners wouldn't have time to solidify if I let them spend the morning cooking. Parents probably wouldn't appreciate molten wax spilled all over the trunks of their cars, right?

Oh, well. We'll make pancakes next time!

  • Learn the uses for and sample dehydrated backpacking meals. My someday goal is to teach my troop how to make dehydrated backpacking meals from scratch, but during a pandemic is not the time for that. Thank goodness for super-expensive but super-fun store-bought backpacking meals, I guess!
Ramen is my secret gateway into the world of backpacking meals, because the kids are all OBSESSED with Ramen. I did bring some Ramen, but I also brought several selections of fancy dehydrated backpacking meals for the kids to choose from:


Just between us, I don't care much for any of these, but the kids LOVED them. The self-heating ones, in particular, were a major source of amazement and wonder for nine kids who'd been completely without internet for over 24 hours by that point.
  • Make and sample trail mix. This is another activity that's so simple that you might not think to do it with older kids, but older kids still love it! Trail mix is so easy to make that a Daisy can do it, and yet so fun to make that my co-leader had to pre-portion the precious M&Ms to make sure that the kids shared them without fighting. 

Camping IP for Seniors and Ambassadors

I considered every activity that we did for the Cadette Advanced Outdoor Cooking badge as also part of the Camping IP, as well as these additional activities:

  • Learn the basics of cabin and tent camping. This includes all the chores and housekeeping involved in setting up our campsite, maintaining it, and tearing it down at the end of our trip. Everyone was on a Patrol and had mealtime and cleaning chores, was responsible for the maintenance and cleaning of their cabin or tent, and followed all our troop rules for group camping.
  • Learn useful knots for camping. One of our troop's co-leaders is a knot-tying genius, and she taught the kids several useful knots:

The kids' knot-tying handiwork included learning how to make clotheslines between trees, and that led to what might have been their favorite activity:


  • Do a camp craft. Our other co-leader set up an activity in which both kids and adults dyed T-shirts with water pistols! It was so ridiculously fun, and the shirts came out great.
Later, the kids went through the trouble of painstakingly rinsing out all the water pistols so they could have a water fight.

  • Make egg carton fire starters. The kids made these at the same time as they made the buddy burners, using the wax leftover after they filled all their burners:

Each kid took home a few to empower their own fire-building at family events, and I put several back in our troop stash to replace the ones we'd used during the camping trip.

CSA First Aid badge

Here are the activities that the Cadettes, Seniors, and Ambassadors used to earn the First Aid badge at their own level:

  • Learn first aid for cuts and burns. We covered these lessons during our tin can stove building and fire-starting activities.
  • Make a backpack first-aid kit. One of our troop's co-leaders cut out felt first-aid kits that the kids could applique and hand-sew with embroidery floss, and I used troop money to buy enough supplies for each kid to stock her kit. I was adamant that I wasn't going to buy my Scouts "white kid" band-aids, so I was stoked to find this colorful set!

  • Discuss and practice wilderness survival. We covered a LOT of ground with this step! It probably could have been an outdoor survival badge on its own, but the kids were so interested and engaged that perhaps we'll try that another time, enabling us to go even deeper into the topic and explore more skills. We discussed proper preparation for outdoor adventures, the importance of the buddy system, and the emergency supplies you should always carry with you during outdoor adventures. And even though I promised myself that I would not terrify the children with tales taken from my Special Interest, People Who Die in the Wilderness (Particularly National Parks), I did, indeed tell them tales of People Who Died in in the Wilderness. 
Our knot expert showed the kids how they could use the knots she'd taught them to make an emergency shelter, and we discussed ways that one could further insulate the shelter and incorporate a fire for warmth. We discussed the things that you DO need in order to survive until rescue--warmth, water, comfort--and the things that you DON'T need in order to survive until rescue--food, moving around. 

Later that night, I brought out this kit and taught the kids to make paracord bracelets so that they'd always have some cordage with them on their adventures. It was a little wild and wooly at times, teaching nine teenagers a fairly process-oriented craft, but all of them got the hang of it and made bracelets that they were happy with. Some of the kids got so into it that they wanted to make even more bracelets, so I gave them some of the extra paracord from the kit to take home and promised them that we could try some different designs next time. I'm looking forward to that even more than they are!

  • Learn and practice wilderness evacuation scenarios. We had the most hilarious time with this! I taught the kids a few of the easier emergency evacuation methods: One-Person Walk Assist, Firefighter Carry, Two-Person Clothes Drag, and Two-Person Seat. Sometime I'll bring a blanket and a couple of poles and also teach them the Blanket Drag and Pole and Blanket Stretcher, but the kids had plenty of fun trying out just the ones I showed them. 
  • Learn emergency methods for purifying water. If you're backpack or survival camping, you'll have a portable water purification method, so for this step we simply discussed ways that you could purify water in an emergency, such as boiling it or adding a little bleach or iodine. 
I kind of can't believe that we got through THAT MANY activities, and still had time for hiking, wading in the creek, hanging out by the fire, having water fights, visiting the camp llamas, and eating endless s'mores, but we did, and didn't feel feel ruled by an agenda or rushed for time, either. Somehow, the nature sprites that rule that Girl Scout camp must have sensed that these nine kids and three adults needed this perfect, magical, happy camping experience after fifteen months of everything else that we've been doing. It makes me glad to think back on the confident campers who left that campground, the campers who can build their own fires and cook on their own homemade stoves, the campers who can keep themselves safe and alive if they're ever lost in the woods, the campers who can evacuate someone in an emergency, the campers who fell in love with knot-tying, the campers who got to have, at long, long, last, a practically normal weekend with their friends. 

And before we left for home, some of those campers even offered their suggestions for what our NEXT camping trip should include!

Saturday, April 24, 2021

Camping Hack: Make a Handwashing Station

 This tutorial was originally published on Crafting a Green World.

You don't get to have filthy hands even while you're camping, not unless you want to hike all day back to your car while suffering from the norovirus. 

 Pro tip: you don't want that. 

 Instead, make this DIY handwashing station that is so easy to assemble, a child can--and did!--do it. If you're not much of a camper, you can use this exact same handwashing station in the garden, or even by the back door, so that muddy hands NEVER make it into your house. 

 You will need: 

  empty plastic gallon jug. A gallon jug of water is the easiest to use, since you won't have to wash it.

  ripped tights. You'll need one intact leg, with no holes so large that a piece of soap could fall out.

  carabiner and rope (optional). You can get by without hanging your handwashing station, but it'll be a lot easier to operate when hung from a nearby tree limb. 

  twine. Yarn or other narrow cording are acceptable substitutes. 

  golf tee. Feel free to look for substitutes for this, because not everyone has a golf tee at hand. You're looking for a peg with a tapered end, sturdy enough not to snap and solid enough to serve as a drain stopper. 

  1. Poke a small hole in the bottom of the plastic jug. Poke it near the edge, on the side opposite the handle. Push the golf tee into the hole--it should fit snugly, ideally no more than halfway up the tee. Over time and many uses, the hole will naturally widen, but the golf tee should fit it for a very long time. When you're out camping and you finally see that you're pushing the golf tee all the way in to fit, make a mental note that upon your return, you need to make yourself a new handwashing station. 

  2. Tie a length of twine between the golf tee and the jug handle. This is so you don't lose the tee while you're washing your hands. You might want to secure the twine to the tee with glue. 

  3. Attach the soap. Cut off one leg of the tights. Push a bar of soap down to the foot, then tie the open end of the tights around the jug's handle. The soap should dangle down past the jug, giving you enough room to soap up your hands at the handwashing station. 

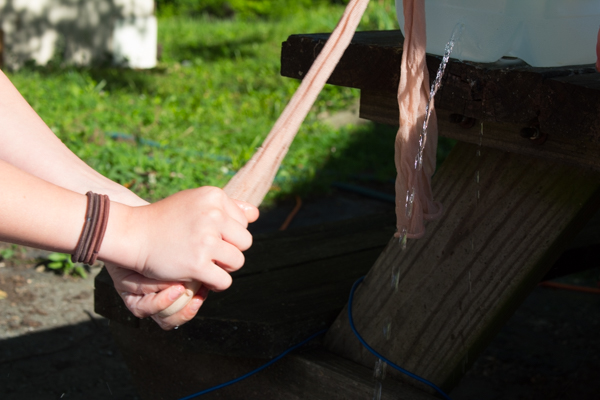
  4. Attach a carabiner or piece of rope. This handwashing station will work when sat at the edge of a table, but it's best used when tied by the handle to hang from a tree limb. Attach a carabiner to the handle, and loop on a long piece of rope that you can toss over a tree limb at your campsite. To use the handwashing station, fill it with water and either set it on the edge of a table, with the golf tee hanging over, or tie it by the handle to hang from a tree limb. Pull the tee to wet your hands: 

 Put the tee back in and soap your hands: 

 Pull the tee again to rinse. Rinsing your hands does take a little while, so if that bothers you feel free to experiment with a larger hole and stopper, although I personally would find refilling the handwashing station after every use far more annoying than I do rubbing my hands vigorously under a narrow stream of water. Either way, no norovirus for you!

Thursday, April 8, 2021

On the Sculpture Trails

A few weeks ago, I had the idea to compile all of my random and many must-dos of Indiana into a single Google Map. Not that we're actually visiting any of those scattered museums and doughnut shops and used bookstores and historic homes right now, sigh. But soon, hopefully!

And if nothing else, also putting all the state parks and locations of interesting waterfalls and public caves and land preserves on the map has helped me be more creative when figuring out spots for family hikes. 

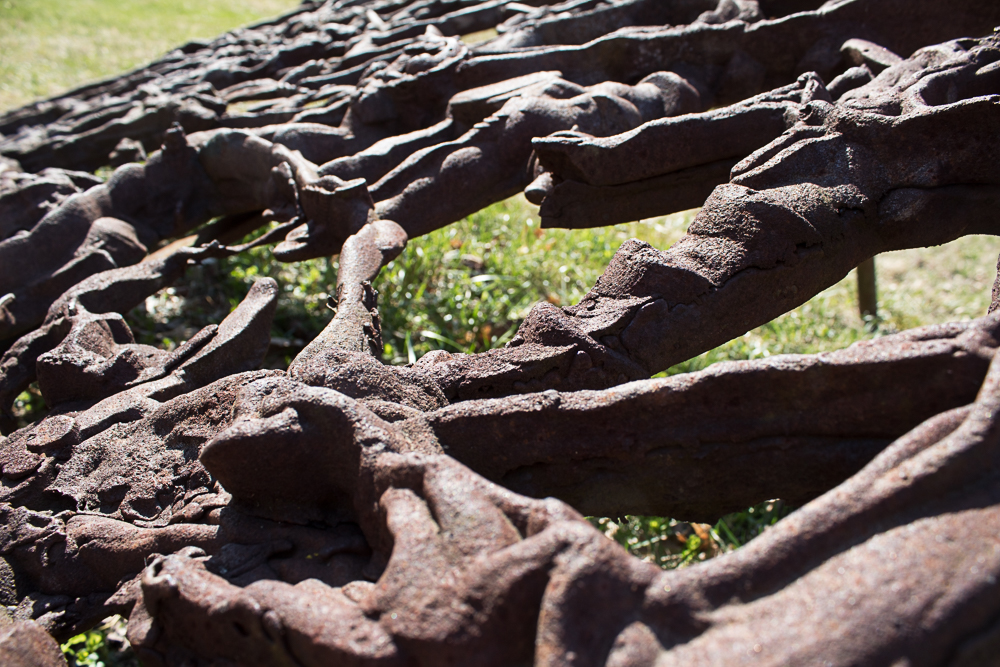
That's how we ended up at Sculpture Trails on the most beautiful day of last week. It's absolutely absurd that this was the first time I'd ever been there, as not only is it nonsensically close to where I live, but the kids and I used to carve scratch blocks for their aluminum pours back when they'd hold them at our local hands-on science museum almost a decade ago. So the fact that it took 13 months of a global pandemic to get me there is a little bit bonkers. Thank goodness for my hand-keyed Google map, I guess!

I was too excited at being out and about with family and friends to think any interesting thoughts while I was there, so instead here are all the photos I was delighted to take out there in the sunshine:


Because ultimately, everything is really all about me, I'm now feeling like my property needs more lawn art! Like, maybe not cast iron sculptures, but I could totally DIY something like this out of plywood and spray paint, right? Wouldn't it look lovely in my woods, perhaps just barely visible from the drive-in but only if the light is right and you happen to be standing in just the perfect spot?

Is there a line between "outdoor art installation" and "Dang, that lady's yard is tacky!", and if so, how does one come down on the correct side of that line...

...or even decide WHICH side is the correct one, lol?