Showing posts sorted by relevance for query art. Sort by date Show all posts

Tuesday, November 6, 2018

Homeschool Book Review: The Art of Doodle Words

I'm happy to admit that art is the hardest subject for me to incorporate into our homeschool. Syd is a gifted artist and needs lots of art enrichment, but resents any art instruction that doesn't come from her father, who fortunately is also a gifted artist, but is not at her beck and call, and certainly not during the average school day.

Will's gifts lie elsewhere, which means that she needs art just as much but is often clueless about how to go about it, and reluctant to pursue it.

I try to incorporate a weekly hands-on art project that both kids can engage in despite their varying skill levels. I've tried and so far failed but have high hopes to try again in the winter semester to include a comprehensive art history study. What has worked most consistently, however, for several months now, is to include daily art time in Syd's weekly homeschool work plans. She is generally left to do what she pleases during this time--mostly mermaid drawings or more panels for her comic strip about office workers who are also cats--but is expected to be accountable for what she's been working on, and to keep a portfolio of her work.

Every now and then, however, I come across an art book that I think Syd will really love, and I'll assign it to her for her week's work. Such it was with The Art of Doodle Words, which I received for free from a publicist. I handed it off to Syd, said, "Here you go. Show me what you make!" and left her to it.

And she made lots!


The book is super clever, in that it shows you how to incorporate themed doodles into words, kind of like your own Google Doodles. It's the perfect book for a tween who loves to draw, loves things to be cute, and is extremely clever.

I love her whale:

Her cat is a little more abstract, but I can read it, especially the yarn ball "C":
Here, I think, is where she really started to get the hang of it. All of "BACON" is made of bacon--except for the "O", which is an egg, and her cotton candy looks just the way that I feel after eating cotton candy:


I actually didn't even see, at first, that the dots on the "I"s are the eyes of the smiley face. How clever is that?!?

I like the way that Syd started to play around with the concept more after a while. She didn't doodle the actual letters in "DREAM," but played more upon the overall idea of dreaming to make a more complex sketch:

And now she's moved into slogans!


The pizza would look cute in color, I think, but I really like the bites taken out:

 And the fox is very adorable and autumn-themed:


This was such an easy book for Syd to follow, and the concept was clear-cut and easy to recreate, but it was a very valuable way to spend a week of art, because the extensions to this idea are unlimited. We've got this book in our home library now, shelved with our other art books (because you know that I have our home library shelved according to Library of Congress call numbers, right?), so that Syd can continue to refer to it as her interests change and experience grows. Syd's also really into black and white right now, but I think these would look well with color, Prismacolor markers or perhaps even watercolors.

That was by far the easiest hands-on art unit that I've ever planned!

P.S. Want to learn more about our hands-on homeschool and all the fun projects that work (and, more importantly, don't work!!!)? Check out my Craft Knife Facebook page!

Saturday, April 22, 2017

Syd Art Update: LOTS More Disney Art Studio, and Homeschool Art Curriculum Queries

Syd is my kiddo who sits are our homeschool table and draws, all day, every day. I ask if she's finished her math and she instead shows me the five pages of mermaids that shes' drawn. I ask to see where she is in her grammar and she shows me fourteen unicorns instead.

Will is really into adult coloring books, and both kids enjoy their dad's weekend art lessons, but Syd, in particular, is also very prone to immersing herself in some particular art or craft and spending hours at it every day. For the past couple of weeks, its been the Disney Art Studio sets that I first reviewed almost six months ago. They were popular with the kids for weeks, then got set aside on the playroom shelves, as things do, waiting, as things do, to be rediscovered. And Syd has rediscovered them with a vengeance!

Here are a few of her creations that I found and photographed the other day:
Syd found the Palace Pets set confusing at first, because these pets aren't canon to the stories, but it's actually teaching you how to draw different animals, and they're just themed on a princess. Once she saw that she could now draw an adorable bunny, she was all about it.


I like the way that Syd draws HER Rapunzel, not the movie version.  
Matt and I struggle a bit with creating a systematic art curriculum for the kids. Should he do a step-by-step development of certain skills? Teach a lesson every weekend that's related to something that we've studied that week (if so, this weekend he could teach the children how to draw Celtic knots! Or have them study shadows, based on our study of Stonehenge! Or spheres, and do a 3D model of Aristotle's celestial spheres!)? Do a completely separate art history unit? I follow a lot of art teacher blogs,  so I know that there are supporting philosophies for all three approaches.

For now, though, the approach seems to be, "Oh, you want me to do art with the kids today? Hmmm... what should we do? Okay, how about this totally random thing?" and of course it goes swimmingly and the kids love it. I should probably continue to let it be an impromptu daddy/daughter thing, since it's going so well, but at some point I'm sure that one needs a systematic development of skills. Perhaps not in the fifth grade, though? Or the seventh?

Ugh. Feel free to tell me how you handle art in YOUR homeschool!

Saturday, May 16, 2015

We Went to Chicago: The Art Institute of Chicago


Finally finished with all of his boring workity-work, Matt was able to spend our last day in Chicago with us. We tooled through Daley and Millennium Parks plenty more, but our ultimate destination was the Art Institute of Chicago.

Let's see some fancy art!
This one politely accommodated my baffling request to pose with the work of art.

This one... not so much. I love how even Van Gogh, himself, is giving her a look of exasperation.

I sort of got them to do this one, but then, even I gave up. Really, all I wanted to do was reshoot it with the kid holding the pitchfork in the correct hand! You'd think I was proposing that she do something genuinely embarrassing!

 To be fair, I really AM an embarrassing person to be with.

I studied Medieval Christian art, in part, in grad school, and I have a special talent for identifying all the people and icons in Crucifixion scenes, so I insisted on doing a lot of that at the museum. Lots of "Look, there's Mary, obviously, because she's about to faint, but check out the ginger chick literally trying to scale the cross--that's Mary Magdalene! Oh, and see the guy with the spear? Ooh, and the other guy with the cup? We could totally start our own magical quest to go look for them in real life--it's the basis for, like, every good adventure movie!"

In between medieval art, Van Gogh, and American Gothic, we saw all the other things:

This one is interesting because that blue chick in the foreground was at one point CUT OUT of the painting on account of she's scandalous. She was reattached, but if you look closely, you can see the seams.


We did a lot of looking at all the things, and then took a lunch break.

We travel a lot, and when we do, I like to pack practically all of our food for the trip. Fast food is unhealthy, sit-down food is expensive (and still tends to be unhealthy), and both options are more time-consuming than simply sitting down and eating one's packed sandwich, chips, and clementine. I like to plan for a couple of special meals during a trip, but I've found that it's just much easier to budget for groceries than it is for restaurants, and I find the experience of sitting in a park eating sandwiches to be much more enjoyable than sitting in a restaurant eating a meal.

The kids and I are easy with food--in the hotel room in the morning, we make nut butter and jelly sandwiches and bag up some chips and decide who wants clementines and who wants baby carrots and we're done until dinner. As we walked out of the art museum and into the park for lunch, however, the kids and I discussing who had made what kind of sandwich (there was a rare jar of Nutella in our grocery bag on this trip, and it had been featured in all kinds of yummy combinations), Matt reminded us all that he is NOT easy with food.

In fact, just between you and me, Matt is a fussy eater.

I offered the man half of my almond butter and raspberry jam bagel. The younger kid said that he could have some of her Nutella and jelly sandwich. There were two perfectly good granola bars up for grabs by anyone. But Matt insisted, "No, I want REAL food!"

Real food, hmm? Real food. As opposed to the imaginary lunches that I have been feeding my children as I chaperone them around Chicago and show them all the sights all by myself for two days, eh?

Fine. Since we're walking to the park, anyway, and since hot dogs are on my list of Chicago meals that I wanted to experience during our visit (we'd eaten the other item, deep-dish pizza, for dinner the other night), I suggested that we eat hot dogs instead of our packed lunches.

The kids' hot dogs had onions and relish and mustard on them. My hot dog had onions, relish, mustard, vinegar, tomato slices, jalapeƱos, and a pickle.

Matt's hot dog? It consisted of a plain weiner on a plain bun. A toddler wouldn't even order a hot dog that way. It was also probably--what, 400 calories, max? How that man planned to sustain himself through an entire afternoon at an art museum and then a walk back to the hotel and then an hour's drive on to the Indiana Dunes I do not know.

But at least it was real food.

My hot dog, just in case you're keeping score, was quite delicious.

Matt and I had seen our must-sees in the morning, but the museum also has a Family Scavenger Hunt, and kids get a prize for completing it, so we devoted the afternoon to that, putting the kids in charge of all navigation and clue deciphering:


Let me tell you--this scavenger hunt MADE our trip to the art museum. The kids dutifully followed us around all morning and looked at all the stuff and were interested, but it was clear that it was OUR thing, you know? But the Family Scavenger Hunt was their thing, and so they had to figure out the navigation and the clues.

Can I just say that navigating the Art Institute of Chicago is impossible? It wouldn't be terribly laid out if the signage was better, but most of the time it's absent, and when it is there, it's confusing--I swear that at one staircase, the American Art sign pointed in two different directions, and neither way would really get you to American Art.

Add to that the fact that although each gallery has a number, that number is not always (or often) displayed in that gallery, so that you can see where you actually are in order to navigate from there. The older kid would study the map deeply, draw our path from where we were to where we wanted to go, and then we'd still get lost getting there, because we couldn't follow the numbers:


Nevertheless, the Family Scavenger Hunt was huge fun, AND it got us all over the museum, looking at exhibits like the fascinating miniatures, and the paperweights, that I otherwise wouldn't have gone to see.

The kids have been asked to figure out what animal inspired the dragon's tail (it's an alligator!).

After we completed the scavenger hunt, the kids got prizes (mini sketchbooks--very awesome) and I bought postcards. I'm a big postcard buyer, but art museums are really the only places that you can still get a good selection of postcards. At a buck or so each, I feel like art print postcards are a decent price for a mini-print of a piece of art--I always pick out a few for our gallery wall or our homeschooling, and I always let the kids each choose one to put on the wall by their beds.

Our visit to Chicago connected us to lots of subjects that I'd like to slowly continue to explore in the next few weeks, not the least of which is a deeper study of some of the artists and artworks that we encountered here.

Here are some more of the Chicago-themed resources that we've been enjoying:

Saturday, September 5, 2020

How to Make String Art

I originally published this tutorial on Crafting a Green World.

When I was a kid, we had a couple of pieces of string art, made by an aunt, framed and hung in our house.

I mean, it WAS the 1970s, the heyday of string art.

But whereas the 1970s craze was all about making a string art owl from a kit (which we had), or a string art sailing ship, also from a kit (which we had), you can now do quite a bit better.

A lot of the imagination that you can bring to string art now comes from how simple technology is to use. Can you imagine what my aunt could have created if she'd had access to clip art and a printer? Google Images? A Cricut?!?

Because I promise you that designing your piece is by far the hardest part of making string art, and even that isn't hard. I know you've got access to Google Images and a printer, after all!

So no more kits for you! I'm going to show you how to make string art the completely DIY way--from scratch, by hand. It's going to be awesome. Here's what you need:

Tools and Supplies

  • Wood, cut to size. I can always find some scrap boards to cut down over in my Garage of Mystery, but other good sources of wood are Craigslist, Freecycle, or your local Restore. Maybe you'll be lucky enough to score a finished plaque!
  • Nails. For this particular project, I'm using 1 1/4" ring shank underlayment nails. They're a little thicker than you need, but I'm doing this project with kids, and that extra width helps them keep their grip. Feel free to use whatever nails you like and have on hand.
  • Embroidery floss. This is another supply that you might just find that someone you know would LOVE to give you. There are a surprising number of people in this world who've given up cross-stitch!

Directions

1. Prepare your wood. This step can take a lot of different forms, depending on what wood you choose and the tools you have available. You can use everything from a pre-finished plaque to a pallet board, but whereas that pre-finished plaque is ready to go, but also pricey and unsustainably sourced, something like pallet boards or scrap wood might need to be cut to size and sanded down, but they're free and keep more resources out of the waste stream.

If you're preparing your own wood, don't skip sanding it--if this is one of your first woodworking projects, you'll be surprised at how much nicer your wood looks after it's sanded. My secret trick is to round the edges of the wood piece while I'm sanding it. It won't replace the services of a router, but just sanding all the edges makes the finished piece look more professional.

Staining and sealing the wood is optional, but if you choose to do so, remember to use water-based stain and sealant.

2. Create your template. Create a template for your string art on typing or notebook paper. You can draw freehand, of course, but Google Image is also your friend, and I love using my old-school Cricut. I mean, it can draw me a parasaurolophus at the size of my choosing! How AWESOME is that?!?

3. Nail directly onto the template. Place the template onto the plaque, and then begin to hammer nails right through the paper, following the lines of the template.

Try to keep your spacing and the nail heights even, but don't stress out too much. The one thing that you DON'T want to do is pull a nail out and leave an empty hole. Just work with where you're going!

Watch, as well, for narrow spacing. You can see above how I modified my parasaurolophus, as I noticed while I was hammering nails that some of my spacing--the tail, for instance, and certainly the legs--was going to be too narrow to look nice when wrapped with string:

Try to remember, though, that nobody is going to be looking at your project as closely and critically as YOU are, so roll with any imperfections that come along.

Once you've hammered in all the nails, tear the paper away. I had to get into a few little nooks with a pair of tweezers, but it wasn't difficult.

4. Wrap with embroidery floss. Now for the fun part! Wrapping the nail art with embroidery floss is the MOST fun, and you'll find that even kids who are too young to hammer nails (although don't dismiss their abilities without really thinking about it--you'd be surprised at how young a kid can handle a hammer!) can have a ball wrapping nails with yarn or embroidery floss.

Tie a knot around one nail (secure it with a little white glue to be safe), then wrap the floss around the perimeter of your piece to outline it. Weave in and out of the nails, wrap it completely around some nails, take a break to go back and forth across your piece--feel free to have fun!

Once the perimeter is wrapped, go back and forth across your piece at every angle, with no discernible pattern, to cover the surface area with embroidery floss. After a bit, you'll be able to notice spots that have gaps and you can easily cover those. This takes a LOT of embroidery floss, so be prepared to use at least an entire skein, and possibly more, depending on the size of your piece. Tie the floss off around a nail, and again, dot the knot with a little white glue to make sure it holds.

When you're finished, you can continue to embellish your piece (not everyone I know is as science literate as I am, so I made a label for my string art parasaurolophus), and mount a picture hanger on the back so that you can hang your new masterpiece in a place of honor.

And now you can make another one as a gift for someone else!

Monday, September 12, 2022

Labor Day Weekend in Chattanooga: On Day 2, We Looked at Art and Walked across a Bridge


When I was planning Matt's birthday trip, I was actually looking for ideas more around Nashville, because I'm still paranoid about both of us traveling too far away from our nearly grown-up teenagers. It's probably very Smother Mother-ish of me, and I don't even care.

But then I saw a TikTok about the fantasy art exhibit at the Hunter Art Museum, and THEN I Googled and saw that there's also a free-play pinball museum there, and a few weeks later, there Matt and I were in Chattanooga!

I really wish we'd done more than drive through Chattanooga when the kids were small, because they would have LOVED IT HERE. On our morning walk to the Hunter, Matt and I passed the Tennessee Aquarium--

--including a plaza out front with a free splash pad and wading stream meant to resemble the Tennessee River just north of it.

We followed the stream past the aquarium, then turned down The Passage towards the Tennessee Riverwalk--

--and found an equally beautiful and interactive memorial to the Trail of Tears and the experience of the Cherokee Nation:


There were interpretive signs for all the symbols, and you could enter the stream at any point, walking down the steps towards the river in a graphic representation of the Trail of Tears.

At the bottom, there was another wading area. Children could play here, in this gentle reminder of former tragedy, and families could enjoy their time together here. 


I love it when spaces overtly defy the intentions of the original acts of cruelty that led to the need for a memorial.

It was a cloudy day for the Tennessee Riverwalk--


--but nevertheless I was stoked, because the forecast had told me it would probably be pouring all day. We hardly got rained on at all, so yay!

THIS is why we came to Chattanooga!


Matt and I both love fantasy fiction. He loves fantasy video games, and I used to play D&D like mad (I'm a half-elf bard at heart, y'all), so this was the BEST exhibit for us!


This is Grendel's Mother, by Yoann Lossel, because fantasy art isn't all dragons and skeleton pirates:


But SOME of it is dragons!

I don't think I owned the D&D guide this art was on the cover of, but I've definitely seen it and used it!

This artist, Scott Fischer, also did the cover of Peter Pan in Scarlet:


And look what else I found!!! DINOTOPIA!!!!!!!


The family love affair with Dinotopia is a long one, and I'm always thrilled to see Dinotopia in the wild! I've just learned that James Gurney actually sells prints of his Dinotopia art, and OMG I want them.

It was really fun to see all these illustrations from beloved books. Here's an Arthur Rackham illustration:


I've got his illustrated Alice in Wonderland, but I think of him more as a fairy tale illustrator.

And here's an illustration from The Lost World:


We did The Mysterious Island as a family read-aloud one magical year, and I remain nostalgic for all things Arthur Conan Doyle.

Here's just the "do not touch" sign at the base of a giant Bigfoot bust:


And here's the skeleton pirate I referenced!


That's another James Gurney illustration. 

This exhibit was presented by the Norman Rockwell Museum, because apparently Normal Rockwell was really into fantasy art. I went to the museum's website to buy the exhibition catalogue and accidentally got completely sucked into learning more about Norman Rockwell and his art--I thought of him as a painter of schlocky sentimental subjects, but then I watched this virtual exhibition of his Civil Rights art and now I'm hooked. 

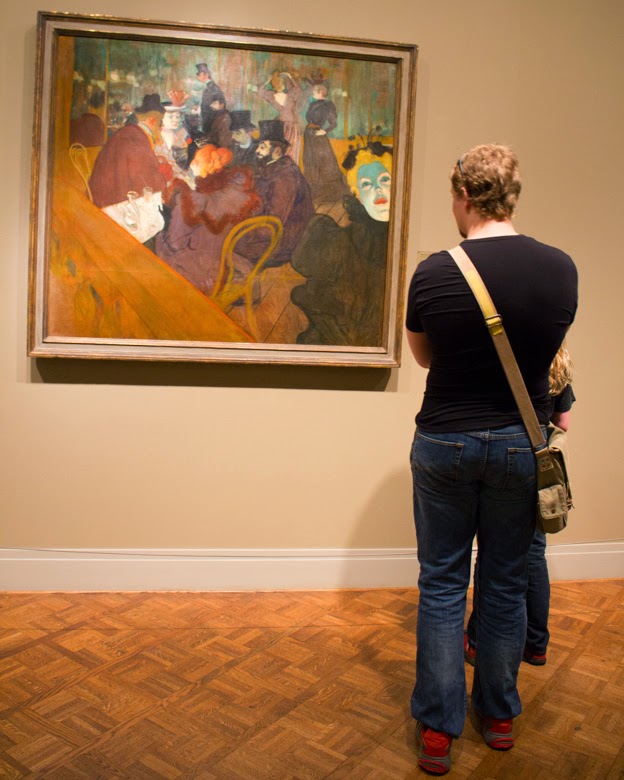
After looking at every single thing in the Enchanted exhibition twice, we eventually made our way into the rest of the museum and looked at the rest of the American art!

self-portrait in a fancy plate

Diamond in Milk by Amber Cowan, using thrifted, upcycled, and found glass

Efflorescence, by Judith Schaechter

Under the Sun, by Andy Saftel

I found a quilt!

Black Star Family, First Class Tickets to Liberia

This is so timely, because I recently met with one of my Girl Scouts who's working on a Gold Award project about introducing more Bipoc authors and artists into her classical school's curriculum. We had a great discussion about the politics and power dynamics involved in determining whether an artwork or piece of literature is "canonical," and one of the examples that we discussed was types of art that aren't traditionally recognized as such, but are still art, like quilts. I'd been thinking more about the Gee's Bend quilts when I brought up that example, but here's another quilt!

I really like the details, especially the use of netting and tulle to add shading to parts of the quilt:


Matt laughed at me for taking pictures of the seating, but you guys, this is what it is to be known!


Seriously, why are museums so freaking exhausting?!? You're just walking around really slowly and standing a lot! WHY AM I SO TIRED AND MY FEET HURT?!?

Rule #1: When you find a mirror, you take a selfie!


I'm a bad vacation photographer, because I think this is our only photo together during the whole trip. Oops!

I did take a lot of photos of Matt, though. Here he is becoming art!


I also pestered the kids by constantly sending them pictures of art that they'd think was funny. Like, here is literally a photo of Matisse:


His muse was apparently 500 pigeons!

And here's an actual photo of me when I get some bread:


When we eventually made it out to the sculpture garden, I was happily amazed to see that it still wasn't raining on us!


And that meant that we could achieve my afternoon plan of walking around the sculpture garden--


--and across the Walnut St. Bridge!


There's the Hunter Art Museum behind me:


Matt does not like to stand near the edge of things, but he consented for this one photo:


Another view east, with the Hunter and a little island in the middle of the Tennessee River:


And the view west:

I was VERY sad that the restaurant I'd been hoping to eat at had a sign on its front door saying it was closed for remodeling, so instead we went to a Mexican restaurant so I could eat a quesadilla and drink a spicy margarita.

My spicy margarita was super deliciously spicy, and the waitress said that the bartenders infuse the tequila with jalapeƱos to make it. So now I have another project for my to-do list!

Don't tell the kids, but afterwards we did a tiny bit of shopping to fill up their Christmas stockings:


Did you know that Chattanooga is the home of the Moonpie? I think Moonpies are gross, but the kids are thrilled by them, so we brought them home a bundle.

Fun Chattanooga street art:


After a while the clouds were starting to look more looming, so we walked back to the hotel to read, nap, swim, and eat leftovers for dinner. 

And then we ate at the most touristy ice cream shop in the country:


I promise that I did have some local, indie, authentic ice cream shops pinned on my Google Map, but Ben & Jerry's was both closer and, when we got home and I told the kids where we'd eaten, they acted like we had gone to the White House and shaken Daddy Biden's hand, they were so amazed and astounded that Ben & Jerry's! Has a real storefront! Where you can get Phish Food in a waffle cone!

Never let it be said that we do not live large on our grown-up vacations!