Monday, February 21, 2022

Girl Scout My Little Pony Fun Patch and Watch Party, Because Teenagers are Still Babies


We have come a LONG way from that one time, 13 years ago, that I spent an entire day trying to distract my four-year-old away from her desire to just watch a freaking My Little Pony cartoon, for pete's sake.

I literally cannot make it any clearer to you that I have no chill, and have never had even the slightest amount of chill, than by having you read that blog post.

Or possibly it just illustrates the fact that I spoil the snot out of Syd, because not only did she watch so much Land before Time at that exact age that I eventually had to start cutting her off ONLY because she started talking like Ducky all the time and I was worried she'd need speech therapy, but also, literally yesterday, she and I played a game where I started reading the plot summaries of a random Land before Time movie, and she'd stop me when she remembered the rest of the plot.

I tell you what, those eggnappers were bad news!!!

And we have since seen every single episode of My Little Pony: Friendship is Magic, and we have the soundtracks as part of our Spotify rotation, AND we watched the movie--in an actual theater!

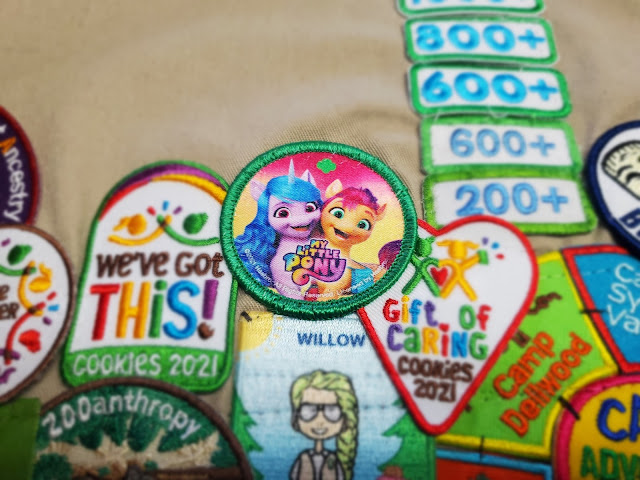
My kids were clearly not the only ones who were My Little Pony superfans, because when this limited edition fun patch for the most recent Netflix movie came out, several of my Girl Scouts wanted one. Nostalgia is a happy emotion, and I love seeing kids who aren't too cool for their childhood pleasures!

The suggested activities for earning the fun patch are of course WAY too babyish for teenagers, so we satisfied ourselves by watching that My Little Pony movie (yes to a whole month of Netflix!!!), and engaging in a few My Little Pony-adjacent activities.

Here are some of those My Little Pony-adjacent activities, all quite suitable for the nostalgic teenager:

  • Perler beads. Really, any fan art will do, but Perler beads are very suitable for teenagers, and many of them like fiddly little activities they can do with their hands while chatting. I also highly recommend shrink plastic, either printed with images you've grabbed off Google that they can color, or photocopied with graphics from the billion My Little Pony coloring books, activity books, and early reader books at the thrift store.
  • stickers and temporary tattoos. Draw your own (have you heard the gospel of water-slide paper?!?) or print graphics like these cutie marks.
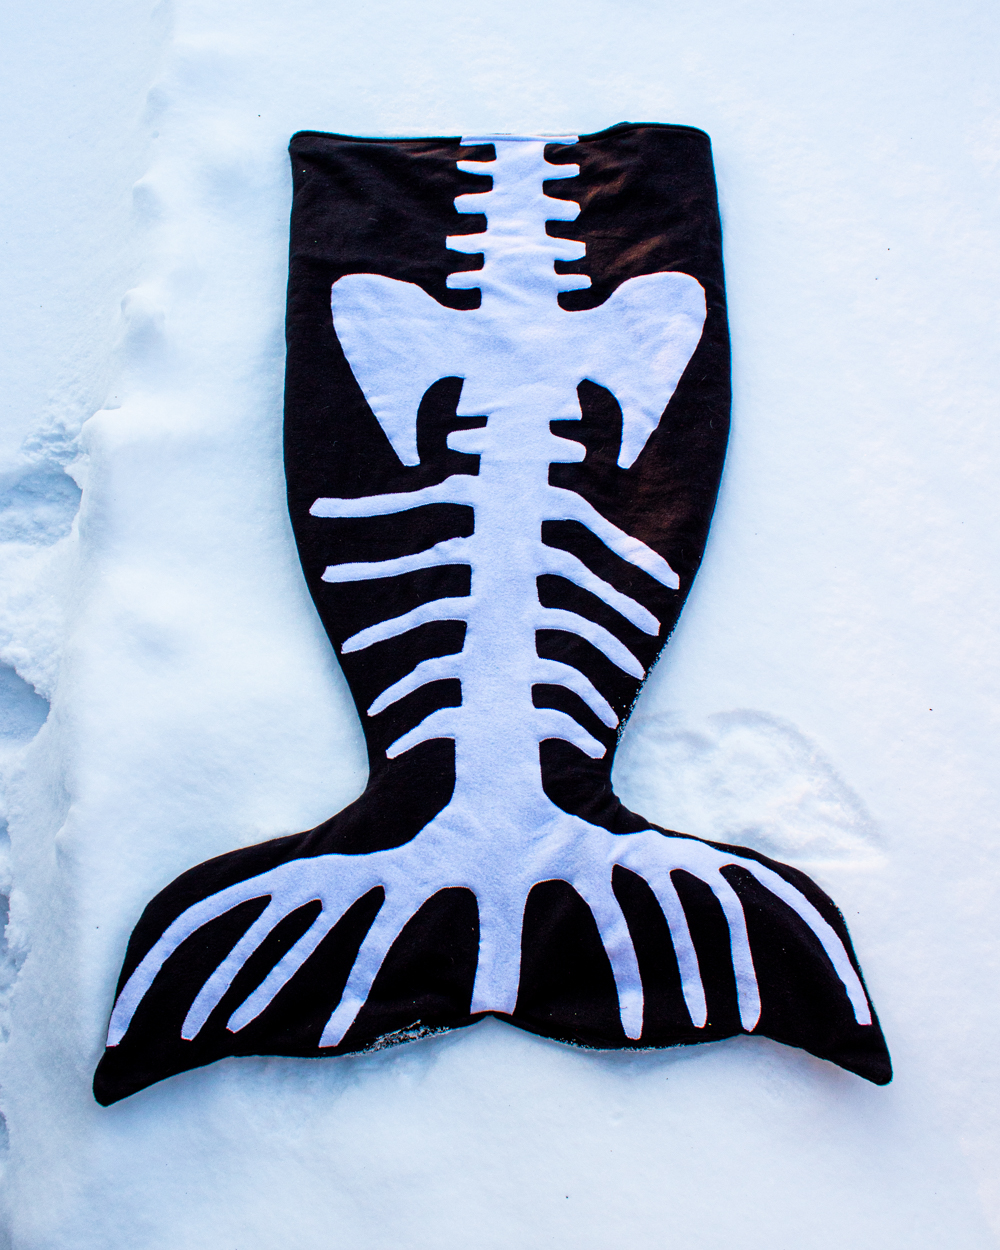
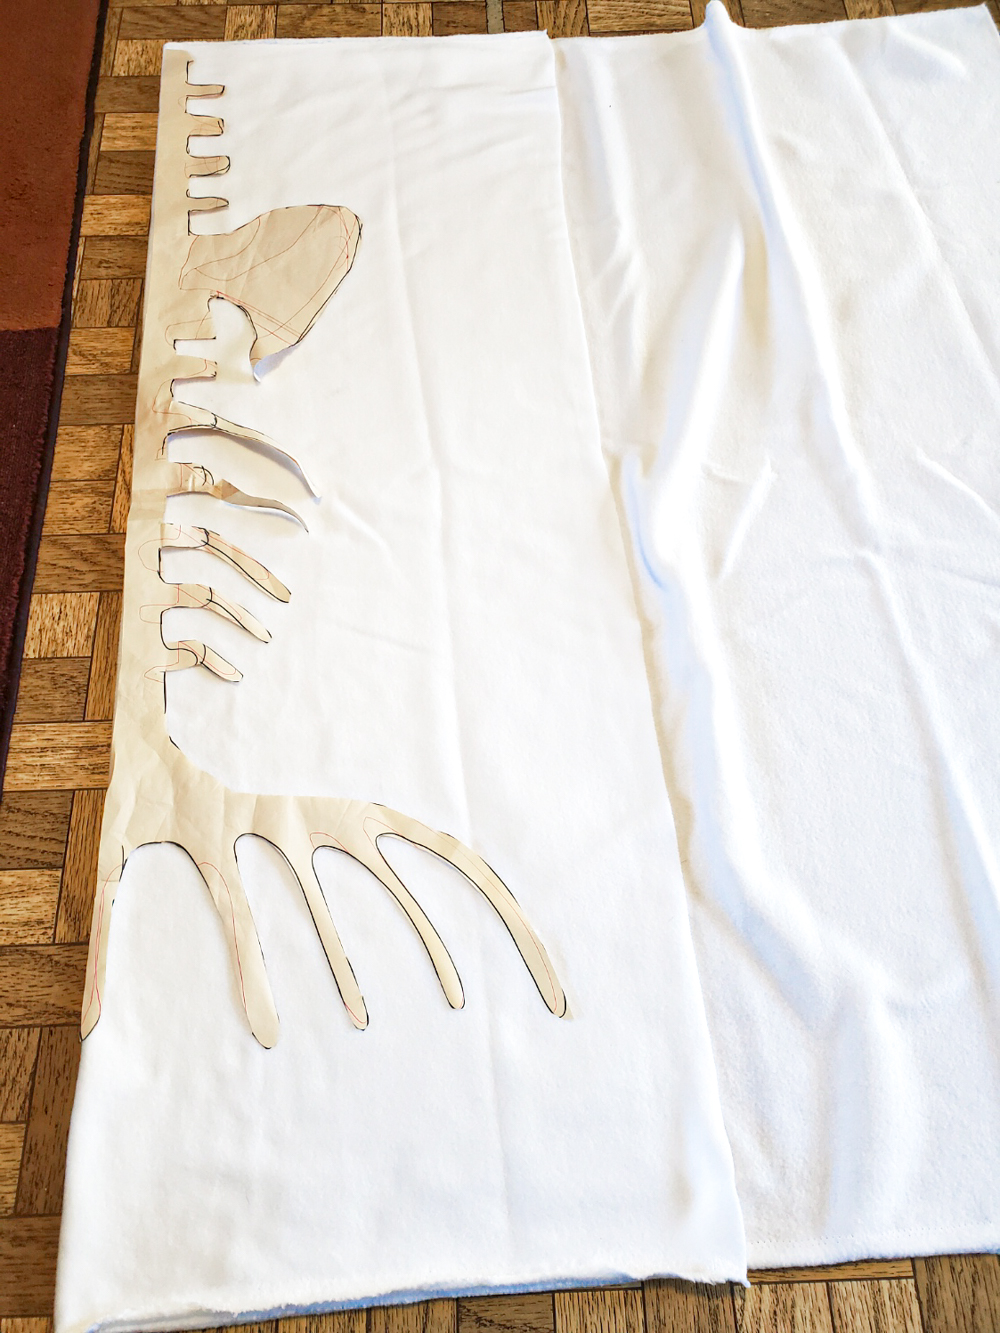
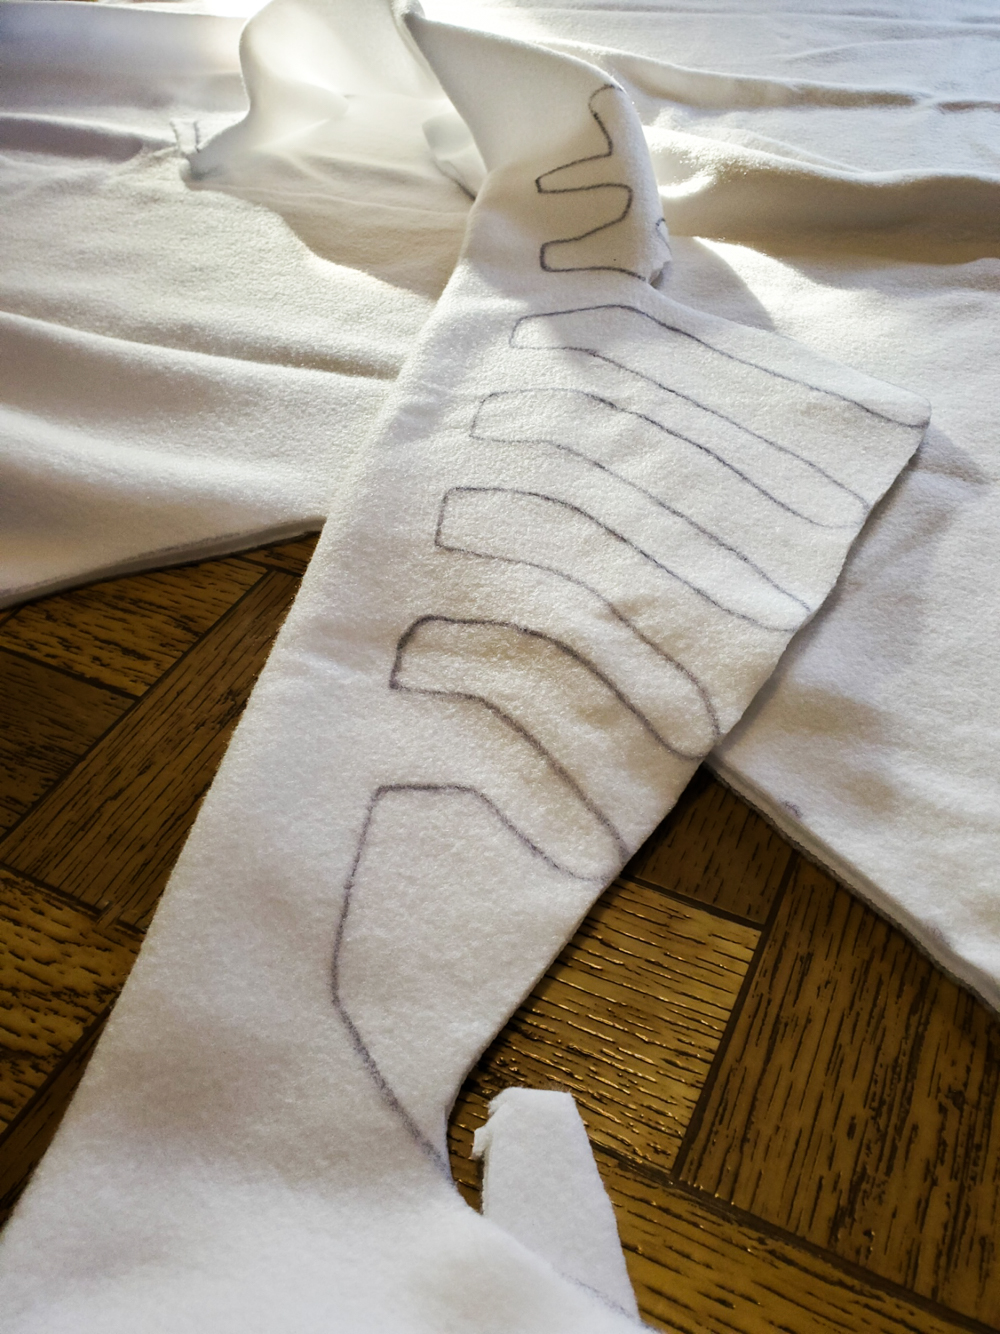
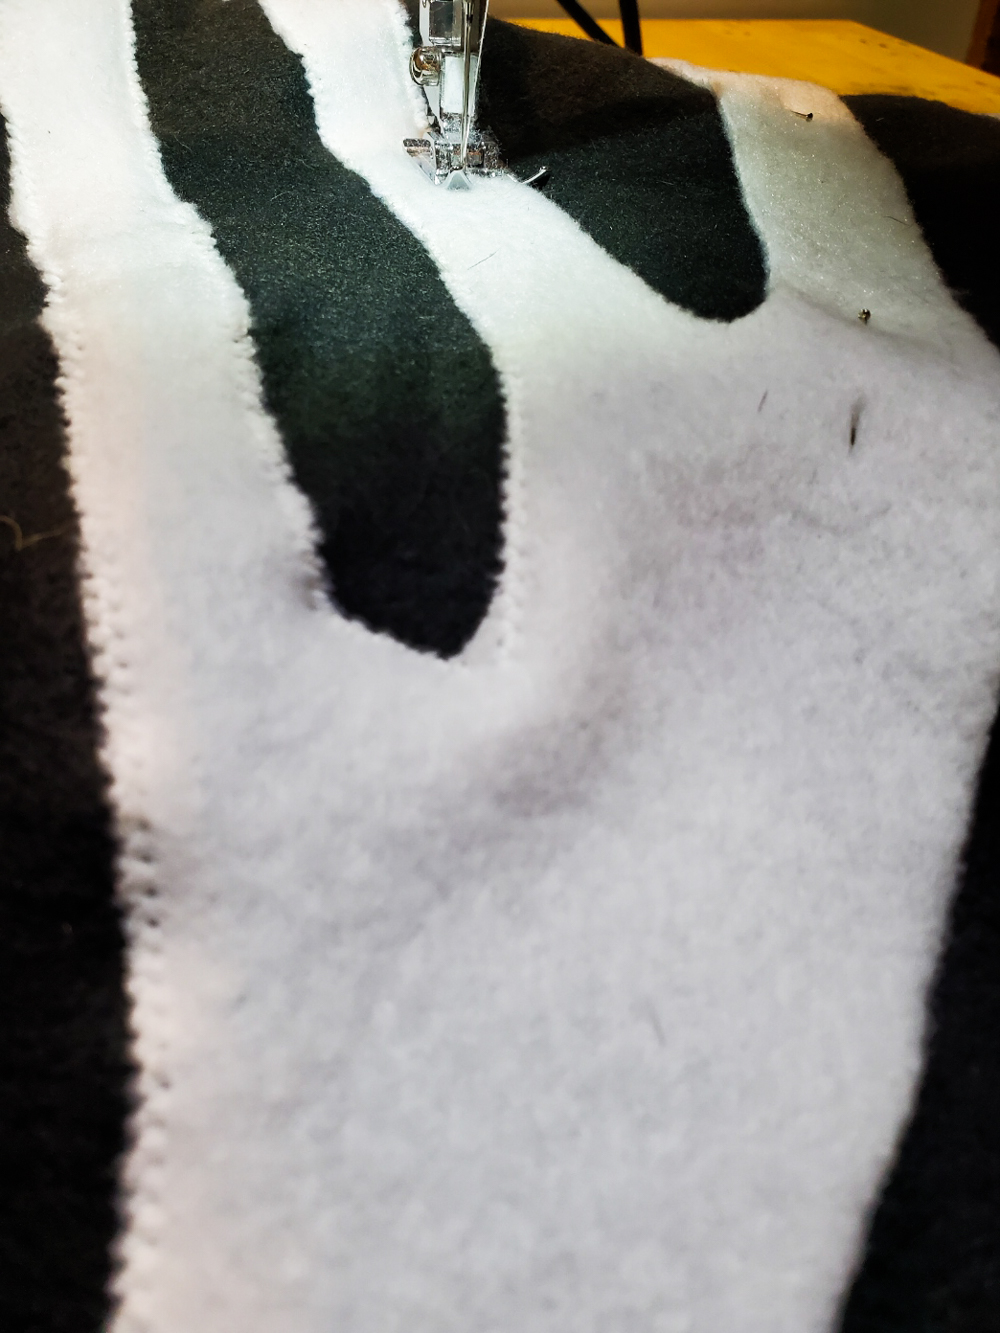
  • DIY plushies. This is way too much work to do with a group of kids, but it would also be a good project to hand-sew in felt and embroidery floss, if you had a teenager or two who wanted to learn that skill.
  • party food. Ignore the fact that this blog post with all the awesome party food is for a My Little Pony party for a THREE-YEAR-OLD. Ahem. The beauty of having a retro MLP party with teenagers is that THEY can make all the food! Everybody can sign up to bring something, or you can choose all the recipes and buy all the ingredients ahead of time, and let making the food be one of the activities.
  • cake cones. One year, Syd had a fairy tale party complete with a castle cake that she decorated herself. Bizarrely, the most popular parts of this castle cake were the waffle and sugar cones she'd coated in canned frosting. The kids mowed down those frosted cones--they might even have pulled the leftovers out of the pantry and frosted and eaten them, too! It was a sleepover that I'm pretty sure nobody slept at. So I think these My Little Pony-themed cones would be pretty popular to make and eat!
  • upcycled toys. It would be super cute to have the kids bring some old MLP toys they wouldn't mind parting with, then letting them upcycle them into fun, new creations. Here's an easy snow globe to start with!
Because one of the greatest lessons that you can teach a teenager is how to throw an awesome retro party!

Friday, February 18, 2022

Breaking News: Our House is a Disaster

OMG you guys, I have been so discombobulated for this entire year so far!

Right at the beginning of the year, it was finally our turn with the construction crew my partner had first contacted back in... oh, March 2020 or so. Turns out that EVERYONE felt like a global pandemic was a great time to get those nagging home renovation issues taken care of! 

We desperately needed to have our main shower retiled, and it turned out when they finally demolished the shower that we ALSO desperately needed to have several joists, several walls, and the floor in three different rooms replaced because that shower had also apparently been leaking into our subfloor for years.

Here's what your house will look like if your shower's been leaking for eight years!

The joists look like they've been through a fire, and they were about as structurally stable.

The head guy, showing me those joists rotted through with mold, said, "I'm surprised you're not constantly sick!"

Fun fact: I AM kind of constantly sick? Although lately my nagging cough has been a LOT better, ahem...

So now we get to have not only a new shower, but also a new closet floor, new bathroom floor, new family room floor, and new drywall in all those rooms, too. And if we're going to have new drywall, we might as well paint. And if we're painting and getting new flooring... well, we HAVE been wanting a new giant couch for several years now.

It's definitely a yay, because we've been living with the previous homeowner's 1980's-era tile, carpet, vinyl laminate, and dingy white wall paint since we moved in. And that couch used to live in a dorm lounge. So, you know, it's always fun to upgrade to stuff that's more one's taste, I guess.

Except if you know me, then you know that's not actually fun for me. The presence of the construction crew, the mess, the need to pick out and purchase new stuff, the drop cloths and stacks of tiles and non-functioning amenities are really getting to me, and I fervently look forward to one day being once again in my own put-together home without strangers.

Currently, the family room floor is done, with solid bamboo installed on top of our gross old vinyl:

Yes, that's my younger child mopping the walls, because a clean room with new flooring made us suddenly notice that there are cobwebs all over the tops of our walls. Does everyone periodically mop their walls, and this is yet another piece of home training that passed me by?

And for some reason I noticed just last night that the workers who installed the floor also nailed our front door shut? You can actually see the board in that above photo! I need to add this to my list of random crap to ask them about.

Also, the bamboo floor is no longer nearly that clean. I don't know if it's always going to show dirt like crazy, or if it's just because I've got construction workers tromping through all day every day, or if it only feels like it shows dirt like crazy because the one good thing about the gross old vinyl floor is that it NEVER showed dirt so maybe I'm just used to being filthy.

These are the two walls we're going to repaint:

The younger kid suggested burgundy, and I was all, "Yeah, that sounds cool," because I don't know or care about wall color and just didn't want to have to make a decision myself, but my partner does NOT think burgundy is a good idea and so has promised me that he'll take some photos of the room and Photoshop wall colors onto it so we can see what looks good.

It probably won't be burgundy...

Here's the shower tile coming together:

Thank the old gods for my partner, who is interested and detail-oriented and design-savvy so all I had to do was follow him around Menard's and be bored while he picked out beautiful tile for us.

Our tile guy, whom I call Tyler in my head and I'm going to be SO embarrassed when I inevitably call him Tyler to his face one day since that's not his name, leaves his empty Skoal cans lying around his work area:

I stole one the other day, intending to clean it and make a cute craft out of it, but when I opened it the lingering--not even lingering. Overpowering? Noxious? Amber waves?--of Wintergreen Skoal fumes about knocked me on my butt. Seriously, just remembering the smell makes me feel like gagging. I held my breath while submerging the empty can halves in bleach water and then left them there for a day, but I swore I could still smell it when I rinsed them off, and anyway, the can is just plastic, not metal like I'd first thought, so I dumped it.

Tyler is, nevertheless, my favorite construction guy, because unlike the other guys, who are gregarious and pleasant and make small talk, Tyler just minds his business, coming and going without fanfare. I unlock the door for him when I get up in the morning, and he lets himself in without a word when he arrives, then leaves without a word eight or so hours later. I have even almost forgiven him for this:


That photo is Tyler, having left for the day without a word, locking me out of the bathroom. Which would be fine, even though I really miss that toilet and sink when they're gone, except that my clothes closet and my homeschool closet are both on the other side of the bathroom. The kids were able to bravely soldier on without the homeschool supplies I wanted for them, ahem, but I needed my CLOTHES! My socks! My underwear! My best hoodie! My comfiest jammy pants! All locked away without warning, along with my heartburn medicine and hair ties and tampons!

And Tyler has done that TWICE so far.

It's for a good cause, though, because check out what he installed underneath our tile:


It's gonna be one of them fancy underfloor radiant heating things so my precious toesies don't get cold without that 1980s bathroom carpet underfoot!

And here's my partner floor-is-lava-ing something I absolutely HAD to have from the homeschool closet:


You guys, I don't even KNOW the timeline for when this crew is going to be finished, and even then my partner and I have to paint and I'm trying to talk him into calling an electrician to put more outlets into the family room because I read an online article that scared the snot out of me on the subject of power strips and extension cords, and the other day I caught him showing the contractor the kids' bathroom and planning for Tyler to retile it, too, and how many rotten joists do you think there are under THAT floor, and if they're retiling it we might as well replace the sink and the toilet and WHEN WILL THIS END?!?!?!?

Just... send soothing thoughts my way, and ocean sounds mixtapes, and frozen pizzas, and links to flexible shared workplaces.

P.S. Want to follow along with my craft projects, books I'm reading, road trips to weird old cemeteries, looming mid-life crisis, and other various adventures on the daily? Find me on my Craft Knife Facebook page!

Monday, February 14, 2022

Homeschool Astronomy: How Does A Color Filter Affect the Temperature of Light Refracted through a Prism?

 Here's my biggest homeschool tip: never get rid of your homeschool stuff!

Big kids may not use those sweet sensory materials and basic manipulatives the way that they did when they were little, sure, and all that stuff from the early years may sit in your closet for a distressingly long time, but every now and then these big kids DO need that stuff, and it's awfully nice to have it. We've repurposed all kinds of the kids' early learning stuff into our homeschool high school, from the map puzzles that I dragged back out when Will was studying AP Human Geography, to the Base 10 blocks that helped the kids wrap their heads around binary during our Robotics and Programming study, to the beakers and balance scale that helped the kids understand mass and volume that we now use in science labs.

For this Honors Astronomy lab, Will repurposed the colored cellophane that I bought back in 2015 when the kids were going through a phase of having big interests in color theory (we did ALL the color wheels and color mixing and color filter stuff! It was so fun!). She also used a set of glass prisms that I WISH I'd bought back when my little learners were super interested in rainbows, dang it, and an infrared thermometer that I bought in 2014, after seeing the one that Will used to earn her Junior Scientist badge at Yellowstone

By this time, we'd played around quite a lot with prisms and their angles of refraction, and how a color filter might affect the dispersal of light, etc. So when I challenged Will to create her own experiment involving prisms, she thought it would be interesting to investigate how a color filter might affect the temperature of each color of refracted light from a prism.

I love the way that this experiment flows so naturally from her prior explorations. To make this lab work, she needed to know the prism shape that would give her the widest spread of individual colors, and have that experience of measuring the temperatures of each color, and noticing how a color filter affects the refracted rainbow.

If we'd owned these prisms throughout her childhood, that's probably information that she would have already picked up through sensory play and simpler experiments, and who knows how sophisticated her lab ideas would be now?


It's surprising how many astronomy labs a kid can complete right on her own back deck!


Will's got a few more labs that she ought to do to finish up her lab notebooks for a couple of her science studies (the goal for a high school lab science course is at least ten labs), and now I'm trying to think of more ways to use this awesome colored cellophane in experiments. 

Maybe she can grow bean sprouts under colored light for AP Environmental Science? 

P.S. Interested in more of the hijinks involved in homeschooling two high schoolers? Follow along in my Craft Knife Facebook page!

Saturday, February 12, 2022

How-to: DIY Color Viewers


This tutorial was originally posted on Crafting a Green World in 2015.

Got a kid who's in love with color? These DIY color viewers will help her see the world in a whole new light! 

These color viewers are a project that is suitable for a wide range of ages. Toddlers and preschoolers will incorporate them into their sensory play, while older kids (who do still love their sensory play, of course!) will be able to use them for a variety of scientific observations and experiments--colored shadows, color mixing, the properties of light, the properties of the eye, etc. 

 Also? They're just plain fun! 

 Here's how to make your own set of color viewers: 

  1. Gather ample cardboard to upcycle. You'll need two pieces of cardboard for each color viewer. I have a horrifying collection of used shipping boxes that I was pretty thrilled to raid for this project, but cereal or cracker boxes, moving boxes, or my most common go-to, cardboard record album covers, will also work well. 

  2. Cut cardboard to size. This size will depend on the size of the cardboard pieces that you're using; to minimize waste, I cut my cardboard to the largest size that I could--about 5.25"x8.5". Cut two pieces for every color viewer that you want to make. 

  3. Cut a window into the cardboard. Measure 1" in on all sides, and cut out to make a frame. 

  4. Cut the cellophane to size. As with my DIY 3D glasses tutorial, it's the colored cellophane that really makes this project. Measure the window that you've cut into the cardboard, then cut each piece of cellophane, one per color viewer, 1" longer than that measurement by both length and width. 

  5. Glue the cellophane to one cardboard frame. Lay one cardboard frame wrong-side-up (for instance, I put the outsides of my scuffed and labeled shipping boxes to the inside of my viewers), then run a line of hot glue along the entire perimeter of the window. Carefully center and set the cellophane down over the window, and press in place. 

  6. Glue the second cardboard frame to the first. Run another line of hot glue around the frame, then center a second cardboard frame and set it down on top of the first, right-side-up. These color viewers are sturdy enough for even toddler play, but if you've got a smaller kid who still likes to gnaw, you'll probably want to cover the outside edges of the cardboard frame with clear packing tape so that the kid's saliva doesn't soften and wear away the cardboard. 

Older kids will mostly do this, though: 

 Then she looked at her sister through it, informed her that she was green and therefore made of puke, the sister screamed in outrage and began to chase her, and I might have possibly gone inside and locked the door.

Wednesday, February 9, 2022

A Skeleton Mermaid Tail Snuggle Sack, For She Who Contains Multitudes


A few years ago, I sewed each of the kids one of those snuggle sacks that were super trendy at the moment. You know the ones that are like lap blankets but also sleeping bags... sleeping bags for your legs, I guess? They're perfect for all those times when you want a comfy blanket but you also want your hands free for snacks and a book.

I used two layers of thick fleece for my snuggle snacks, and Matt made the patterns for me. Will got a giant fleece shark, complete with a pelvic fin and both dorsal fins, and large enough that she could use it as a sleeping bag, if she wants. It's quite amusing to walk through the family room and see her kicked back reading on the couch, half-consumed by a giant fleece shark.

Syd got a mermaid tail (it was the Year of Mermaids, you might recall), but I purposefully made hers a little shorter, because you obviously can't be swallowed up to your smile by a mermaid tail! It can go up to the small of your back, max--any further and people wouldn't glimpse you and accidentally assume that you're a real mermaid. So Syd's mermaid tail snuggle sack was perfectly Syd-sized, with mermaid scale fleece on the outside, and she looked like a real mermaid that whole winter every time she wore it.

And then she hit a growth spurt, and by the next winter her mermaid tail snuggle sack was about a foot too short.

Back when I sewed those first snuggle sacks, I'd had another idea for a snuggle sack that wasn't quite right for my littler kid who loved mermaids sincerely and intensely, nor for my bigger kid who liked dark stuff, but liked sharks even better.

It turned out, though, that my other idea was absolutely perfect for a kid who has grown up a few years and now loves both mermaids AND dark stuff.

Finally, the world is ready for my skeleton mermaid tail snuggle sack!

But first, Matt had to make me a pattern. Have you ever imagined the skeletal structure of a mermaid? It looks, I assure you, exactly like this:

You only have to draw one half of your mermaid's spine, then trace and cut it on the fold:

After that, the snuggle sack is the easiest of builds--WAY easier than that dang shark! I copied Syd's original mermaid tail pattern onto black fleece, added a couple of feet to the top to accommodate that growth spurt, then appliqued the skeleton onto the front piece before sewing it together:

So. Much. APPLIQUE!


The inside lining of the skeleton tail is stash red fleece, because that's the inside color of mermaids, of course!

I LOVE how Syd's skeleton mermaid tail snuggle sack turned out:


It's cozy and warm and makes you feel like a mermaid without being, you know, twee or cringe or whatever word the kids are using these days. 

Monday, February 7, 2022

Earning the Girl Scout CSA Think Like a Programmer Journey (with Actual Programming!)


None of my Girl Scouts, including my own kids--and especially including me!--have ever been super enthused by the Girl Scout Journeys. Some are definitely better than others, and Will, who's obsessed with earning badges and awards, always completes the three Journeys needed to Summit at every level, but I'm not gonna lie--my favorite thing about the Think Like a Programmer Journey is how fairly quick and straightforward it was.

Technically, you can complete the Think Like a Programmer Journey without touching a computer, as its focus is on teaching the process of computational thinking that programmers use, not on actually, literally programming. But incorporating actual, literal programming made the Journey a LOT more interesting to the kids, and added additional STEM enrichment into our school days.

As the intro to the Journey, we watched this Code.org video about how computers organize, process, and represent information:

We discussed a couple of ideas related to this video: 1) the importance of programming solutions that are workable and understandable to the user (not just the programmer), and 2) computational thinking as a method of problem-solving that breaks down problems to manageable bits and works towards solutions that are beneficial to the user--not just the programmer!

These ideas are applicable to Girl Scouts in a lot of ways, particularly in the ways that we try to be of service. Because Girl Scouts often requires Girl Scouts to create and enact service projects in order to earn awards--or even badges, sometimes!--it can be VERY tempting to get some of these service projects done in ways that are expedient for the Girl Scouts, and not necessarily in ways that best serve the beneficiaries. It never hurts, then, to have a reminder that the beneficiaries of our projects are the ones who need to be able to understand and work with our solutions--and in a real way, not just the kind of surface level that could earn a kid a Journey but that we all know good and well isn't going to result in any kind of lasting change for the better.

To that end, the kids started a working doc in which they practiced coming up with needs/problems and proposed solutions for various user groups. They worked in the document periodically throughout this Journey, and if you read down their lists you can actually see them begin to be more thoughtful and detailed, and to think more deeply and specifically about the real needs and problems of their user groups. 

I'd actually anticipated that something on this list would eventually inspire their TAP, but nope! If only life/Girl Scouts was that easy!

On another day, the kids and I explored how language choice affects the value of a solution. Fortunately, I've been telling the kids for their entire lives (usually after they've smugly corrected someone's grammar, but sometimes right before I correct their own grammar, ahem) that "effective communication is good communication." In other words, if you get your point across, that's good communication, whether you've gotten your point across using invented spelling because you're newly literate or lots of gestures combined with a very limited vocabulary because you're in Quebec trying out your Parisian French 101 on a French-Canadian hotel clerk.

Ahem.

The point is that a programmer is in charge of figuring out the most effective way to organize and represent knowledge and information, and any method of effective communication is fair game. 

To practice this, the kids tried out the Representing the Alphabet Activity for the CSA Think Like a Programmer Journey in the Volunteer Toolkit. 

I wouldn't usually do all this printing and cutting for a single activity, and I did think about trying to substitute LEGOs, but whatever:

I really like how each kid chose to represent her word using a completely different method. Syd's uses a vertical two-animal pair to represent each letter--


--while Will's relies on a very precise arrangement of stacked papers:


And yet they were both able to read the other's words without struggle! Yay for good communication!

Before sending the kids to work on their user groups doc some more, I helped them make the connection that they can approach a problem the same way they approached a message to be decoded--by working backwards and illuminating the underlying algorithm. If only every problem had its handy-dandy decoding sheet all written out for us!

Another day's lesson was also a real-life programming activity: binary!!! I got out the white board to teach the kids how to read and count in binary, discussing, as well, some other number systems that use different bases. The Sumerians, for instance, used a sexagesimal system!

To make sure they grasped the concept, I gave the kids this set of binary puzzles to work. One of them needed a couple of tries, but in the end they both mastered Base 2! That meant that I could tell them that these ones and zeros are also called bits, and you can use a bitmap to visually represent the information encoded in binary... or you can use it to make a picture! We Google Imaged some examples of bitmaps, then the kids used the Pixelation widget on Code.org to make their own. They enjoyed the open-ended free play of creating black and white and color pixel images, while practicing their binary and learning hexadecimal. 

Our special activity for this Journey was building a computer from a kit:


The Kano kit is a super fun walk-through of assembling the parts of a computer, then setting it up. It's got Raspberry Pi to support more sophisticated programming activities, or a variety of add-ons that you could purchase to give a younger kid different coding experiences. 

After building the computer, we used another computer analogy to think about user-centered needs. If every need/problem is an output, then the reasons why a problem is happening or a need is occurring are the inputs. You can decode the problem the way that we decoded the animal alphabets, trying to figure out the inputs. When you think you understand the input, you can work towards a solution that changes that input and produces a better output.

The kids did some more programming in later days--Will made me a table tennis game, for one!--and played with our Turing Tumble, but once kids understand the concept of computational thinking, they're actually ready to use computational thinking to solve a community problem.

The kids' TAP dealt with the deficit of good educational materials to teach the Robotics badges, especially to younger levels. When we were learning the parts of a robot, the kids made their own graphics, diagrams, and definition cards, but it's probable that most troops wouldn't have that kind of time. But those visual, tactile learners still need to learn the material!

To solve the problem, the kids created this set of educational materials that can be presented online or printed. 

Click here for the complete Robot Slide Deck.

If printed, they can be copied at different sizes and the definitions can be used to label the robot graphic. It's a pretty nifty plan, and you can tell that a couple of homeschooled kids who've had a heavily Montessori-inspired education created it!

Saturday, February 5, 2022

Kid-Made: How to Make 3D Glasses


Got some scratched sunglasses, or an old pair of prescription glasses with a cracked lens? Pass them over to your kids, because this is a project just for them! Here's how to make 3D glasses from an old pair of frames.

How to Make 3D Glasses

These DIY 3D glasses are an excellent kid-build, and really fun for kids to play with afterwards. Here's what your kid should do to make them: 


1. Remove the lenses from the frame. You may have to help your kid bust the plastic lenses out of plastic sunglasses (or just give her a hammer!), but all old prescription frames should require are a teeny-tiny screwdriver and the assertion of your kid's fine motor skills: Screw the little screws back into the frame after the lenses are removed. Save those lenses for telescope-making! 


2. Trace each lens onto colored cellophane. Colored cellophane is the real trick pony here! Have your kiddo trace around the outside of the lens, so that it will fit over the frame, not inside it: The traditional order is red for the left lens and blue for the right, but there's nothing to prevent an interested kid from experimenting--how would a yellow/blue combo work? A purple/green? 

3. Glue the cellophane to the front of the frames. Hot glue can be a little messy (as you can tell from the pic of the finished glasses!), but it holds well and dries quickly, perfect for my kid who likes to see results right away! 


4. Play with drawing. Let the kid choose marker colors that closely match the cellophane, then experiment with drawing images that will be perceived as three-dimensional. My kiddo first tried taping two markers together, but now prefers to simply hold the two together. You can also play with drawing the red and blue lines not as parallels, but as different elements of a single drawing--this works especially well if you draw a 3D cube, for instance, making some lines blue and some lines red. Your kiddo can also experiment by trying different papers--plain typing paper, graph paper, or graph paper with red or blue lines. 

5. Troubleshoot. After making a set of glasses using a single layer of colored cellophane for each lens, my kiddo spent some time goofing around with the extra cellophane pieces and discovered that doubling or tripling each piece, to make the color darker, improved the 3D effect, so she glued a couple more layers of cellophane to each lens, and now her 3D glasses REALLY pop.  Another variable that might make a difference is marker color. Play around with brands of markers or shades of color to see what works the best. 

Because there are so many interesting variables to explore, this is a terrific STEM-enrichment activity for an interested kid, and could also make a stellar Science Fair project. Just have your kid write up her hypothesis and procedure for how to make 3D glassses, paste up a diagram of an eyeball, draw a couple of pictures to look at through the glasses, and BOOM! Blue ribbon.