Wednesday, June 24, 2020

Homeschool Geography: A Yellowstone National Park Unit Study


Our in-person explorations this summer were supposed to be the Western Caribbean with our Girl Scout troop, southern Alabama and Louisiana with our family, and several assorted camping trips and weekend adventures with just me and the girls.

Honestly, though, at this point I'm so tired of complaining about the pandemic that I don't even feel like complaining about it. We're together at home, safe and sound, making our own fun more or less.

And instead of real travel on a cruise ship with lots of friends, exploring Mayan architecture, taking young people to get soft serve and pizza at 3:00 am just because we can, the four of us are eating popsicles at home and I'm only up at 3:00 am every day because a mockingbird lives right outside my bedroom window.

Whatever. It is what it is.

It's been several years since we took our family trip to Yellowstone National Park, and so when Yellowstone kindly announced that it would allow children to earn its normally park-only Junior Ranger badge at home, I decided that it was the perfect chance to make our own fun and I turned it into a unit study.

The study broadly follows the Yellowstone National Park Junior Ranger badge book, which at least right now Yellowstone is still offering on their site, still with the possibility to earn the Junior Ranger badge from home. The subheadings for this study match the activity titles for the Junior Ranger book, although you could complete this study without referencing it.

SUPERVOLCANO

Naked Science: Supervolcanoes is a terrific documentary about the Yellowstone supervolcano, although it scared the snot out of Syd and I have somehow managed to inform everyone that I have seen in person since we watched it (being that we watched it about 6 weeks ago, that number amounts to Matt, two socially-distanced friends, and the physical therapist helping me with my rotator cuff tendinitis) of exactly how long we in Indiana can expect to live after it erupts, and what we can expect to die of.


The documentary speaks quite a bit about calderas (there's a great Jurassic Park moment in which the scientists are frustrated because they know there *should* be a caldera at Yellowstone but they just can't find it, and then one of them is flying over the park in a helicopter and realizes that they haven't been able to see it because they've been IN it--it's that large!), and so this DIY caldera project makes a great hands-on activity to accompany it.

HYDROTHERMAL FEATURES

It's a shame that we're not really at Yellowstone, because these were the sights that I enjoyed most when I've gone! Here are a couple of decent virtual tours of various hydrothermal features at Yellowstone, and here's a fun little PBS documentary entitled Yellowstone and Their Steaming Acid Pools of Death:


It's an apropos title!

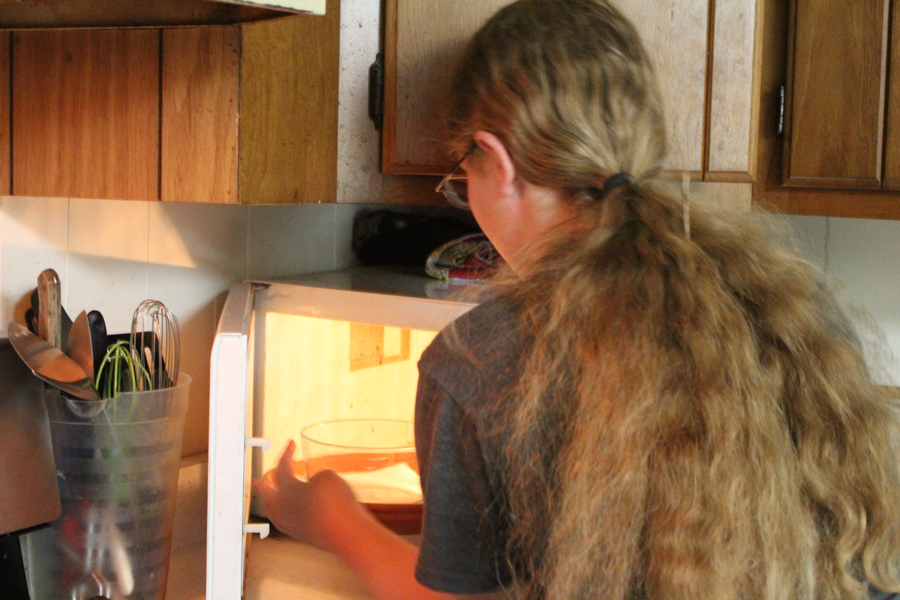
It's very easy to model hot springs and fumaroles, at least--here's a handy tutorial, as well as a list of hydrothermal features and good definitions for them. I had the kids memorize the types of hydrothermal features, but our modeling didn't go quite as well. The hot spring and fumarole were fine, of course, but my idea that perhaps the kids could engineer a way to DIY a stovetop geyser (got to practice those STEM skills, don't you know?), was unsuccessful:


Well, at least we now know a good half-dozen ways NOT to make a stovetop geyser, so that's something!

Will was interested in the difference between a fountain geyser and a cone geyser, so we found videos that illustrate each one. Here's a fountain geyser:


And here's a cone geyser!

RECIPE FOR A GEYSER

The kids and I had a LOT of fun with this lesson. Geysers are a great subject for a YouTube rabbit trail!

We started off simply trying to find a YouTube video that had a model or demonstration of how a geyser works, but got interested in this video about Yellowstone's largest and just about most sporadic geyser, Steamboat:


This got us looking for other videos of Steamboat Geyser erupting, and we found this great video from a YouTuber named David Schwartz, with lots of angles and good captions:


It was such an interesting video that we checked out his profile to see if he had filmed any other geysers.

He had!


Clearly, someone who has filmed several geyser eruptions must be interesting, so we Google stalked him.

And that's how we learned the term GEYSER GAZER! That's what you call people who've made watching/studying geysers into a hobby!

You know what else we found while cyberstalking this random person?

He appeared on A Prairie Home Companion, in an episode that was recorded live at Yellowstone National Park for its anniversary!

Of COURSE we listened to this episode.

It was not great. The kids were beside themselves with how hokey and unfunny it was, in the many lulls I read out loud to them all about Garrison Keillor's history as a workplace sex criminal, and as if we didn't already loathe our listening experience enough, when it came time for David Schwartz's big moment, he got to speak approximately half a line, then Keillor cut him off, made a joke that felt like it was at least partially at his expense (I don't totally remember, and I am NOT going back to listen to it again), and then moved on to something else!

We were livid. Syd had to be talked down from violence. She loves David Schwartz the MOST, and did NOT appreciate some hokey sex criminal denying our favorite geyser gazer his public radio glory.

I did tell you that we make our own fun, right? Ahem.

Since the kids loved studying geysers so much, I gave them the assignment to draw one. They had to find a good geyser eruption video on YouTube, pause it at an appropriate point, and then create a piece of art showing their geyser mid-eruption, making sure to include elements of background and foreground, realistic or creative. And, of course, they had to credit the video's creator, because we don't deny people their glory in our homeschool!

Here's Syd's creation:

LIVING COLORS

This lesson was a great place to add a little more academic rigor for my older students. Yellowstone has an absolutely terrific lesson on thermophiles, and learning about chemosynthesis means that you get a chance both to review photosynthesis AND compare it to a completely different metabolic process!

Will handled our photosynthesis model:


That sugar molecule is so tricky to build!
Syd built the chemosynthesis model:


For a little bit more challenge, I had the kids research and label the possible name of each thermophile represented in the thermophile coloring page in their Junior Ranger books. Everybody likes to color!

PREDICT OLD FAITHFUL

The kids and I often watch the Geyser Basin webcam just for funsies, and trying to predict Old Faithful's next eruption is actually a super accessible activity using that webcam!

I had only intended our Yellowstone study to take up our afternoon project time for one week, and we spent soooooo long on geysers that we skimped quite a bit on the rest of the unit. Here's what we did:

Is your library opened back up again? Ours has curbside check-out of online holds! If/when your library is back in business, here are our favorite library resources on Yellowstone:


blah

Tuesday, June 23, 2020

Homeschool Science: Model Chemosynthesis with Zometools


Earlier this summer, the kids and I worked through a brief Yellowstone National Park study that had us spiraling back to a favorite activity: modeling chemical processes with Zometools!

As part of that Yellowstone study, the kids and I looked at thermophiles, those heat-loving bacteria and archaea that make their happy homes in the different high heat zones of the park's hots springs. Some thermophiles, including these thermophilic archaea at Yellowstone, have a metabolism that uses chemosynthesis. It's cool and unusual, makes an interesting contrast to photosynthesis, and--just like photosynthesis!--you can model it with Zometools!

For our chemosynthesis model, we decided that our organism would be oxidizing hydrogen sulfide. There are other organisms that start with not hydrogen sulfide, but chemicals like methane or sulfide, and it would be another interesting project to model and compare various chemosynthesis pathways.

Syd used this chemosynthesis formula on the NOAA website as her reference, although when Will, who was reviewing the photosynthesis formula at the time, tried to use that same NOAA site as her reference, she discovered that the photosynthesis formula written there is incorrect! GASP!

You will be unsurprised to learn that I contacted their webmaster to inform them of the error.

One of the interesting challenges in modeling a chemical formula is figuring out the correct way to assemble each molecule:

This is frustrating for students who would rather assemble, say, hydrogen sulfide "their" way, ahem...
 Looking each chemical compound up, though, will generally also help you figure out its common name. H2S, for instance, is known as hydrogen sulfide. You probably already know that CO2 is carbon dioxide, but maybe you didn't know that O2 is called dioxygen:


So this chemosynthesis formula begins with hydrogen sulfide, carbon dioxide, and dioxygen. The fuel for the change is the oxidation of the hydrogen sulfide. This source of energy allows all of the compounds to convert--


--into sulfur, water, and formaldehyde!


Good thing THIS isn't what plants do--you wouldn't want to try to breathe formaldehyde!

I think it's important, when kids study processes like photosynthesis, to make sure they understand right from the start that there are other ways for organisms to synthesize energy. You don't want a rigid scientific thinker, who can't imagine any other way for an organism to flourish. You want a creative thinker who can look at the surface and atmosphere of an alien planet and immediately start thinking of all the ways that an organism could use those formidable chemicals and that unusual energy to live!

P.S. Want to follow along with all the other ways that I insert the search for alien life into our homeschool? Check out my Craft Knife Facebook page for photos, resources, and other bits of the weird stuff we do all day.

Saturday, June 20, 2020

How to Dry Flowers in the Microwave


I originally published this tutorial on Crafting a Green World.

Have you ever gone out to collect flowers and then wanted to make some beautiful craft with them RIGHT THEN, but were kind of over the impulse by the time you finished drying and pressing them weeks later?

Unless your attention span is really, really, really short, that won't happen when you use my full-proof method of drying flowers in the microwave. Pop a flower in and two minutes later you'll be crafting away!

This method works with both flowers and leaves--it's particularly great for making leaf collections and saving wildflowers, especially with kids (although preserving leaves with beeswax is also really fun!).

Supplies & Tools

You likely have everything that you need to dry flowers already in your house. Here's what it takes:

Microwave

I know that a lot of y'all don't use microwaves for your food, and that's cool, but you're not going to eat these flowers. If you don't own a microwave, ask a friend if you can come over and dry flowers in theirs for a few minutes.

Unglazed Terracotta Dish Or Tile

You can find one of these at your local hardware or garden store, or in a store like Restore that resells such supplies. I'm using a large terracotta plant saucer that in its free time sits underneath my fern.

Paper Towel Or Paper Napkin

I know, this supply is also pretty gross and environmentally unfriendly, but it's also necessary. The good news is that you can use the same quadruple-folded paper towel or paper napkin for all your flowers, only changing it if it gets stained.

Glass Bowl Or Plate With A Flat Bottom

This is actually the trickiest supply to source, because the glass bottom needs to be flat so that it presses against the flowers. Most plates and even bowls have a bottom lip that makes that impossible.

I make do with a couple of glass food storage containers, but what I wouldn't give for a flat piece of glass that better matched my plant saucer! You could also upcycle picture frame glass or glazed tiles for this--just make sure that there's no metal at all in what you use, since you'll be nuking it in the microwave!

Directions

1. Set up the plant saucer and paper towel.

Make sure the plant saucer is clean and dry, then cover the bottom with four layers of paper toweling.

The paper towel layers keep the flowers from sticking to the unglazed terracotta, and they also pad the flower a bit as it dries, so that it doesn't crumble to bits between the heavy top and bottom layers that it's sandwiched between.

2. Arrange the flowers and leaves in a single layer on the paper towel.

I actually think that it's really hard to arrange flowers in a way that will look attractive when they're dried and pressed flat, so don't be afraid of trial and error here.

3. Cover all of the vegetation with a piece of flat glass.

Don't mash it down or try to manually flatten the flower; just set the glass on top of it.

4. Microwave it!


Set the saucer down in the microwave, and microwave at full power for 20-30 seconds. A delicate, thin flower will be completely dry in 20 seconds, but a juicier flower will take a bit longer.

If you've got something thicker, like a Bachelor's Button or Black-Eyed Susan, microwave it for 30 seconds and then check on it, then microwave it again in increments of 20 seconds, checking each time to see if it's dry. When the flower feels stiff and no longer damp, it's ready! If the petals start to brown then you've microwaved it for too long--try again with another flower, but dial it back by several seconds.

You guys, this method of drying flowers is so easy and fun! My kids and I can go from taking a walk in the woods to making bookmarks out of the flowers that we picked on that walk on the same day. Our leaf collections are EPIC. I actually went looking for more crafts to do with dried flowers the other day, I had such a lovely surplus.

If that surplus lasts long enough, I'll come back in a couple of months and talk to you about making dried flowers into Christmas ornaments!

P.S. Yes, you can use this same method to dry herbs, as well, but if you're feeling wary of microwaves, remember that you DO want to eat your herbs.

Thursday, June 18, 2020

How to Sew an American Girl Doll Face Mask with Ties


My kids don't even play with their American Girl dolls anymore, and I don't even care--I'm still sewing them matching outfits and adding cute DIY accessories to my dollmaking Pinboard.

It's not a non-possibility that when both kids move out one day I'll turn their bedroom into an American Girl doll world and set up a bunch of little handmade scenes that the dolls can prance through wearing their handmade clothing and accessories.

Just... come find me there sometimes and bring me snacks, okay?

Anyway, for obvious reasons I deeply needed to make the kids' American Girl dolls face masks that match the kids' own face masks that I made them. It took some fiddling to get those tiny pleats just right, but I'm super happy with the pattern now, so much so that I've also been selling American Girl doll masks in custom colors in my Pumpkin+Bear etsy shop, and I'm going to show YOU how to make them, too!

Here's what you need to make your own fabric face mask for an American Girl doll:

  • fabric. Unlike with my human face masks, it does not matter what kind of fabric you use for these face masks, because your doll doesn't care whether or not the fabric touching its doll skin is 100% natural. The important things are that the fabric is thin enough to pleat and can be ironed on hot. I HIGHLY recommend using up your fabric scraps for this project!
  • bias tape. I use a poly-cotton blend 1/4" bias tape for my human masks, and the great thing about it is that it also works perfectly for these doll masks. I wouldn't go any wider than this on the bias tape, because you want it to look proportional to the doll. 
  • matching needle and thread. I like a universal needle for sewing the mask fabric, and a jeans needle for sewing the bias tape.
  • iron
  • measuring and cutting supplies

1. Cut the fabric and bias tape to size. Cut two pieces of your fabric to 3.5"x3". Cut two pieces of bias tape 21" long. I really like this photo that shows all the cut fabric sizes for adult, big kid, little kid, and doll masks. The doll mask fabric is the tiny one at the bottom!


2. Sew the fabric. Put the two pieces of fabric right sides together, then sew down both 3.5" lengths with a 1/4" seam:


Turn it right side out and iron the seams to press them flat:


3. Pleat the mask. Because your piece is now approximately 2.5"x3.5", the pleats are a little fiddly to make. First, measure and mark a chalk line approximately 1/4" from the bottom of the fabric. Crease the fabric again a little more than 1/2" above that mark and fold the crease down to that mark. You'll make two more pleats above the first one, each a little more than 1/2" from the top of one pleat to the fold of the next. For your last pleat, take care to make sure that the fabric above the fold visually matches the width of the fabric below the bottom pleat, even if it means that the top pleat is a little uneven. 


Baste the pleats in place.

4. Attach the ties. Fold each piece of bias tape in half and iron the fold to crease it, marking the center. 

Center the bias tape on the middle pleat of the mask, then pin it well, encasing the raw edges of the side seams in the bias tape:


Sew down the entire length of the bias tape, sewing it shut and sewing it to the fabric mask.


Here's what the masks looks like when worn by my kiddos' American Girl dolls:


They're not too hard to tie onto the dolls, 
and I think the proportions look just right!


Want to make a human-sized face mask to match the doll masks? Here's how to make a fabric face mask for an adult, and here's how to make a fabric face mask in two children's sizes.


Whether you're a human or an American Girl doll, please stay safe!

P.S. Want to follow along with my craft projects, books I'm reading, dog-walking mishaps, encounters with Chainsaw Helicopters, and other various adventures on the daily? Find me on my Craft Knife Facebook page!

Monday, June 15, 2020

How to Sew a Child-Sized Fabric Face Mask with Ties


Kids, especially, often don't like to have a lot of extra fabric on them--especially on their faces!--and so even though most adult-sized face masks with ties really would fit most kids, too, it can be nice to size their masks down for a better, less claustrophobic fit.

The most popular mask that I've sold so far in my Pumpkin+Bear etsy shop, actually, is my Big Kid face mask. It's more tween-sized, best fitting kids around the ages of 7-12, but as you can see in the photo above, the Big Kid mask is also a good size for my 14-year-old Syd. It's approximately 7" across the face, and expands to a maximum of 5" to cover the nose and chin.

Size down even more to make a Little Kid mask, which is approximately 6" across the face and expands to a maximum of 4" to cover the nose and chin. It's designed to best fit a kid around the ages of 2-7. With a little kid, especially, you can see how nice it might be to not have all the extra fabric of an adult mask on their face!

These masks are a little fiddly to sew, with the precise pleats and the narrow bias tape, but if you'll bring your sewing skills, I'll deliver your tutorial!

Here's what you'll need to sew one child-sized face mask with ties:

Here's an example of all the different mask starting sizes. The grey fabric at the top is an adult mask, the pink fabric below it is the Big Kid mask, the light blue fabric below that is a Little Kid mask, and the indigo fabric at the bottom is a doll mask.
  • 100% natural fabric. I've seen these masks made with cotton, silk, and linen. Jersey knit is tempting because it's so soft, but I worry that the weave is too loose for it to be an effective face mask. I've also seen masks made from upcycled denim, but to me that seems way to heavy to be right in front of your mouth. For a Little Kid mask, cut two pieces of fabric 6"x4". For a Big Kid mask, cut two pieces of fabric 7"x5". 
  • bias tape. I use a poly-cotton blend 1/4" bias tape, and I think it's perfect for these face masks. For both the Big Kid and Little Kid mask, you need two pieces of 1/4" bias tape, each 32" long. 
  • matching needle and thread. I like a universal needle for sewing the mask fabric, and a jeans needle for sewing the bias tape.
  • iron
  • measuring and cutting supplies
1. Facing the right sides of the fabric together, sew down the two long sides. Use a narrow 1/4" inch seam for both.


This essentially makes a tube. Turn it right sides out and iron to press the seams:


2. Pleat the mask. Put three pleats into the mask by folding the fabric down, then ironing it to crease it:


3. Baste the pleats. Baste the pleats on both sides of the mask:


4. Attach the bias tape. Fold each length of bias tape in half and iron it to crease it. Match the crease to the center pleat of the mask and pin it:


Sew down the entire length of the bias tape on both sides, stitching it to the mask:


If you want to sew a mask to exactly fit a kid, follow these instructions but measure the distance between the kid's jaws for the length and the distance from the bridge of their nose to the bottom of their chin for the width. These two kid masks, however, should fit all of your kittycats until they're quite grown up!


Six Months Ago: Topics in STEAM: Origami
Five Years Ago: Ballerina: Three Years
Eleven Years Ago: Makeup for Momma

Saturday, June 13, 2020

Make an Upcycled Aluminum Can and Silverware Wind Chime

I originally published this tutorial on Crafting a Green World.

One of my favorite parts of windy weather is enjoying the sound of the wind chimes singing from my front porch and back deck. I love them even more because they're handmade!

Do you need some handmade singing in your life, too? Here's how to make your own wind chimes. Mine are upcycled from aluminum cans, silverware, old keys, bottle caps, and metal lids, but feel free to substitute your own stuff needing to be upcycled. I also really like glass bottle wind chimes!


Supplies & Tools Needed

Here's what you'll need:

  • Aluminum can (empty, no label, clean, and dry)
  • Embellishments (silverware, old keys, metal lids, stash beads, bottle caps, etc.)
  • Keyring or paperclip
  • Twine
  • Cordless drill with a drill bit
  • Scissors

Directions

1. Drill Holes In The Can

Use a drill bit that's slightly wider than the width of your twine, and drill a hole through the bottom center of your aluminum can.

Next, drill holes around the rim of the can. I prepped these cans for my Girl Scout troop, and drilled eight holes around the rim of each.

At this time, you can also drill holes through any of the hanging objects that CAN be drilled. The stainless steel silverware that I purchased from Goodwill for ten cents a piece can't be drilled by my cordless drill (you'll see soon how we'll attach those to the wind chime!), but the metal lids and bottle caps can.

2. Prime The Cans

Priming the cans will allow the paint to stick when you embellish them later. Paint-on primer is far more eco-friendly than the spray primer that I used here, but spray primer is a LOT faster when you're priming enough cans for seven kids!

While you've got the primer out, prime anything else that needs it. If you'd prefer a different base color, you can also use a spray paint + primer.

3. Embellish The Can And Silverware

Use acrylic paint or paint pens to embellish any of the hanging elements. You can even decoupage if you seal it VERY well afterwards, or super glue on three-dimensional embellishments.

My Girl Scouts especially enjoyed painting the silverware, although next time I do this project with a group of children, I WILL take my own advice and give some of the pieces a different base color. Some kids create better when they're not faced with all that empty, white space waiting to be filled!

4. Knot The Hanging Cord

To attach a hanging cord, cut a piece of twine, tie a knot to a key ring or even paper clip and pull the twine through the bottom of the can. The keyring will hold the can, and you can hang more wind chime elements from it.

To attach the hanging pieces that have holes, just knot twine around them and tie them to the can using the holes that you drilled around the rim.

5. Lash All Of The Hanging Piece To The Can

To attach the silverware, however, you get to act like a good Girl Scout and learn how to tie a lashing knot! Use this animated tutorial to walk you through the process, and then go forth with your life, knowing how to tie anything to anything else!

Seriously, the lashing knot is dead useful. You're going to be thrilled that you now know how to do it.

6. Seal Your Embellishments

Even if your wind chime will be hanging under a protected eave, you still want to seal anything that you painted or decoupaged. A clear sealant does the trick!

If you're feeling uncertain about any of your knots, you can also hit them with a little dab of super glue.

Pro tip: Noise can also be pollution, and wind chimes should only be mounted where they can enhance nature, not disturb it, so be a good Girl Scout and don't hang your wind chime anywhere that it can annoy someone else.

We've got acres of land and only ourselves to annoy on it, but we still wouldn't put a wind chime anywhere near our bedroom windows. If you've got other people's bedroom windows nearby, be similarly considerate of them!