Saturday, June 13, 2020

Make an Upcycled Aluminum Can and Silverware Wind Chime

I originally published this tutorial on Crafting a Green World.

One of my favorite parts of windy weather is enjoying the sound of the wind chimes singing from my front porch and back deck. I love them even more because they're handmade!

Do you need some handmade singing in your life, too? Here's how to make your own wind chimes. Mine are upcycled from aluminum cans, silverware, old keys, bottle caps, and metal lids, but feel free to substitute your own stuff needing to be upcycled. I also really like glass bottle wind chimes!


Supplies & Tools Needed

Here's what you'll need:

  • Aluminum can (empty, no label, clean, and dry)
  • Embellishments (silverware, old keys, metal lids, stash beads, bottle caps, etc.)
  • Keyring or paperclip
  • Twine
  • Cordless drill with a drill bit
  • Scissors

Directions

1. Drill Holes In The Can

Use a drill bit that's slightly wider than the width of your twine, and drill a hole through the bottom center of your aluminum can.

Next, drill holes around the rim of the can. I prepped these cans for my Girl Scout troop, and drilled eight holes around the rim of each.

At this time, you can also drill holes through any of the hanging objects that CAN be drilled. The stainless steel silverware that I purchased from Goodwill for ten cents a piece can't be drilled by my cordless drill (you'll see soon how we'll attach those to the wind chime!), but the metal lids and bottle caps can.

2. Prime The Cans

Priming the cans will allow the paint to stick when you embellish them later. Paint-on primer is far more eco-friendly than the spray primer that I used here, but spray primer is a LOT faster when you're priming enough cans for seven kids!

While you've got the primer out, prime anything else that needs it. If you'd prefer a different base color, you can also use a spray paint + primer.

3. Embellish The Can And Silverware

Use acrylic paint or paint pens to embellish any of the hanging elements. You can even decoupage if you seal it VERY well afterwards, or super glue on three-dimensional embellishments.

My Girl Scouts especially enjoyed painting the silverware, although next time I do this project with a group of children, I WILL take my own advice and give some of the pieces a different base color. Some kids create better when they're not faced with all that empty, white space waiting to be filled!

4. Knot The Hanging Cord

To attach a hanging cord, cut a piece of twine, tie a knot to a key ring or even paper clip and pull the twine through the bottom of the can. The keyring will hold the can, and you can hang more wind chime elements from it.

To attach the hanging pieces that have holes, just knot twine around them and tie them to the can using the holes that you drilled around the rim.

5. Lash All Of The Hanging Piece To The Can

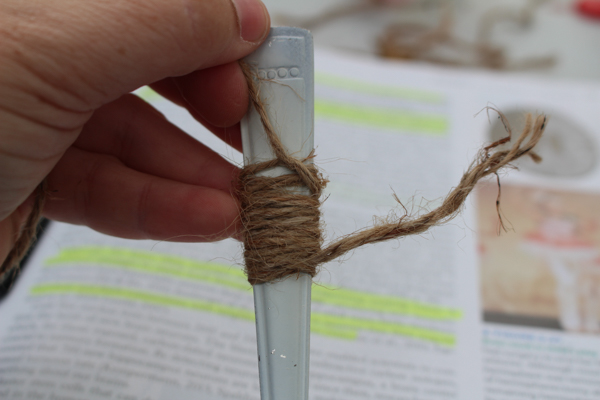
To attach the silverware, however, you get to act like a good Girl Scout and learn how to tie a lashing knot! Use this animated tutorial to walk you through the process, and then go forth with your life, knowing how to tie anything to anything else!

Seriously, the lashing knot is dead useful. You're going to be thrilled that you now know how to do it.

6. Seal Your Embellishments

Even if your wind chime will be hanging under a protected eave, you still want to seal anything that you painted or decoupaged. A clear sealant does the trick!

If you're feeling uncertain about any of your knots, you can also hit them with a little dab of super glue.

Pro tip: Noise can also be pollution, and wind chimes should only be mounted where they can enhance nature, not disturb it, so be a good Girl Scout and don't hang your wind chime anywhere that it can annoy someone else.

We've got acres of land and only ourselves to annoy on it, but we still wouldn't put a wind chime anywhere near our bedroom windows. If you've got other people's bedroom windows nearby, be similarly considerate of them!

Friday, June 12, 2020

How to Sew a Cloth Face Mask with Ties

That's poison ivy on his neck, the poor dude. The two indoor/outdoor cats like to rub against it, then come inside and rub it all over us! In our family, a poison ivy rash is just proof that a cat loves you.

Here is how to make my absolutely perfect cloth face mask with ties instead of elastic!

I took my general sizing from the CDC's recommendation of cloth face coverings, but I took the length down a little, because that extra fabric isn't really doing any extra work. I also adjusted this face mask from my elastic face masks, making the pleated sides more professionally finished and reducing some bulk by doing away with now-unnecessary side seams. 

The result, I think, is a mask that's quick to sew, sturdy and washable,  comfortable and adjustable to a range of sizes.

And although I hate having to see my loved ones wearing face masks, I think these look very nice!

To make this cloth face mask with ties, you need the following supplies:
  • cotton fabric, two pieces that measure approximately 8"x 6". Quilting cotton is my preference for this, although any fabric around that weight should work, for instance most polyester/cotton blends, linen, or silk. I personally think that jersey knit is too light and denim is too heavy, although I have seen homemade masks sewn from both.
  • double-fold bias tape, 1/4"x 2 yards. I'm less picky about the bias tape, mainly because pre-made 100% cotton bias tape is hella expensive and making my own is not the way I want to spend my afternoon. I'm very happy with this bias tape, which is a polyester/cotton blend that I've bought for years from the same supplier
  • Matching needle and thread. My sewing machine is CRANKY, so I'm also picky about needles. I use a jeans needle for this project because my sewing machine protests the bias tape otherwise. For sewing just the two pieces of quilting cotton together you can either test the jeans needle first on scrap fabric and adjust the thread tension, because otherwise it's a little overpowered, or switch to a universal needle
  • iron
  • measuring and cutting supplies.

1. Facing the two pieces of 8"x 6" fabric right sides together, sew down the two long sides. I like a 1/4" seam allowance for this. I also like to use up my weird thread for these types of seams, since you'll never, ever see that thread on the finished mask.


2. Turn the tube that you've made right side out, and iron flat. Run your finger down the seams from the inside, first, to press them outwards so that they're nice and precise when you iron:


If you do that, there's no need to edgestitch those long sides to keep the seam neat. You've just saved yourself a step!


3. Fold and iron the pleats. I like the pleats to be as even as possible, so here's the best way to do it:
  • From the bottom of the fabric piece, measure up and mark in chalk 1", then 1.5".
  • Fold the 1.5" line down to meet the 1" line. Iron to crease. If necessary, pin it to keep it in place.
  • On the back side of the fabric, the top of that pleat should measure 1" from the bottom of the fabric. From that point, measure up and mark in chalk another 1".
  • Fold the 1" line down to meet the top of the pleat. Iron to crease. If necessary, pin it to keep it in place.
  • On the back side of the fabric, the top of the highest pleat should measure 1.5", and there should be about 1.5" of unpleated fabric above it. Measure up and mark in chalk 3/4" from the top pleat.
If you don't have 1.5" of unpleated fabric above that top pleat, don't freak out! Just measure up and mark in chalk the halfway point.
  • Fold the chalked line down to meet the top of the highest pleat. Eyeball to see if the top of the fabric now matches the bottom. If not, adjust it a little so that they look even, then iron to crease. If necessary, pin it to keep it in place.
4. Baste both short sides to keep the pleats in place.


As you can see, you can still use whatever color thread you're looking to get rid of!


If your pleating has skewed the short sides a little, trim them to square them off.


5. Cut your bias tape in half. Now, you should have two pieces that are each one yard long. Fold each in half, iron to crease, then unfold.


6. Sew the bias tape to the short sides of the mask. NOW you need to switch to thread that matches your bias tape!

Match the center crease of the bias tape to the middle pleat on the face mask on each side, and pin into place.


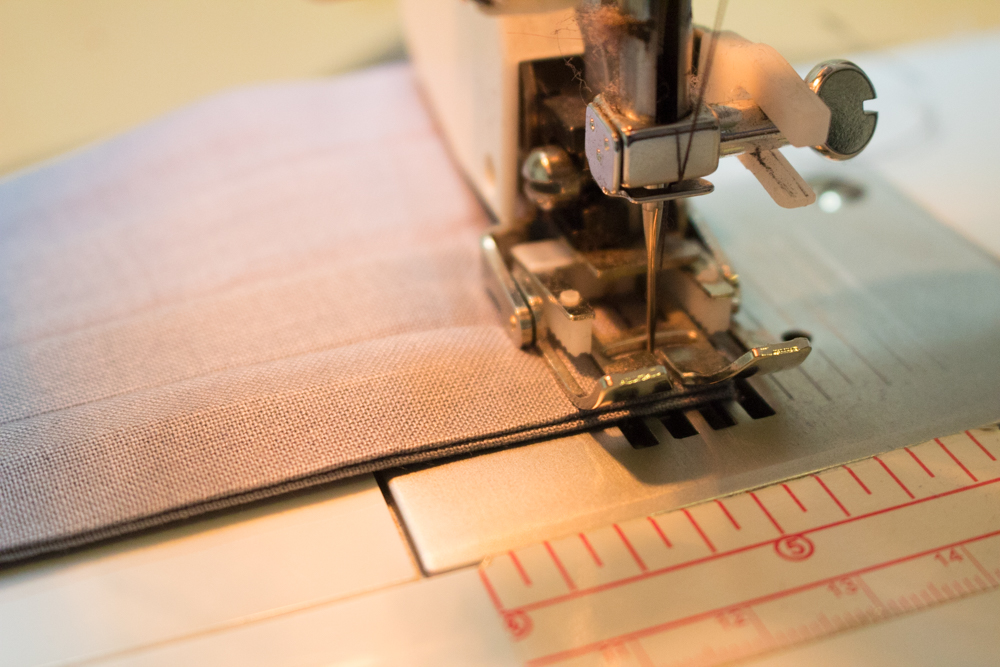
Sew the bias tape closed down its entire length. If you're worried about the fabric feeding unevenly, you can start sewing at the top of the fabric mask down to the bottom end of the bias tape, then reverse it and sew the top tie closed.

Knot the end of each tie, if you like, and then try it on for size!


Here are the approximate finished measurements of the face mask:


This face mask should fit most adults and teens, and even most tweens, but sometimes for smaller faces all that fabric can feel claustrophobic. Next week, I'll show you how to size the face mask down to fit big kids and little kids.

And if you don't want to make your own face mask at all, you can buy a face mask from me. I'll even let you pick all your own colors!

Thursday, June 11, 2020

New for Summer on Pumpkin+Bear: Doll Candles, and Face Masks for Everyone (Including Dolls!)


The only thing that hurts my pandemic-sore heart more than seeing a child's doll in a face mask is seeing that child, herself, in one:


But if they've got to wear them, they're going to be as sturdy and well-sewn as I can make them, and as close to as exactly what the children want as I can manage.

I don't know if I've ever spent that much time getting a pattern absolutely, exactly right. It's an improvement even over the elastic face masks that I was also super happy with, until the elastic started bothering my ears and I decided that the side seams needed more of a finished look.

As usual, bias tape to the rescue! These face masks with bias tape ties aren't quite as grab-and-go as the elastic ones, but even so, tying the ties only takes a few seconds, and these masks are much more forgiving in fit. Syd, for instance, had to have my original elastic band mask adjusted to fit her, but she can easily wear these bias tape face masks in both the Big Kid size, which is that hot pink mask she's modeling in these photos, and the Adult size, which is what I actually sewed for her.

Black on black, of course.

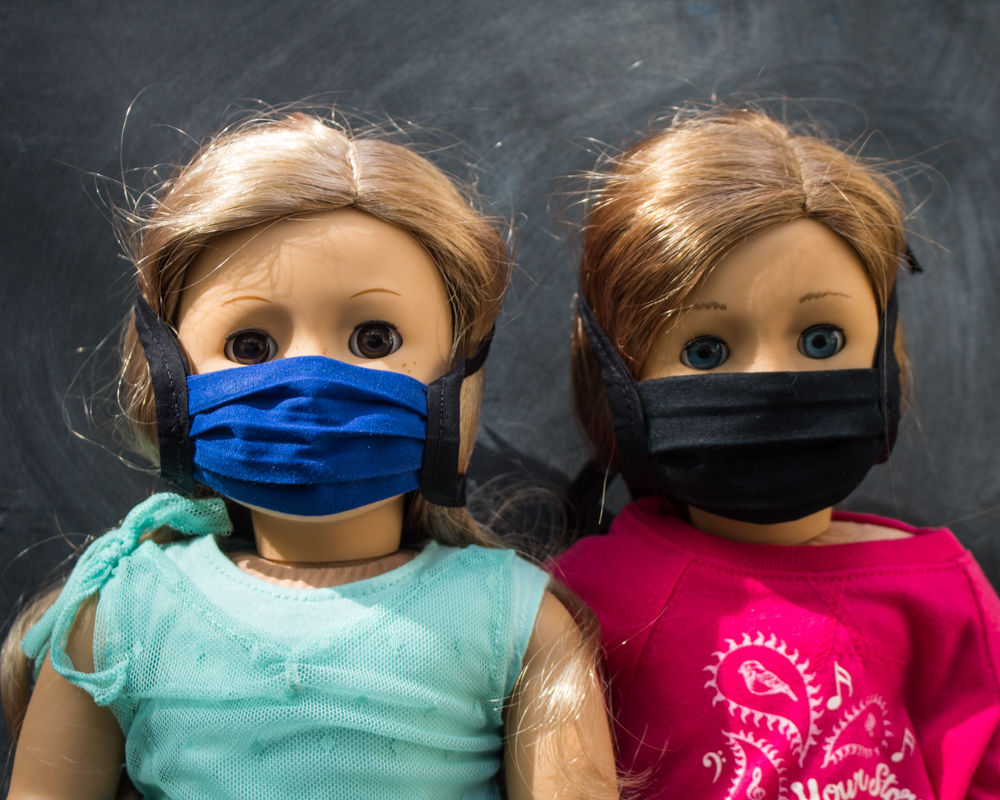
And here's her doll's mask to match, now listed in my Pumpkin+Bear etsy shop, where you can choose to have me make your doll a face mask in your favorite colors, too!


Will is, in fact, modeling her own mask, sewn in the exact colors she requested, and here's HER doll's matching mask:


Sisters!


It can be tricky to make proportions look correct in doll sizes, so I'm pleased that the bias tape that I'm using looks good with both human and doll masks--


--and since I'm working only in solid colors, not patterns, I don't have to worry about prints looking oversized on the dolls.


Here's my assistant and costume designer at work:


And then I snookered Matt into modeling my Adult mask, grey on navy, and additionally snookered him into letting Syd gel his hair for the photos:


I sew the human face masks, also available in custom colors in my Pumpkin+Bear shop, in three sizes, to better fit all the humans I can think of. I've got Adult masks--


--Big Kid masks that I think should work for most kids ages 7-12 (and older, as you can see!)--


--and Little Kid masks that I think should fit most kids who are old enough to wear a mask through at least age seven:


My etsy listings include all of my exact measurements, though, and so whenever possible, I recommend that you measure your human first.

I'm sewing all of my masks, human and doll, as custom orders, which means that when you order you can pick the exact color of bias tape (a poly/cotton blend)--


--and exact color of mask fabric (100% cotton):


The bias tape and fabric match closely, so you can go completely monochrome if you want, but the mask is double-sided (and reversible!), and there are two sets of bias tape ties, so if you want a different color for everything, that's a totally reasonable jam and I'll make it for you.

My other new listing is completely unrelated to the pandemic--whee! I was looking through some photos of busy summers back in the Before-Times, and I found a whole photo shoot that I did with Syd while Will was at Space Camp one summer. We had a birthday party for her dolls, wherein she baked and frosted a doll-sized cake, and I made a rainbow of doll-sized candles for it:

It was magical:


Is it possible that I did not understand at the time what a precious and small fairy child I had? I can't have possibly treasured enough my time with this magical little creature. I mean, you guys. She made a TINY BIRTHDAY CAKE. FOR HER DOLLS. AND THEN SERVED IT TO THEM ON DOLL-SIZED DISHES.

I can't even.

A friend and I have this shared fantasy, in which time travel is invented, and we each go back to find ourselves on some hard day we were just about to have with two very young children. You know, one of those days that just dragged on, where the kids kept wanting books read to them and getting all their clothes dirty and you'd trek outside with them to the sandbox and then back in for a snack, get out the play dough and then read fourteen books, tromp them all to the park and then back home for some coloring, and you'd look at the clock to see if it was maybe almost time for your co-parent to get home and see that it was something like 10:00 am and sigh and make another snack.

So, we're each going to show up at our old houses on one of these mornings, and our old selves will of course recognize us, because we're US, just old, and we'll tell our young selves to take the day off, have a nap, order a pizza and eat it while reading a book, etc. And they'll go off to do that, having no problem leaving their kids with us--because, you know, it's US--and we will spend that long, tedious day absolutely treasuring the chance to be with those precious and small fairy children again. We'll read them picture books! And change their tiny little clothes! Dig with them in the sandbox! Make them a plate of cheese cubes and strawberries! It's a win-win situation, ideally to be repeated weekly.

Until time travel is invented, I guess old photographs will have to do. 

Oh, and there are rainbow doll candles now in my Pumpkin+Bear etsy shop.

Saturday, June 6, 2020

I Made a Jewelry Organizer from a Vintage BINGO Game

I first published this tutorial on Crafting a Green World.

I originally bought this vintage BINGO game from a thrift store when my two kiddos were a toddler and a preschooler.

Fun fact: EVERY little kid loves BINGO, and this game stayed in heavy rotation on our games shelves for a shocking number of years. Heck, we still played it even after we lost a couple of the numbers. Knowing that some numbers will literally never be called just adds to the challenge!

My little kids are teenagers now, and their plan for the ultimate game night is no longer BINGO but Cards Against Humanity (don't tell them, but I took out all the really awful cards before they saw them, mwahaha!). Normally, I'd happily donate something that we no longer use to another thrift store for someone else to discover and love for another decade, but my philosophy is that I do NOT donate something that's broken or has missing pieces.

Not only is it a waste of effort and space to put that thing on a thrift store shelf, but it's disrespectful to the person who might then buy it and be stuck with it. And what if they're frustrated and decide that it's not worth it to buy secondhand anymore? Then you've just done a disservice to the entire planet, all because of one BINGO game!

I spend a lot of time carrying around potential anxiety. It's a thing.

tl;dr: a super-old BINGO game that's missing some vital pieces is not something that you donate. It's something that you upcycle!

The first project on the list: I turned the vintage BINGO board into a jewelry organizer. It was a quick and easy project and it turned out great. Here's how I did it!

Supplies


You will need:

  • Vintage game board with pegs: You'd be surprised how many board games include plastic parts that would work for this project. If you've got an old Trouble game or some Hungry Hungry Hippos, then you're all set. Want to get crazy? Throw up a dartboard with darts!
  • Paint (optional): You can embellish your jewelry organizer any way you'd like.
  • Sharpies: Sharpies draw on plastic like a dream, so a Sharpie is a great choice for adding enough color to allow the embossing on this BINGO board to stand out.
  • Picture Hanger: Since I'm using this as a jewelry organizer, I upcycled a couple of jewelry findings for this. If you're looking for the cheapest solution possible, paper clips are totally valid picture hangers, I declare.
  • Hot Glue: Hot glue also works well on plastic.

Directions

1. Scrub Your Vintage Game Board

This BINGO board was actually really gross, once I stopped playing with it and instead took a good, close look at it. Fortunately, some dish-washing soap, a scrub brush, and time to air dry put it to rights.

2. Use A Sharpie To Highlight Details

As you can tell from my photos, all that white on white is just about impossible to photograph, and it's just as impossible to see the details of. I wanted all the little numbers, especially, to stand out clearly, which means that I had to add the contrast myself. I traced over all of the embossings with a navy Sharpie.

Don't the numbers stand out so much better afterward?

3. Clean Up Any Sharpie Mistakes

If you get Sharpie somewhere you don't want it, the secret is to remember that a permanent ink still has to be soluble in something, or it wouldn't be a liquid. With Sharpies, the liquid that the ink is soluble in is plain old rubbing alcohol.

That means that if you don't want that Sharpie ink somewhere, you just have to wet a cotton swab in rubbing alcohol and gently dab the stain away.

It's magical (Psst! Don't forget to only buy biodegradable cotton swabs!)!

After the rubbing alcohol is dried, you can also seal your jewelry organizer if you really want to. I didn't seal this project because it's not going to get any hard wear, and if it randomly does, the Sharpie is easy to reapply.

4. Add Hangers To The Jewelry Organizer

Since the BINGO board is so light, this was another thing that I could play around with. I hot glued brooch clips to the top of the BINGO board, and then just clipped them onto the nails to mount my new jewelry organizer.

This DIY jewelry organizer is working really well for me, although if I'd been less selfish, I'd have put it in the kids' bathroom instead. Don't you think a game board jewelry organizer would look especially cute in a teenager's bathroom? The next time they're in a major snit about something, a little whimsy might remind them to chill out just a tad.

Or maybe that's just wishful thinking. I'll let you know if my whimsical jewelry organizer keeps ME from wallowing in my next major snit, okay?

If you've got any cool ideas for upcycling BINGO numbers or BINGO cards, please share them with me in the comments below. I mean sure, I've given a new life to one part of this old game, but there are lots more left to remake.