Showing posts with label yarn. Show all posts

Saturday, May 30, 2020

How to Latch Hook


This post was originally published on Crafting a Green World.

If you had a grandma who lived in the south in the 1980s, it's quite likely that you already know how to latch hook.

You might think that you don't remember lying on the living room carpet, working on a Rainbow Brite latch hook kit while your grandma sits in the recliner behind you and watches 60 Minutes, but I assure you that once you pick up a latch hook, it's all going to come flooding back to you.

There's one big difference, however, between this project and those awesome 80s kits, and that difference is what makes getting back into latch hooking a terrifically eco-friendly activity: whereas latch hook kits almost universally use acrylic yarn, the latch hook creation that you make yourself, from a pattern that you create yourself, can use ANY YARN YOU WANT. Any yarn! Wool yarn! Plarn! Cotton yarn! Or, my favorite of all yarns to use--STASH YARN!

Latch hooking is a fabulous stash-busting project. Creations can be as big or small as you want, with pile as short or long as you like, meaning that you can find a way to reuse any amount of leftover yarn.

Supplies & Tools


Here's what you need to get started:

  • Rug canvas. This is a mesh canvas, ideally 100% cotton, that's stiff and sturdy and able to stand up to heavy usage. Use your least precious scissors to cut it to size! Rug canvas isn't all you can latch hook on, however. Any mesh, such as produce bags or plastic canvas, is workable, providing you use the appropriate size latch hook.
  • Latch hook. The standard size of latch hook that you can buy online, at any larger craft store, or in a latch hook kit will work for rug canvas. If you want to play around with smaller canvases, use a smaller latch hook.
  • Yarn. My yarn stash is upsettingly large, which is largely why latch hooking is so appealing to me at the moment, and my solemn vow is to use ONLY my stash until it's mostly resolved. You, however, can use any standard-weight yarn that appeals to you. Cotton and wool are both great choices, but you can also play with bulky blanket yarn if you size up your canvas accordingly.
  • Template To Measure Yarn. Your template should be half the desired length of yarn. Cardboard is the ideal material.
  • Scissors.
  • Thread and a tapestry needle.


Directions


1.  Measure And Cut The Yarn


In this post's top image, the yellow and blue piece is made from 2" yarn; the purple and blue piece is made from 4" yarn. The process of latch hooking will halve that length, plus take away another fraction of a centimeter for the lark's head knot.


Cut your template to be as wide as the desired final length of nap of your project. To make the yarn pieces, wrap the yarn a zillion times around the template, and then cut straight across one side. You'll be left with a zillion pieces of yarn that are exactly twice as long as your template is wide--perfect!

2. Cut Your Rug Canvas To Size And Transfer Your Design


Cut the rug canvas at least .25" to .5" wider on all sides than you'd like the finished size to be, so that you have room to fold and hem the raw edges later.

It's possible to draw a design directly onto the rug canvas, although I've never found a material that works perfectly for this. Chalk rubs off, pencil rubs off more slowly, Sharpies smudge... try a few possibilities, and see what works best for you.

3. Begin Latch Hooking!


There are a few slightly different methods for latch hooking, but this is the way that my grandmother taught me. If it doesn't start to feel intuitive to you after a few tries, snoop around the Internet and see if you like someone else's method better. Hold the latch hook in your dominant hand, and use your non-dominant hand to double up one piece of yarn.


Wrap that yarn around the latch hook, and hold both the latch hook and the yarn in your dominant hand.


Push the tip of the latch hook underneath the strand of mesh that you want to attach the yarn to. This step can be a bit tricky, so mind that you don't snag the mesh with the latch.


Open the latch, then use your non-dominant hand to draw up that loop of yarn. Both strands of yarn should be pulled to one side of the latch, then the other way around the hook.


Pull the latch hook back out of the rug canvas. You might have to keep hold of the ends of the yarn at first to maintain tension, but then the latch will close itself as it's pulled through the canvas, and the hook will pull the yarn out with it.


What you're left with is a perfect lark's head knot! You can pull the ends of the yarn to tighten it, and then go on and make a billion more!

4. Hem The Raw Edges


When your creation is finished, turn it over and observe how lovely it looks from the back! All that's left is to hem the raw edges. Thread a tapestry needle with a thick thread or embroidery floss.


Fold one raw edge over so that one row of canvas lines up with another, then hem the canvas by catching just those horizontal strands of canvas with your thread.


Continue this for all sides of your creation. If you don't sew, you can also bind the raw edges of your project with iron-on fold-over binding (there's some especially made for rug canvas!), or, if you don't anticipate your creation being machine washed or put to heavy wear, just hot glue it, Bro!


The possibilities for latch hook creations are endless! Yes, you can make actual rugs, but wall hangings are also popular, as are pillow covers. I've seen wreaths, tote bags, and chair covers, and I'm nearly positive that someone in my family had a pair of latch hooked slippers back in the 1980s. If you, too, hung out with a Southern grandma back in the early 80s, please tell me what YOU latch hooked!

Thursday, December 21, 2017

How to Make a Fuzzy Ball Christmas Ornament

The kids and I made the cutest Christmas ornaments ever quite by accident:


I was attempting to make a wool dryer ball (which I did, and I'll show you how another time!). I didn't want to use wool roving, so I was instead using wool yarn. I made a giant pompom out of the yarn, and was about to stuff it into some old tights, tie it off, and toss it into the wash, but Syd got to it first and started playing with it.

I let her play while I worked on another, and she played with the wool yarn pompom so much that she unraveled all of the yarn strands and turned the pompom into a adorable, soft, fuzzywuzzy fuzz ball. We have a couple of these now sitting on random tables as fidgets, but the cutest couple I strung up on the tree as ornaments, and we adore them.

And here's how we made them!

You'll need some chunky yarn, 100% wool. Something like this wool yarn would work, although ours is this wool from We are Knitters.  

Make a giant pompom around your hand by holding the end of the chunky wool yarn between two of your fingers--

--then wrap the yarn loosely around your hand approximately 50 times:

Slip it off of your hand and use another piece of yarn to tie it off tightly in the middle:

Cut through the loops and you'll have yourself a giant wool yarn pompom!

The pompom would be super cute as a gift topper, but if you play with it a while, fidgeting it around in your hands (which won't be hard, as it feels super soft and awesome!), the yarn strands in your pompom will unravel, and now it will look like this:

Ugh, I love it so much!

To make your wool fuzzy ball into an ornament, thread a nice color of embroidery floss through that tie in the center--

--and tie it into a loop.

It's so pretty!!!

We're not really ornament buyers, and so although we've got a few store-bought ornaments on our tree, I do love that the vast majority of our ornaments are vintage ones from Mammaw and Pappaw's Christmas tree when I was a kid, and homemade ones from our years celebrating Christmas together as a family.

I'm really crushing my goal this year to have an ornament for every single branch of our Christmas tree!!!

Wednesday, April 20, 2016

Pom-Pom Pals: Our Obsession Begins

As of now, knowing what I know, having done what I have done, I cannot fathom how, until last week, I have NEVER made a pom pom by hand. 

I mean, what?

I LOVE making stuff by hand! I LOVE quick and easy little crafties! I love cute little crafties! I love kid-friendly little crafties!

Friends, how have I NEVER made pom poms before, and even more outrageously, how have I NEVER introduced the children to pom pom making before?!?

Fortunately, as of last week, that has all been rectified. A publicist sent me a free copy of Pom-Pom Pals: Animals, and as the kids and I are winging our homeschool for these couple of short weeks (grandparent visits, big fashion shows, and a multi-day camping trip with friends have been keeping us quite busy without my set-in-stone by-the-week lesson plans, thank you very much), one day last week it, along with a documentary on the brown bear of Alaska, a Math Mammoth lesson and some cursive copywork, a couple of books about rocks, and a long hike through our woods to hunt for morels seemed like just the way to spend our school day.

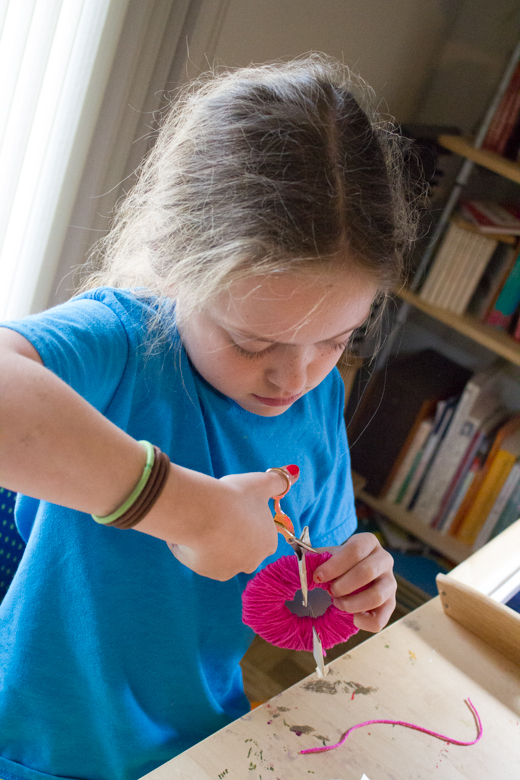
It's not often that we start a craft with me just as ignorant about how it's done as the kids, and it was fun to see them read the instructions, more or less, grab the yarn, and set off making pom poms without looking to me for direction:


Syd let me help her make one of the pom poms for her lion--

--but Will worked completely independently the entire time--

--taking breaks only to snuggle the cat:

I mean, of course.

We actually don't work with yarn that often, which made this particular project much more of a process-based, explore-the-yarn-and-all-its-possibilities project than one in which a specific result must be obtained, and yet, with the addition of hot glue and felt and more miniature pom poms--


 --adorable results were obtained:


We spent part of today making more pom poms, just for fun--

--and I have to say that when I searched Pinterest for "pom pom crafts," because of COURSE I searched Pinterest for "pom pom crafts!!!", I found so many ridiculously cute things to do with them that I see no reason to ever stop making pom poms.

In fact, I kinda hope to make it to the craft store this weekend to buy yarn in Girl Scout colors, because I'm thinking pom pom hair bands would look SUPER cute with their Girl Scout uniforms, right?