Showing posts with label stamping. Show all posts

Tuesday, January 26, 2021

Crafting with Teenagers: DIY Pinback Buttons

 Okay, this isn't so much a teenager-specific craft, because Syd has been happily creating her own 1" pinback buttons since she was a brilliant and adorable three years old:


Check out my amazing little peanut in action!


Yes, she's always been a creative and mechanical genius.

Even though we never go anywhere to show them off anymore, Syd still likes making pinback buttons (here's the exact button machine I've apparently owned for over a decade now!), and I'm pretty sure that this is a universally appealing teenager craft. Here's one of the handmade Black Lives Matter pinbacks that she made near the start of the pandemic, when we were quarantining our way through a homeschool social justice unit:


I REALLY miss homeschooling that kid. 

A little while ago, Matt and Syd were cleaning out the garage, when Syd came across a box with the moveable type for my business card stamp inside (the one we own is the same brand and very similar to this one, only mine is self-inking, which after a decade of use I actually think I do not prefer!):


She asked if she could use my stamp set to make her own pinbacks, and even though putting the moveable type of my business card back on the stamp afterwards was a PAIN IN THE ASS, I told her yes because I love her.

Want to know what kind of custom stamped pinback a teenager would make?

This kind:


It's very on-brand!

And now I'm on the lookout for more fun stamped phrases that would fit on a 1" pinback button, EVEN if it means having to redo that whole entire business card stamp again, ugh. I also think they would be a great canvas for creating adorable and intricate little artworks... if only I can convince my local artist to make a bespoke creation or two!

I even found a way to display them that doesn't require going out into society:

If you, too, want to sneak some learnin' into DIY pinback button making, here are some ways we've incorporated homemade pinbacks into our homeschool:

  • slogans. Syd did this for our social justice study, of course, but it would also be super fun to let kids make their own campaign buttons for civics or history studies.
  • party favors and giveaways. One year, the kids designed their own Girl Scout cookie pinbacks and gave them out as "prizes" when customers bought a certain number of cookies. It was a terrific kid-led marketing exercise!
  • moveable alphabet. When Syd was a pre-reader, I used an alphabet punch set and made several sets of moveable alphabets, using the button base but not the pins. The kids used them interchangeably with the rest of our moveable alphabet collection for all kinds of early reading exercises.

  • chores. For a couple of years, when the kids were especially high-energy and rascally, I kept a bag of a billion chore buttons in a little bag on a hallway table. Each of the million times a day that the kids did something ratty--punched her sister, left her half-eaten lunch in the middle of the floor, lost her shoes for the fiftieth time that hour, etc.--instead of dealing with the emotion or reasoning or whatever behind the infraction like a good parent, I'd just wearily tell her to go pull a chore. They were all small and random tasks that would take anywhere between 5-10 minutes to complete, stuff like picking up all the sticks in the backyard, or spray cleaning the bathroom sink, or vacuuming the couch with the handheld minivac. When the kids weren't in trouble they could also pull a chore to earn quarters, and if a kid's infraction had been something ratty towards her sister and I was mad about it, I'd sometimes make her pull a chore and complete it, and then hand her a quarter and make her GIVE IT TO HER SISTER, MWA-HA-HA! I don't necessarily think chores as punishment is a sound discipline strategy, but each time I did welcome the chance to lower the everyday chaos in our household a tiny bit.
Interested in even more unsound but highly effective discipline strategies? Well, you'll barely even find those on my Craft Knife Facebook page anymore, but you WILL find a bunch more random craft and homeschool projects and a lot of chaos energy that will probably make you feel a ton better about your own household!

Friday, November 10, 2017

How to Metal Stamp Dog Tags

Metal stamping, especially metal stamping dog tags, is actually super easy, accessible and with a short learning curve, and great for kids. My kid who isn't really into crafts still gets into metal stamping, and my kid who is REALLY into crafts does all kinds of creative things, making cute slogans and gift tags for friends, etc.

I'm not that creative with it, but I do think it's fun and you can make some handy stuff. I took Syd's good idea and made some gift tags for Christmas gifts,  and a couple of tags with my name on them to put on my stuff--I am always leaving my stuff places!

The "real" metal stampers will tell you that you need a steel anvil, and that's awesome if you've got one on hand, but just between us, we've always done all of our metal stamping on top of a flat brick. I'll show you later how it makes the tag look a little janky on the back, but honestly, it's fine.

Here's what you actually need!

  • metal stamps. These 1/4" stamps are easier to wield--


--but I think that the look of the 1/8" stamps is nicer and more sophisticated. 
  • something to stamp. We played a little with stamping on coins, and it works, but I bought this pack of dog tags--


--and that's what we mostly use. I like that there are tons of tags in the set, so that when there's a group who's all stamping with us,  I can encourage them to do a couple of practice tags first. I HATE feeling the pressure to do something right the first time just so I don't "waste" supplies!

I haven't tried stamping on flattened soda cans yet, but it's on my to-do list!
  • something to stamp on. This steel anvil is the best surface to use, but we get fine results by using a regular old brick.
  • masking tape.
  • hammer.
  • fine-point Sharpies (optional).


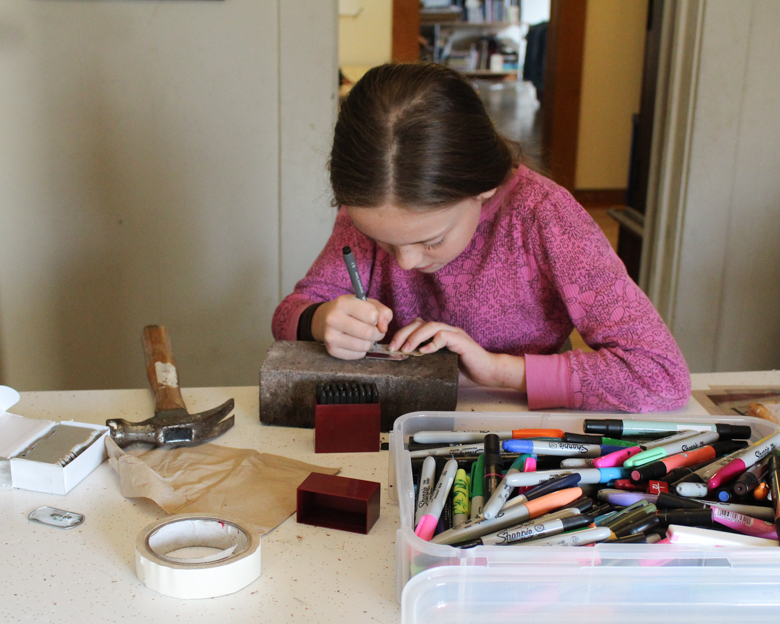
1. Set up your dog tag on the brick, with masking tape to hold it down. The masking tape also makes a good guide line, although don't try to line your stamp up against it, or you'll end up stamping over the top of the tape and your stamped image won't be as crisp.

2. Starting at the center of your word, hold the stamp level against the dog tag and give it one hard whack with your hammer:


If you're using dog tags and a brick, it won't hurt your stamp to whack it more than once to make the image, but it's likely going to blur your image to do that. So just harden your soul, screw your courage to the sticking place, and WHACK that stamp!


Here's what the back of the tag will look like:

That raised pebbling is what I meant by the back of the tag looking kind of janky--it would be nice and smooth if you used a steel anvil, but YOU try throwing your dog a birthday party and having dog tag making the party craft, and YOU buy a steel anvil for every party guest to use at the same time!

That's right, a brick works just fine, doesn't it?

3 (optional). Use a fine-point Sharpie to carefully trace the lines of your stamping:


It gives the stamped image a nice contrast to the plain metal tag. 

I left these stamping supplies out on our playroom table all week after the dog's party, and this morning I came by and noticed all the tags that the kids have stamped off and on all week. Here are a few of them:
I made this one as a reusable gift tag.

Syd made this one. I have no idea what her plans are for it.
I encouraged the kids to make these as future SWAPS.


Will made a dog tag for the dog!
 This project seems to appeal to everyone. It's highly satisfying to whack something with a hammer as hard as you can, and my non-crafty kid seems to appreciate the fact that she can make a whole tag in less than five minutes. At the same time, if you like fiddly work, you could also spend ages of time getting all your letters lined up just right, or making each tag ever more decorative, or even buying more fonts or symbols if you wanted.

Or you could do what I do, and make another gift tag for someone every time you pass. Next time I go in there (to sort LEGOs, which is my other endless project currently running), I need to make a tag for Syd's ballet teacher that will go with her Starbucks gift card, Syd-made card, and letter from me explaining in detail that she is the best ballet teacher my kid has EVER had.

Thanks for being so awesome, Victoria!

Friday, August 2, 2013

Adventures in Letterboxing

I understand that geocaching is the big thing now, but my kiddos and I are pretty old-school.

We like letterboxing.

It's like searching for pirate's treasure, this following of clues to find the letterbox cache. And it's really kid-friendly! The girls each have their own hand-carved stamp--
Willow's stamp
Syd's stamp
 --and once I get them to the correct starting location, they can follow all the clues independently.

Of course, since letterboxing is old and somewhat out of style by now, not all the letterboxes are current. The girls were REALLY disappointed, for instance, when the letterbox for The Bridge behind the Child simply wasn't there anymore, and they kept coming back to the spot over and over, searching again and again just in case they'd missed it the last time. Fortunately, all our local letterboxes are in pretty great spots, and often in places where we've never been before, so even though they didn't get to find a letterbox here, they did get to stalk deer--
This is Willow, stalking a deer.

--and do some creek stomping--


--and play on a playground:


It's even more exciting, though, when the letterbox pans out, and after following all the clues and a bit of searching--

--you find one!

You have to carry your own ink pad for the stamps, and a pen or pencil to write the date and a short message in the logbook:

The girls stamp the letterbox's stamp into their nature journals, and add a few sentences about the adventure while I look through the logbook and check out everyone else's stamps--
the founder of this letterbox


--and then we sneakily hide the letterbox again in the same spot, and surreptitiously make our way back to the well-trodden path.

I considered letterboxing on our recent road trip, but a friend who also tends to take long road trips said that she and her kids used to geocache on their trips, and it turned into a huge time suck for them--they'd think they were stopping for fifteen minutes to check out a quick geocache, but then that would turn into forty minutes, and then there'd be another cool-looking geocache just right near by that they might as well check out since they were in the area, and all of a sudden that fifteen-minute break to stretch their legs while finding a geocache had turned into half the day, and there was no way they were making it to their camping site that night.

That sounds SO like something that I would do, especially considering that one of our fifteen-minute local letterboxes can easily take half the day, what with climbing trees, following interesting-looking ants, playing on a strange playground, eating a snack on the grass, drawing dragons in the nature journals, grubbing in the dirt, etc.

That's a productive day for a couple of homeschooling kids, but a letterboxing road trip is probably out of the question.

For now...

Sunday, May 15, 2011

Stamping the Stars

Draw the stars:
 

Have the Momma cut out the stars.

Add paint:


The full tutorial for our hand-drawn, hand-carved rubber stamps is over at Crafting a Green World. Normally, I use the rubber stamp carving blocks to carve stamps for myself, simple shapes such as the ones that I use for gift bags, but the girls had so much fun drawing stamps for themselves that I may soon teach Willow, at least, how to use a linoleum cutter so that she can do her own rubber stamps from start to finish.