Showing posts with label sewing patterns. Show all posts

Saturday, August 6, 2022

WIP: I Finished Piecing the Road Map Quilt Top

 Matt refers to this as "mission creep."

My original objective was to make my baby niece, who likes cars, a simple little roll-up road play mat. 

Then I got left at home alone for too long, started a five-hour podcast about a school group that got stranded on Mount Hood, and things... got out of hand.

This is the Fishing Net quilt pattern. I'm not proud of my visual design sense (although I do think it's improved over the years), so thank goodness that one of my kids has a GREAT visual design sense and the patience to hold my hands and reassure me as I continually disturb her to ask things like, "Would it be weird to have some black roads and some grey roads?" or (holding up several coloring pages of this quilt pattern that I have filled in with crayon) "Do you like the way I colored it here better, or do you like this one better? Or this one?"

She liked the alternating grey and black roads better, so that's the way I started planning it!

I DID iron all my fabric, but animals kept lying down on my layout and then the robot vacuum got into it, as well.

Syd was also required to look at every piece of flannel that I own and help me come up with believable prints and colors for a road map, then lay them where they ought to go:

Here we have a park, two neighborhoods, two construction zones for the epic mini Tonka trucks I bought her, and a ginger cat without a thought in his head:


Now I've added a couple of rivers, a couple of parking lots, a dino dig site, and an ocean:


And now I've got everything!


I was actually just finishing cutting out the pieces for this quilt as Matt and Will pulled into the driveway, home from Peru. Neither of them are big communicators, especially when they travel, so imagine my surprise when instead of coming straight in for hugs and celebrations and snuggling on the couch, Matt backed away from me when I met them on the driveway and asked for a COVID test.

And then imagine how I felt when both their COVID tests were so chock-full of COVID that they pulled up that dreaded second line right away. By the time the fifteen-minute timer actually went off, I'd already partitioned off part of the house, fetched the air mattress and extra sheets and towels, and was busy sobbing quietly to myself in the bathroom.

Friends, let's follow Grandma's on the Roof rules with your loved ones: if you're traveling and wearing your mask like a baller but have to take a six-hour bus ride with some maskless stranger wetly coughing behind you the entire time, maybe just, you know, go ahead and tell your loved one at home that. And then a couple of days later, when you're finally heading home and you arrive at the Chicago airport and you've got just a four-hour drive ahead of you and you start thinking, "Huh, I'm starting to feel kind of crappy," maybe just shoot your loved one a quick text along the lines of "Hey, feel like shit, COVID tests on the driveway before hugs!" That way your loved one, who's barely seen two sentences in a row out of you for the past two weeks and misses you a LOT, can, you know, modulate her excitement with some fair warning.

I mean, hypothetically.

ANYWAY, you know what spending the entire next day after a huge disappointment disassociating from your sadness does for you?

It makes you SUPER PRODUCTIVE!

The instructions had me piece big triangles as if they were log cabin quilt blocks. It was a little tricky to wrap my head around, but I only had to pull out the seam ripper once, so yay for me!

So then the quilt actually comes together as four big triangles, with that one road that runs corner to corner pieced last as a sash:

Especially considering that I wasn't really able to picture how it would look pieced, even with all the pieces laid out (darn my visual-spatial thinking deficits!), I am SO happy with how this road map quilt top turned out!


My next visual-spatial reasoning challenge is to add just enough applique road map embellishments to give a hint as to the purpose of each different part of the map, without having the embellishments look tacky or ugly or overwhelming or too restrictive.

Saturday, July 23, 2022

The Fantasy Quilts I'm Working On because Everyone Has Left Me Home Alone


Syd and I have pretty big plans while Matt and Will are taking a graduation trip to Peru. They may be going to Machu Picchu and Lake Titicaca and tasting chocolate and pisco, but Syd and I bought a month of Disney+ and checked Stardew Valley out of the library. So. We're pretty well set.

We've also been keeping the house really, really clean, because we are not the messy ones, and it's really, really quiet, because Syd doesn't get up until noon and sometimes works in the evenings and other times has sleepovers with friends. 

So. I've been pretty much going stir-crazy.

I've gotten way too invested in this history of salt that I'm reading, and I've gotten WAY ahead on my freelance writing schedule (synchronized with getting WAY behind on getting paid, so that's fun), and dang, has it turned out to be a week for quilting!

Above is the quilt that I'm sewing Will for her dorm room bed. She's not going off to college until January, so I've got plenty of time (and it's actually going to be one of her Christmas presents, so don't tell!), but it's also fiddly as hell, involves a couple of new-to-me techniques, Will's not here to get a peek at it and spoil the surprise, and I'm bored.

I started off trying to directly copy this Lily the Dragon quilt, and you can see that I'm using that exact template, too, but then I got way into the weeds and it looks super different entirely because I do not know that ticker tape technique the author references and could not figure it out. 

Fortunately, I think that what I did end up doing, which was just ironing fabric scraps willy-nilly to interfacing, looks fine and probably better suited to my kid's grown-up nerd girl aesthetic than the look in the original blog post. Also, Syd helped me with the color arrangement of the wings, because I never mastered my preschool Montessori sensory work

I bought the grey Kona cotton background fabric and the black flannel backing fabric, but the entire dragon is made from scraps and stash. I tried to stick mostly to quilting cottons, but the white spikes (and yes, each spike is a completely novel shape so each one had to be numbered, traced, numbered again, cut out, traced again, numbered again, and cut out again ugh) are some kind of dimensional bottomweight leftover from a pair of pants Syd cut up for some Trashion/Refashion Show garment once upon a time. And hiding there in the blue wings are pieces of a flannel shirt and a skirt that my tiny youngling child once wore. 

I did the same thing for this quilt below:


That black flannel is what I didn't need for Will's quilt backing, that grey flannel was in my stash but uncut so I KNOW I must have bought it for something specific (oops!), but all the rest of the flannel is scraps, including my greatest triumph, that brown that I had exactly enough left of for just those half-square triangles. 

Most of that other flannel is leftover from the Great Jammy Pants Craze of 2014

I don't know if you can even tell what this quilt is supposed to be, but basically, it's me deciding that my baby niece might like one of those road play mats for her upcoming birthday. 

And then I got left alone in the house for too long and I went overboard. 

Like, why a felt play mat, when a quilted cotton play mat would be so much more versatile and sturdier? 

And if I'm doing what's essentially a quilt, I might as well make it an actual quilt size so it's even more versatile. 

I love this one, so I'll just buy the pattern and copy it. 

And now I'll spend the entire day going through my flannel scraps and figuring out which ones look vaguely road play mat-themed. 

Syd had to come to my rescue with her design sense superpower again, but I think I got it nailed down. Green is going to be a park, green plaid is going to be neighborhoods, brown is for construction zones (and maybe a dinosaur dig site), black plaid is parking lots, and blue is water. I picked out some interesting scraps that I can use as applique fabrics to add trees and houses and whales and dino bones.

I think I made it WAY too big, though. It's only a throw, but a throw size seems really dramatic for a road play mat. 

Oh, well. You don't want the world's largest play mat, then don't leave me to my own devices for this long! 

Wednesday, February 9, 2022

A Skeleton Mermaid Tail Snuggle Sack, For She Who Contains Multitudes


A few years ago, I sewed each of the kids one of those snuggle sacks that were super trendy at the moment. You know the ones that are like lap blankets but also sleeping bags... sleeping bags for your legs, I guess? They're perfect for all those times when you want a comfy blanket but you also want your hands free for snacks and a book.

I used two layers of thick fleece for my snuggle snacks, and Matt made the patterns for me. Will got a giant fleece shark, complete with a pelvic fin and both dorsal fins, and large enough that she could use it as a sleeping bag, if she wants. It's quite amusing to walk through the family room and see her kicked back reading on the couch, half-consumed by a giant fleece shark.

Syd got a mermaid tail (it was the Year of Mermaids, you might recall), but I purposefully made hers a little shorter, because you obviously can't be swallowed up to your smile by a mermaid tail! It can go up to the small of your back, max--any further and people wouldn't glimpse you and accidentally assume that you're a real mermaid. So Syd's mermaid tail snuggle sack was perfectly Syd-sized, with mermaid scale fleece on the outside, and she looked like a real mermaid that whole winter every time she wore it.

And then she hit a growth spurt, and by the next winter her mermaid tail snuggle sack was about a foot too short.

Back when I sewed those first snuggle sacks, I'd had another idea for a snuggle sack that wasn't quite right for my littler kid who loved mermaids sincerely and intensely, nor for my bigger kid who liked dark stuff, but liked sharks even better.

It turned out, though, that my other idea was absolutely perfect for a kid who has grown up a few years and now loves both mermaids AND dark stuff.

Finally, the world is ready for my skeleton mermaid tail snuggle sack!

But first, Matt had to make me a pattern. Have you ever imagined the skeletal structure of a mermaid? It looks, I assure you, exactly like this:

You only have to draw one half of your mermaid's spine, then trace and cut it on the fold:

After that, the snuggle sack is the easiest of builds--WAY easier than that dang shark! I copied Syd's original mermaid tail pattern onto black fleece, added a couple of feet to the top to accommodate that growth spurt, then appliqued the skeleton onto the front piece before sewing it together:

So. Much. APPLIQUE!


The inside lining of the skeleton tail is stash red fleece, because that's the inside color of mermaids, of course!

I LOVE how Syd's skeleton mermaid tail snuggle sack turned out:


It's cozy and warm and makes you feel like a mermaid without being, you know, twee or cringe or whatever word the kids are using these days. 

Saturday, July 24, 2021

Pattern Drafting: How to Draft a Curve

 This tutorial was originally published on Crafting a Green World in 2017.

Enlarging an existing pattern by a fraction of an inch is a pretty common thing to have to do. Sometimes a pattern won't have the seam allowance that you want, but usually you need to do it when you're copying an existing article of clothing. 

 For instance, to make my daughter's Junior Ranger vest, above when it was still a WIP, I copied her Girl Scout vest. That gave me the footprint of the completed vest, sure, but I still needed to add the seam allowances. Therefore, I needed to enlarge the pattern on all sides. 

 That's easy enough to do on the straight sides, but what about the curves? I don't have much of a steady hand for drawing, and I don't like the look of wobbly, hand-drawn patterns anyway. 

 Fortunately, there IS a method for drafting a curve onto a pattern that is steady, accurate, and fool-proof. Here's how you do it! 

 1. Extend the line from each adjacent side of the curve to the proper seam allowance. In these photos, I'm extending my seam allowance by .25". In the photo above, see how I've extended the line from the adjacent side by .25"? That's where my new curve is going to end on each side. 

  2. Rest your transparent ruler against the drawn curve, so that the straight edge represents your desired measurement. Draw one short, straight line there. Move the ruler slightly down the curve, and repeat. Do this over and over and over again until you've done this down the entire curve. You'll see that all of your many straight lines will, at their intersection with each other, mark out your new curve. 

 3. Re-trace the curve and neaten it. I usually trace over my finished pattern in Sharpie, then label it with the size and sewing instructions before cutting it out. 

 When drawing a pattern from scratch, you'll find a French curve indispensable for making those curves, but for enlarging an existing pattern or creating seam allowances, this method is the most accurate for preserving the original cut of the piece.

Saturday, July 17, 2021

How to Add a Hood to a T-shirt Pattern

This tutorial was originally published on Crafting a Green World in 2017.

 When you're sewing a T-shirt, adding a hood is one of the easier modifications to the pattern that you can make. It's a modification that also looks a lot harder to do than it is, so get ready to impress all of your friends with your mad sewing skills! 

 To make a hooded T-shirt, you will need: 

  a good T-shirt pattern. I'm using the Oliver + S School Bus T-shirt pattern, which you can read my review of here

  a well-fitting hoodie. It should be made from a fabric similar to what you'll be using for your T-shirt, so a sweatshirt with a hood won't work here. I don't always love tutorials that ask you to copy something that you already own--if you own one, do you really need to make another?--but this is the quickest and easiest way to draft a hood pattern. Other options include reading up on how to draft a hood pattern from scratch, or simply asking your buddies if they have a hoodie that you can borrow for five minutes. 

  jersey knit fabric. The blue fabric for this shirt is upcycled from other T-shirts, but the black fabric is store-bought jersey knit. You can see that they both work well here. 

  sewing supplies. Don't forget the ballpoint needle for your sewing machine! 

 1. Trace the hood. I have some extra tips for copying an existing piece of clothing here. Seriously, masking tape is your friend! 

 Note the general shape of the hood in the photo above. No matter what hood you copy, that general shape should be the same. Pay special attention to the curve at the neckline--that's key to a hood that will fit the shirt's neckline well. 

  2. Make modifications. You want your hood to slightly overlap at the front--you can get a view of what this will look like both in the top photo here and in the top photo of my review of the Oliver + S School Bus T-shirt pattern. The degree of overlap is up to you, and there's a lot of wiggle room. 

In this shirt, for instance, the overlap is maybe an inch, but I sewed a second hooded T-shirt this weekend with a hood overlap of at least three inches, and although it felt like a lot as I was sewing it, it looked totally fine and normal on the kid, and she declared that she liked it even better than the first hood. So there you go. 

 3. Add seam allowance. You'll need seam allowance for the bottom and the top/back, and a hemming allowance for the front. I've gone into detail in a previous post about how to enlarge a curve on a pattern, so you should be all set! 

 4. Cut out the pattern pieces and sew. You'll need two hood pieces, and you'll immediately sew them together to create the complete hood. You won't need the neckband from your T-shirt pattern. Instead, you'll sew the hood on in place of the neckband, centering the back seam of the hood onto the center of the back piece of the T-shirt, then sewing all the way around, overlapping the front pieces of the hood at the center of the front piece of the T-shirt. 

 You can further modify this hood by adding trim to the front edge or the middle seam (think pony mane or dinosaur spikes), or making it deeper and taller (think wizard's hood).

Monday, May 10, 2021

Two Free Pairs of Bike Shorts Were Living in My Fabric Stash


Syd mentioned that she needed a new pair of comfy, stretchy exercise shorts for dance class, so into my fabric bin I dove!

I knew I had some spandex fabric leftover from our DIY leggings kick of three years ago, but just between us, I suspected that there wouldn't be enough spandex left to sew anything, because we hit that leggings kick pretty thoroughly!

I'd forgotten, though, that noses had been snubbed at the camouflage spandex that I'd bought, foolishly thinking that the kids would find it cute. They did NOT find it cute back in 2018, but it turns out that in 2021... well, it's still not their favorite print, but it's certainly good enough for a couple of pairs of bike shorts. I'm a little disappointed that there is just no way to match thread to the camouflage fabric, but it doesn't bother me so much that I'd put forth any effort to find a solution, either (edit: apparently, this is the solution. Now I know, at least!)

Syd's grown enough that now I can use my favorite Patterns for Pirates leggings pattern for her as well as Will. I love the fit of these leggings, the range of sizes in the pattern, and the customization options. Home-sewn leggings are still more expensive than store-bought, fast fashion leggings (and honestly, at the moment our local Goodwills are also absolutely stuffed with LulaRoe leggings, too, so you don't even have to go the fast fashion route to find cheap leggings), but the leggings that you sew yourself using a free pattern from the fabric that's just been sitting in the bottom of your fabric bin for the past three years?

Well, those are basically free leggings, and well-sewn, free bike shorts exactly when you need them, no trip to the store required, is way better than sweat shop clothes!

Monday, January 7, 2019

Pattern Review: T-Shirt Panties from the Kid's Scrundlewear Pattern

The kids tie-dye T-shirts at every single Girl Scout camp, and I (secretly) never think they come out cute, but it turns out that cutting it down into underwear actually makes the tie-dye look a lot nicer.

The younger kid needed more underwear, and why should I spend an hour going to the store and back to buy them when I could instead spend an hour researching underwear patterns, buy one for the approximate cost of a ten-pack, and then spend another five hours sewing seven pairs on my home sewing machine?

I don't know. Why do I do anything?

Well, the fit is better, for one. The prints are cuter, and just what the kid likes. I don't have to worry about some other little kid in a sweatshop laboring 14 hours a day making them; I'm in my 40s, and I only sew when I feel like it. I can use up my stash fabric sewing these, so that's pretty cool.

Also, I hate shopping, but I like to sew. Case closed!

For this project, I bought the Kids' Scrundlewear pattern from Stitch Upon a Time. It might not have been the best economical decision, because my kid is in the top size for this pattern, but I liked it the best of all of the digital patterns that I browsed and I think I'll get my eight dollars' worth from it.

Actually, I think I already did!

I have a ridiculous stash of T-shirts for crafting. Most are T-shirts that the kids have outgrown or that are damaged beyond repair, some are shirts that were given to me specifically for crafting with, and few are ones that I thrifted because they fit somebody's passionate obsession and surely will come in handy for something.

Such as this adult-sized My Little Pony T-shirt that I bought for a dollar several months ago:

Excuse the awful lighting in all of these photos. It is never not raining, and it is, to the children's great sadness, seemingly never going to snow.

Yep, all seven of the kid's new pairs of underwear are sewn from T-shirts. I mixed and matched the waist- and leg-bands from other shirts, and came up with some really cute combinations, I think:

Both kids love sharks, and the younger kid wore this shirt, a gift from her grandparents, until she could no longer squeeze into it. Now she can wear it again!

 One thing that I'm pretty proud of is my ability to sew with knits, no starch or stabilizer necessary. If a piece gets fiddly I will starch it, but all of these came together quite quickly and easily:


The Scrundlewear pattern also doesn't call for any elastic, which is nice because I then didn't have to buy a single other thing to make all this underwear. And I could have made the kid twenty pairs, what with all the T-shirts in my stash, but I started to get bored with sewing multiples of the same thing and decided that I'd see how she does with seven pairs for now:

I like the pairs with the T-shirt graphics the best, but the kid's favorites are these striped pairs.


The kid reports that they're super comfy, they wash well, and although I was worried that she'd think them too bulky, since T-shirt fabric is thicker than underwear fabric, she hasn't complained and so I'm certainly not going to bring it up!

Next up: I bought this adult underwear pattern, and so now it's time to attempt to sew something that will meet the approval of the REALLY picky kid...

P.S. I sew LOTS of things, usually pretty weird. Want to see it all? Follow along on my Craft Knife Facebook page!

Friday, October 19, 2018

Homemade Leggings for Nearly All of Us

Because Matt said that he didn't want leggings, the silly boy. Leggings are way more comfortable than basketball shorts and tracksuit bottoms, Dude!

I just want to say right off that you don't sew your own leggings to save money. Sweatshop leggings bought from big-box clothing stores that earn an F on their Fair Trade practices are waaaaay cheaper. Like, WAY cheaper. And when I can find thrift store leggings that don't have holes or grass stains, I snatch those babies up!

So why DO you sew your own leggings?

So that you can make dreams like this come true for your kid:


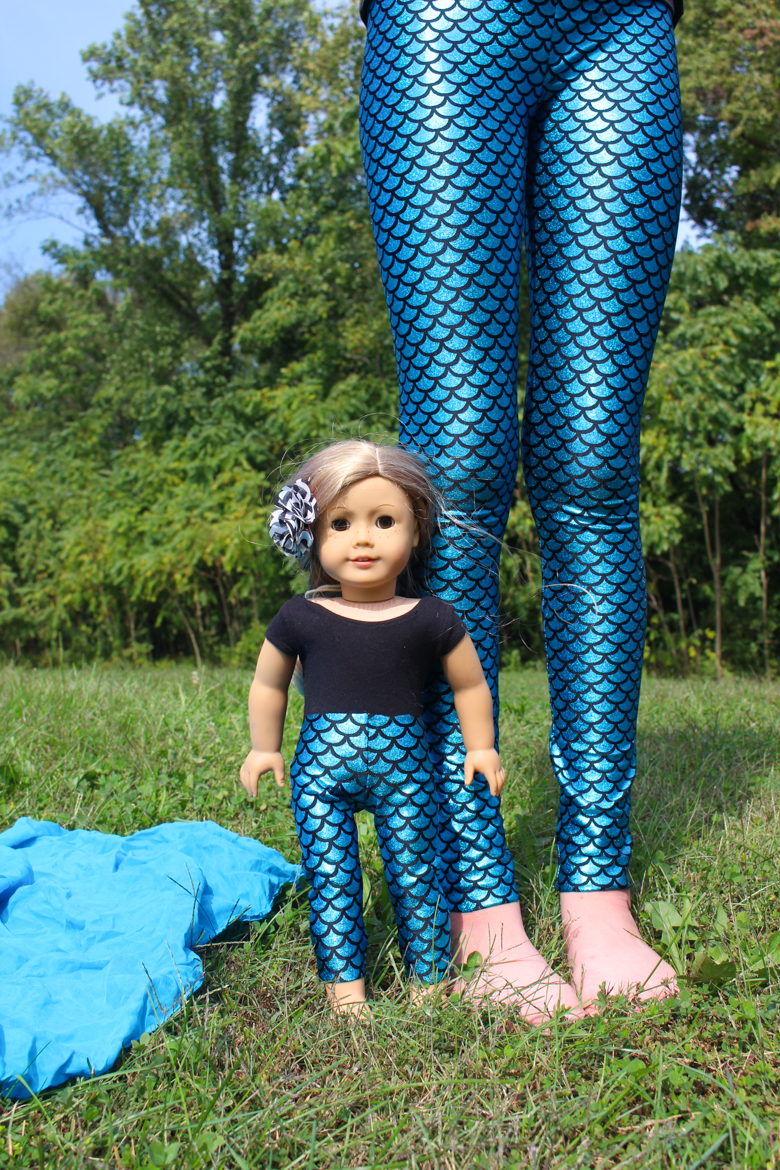
I mean, it helps if your kid's dream is to own leggings made from holographic blue mermaid scale fabric...

This particular fabric (actually, as is all of the fabric that I'm going to show you) is from Spandex World. Yes, I shopped at an online store named Spandex World. I really liked them for this project, in particular, because they offer the stretch percentages for many of their fabrics. If you're just starting to sew leggings, so you can't yet tell what will work just by feel, that's even more helpful than shopping in person in a place where that info isn't offered, in my opinion.

Also, I feel like half the craft bloggers out there have a free leggings "tutorial," but they generally all consist of "Step #1: Trace around a pair of leggings that you already own. Step #2: Sew those leggings," and I call hijinks. That nonsense works for little kids, when their bodies are just straight little noodles, but it's not happening for tweens, teens, and adults.

My own personal Step #1 was to search for a digital pattern that I liked, and buy it. For Syd's leggings, I bought the Felicity Sewing Patterns Children's Leggings pattern, and I'm perfectly happy with it. I had to fiddle with it a bit--which is another thing that's MUCH better than "trace your clothes," because with a real pattern, it's so much easier to make the waist a size 10 and the length a size 12, with a low-rise waist, like so:


Here are my new favorite things about sewing leggings:
  1. You don't have to hem the bottom of full-length leggings. I do hem the bottom of the biker shorts that I've made Syd, but when they're ankle length, I think they look nice unhemmed.
  2. There's only one pattern piece. It's super quick to cut out.
  3. They sew up so quickly! Yesterday, I was able to whip up a new pair of leggings for myself in the hour between when we got home from the apple orchard and when I had to leave for the Girl Scout volunteers meeting, and that included the time  that it took for Syd to dress her doll in a complete outfit to complement the doll leggings that I also sewed in that time and to do a photo shoot of me and the doll wearing our leggings.
Another favorite thing?

This kid was absolutely THRILLED about her new mermaid leggings, and *I* made that happen!

I wanted to do a photo shoot of Syd's new leggings, because if I'm going to buy the fabric and make them and they're going to turn out awesome then heck, yeah, I'm going to show them off! Excuse how much eye makeup Syd is wearing in these photos, because apparently mermaids just wear a lot of eye makeup.

Do you see how she laid out her play silks to look like a mermaid's fin? This kid.


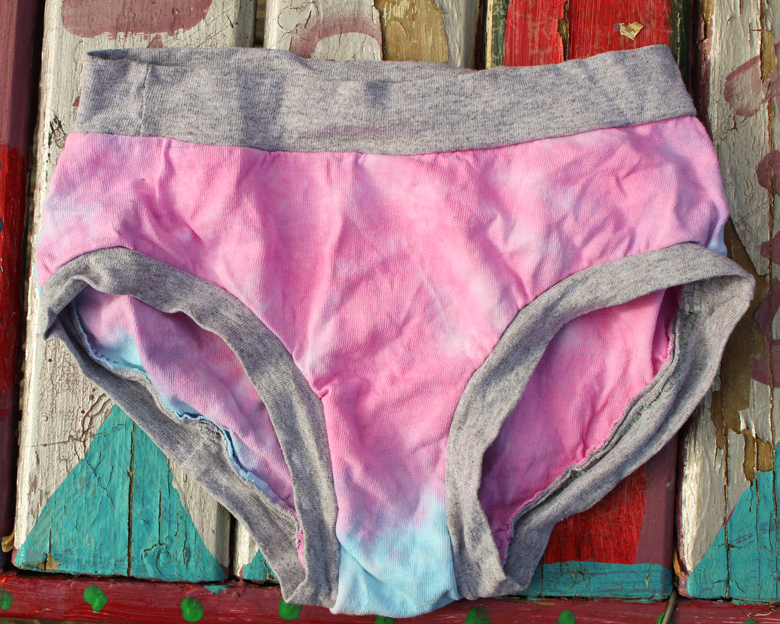
I don't have an immediate use for four-way stretch fabric scraps, so I've been trying to use up every square inch in this leggings project. There was enough leftover from Syd's full-length leggings to make her a pair of bike shorts--


And you might also have noticed that her American Girl doll has her own pair of mermaid leggings. The American Girl doll leggings pattern is from Artsy-Fartsy Mama, and I've sewn it a billion times now. I don't always put elastic in the waistband, and in consequence, I've cut several inches from the waist of the pattern.

Of course, if I'm going to make special leggings for Syd, then I've got to make leggings for Will, too. Will is probably the worst person to sew leggings for, because she's crazy rough on clothes, and unlike her sister or I, will not take pains to keep something nice. Sigh. Nevertheless, here are her brand-new leggings (along with bike shorts for Syd and leggings for the American Girl doll from the scrap fabric):


Will's pattern is the Patterns for Pirates Peg Legs pattern, which is so good that I absolutely cannot believe that it's free! I would pay good money for such a terrific pattern! There are even free add-ons so that you can do even more cool things to the leggings! The sizes run pretty small, but they go up really high, so it works out. I used an XL for Will, and she claims that it fits well and didn't even want me to put elastic in the waistband.


And here are the leggings that I made for ME!


I need to do some troubleshooting on my pattern, grr. I didn't cut the waistband that it wants you to cut, fold in half, and then attach to the leggings for Will, because I thought I'd end up adding elastic but then she didn't want it, so I forgot all about the waistband for me, and now that my leggings keep wanting to slip down, I'm wondering if duh, that fold-over waistband might have helped! So that will be another little project to try before I'm confident that I'm confident with my own leggings pattern.

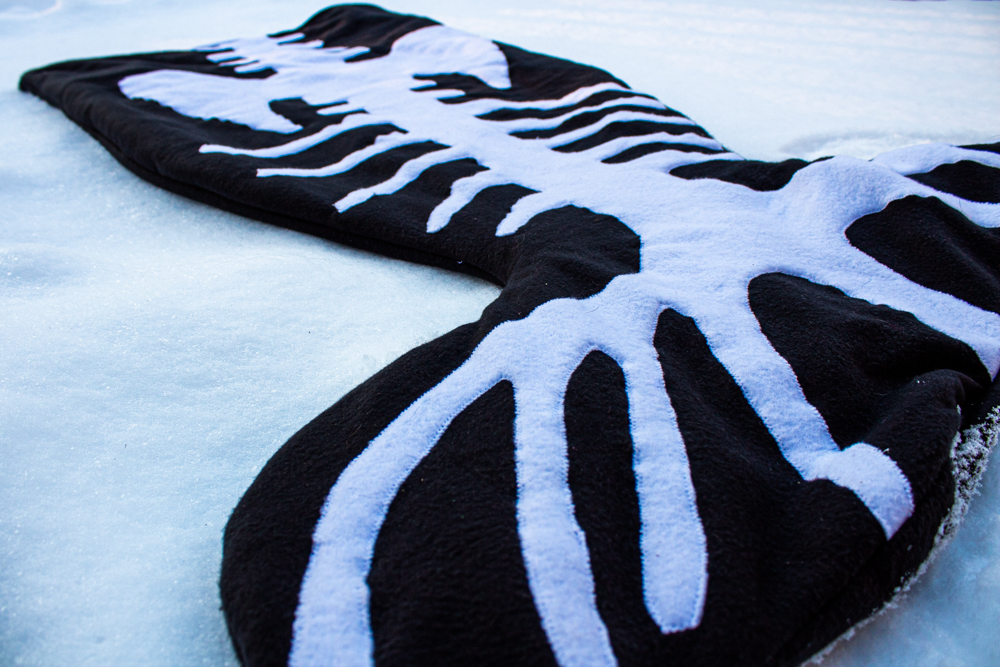
Syd, however, loves her doll's new galaxy leggings, which came out just perfect:


Like I said, these are NOT money-saving leggings, but they're not too terribly expensive, either, especially considering that I can make two kid leggings plus one doll pair from one cut of fabric, so there will more than likely be at least one more order from Spandex World in our near future.

After all, they do make that holographic mermaid scale print in several colorways...

AND Syd says that she'd also really like a skater dress, also in mermaid scale fabric, so there's another fun sewing project to get to!

P.S. Want to follow along on more of my crafting adventures? Check out my Craft Knife Facebook page for lots of pics and WIPs!

Wednesday, February 22, 2017

I Made My Kid a Shirt

Does anyone actually like making muslins?

Not me! It's a freaking waste of fabric, that's for sure, although fine, I get even more pissed if I sew something and it doesn't fit correctly, especially because it would have fitted perfectly if I'd JUST SEWN A FREAKING MUSLIN FIRST.

I compromise with myself in that, when I DO sew a muslin, I try to make it something that will be wearable in its own right, if it works, but out of fabric that I won't be sorry to repurpose or turn into dishrags if it doesn't work. It's even fun, because I'll make fabric choices that I wouldn't normally make, such as the time that I sewed this muslin for Syd out of mismatched stash fabrics that she loved but that I didn't care for and probably wouldn't use in garments of my own design.

How do I end up with stash fabric that I don't love? I cave to kids in fabric stores, that's how.

I've made two recent "muslins that aren't really," both for Syd's Trashion/Refashion Show garment for this year. One was this basic upcycled jean skirt--

It's sewn from a pair of jeans that fit Syd well in the waist but that were too short and had holes in the knees, to boot--mending the knees of kid-sized skinny jeans is a nightmare repair job! The front piece is stash flannel, the blue dotted bias tape is the last scrap leftover from this hooded towel, and since it wasn't quite long enough for the entire circumference I made two matching pieces of bias tape from the pink flannel to piece it out to fit. See? A little too mismatched for my taste, but the kid likes it just fine.

--which I'm just now realizing the kid tricked me into making shorter than I'd like her skirts to be, but which also let me test out the construction method and desired look for the denim/formalwear fabric skirt that I'm entering in the show.

The other muslin is for a shirt that I'll also sew out of formalwear, but from stretch fabrics that allowed me to substitute jersey knit for the muslin. This turned into a shirt that I really love:

Why yes, I AM using the crap out of that "Think Spring" backdrop for as long as the drive-in owners keep it up. Fun fact: the other night, while I distracted the kids, Matt had to sneak over there in the dark and fix it back, because we came home from fencing and ballet to find that some hooligans had changed it to "Thick Pricks." And THEN about five minutes after Matt had gone out, I saw the lights from a police car RIGHT IN FRONT OF OUR HOUSE! I was about to tear outside and run over to inform the cops that Matt was FIXING IT, DAMMIT, but just then he came back in and said that he'd just finished, and the lights were just a police car pulling over a speeder. Whew!
 I really love the hood that I drafted, and the light blue/black color combo. The black fabric is stash jersey knit of indeterminate origin, and the blue fabric is from the backs of two matching Girl Scout camp T-shirts from a few years ago. I didn't think of the idea before I'd already tossed a couple of outgrown Girl Scout T-shirts, but now I'm saving them all for a couple of someday quilts.

The sleeves of this pattern were too short--see? So glad that I sewed a muslin!--and I was sewing late at night while Matt was finishing up a Girl Scout cookie booth with the kids and I managed to sew the ribbing on one cuff inside out. I just sewed the second cuff to match.

I altered the pattern piece of the sleeves to lengthen them after this, but then it turns out that the formal blouse that I'm using for part of the shirt in Syd's Trashion/Refashion Show garment doesn't have enough material for full-length sleeves, anyway, so that shirt will actually have half-length sleeves.

Oh, well. I like this pattern well enough that I'm sure I'll make a few more. You can't have too many long-sleeved hooded T-shirts!