Showing posts with label pandemic. Show all posts

Monday, July 18, 2022

We Finally Finished the Southern Indiana Ice Cream Trail (and It Only Took 2 Years...)

Indiana murals are always SO weird.

The Southern Indiana Ice Cream Trail was one of our first Pandemic Projects, and just might be the last of the original 2020 projects that we were still working on this summer. 

Like, we completely finished our collective obsessions with charcuterie boards, paint-by-numbers--

--and recreating TikTok recipes. I visited every Girl Scout camp in the state, and the kids ate every kind of Little Debbie that there is. Matt made every one of the 100 Famous Cocktails. One of my kids earned a YouTube Silver Play Award. The other kid grew a lot of strawberries.

But in between all of that and afterwards, ice cream remained part of the family dream. 

We're just barely in Southern Indiana, so almost every ice cream place involved quite a long trek. And for most of them, we also found something scenic to do, whether it was visiting a water wheel, a German cemetery, and a locally famous geologic feature, or uncovering the Masonic roots of historic downtown:


In Salem, we also happened upon an interesting piece of local history. This raid is one of the "lands" of Conner Prairie, a local living history park, and the kids and I have visited 1863 Civil War Journey numerous times (including that one time that led to both kids unconscious on the ground and a security escort out of the park), but it had never occurred to me to check out any of the REAL raid sites!


This ice cream trail was a really great way to spend time together during a pandemic. We got to get out of the house and do a little sightseeing, but it was easy to stay in the fresh air and away from strangers. We got to bring Luna along--


--and the long car rides recreated some of the things I best love about travel, that isolated space for conversations and audiobooks and sibling quarrels, as well as siblings having fun and acting adorable:

The only sad thing about the ice cream trail is that way back in 2020, when we first started it, the prize for completing every stop on the trail was a T-shirt. So OMG you would not even have wanted to see Matt's face when we finally made our final stop a few weeks ago (The Happy Hive in Marengo, although alas, we didn't have time to also go to Marengo Cave like I'd planned, because the younger kid had to work that night. I'm hoping to snooker everyone into visiting the cave with me later this summer), and then Matt finished filling in the forms with our address and T-shirt sizes, sent them in, waited by the mailbox for several more weeks, and then got a package with pictures of ice cream cones all over it in the mail, and...

Sometime in the past two years, the prize switched from T-shirts to caps. Matt is SO sad!

If you see Matt doing errands around town wearing his Discover Southern Indiana Ice Cream Trail cap, can you please tell him that it looks really cool and wow, visiting every stop on the ice cream trail must have been a major accomplishment to earn such an awesome cap? Because I have tried telling him that the real treasure was the friendships we made along the way, but he is not buying it and would way rather have had a T-shirt.

P.S. Want to follow along with my craft projects, books I'm reading, dog-walking mishaps, and other various adventures on the daily? Find me on my Craft Knife Facebook page!

Thursday, November 4, 2021

Nutcracker Masks


I have decided that the holiday between Halloween and Christmas is, in our family, The Nutcracker. 

I mean, it's got all the holiday trademarks. It's time-consuming! It's expensive! Out-of-town family comes to visit! There are decorations! Children are delighted! There is MUSIC!!!

Last year, the absence of The Nutcracker put a pall over the entire season for me. This year Nutcracker is back, and I am determined to treasure every second of it.

Syd is reprising her role as a little lad in the party scenes of the ballet, and I wanted something extra festive to send her off to rehearsals in. I found this awesome Nutcracker print at Spoonflower, reworked Syd's favorite mask design to have a single front piece, and fussy cut the Nutcracker Prince battling the Mouse King to fit:


I LOVE it! It's the perfect size for this mask.


These cord locks and nose strips have been working great, although the cord locks definitely have the potential to wander away. The nose strips have a sticky back, which helps them stay in place while I sew them.

I made Syd two identical masks so that she can trade them out when she gets sweaty. The costumers will have custom masks for the children to perform in, and I'm excited to see if they'll be cute, but they're definitely not going to be as cute as this:


The boring black mask is MY Nutcracker mask, because I have to dress like a bandit when I volunteer backstage, and the costumers certainly won't be making ME anything cute!

P.S. I'm working on a Nutcracker Pinboard, because obviously it's not a real holiday if it doesn't have a Pinboard, so hit me up with any ideas you find!

Tuesday, April 7, 2020

How I Sew Re-Usable Fabric Face Masks


I HATE sewing these re-usable fabric face masks, and I hate seeing my family wear them. 


I mean, they're not hard or unpleasant or tedious to sew or anything, and the designs look fine and fit well and everyone says they're comfortable, but I hate everything about this pitiful, uncertain shot in the dark in the face of a global pandemic.


Or, in Syd's case, when she's chilling on the couch reading the instructions for her new DIY screenprinting kit:
 

I'm not going to tell you how to sew these face masks, because I don't want to be responsible for you. Instead, I'm gong to tell you how, when I wasn't busy reading every book ever written, *I* sewed these face masks, roughly following the tutorial printed in my local newspaper, since this is also the type of re-usable fabric face mask that local medical establishments, nursing homes, and non-profits that serve the community are asking for. 

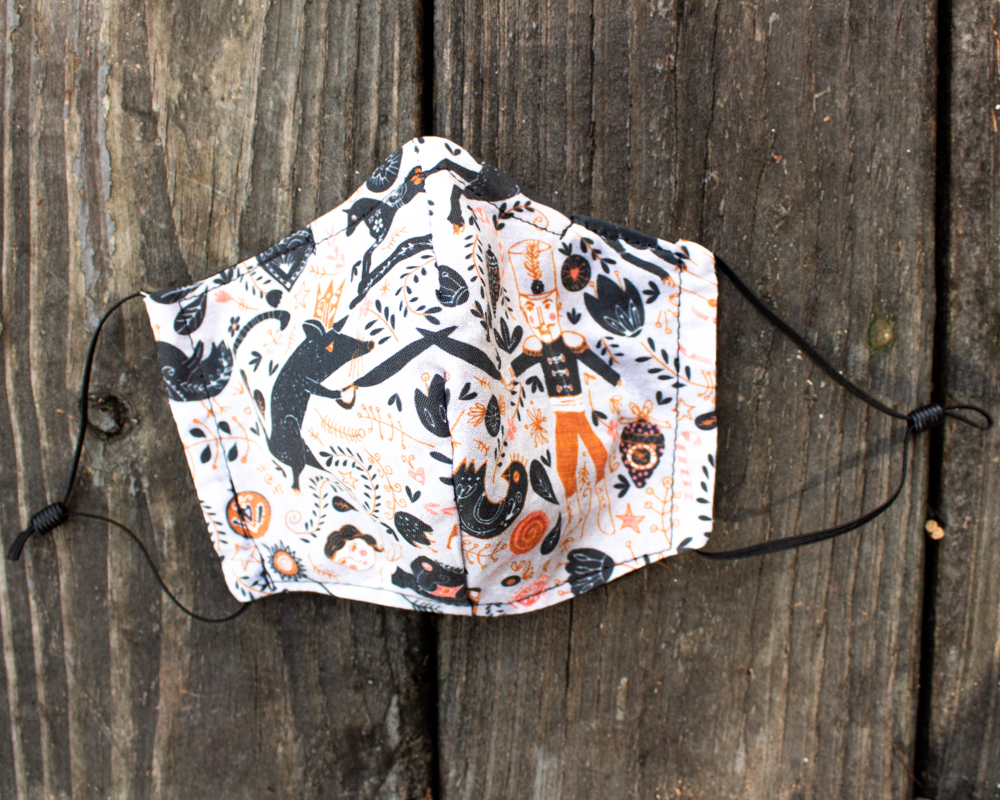
For each mask, I used two pieces of 100% cotton quilting fabric, cut to 6"x 9", and two pieces of elastic around 1/8" to 1/4" wide, cut to 6.5" long. I later learned that although Syd is taller than me, she has a petite face, and her elastic probably should have been 5" long at the max. She shortened her own elastic to make her mask fit her well.


I've used both 1/8" elastic and 1/4" elastic, and found that the stretch matters more than the width. For a couple of family masks, I used 1/4" elastic that I pulled out of a super old fitted sheet as I was ripping it up for kitchen rags, and the super old, super soft, super stretchy elastic worked great. For a friend, though, I made another four masks using new 1/4" elastic, and it turned out to be too stiff and uncomfortable to be practical.


I put the two pieces of 6" x 9" fabric right sides together, then pinned the elastic to the corners. I started by folding back the top piece of fabric, and placing the elastic where I wanted it against the front of the bottom fabric:


I wanted it to be at an angle like that so that I didn't catch more than the end of it when I was sewing the fabric pieces together.

I pinned one end of the elastic just to the bottom fabric--


--straightened it out, because twisted elastic would be NO fun behind the ears--


--and then pinned the other end to the corner below it:


I repeated this with the other elastic on the other end of the mask, and then I pinned the top fabric down, sandwiching the elastic between the two fabrics.

I sewed around the perimeter of the mask, leaving an approximately 3" opening for turning and backstitching over the elastic at the corners:


I clipped the corners to reduce bulk--


--and then turned the mask right side out. I finger-pressed the raw edges of the opening to the inside to match the seam, then ironed the mask flat.

I edge-stitched along the top and bottom of the mask only, once again backstitching when I stitched over the elastic. Those little buggers are not coming off!

Because I used a 1/4" seam to sew the mask together, I was left with a flat mask that was approximately 5.5" tall. From the bottom, I pinched the mask at 1.5", then brought that fold down to the .5" mark, ironed it to crease it, and pinned it:


Next, I pinched the fabric at the 2.5" mark, folded it down until this second fold butted up to the first fold, then ironed and pinned it:


I never did figure out how to get my tucks perfectly even, so for the third tuck, I just pinched the fabric 1" from the top, brought it down until that fold butted up to the second fold, then ironed and pinned it:


Eh, they're not totally noticeably uneven, and you can't see the tucks when we're wearing them, anyway.

The only remaining task was to sew down both sides, stitching those tucks in place:


With my fifth mask, I started backstitching every time I sewed over a fold, and I think they look a lot sturdier.

Here are our family masks in all their glory:


And here's me about to low-key risk my life and the lives of my family for a trip to the grocery store!


At least we bought enough food that, barring emergencies, we shouldn't have to shop again for a month.

And by that, I mean that we bought a bunch of delicious food that we'll eat all of in a week, and then we'll go back to the rice and beans and cheese that we already had in the house for the three weeks after that.