Showing posts with label homeschool biology. Show all posts

Tuesday, November 15, 2022

The New and Improved Way to Press Flowers in the Microwave

I spent years pressing flowers in the microwave using the supplies that I had on hand--a terra cotta plant dish, a Pyrex bowl, and paper towels.

But when my Girl Scout troop also wanted to learn how to press flowers in the microwave, I realized that what's good enough for me is not NEARLY good enough for them! They needed proper materials and a clearer method.

A trip to the town's ReStore scored me a whole troop's worth of unglazed terra cotta tiles at something like ten cents apiece. And simply substituting white typing paper--even the back sides of used typing paper!--turned out to be a much easier method than using paper towels, with a cleaner-looking result, as well.

So here's the new and improved way to turn your microwave into a flower press!

You will need:

  • two unglazed terra cotta tiles. The larger the better, as the size of the tile is the limiting factor in the size of flower you'll be able to press. The tops should be completely smooth.
  • plain typing paper, several sheets. Recycle used typing paper, as long as at least one side is blank and clean.
  • freshly-picked flowers. I think the ones that have a distinctive front and back are most easily pressed, but you do you!
1. Set up the microwave flower press. 

The bread of your flower press sandwich consists of two unglazed terra cotta tiles, the unglazed fronts facing each other. 

My tiles have gotten dirty because the backsides of the paper that I've been laying against them has had printing on it. It won't affect the flowers, though, and they'll wash clean. 

Fold a stack of 4-5 pieces of typing paper in half. Place the flowers you'd like to press in the fold of the typing paper stack, then fold the top of the stack over the flowers and sandwich the stack in between the terra cotta tiles.

If your flowers are especially big and juicy, you may have to dissect them a bit before you place them in the press.


2. Microwave the flower press. 

Pop the entire flower press into the microwave, and microwave it for approximately 30 seconds.

Use an oven mitt to lift off the top tile, then check the flowers. They should feel dry, not damp. If they're still damp, continue to microwave in 15-20 second intervals, checking in between. 

If the flowers are already a little crispy, then you've microwaved them too long. Better luck next time!


When the flowers are perfect, let the entire press cool for a few minutes before you remove them. If you've got several terra cotta tiles, you can keep a few flower presses going simultaneously:

While a third person grates cheese, ahem.

A DIY microwave flower press is SUCH a time saver! Even fairly young kids can work it, as long as an adult handles the hot parts, and this makes the entire process of collecting, pressing, and studying or crafting with flowers a lot more enjoyable for a small child. 

You can also use this press in tandem with a traditional flower press--which you can also DIY! Put flowers into the traditional press right away while you're hiking, then transfer them to the microwave press to finish them off when you get home. 

Sunday, November 13, 2022

Holiday Crafts: Leaf-Carved Pumpkin


This tutorial was originally published on Crafting a Green World way back in 2013!

Yes, we DID finally carve our pumpkins! 

To be honest, I was quietly hoping to get away without carving pumpkins at all this year, especially after Halloween came and went without the kiddos making a peep about Jack-o-lanterns. 

However, last week my older daughter, passing by the gorgeous whole pumpkins decorating our front porch, suddenly seemed to notice them for the first time since early October. She did an actual double-take, then shouted, "Hey! When are we going to carve our pumpkins?!?" 

Busted! 

Fortunately, the kiddos were perfectly happy with my suggestion that we carve the pumpkins into something appropriate for Thanksgiving, not Halloween, and that's how we ended up with our leaf-carved pumpkins. They're festive without being spooky, use real leaves as stencils, and are, thankfully, just as fun to carve as Jack-o-lanterns are. 

Here's how to make them: 

1. Collect autumn leaves. Go on a leaf walk around your neighborhood, and collect some nice samples of the autumn leaves around you. The best leaves will be supple, not brittle, and medium-sized or smaller; we did try one giant sycamore leaf on one pumpkin, and although it looks really cool, it's WAY too big and lets too much light through. 

2. Hollow out your pumpkin. Don't forget to save your seeds to roast or make dehydrated crackers with, and to compost the guts or feed them to the chickens. 

Years ago, my Aunt Pam also taught me a neat Jack-o-lantern trick: use a fork to score the underside of the lid piece of the pumpkin, and rub cinnamon into the cuts. The heat of the candle inside will waft a cinnamon scent across your porch every night, and knowing what I know about herbs and oils these days, I wouldn't be surprised if that cinnamon helped preserve the pumpkin a bit, as well.

   
3. Stencil the leaves onto the pumpkin. Hold each leaf to the pumpkin and trace around it with a Sharpie. The more leaves you can fit on, the more festive your pumpkin will look, in my opinion, although my kids didn't carve a ton of leaves, and I still think their pumpkins look pretty cool. 

And if you've ever been faced with a half-finished Jack-o-lantern and a kid who insists that her hand is just too *tired* to make a mouth, whine whine, you'll appreciate the fact that you can just as easily be done carving after one leaf as you can after twenty.  


4. Cut out the leaves. Yes, that's my kid wielding a steak knife. I can't bring myself to buy any of those plastic Jack-o-lantern knife thingies, even though I've heard they work great. (Note from Future Julie: I now own those plastic Jack-o-lantern knife thingies, and they DO work great! Way better than steak knives!)

Know what also works great? Steak knives. 

5. Shine on. We popped our pumpkin back out onto the porch with a rolled beeswax candle inside, and we LOVE how it looks. The kiddos got to carve their pumpkins, I didn't have to do it with all the other million things that I had to do before Halloween, and it looks like we actually did them Thanksgiving-themed on purpose. 

Here's hoping that next year, I don't have to come up with a Christmas-themed Jack-o-lantern concept...

Tuesday, August 30, 2022

Homeschool High School Biology: Prepared Slides of Protists


The Amscope prepared slides of bacteria were garbage, but the prepared slides of protists are MUCH better!

They can't replace the real-life observation that we'll be doing later, when we look at lake water through the microscope (OMG don't ever drink lake water, because it is chock-full of protists!!!), but looking at prepared slides is a good way for a student to study anatomy, and specifically to get used to--and see the differences between!--an illustrated diagram of an organism and an actual example of that organism. Real-life critters never look exactly like their diagrams!

In 2017, when the kids were still older elementary/middle school but it was becoming clear that Will, at least would likely want to homeschool through high school, I did OMG TONS of research before buying this microscope, the Levenhuk 320, and I have been so happy with it! This specific model is actually discontinued now, I bought it so long ago, but honestly I'd trust anything from the Levenhuk site. A year later, I even bought the digital camera attachment, and it is also so great. The user interface is very dated, a little clunky, and extremely non-intuitive--

--but once you click around enough to figure out what you're supposed to do, it's fairly seamless to switch between the optical eyepiece and the camera, and to take both photos and videos of the cool stuff you're looking at.

At each magnification, I like to use the optical eyepiece to observe first, then pull that eyepiece out and switch in the camera eyepiece, already plugged into my laptop and set up in the software. Then I can adjust the focus if I need to, and then I can start taking photos and videos.

Here's an example of the genus Euglena at 400x:

If you scroll to the bottom of this Wikipedia article, you can see a video of a Euglena that looks very similar to this slide. It would be better if the slide had additional examples of Euglena when it's not a sphere, though.

Here's a Volvox at 100x:


The large encasement isn't a single cell, like a prokaryote, but instead a gelatinous structure that the cells hang out in. The staining on this slide is a little weird, because Volvox would usually be green.

The best prepared slide in this group is the Spirogyra. Here it is at 40x:


And here it is at 100x:


I sourced an illustrated diagram of Euglena, Volvox, and Spirogyra, and Syd's assignment will be to sketch the microscope views at 40x and 100x of each slide, then label the sketches with the features she can identify, using the diagrams as references. I think this will be a good refresher on how to use the microscope and how to sketch microscope observations.

And then it's off to the lake!

Friday, August 26, 2022

Homeschool High School Biology: Fermentation of Sauerkraut

Welcome to Honors Biology: Year 2!

During my kid's brief foray into the public school system a couple of years ago, I discovered, to my dismay, that the entire full-year high school Honors Biology class didn't get past ecology! They studied ecosystems, cells, the cell cycle, ecology, and evolution... and then they were done. The kids then had to take a state-mandated standardized test on those topics, and I imagine that for many of them, that was the end of their biology studies.

No plants. No animals. One lab. No MICROSCOPE!!! Like, don't get me wrong, cells and ecosystems and ecology are all super important, and hallelujah my state is at least teaching evolution, but... aren't plants and animals the fun parts of biology? Aren't labs and microscopes the high-interest activities that inspire kids to love science?

Anyway, that's why I feel perfectly justified in turning our homeschool biology study into a two-year course, rounded out with lots of plants, lots of animals, lots of labs, and LOTS of microscope time. 

Honors Biology: Year 2 begins with a study of prokaryotes. Please read all of the sections about bacteria in your biology textbook, and master the practice problems, but then, for the love of all that's good and holy and engaging and enriching, let's go do a lab or look through the microscope. Or SOMETHING!!!

My set of AmScope prepared slides does have a few bacteria slides, but I don't love them. The AmScope prepared slides can be really hit or miss--some are absolutely fabulous, including the protist slides we'll look at next, but the bacteria ones weren't worth trying to incorporate into a lesson. Instead, we looked at illustrated diagrams of bacteria, and played around with growing our own.

Which means... sauerkraut!!!!!

Here's the biology lab that I wrote to lead Syd through the scientific process of making sauerkraut. My favorite parts are calculating the correct grams of table salt and testing the sauerkraut's pH. Most sauerkraut recipes call for a cabbage by the head and a specific measurement of salt, usually in tablespoons. There is some wiggle room in the amount of salt in a sauerkraut recipe, but it's much more accurate to weigh the cabbage, then add 2.5% of that weight in as salt.

Because it can sometimes be kind of lonesome to do a lab alone, I recruited a second biology student for this activity:

Which means that we'll get a yummy two quarts and one pint of sauerkraut out of this lab!

If you've never made sauerkraut before, I really like this walkthrough.

I've never had a problem with my sauerkraut spoiling, but if the thought worries you, an airlock system pretty much guarantees success. 

To see an example of a scientific paper written on the subject of sauerkraut, check this out. There is a lot of sophisticated study that an interested student could make from sauerkraut!

If you're interested in other ways of incorporating food preservation into a kid's homeschool studies, check out my totally made-up Girl Scout Homesteading badge. So many practical life skills in evidence!

And to follow along with all my homeschool and crafty adventures and mishaps--and to see how yummy our sauerkraut looks when it's done!!!--check out my Craft Knife Facebook page!

Thursday, July 7, 2022

My Flowers Bring All the Bees to My Yard


Y'all, this might be my least incompetent gardening year yet!

I mean, not because I'm increasing in skill or anything, but more because every year I'm figuring out even more plants that can thrive in my garden in spite of me.

May brings flowers to my homestead lilac, which does not like me to do anything but clear the honeysuckle vines off it every spring:


This lilac is one of the oldest growing things on our property that was intentionally planted (see also: persimmon trees), and every now and then it inspires me to take a break from doing anything productive to instead deep dive into figuring out how to figure out the history of this property. I'm currently working my way through scans of a tiny, gossipy little local newspaper circa 1908 to see if I can find mention of the place or its owners, and annoying everyone around me by reading baffling tidbits:


If you can find a gossipy little newspaper over a hundred years old from your area, I highly recommend it. It is surprisingly engrossing to read about some guy's watermelon harvest, or the ladies' picnic, or the big snake somebody found, or the buggy accident in which all lives were lost.

The deck plants are staying classy, as always, with the addition of the toilet that used to be in the kids' bathroom:

But the real champions of the garden are the perennials that I ignore.

Look at my milkweed!


This is Asclepias syriaca, or common milkweed, the last remnant of Will's old butterfly garden. It's so aggressive that it pops up even in my raised flower beds, and I just plant around it because I'm a pushover for anything nice that wants to live here. The milkweed blooms in June, and the bees LOVE it:


June also brings flowers to the comfrey, and they are also beloved by the bees:


In July, the oregano flowers--


--and so does the lavender:


Late August will bring flowers to our perennial sunflower, and by September I'll have monarch babies to tend to. My plan is to try to bring this year's babies in as eggs--last year, I brought them in as teeny cats, and didn't know until they all died in their pupal stage that every single one had been parasitized by tachinid flies. It was a monumental tragedy, and one that I'd prefer to never repeat again.

Every summer I think about how, during our first summer in this house, the kids and I did a unit study on bees. As part of that, we wanted to find bees and try to identify them, and... couldn't. There were no bees that we could find on our property, no bees for the entire summer. Our property then was all mown lawn, invasive multiflora rose, evergreen shrubs, and invasive rose of Sharon--nothing that a bee would exactly want to visit. Will's the one who brought the bees the next year with her butterfly garden, and since then, even if I can't get a veggie to grow, at least I always have plenty of flowers for the bees.

Maybe next year I should drop the veggies altogether and just go full-on Monarch Waystation

Monday, January 31, 2022

Homeschool AP Environmental Science: Water Quality Monitoring Using the Creek Critters Citizen Science App


What, you mean you didn't spend YOUR New Year's Eve looking for aquatic macroinvertebrates in a local creek in order to evaluate its water quality?

I'm just kidding, y'all. The only reason WE spent part of our New Year's Eve looking for aquatic macroinvertebrates in a local creek is that we'd already procrastinated on this particular lab for so long that now it was winter, but I noticed on my weather app that the temperature was going to get up into something like the lower 50s on that day. Will and I weren't sure if any colleges would ask to see her lab notebooks when they evaluated applications, but we figured we might as well jump on finishing up any labs we could, just in case they did. 

Joke's on us for procrastinating, though, because this lab was FUN! Like, legitimately FUN! I'd do this lab again in a heartbeat, air temperature in the lower 50s or not. 

Will and I used this Creek Critters app to guide us through the lab. I bought a little aquarium net (which Amazon tells me I bought back in September, in case you were wondering how long we'd been procrastinating on this lab!), but otherwise we already owned the small clear container, larger clear container, and plastic spoon that were all we needed to complete the lab.

Here's where we conducted our lab:

This is the same little creek between two parks that my Girl Scout troop did our chemical water quality analysis this summer, so it was interesting to compare the results between the two types of monitoring.

You do get your feet wet during the collection part of this lab, but only by a couple of inches. Then you take your stuff back to shore, sit somewhere dry, and start identifying creek critters!

When you see a likely-looking critter, you use the plastic spoon to transfer it to a very small clear container:

And, of course, you put a little creek water in with it so it's comfy:

Then you peer nearsightedly at it for a good, long while:

The best part about the Creek Critters app is that it walks you through identifying your critter:

You also don't have to try to count the number of fingernet caddisflies, or whatever, in your sample; just find one, then move on to identifying something else:

Like an aquatic sowbug, perhaps!

Here are all the creek critters that Will found in our sample:

And yep, that water quality result is POOR. On the one hand, that does match with the chemical water quality analysis that my troop did last summer, but on the other hand, I have a theory that there might be aquatic macroinvertebrates that simply aren't there in the winter?

So I guess we DO get to do this lab in the spring, after all, because obviously we've got to take another sample so we can compare our results! 

Wednesday, January 5, 2022

Whirlwind Trip to NYC Day 2: The American Museum of Natural History to Times Square

I tried really hard to confine myself to only one museum on this whirlwind trip. Mind you, I could spend every day of the rest of my life in a different museum and be as happy as a Mercenaria mercenaria, but I'm supposed to be practicing moderation in all things, sigh, so I picked only one museum--the very, very large American Museum of Natural History--and planned to spend only one day--a very, very, VERY long day!--there.

I also managed to pick the very stupidest way to get there, because just because Google Maps includes subway routes doesn't mean they have to make sense, and I managed to turn the exact wrong way upon leaving the subway station, which is my absolute biggest pet peeve, grrr. But finally, passing three playgrounds and a farmer's market and two different Covid testing/vaccination stations, we made it!

Or rather, we made it into the line that extended from the entrance, down the stairs, around a corner, and past the building. And that WAS the line for our reserved tickets! We provided plenty of entertainment for the passersby who felt pretty happily smug that THEY weren't the ones in such a long line, and one guy smirkingly informed us as he passed that we'd still be in line at 4:00 pm, but joke's on him, because it took exactly 41 minutes until it was our turn to show our vaccination cards (the NYC Covid Safe app is the best thing EVER!) and tickets and get sent into natural history heaven.

I don't so much love the hands-on science museums that I've spent the kids' entire lives shuttling them to and from, it seems, but give me an old-school set of exhibits like the Hall of African Mammals and I. Am. SET! 


And OMG they have dinosaurs!

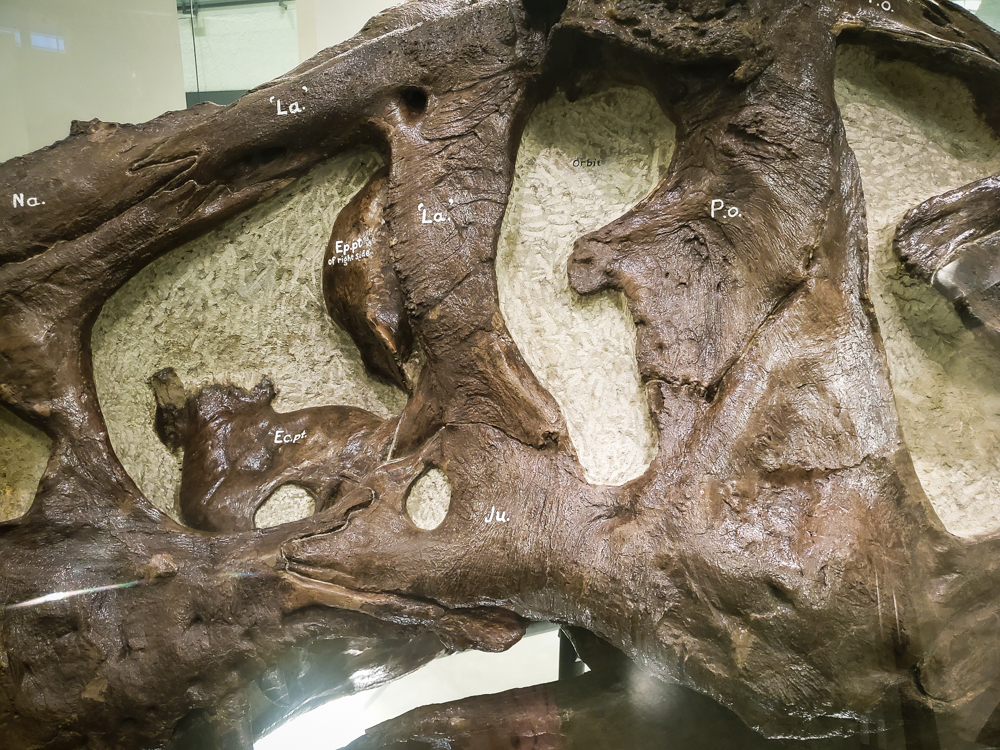
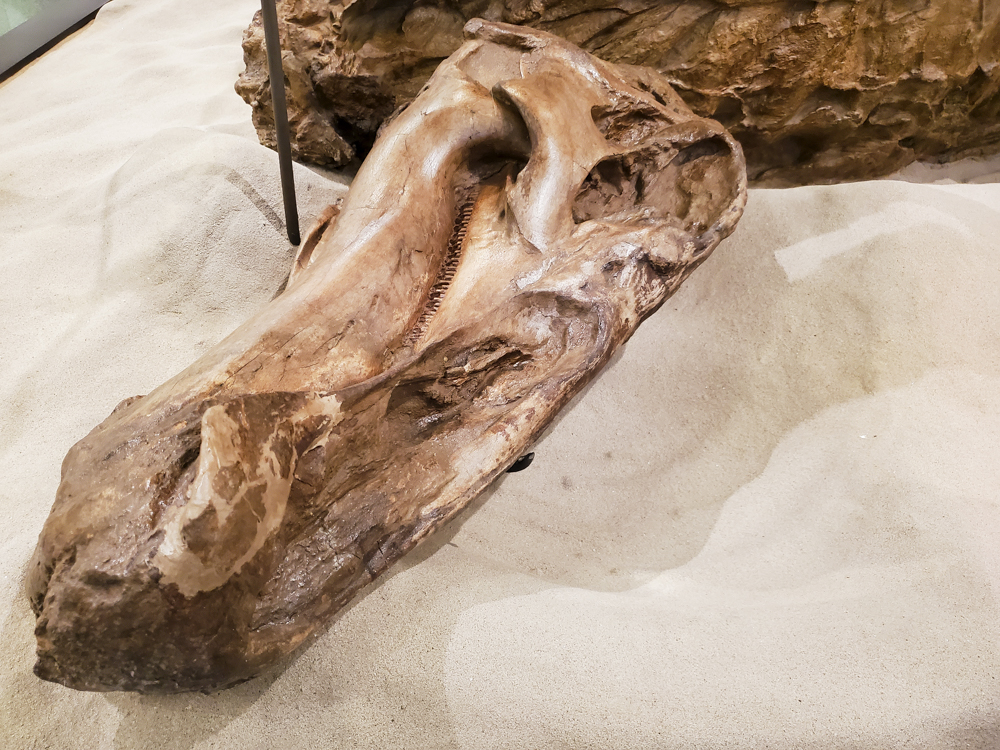
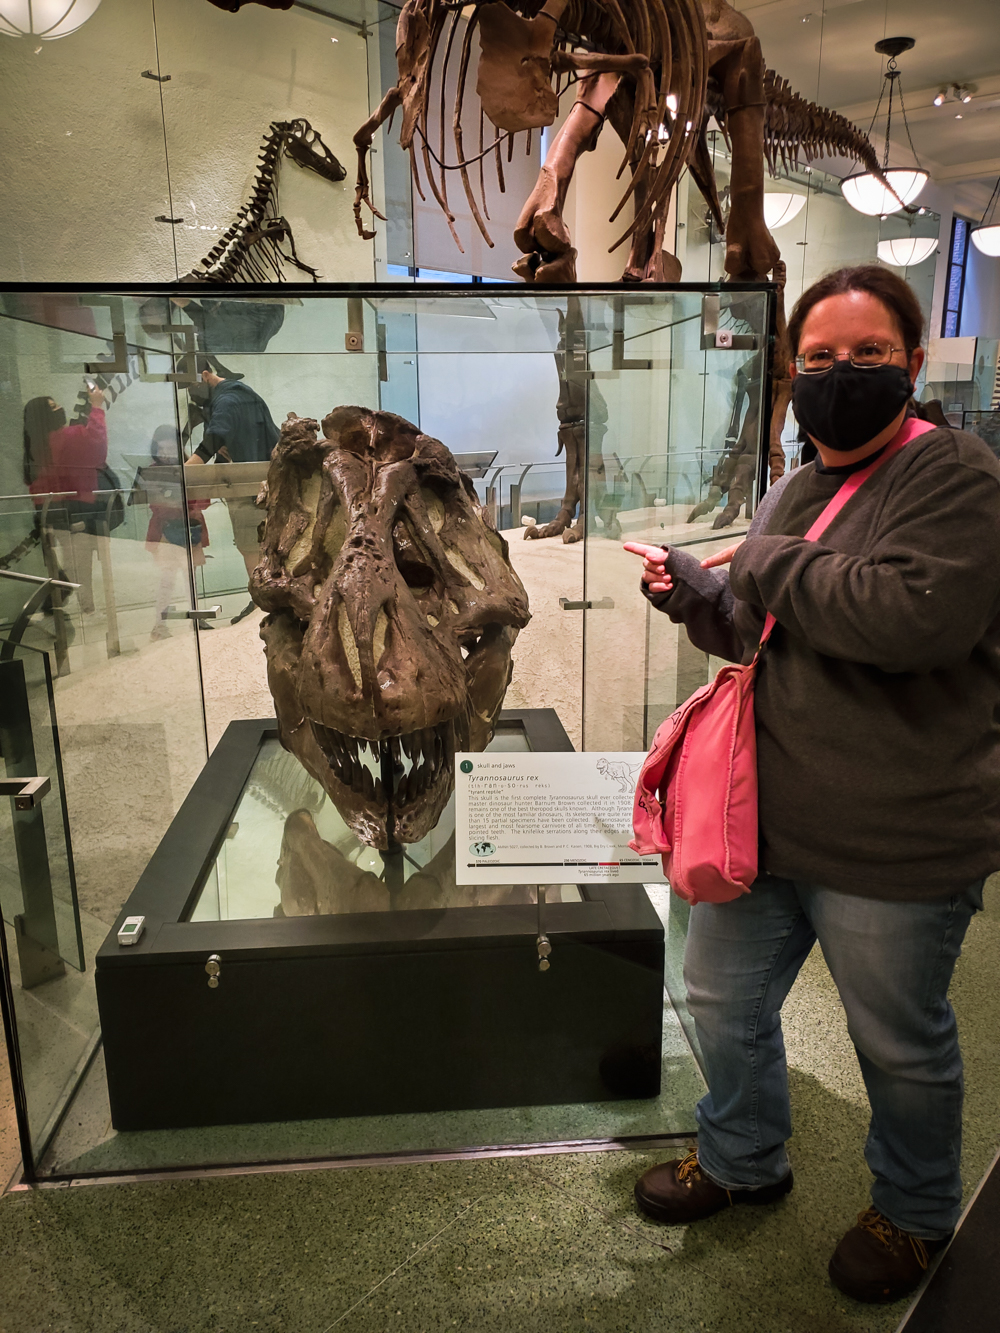
You guys, that's a Barnum Brown Tyrannosaurus rex! Here's me being... not real chill about the first complete T. rex skull, also collected by Brown:

Here's the beautiful Allosaurus:


And the Apatosaurus!


It's walking on an excavation of the Glen Rose Trackway. When I was an undergrad way back forever ago, my university was in driving distance of several fascinating fossil sites, and I'd often make a day trip to hang out in the Glen Rose Formation instead of writing my English Lit essays.

I would have told you back then that I had zero interest in science, too! Self-knowledge has never been part of my skill set...


Syd and I hadn't eaten breakfast, so she and I took a break after this to brave the crowded cafeteria while Will and Matt visited another hall. As soon as we sat down, though, I texted Matt that there were free refills on the fountain drinks, and we'd bought a cup(!!!), and mysteriously, even though they hadn't been at all hungry or thirsty when we separated, they both showed up in minutes and helped us do our part to get our money's worth on our five-dollar drink cup.

Ahem.

So, I did have one ulterior motive for visiting the American Museum of Natural History as opposed to, say, the MOMA. The kids and I are studying Meso-American history, geography, and culture this year, and the AMNH has an excellent Hall of Mexico and Central America

This is a votive adze, a ceremonial piece made of jade and probably of Olmec creation. Fun fact: the Olmec produced a LOT of art depicting were-jaguars, and this is likely one of them!

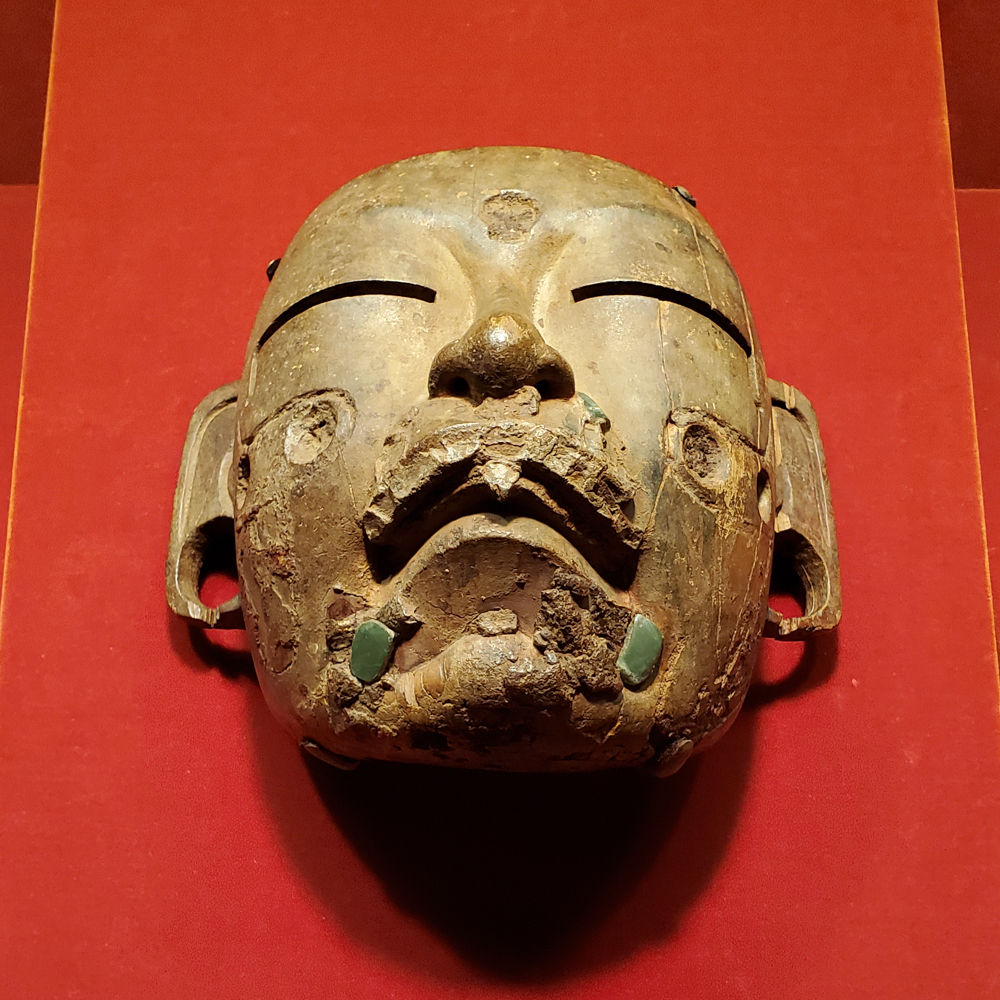
This mask is currently the only known Olmec object made of wood. You can see bits of a jade mosaic that was added to it in some post-Olmec time:


At almost six feet, this is a life-size plaster replica of an Olmec monument that's thought to be the portrait of a leader. You'll be pleased to know that the original is home in Xalapa, Veracruz:

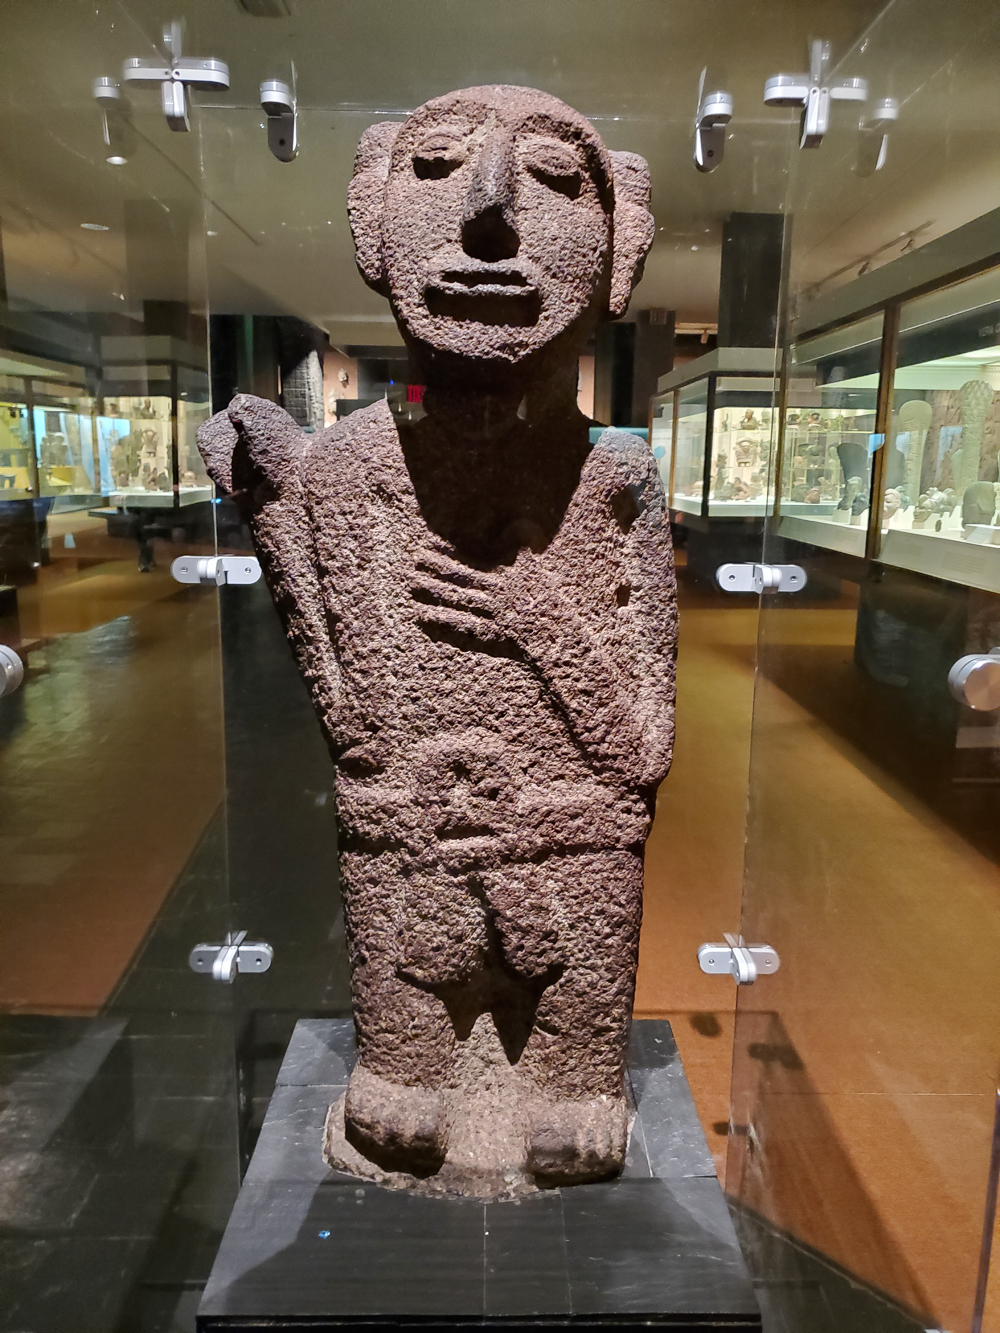
This is an Aztec sculpture. This type of figure, with that one hand raised, has also been found in several other Aztec sites:


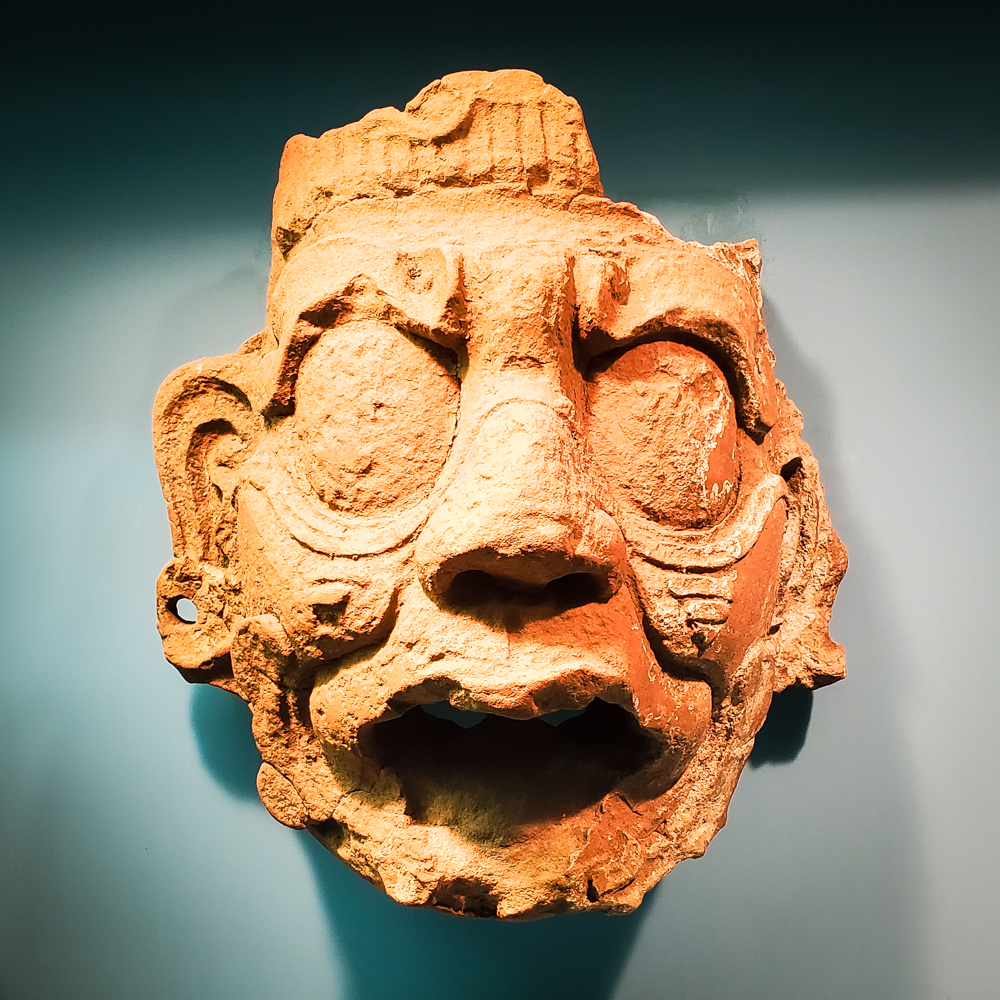
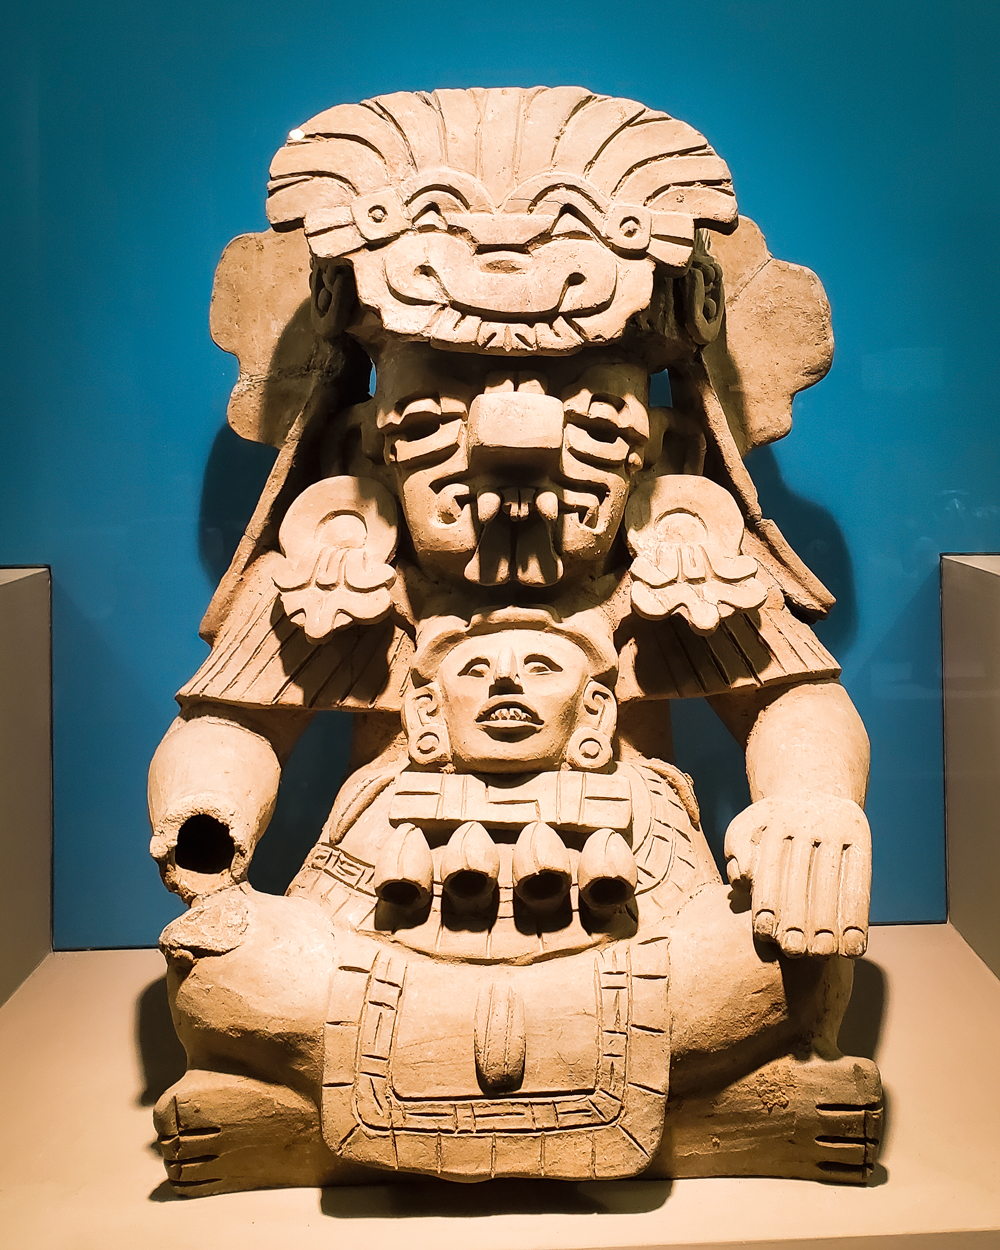
This is a clay funeral urn from Oaxaca, probably from around 200-550 AD. It was collected in 1904, and on the AMNH database you can see the original manuscript catalog for this and the other items in this hall. They're fascinating, because they're all handwritten (and why would you not use your most legible handwriting when writing a museum catalog?!?), and they make clear that provenance around this time was pretty fast and loose. One entry I looked at described some artifacts that came buried in a box full of dirt along with a skull! 


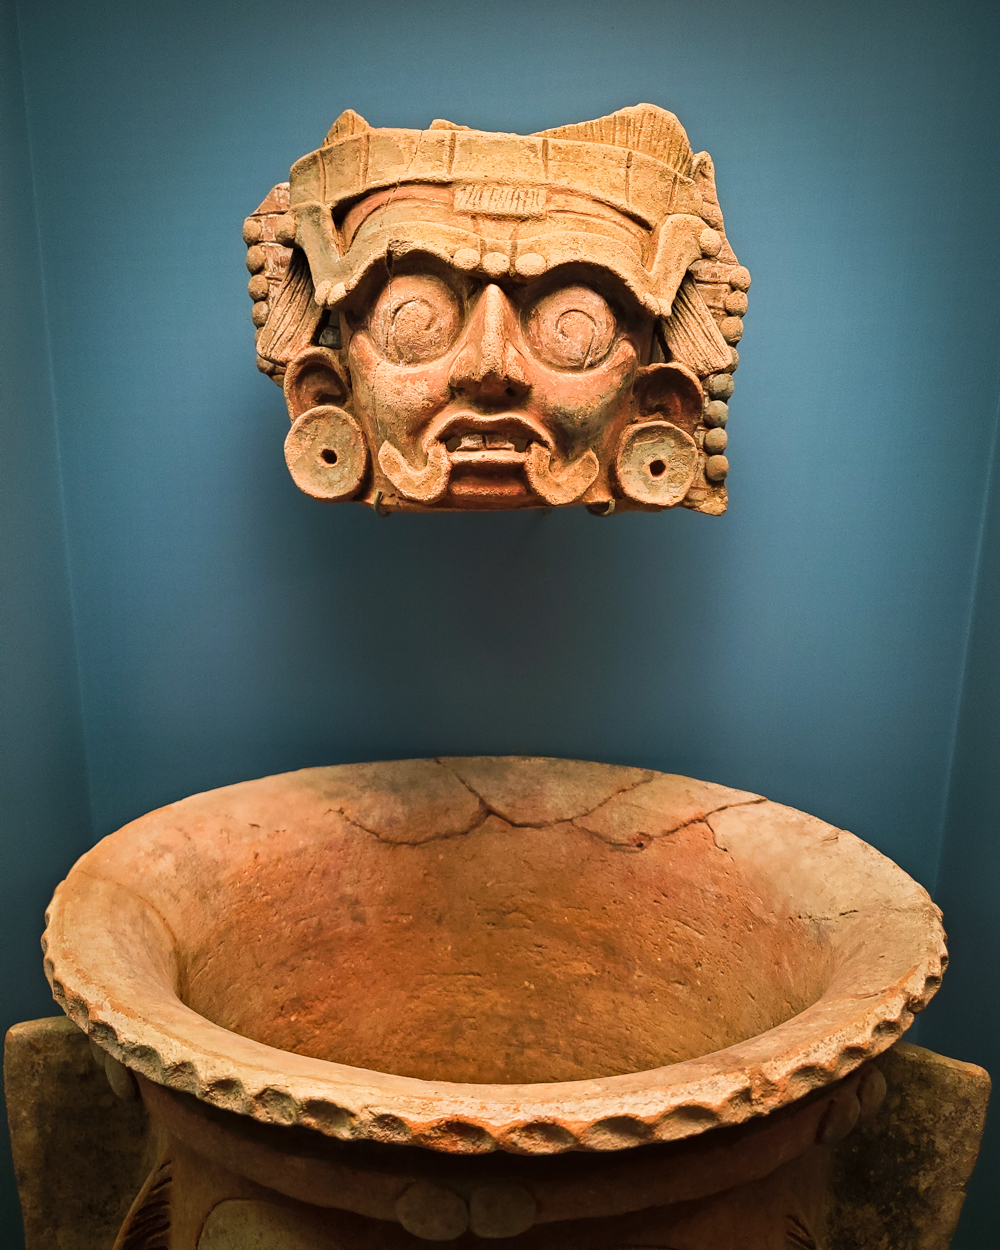
Here's another clay urn from the same site. When I was looking this one up in the AMNH database, I found a more updated catalog that described it as a product of the 1901 Loubat Expedition. I'm low-key interested in historic archeological expeditions (mainly because of how Wild West, unethical, and off-the-rails they could be), so I did some additional digging for info, and found a dissertation about the conflict between Mexican and American representation during these historic expeditions

Basically, for the Loubat Expedition, the AMNH made a contract with the government of Mexico, stating where they'd go and what they'd look for, etc. The AMNH had a guy, Marshall Seville, and the Mexican government had a guy, Leopoldo Batres. They were meant to work together in relative harmony, but Seville spends most of his written reports back to the AMNH bitching about Batres, and Batres spends most of his reports back to the Mexican government talking about all the cool stuff he was doing and, oh yeah, Seville was also present, I guess.


Here's a model of an Aztec stone depicting the date when the Aztecs won a bunch of really cool wars against likely unsuspecting outlying nations. We were sitting on a bench across from this stone, resting our feet, when a family walked by that contained my least-favorite travel persona: Man Who Loudly Explains Things. Man Who Loudly Explains Things proceeded to explain to his family about the Aztec calendar that predicts the end of the world (I gritted my teeth) and the Aztec ball game in which they sacrificed the losers to their gods (I gasped, whirled around to my own family, and exclaimed "That's not true!" while they reminded me that I'm supposed to shush in public). 

I mean, yes, people probably got sacrificed sometimes, but 1) we don't know nearly enough about these ancient nations to say with any kind of certainty what they did or didn't do, especially about something as emotionally charged as human sacrifice (I blame you entirely for this, Diego de Landa!), and 2) OBVIOUSLY they didn't always sacrifice the losers of this game, because it's a really difficult game! If you always sacrificed the losers, all the players would suck at it and you'd probably run out of them after too long, too.


Here's a replica of a 700s Maya Stela that's also thankfully still where it's supposed to be in Mexico.


This is a limestone slab from Guatemala circa 633. Check out that beautiful writing!


A lot of figurines like this one were found in graves on the Island of Jaina in Tabasco. They range from about 600-900 AD.


This is another clay Maya sculpture


The provenance for these little bowls is unclear, other than that they're circa 600-900 AD from Mexico. That little guy is emerging from a shell, though, which says something interesting to me about the Maya's relationship to the ocean.


Here's another figure from the same area with an uncertain provenance, although they think it's probably from Guatemala:


And here are some painted vases from the same period. Reading between the lines in the manuscript catalog, I get the idea that much of the early 1900s consisted of rich people donating artifacts of uncertain provenance, probably looted, bought on the black market, or otherwise illegally put into their possession. The AMNH said thanks, wrote down the little info about them that the donors could give, and popped them into their collections.


At one point I left the family so I could go find a bathroom (SO many refills of fountain lemonade!!!), and when Matt texted me much later to find out who'd abducted me and what they wanted for ransom, I was all, "Oh, right... I sort of ended up in the Hall of Meteorites instead?"

Side note: I'm going to pretend to the kids that the Chicxulub Crater is an important part of our Meso-America study because when we take our Girl Scout troop trip to Mexico, our ship will be sailing right over it!!!!! When we do, you'll find me standing on the deck screaming "SQUEE!!!!!"

This is the very, very, very beautiful Esquel meteorite, found in Argentina.


Eventually, I met up with everyone else in the Halls of Gems and Minerals. The kids really liked this exhibit, so we're going to do more with it this semester as part of Syd's geology study.

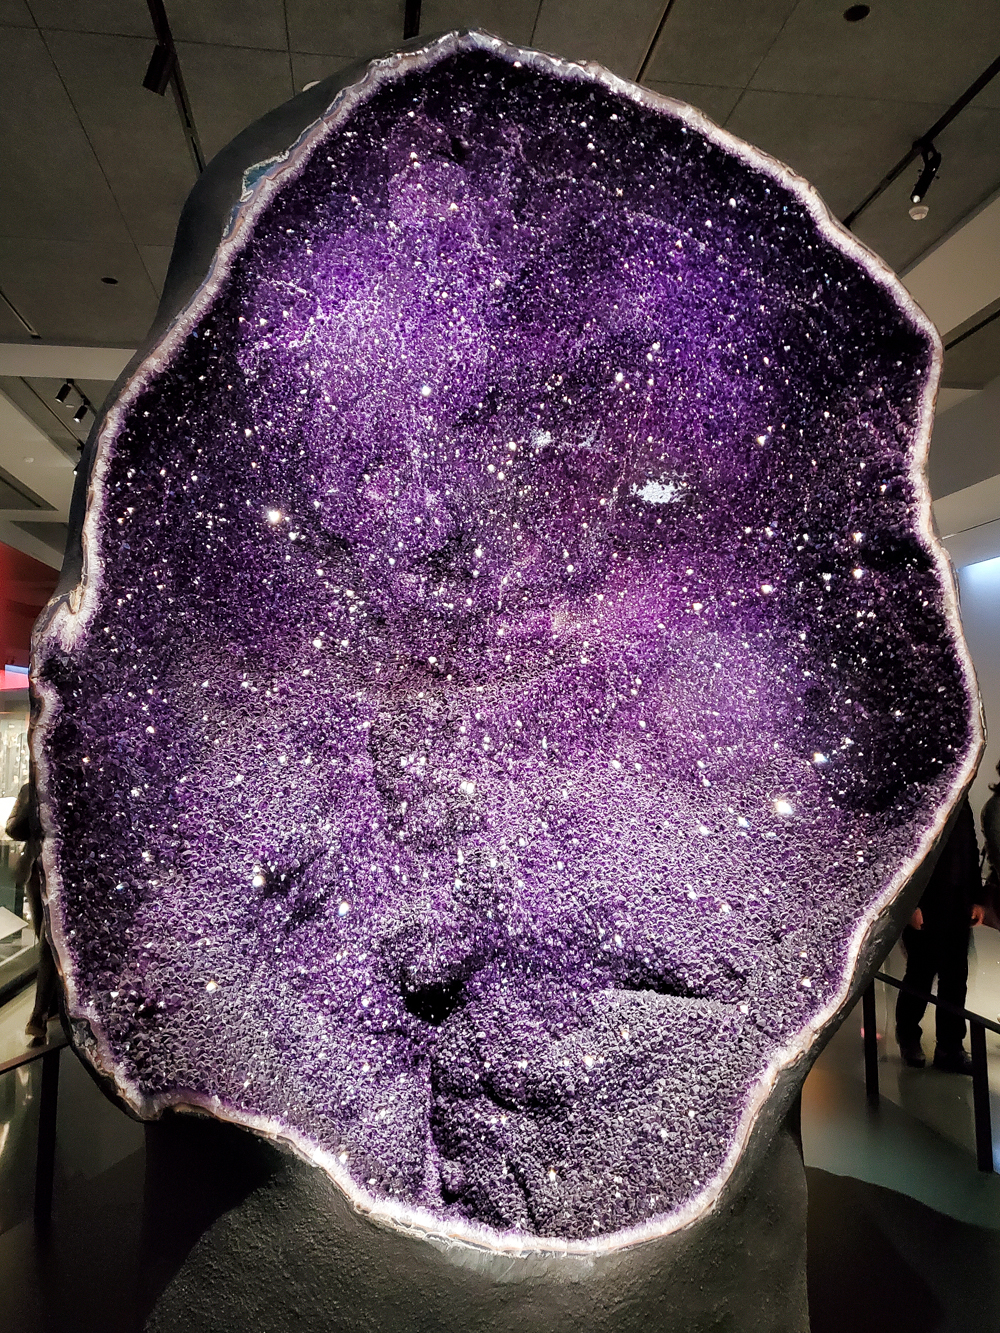
This is a 9-foot amethyst geode. It definitely beats out the quartz geodes that the kids and I collect while creek stomping!


This is an 838-pound stibnite, formed with spacious perfection in an underground cavern:


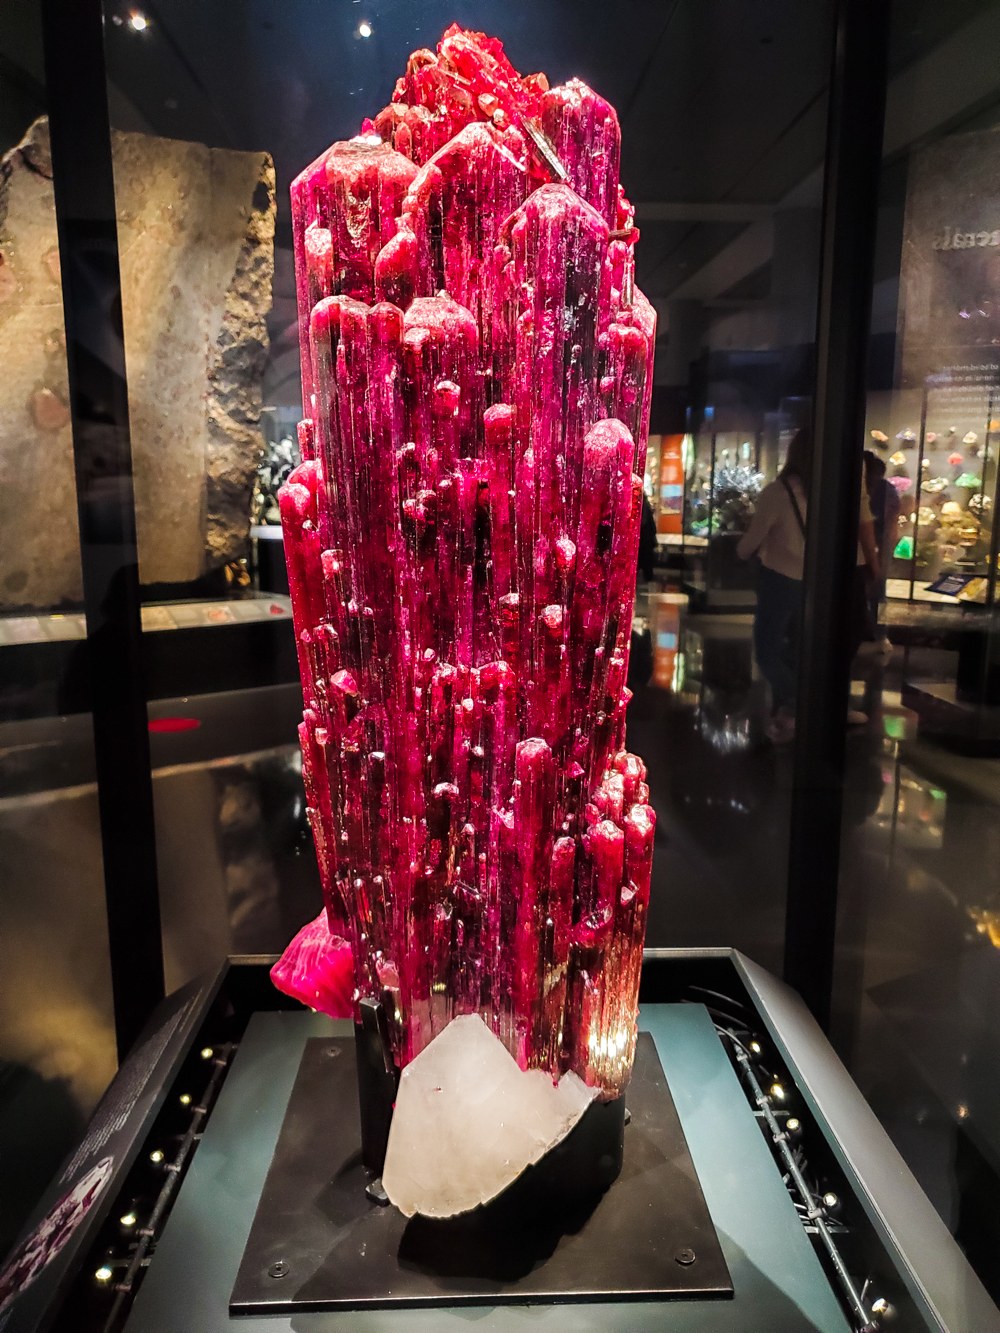
This is elbaite tourmaline from Brazil.


The afternoon is very much wearing away at this point, and here Will kind of lost her head a little. I had mentioned numerous times throughout the day that the AMNH is too big to see in one day, but it's not going anywhere, so we'll see what we can see in one day and then we'll come back another day to see some more. I encouraged Will to choose specific halls to visit, and for most of the day, she happily wandered from exhibit to exhibit, happy as a clam looking at every single display and reading every single word on every single label.

But her list of what she wanted to see kept growing longer, and the day kept growing shorter. The last two hours of our time in the museum mostly consisted of Will bolting frantically from one hall to another across the entire freaking museum from it to another equidistant from the first two, and also up three flights of stairs. Not gonna lie--Syd and I tapped out for a while and people watched on this here bench:


And then we tapped out some more and hit the gift shop. Somebody please buy me all these dino plushies please!


But then Will rushed past us muttering something about a life-sized model of a blue whale, and I was back on my feet.

Origami Christmas tree on the way there!


And, indeed, a life-size model of a blue whale! You can barely see Syd and Matt lying flat on their backs underneath it.


And then, since I was up again, we might as well go to a couple more dinosaur halls!

Mosasaur!!!!!


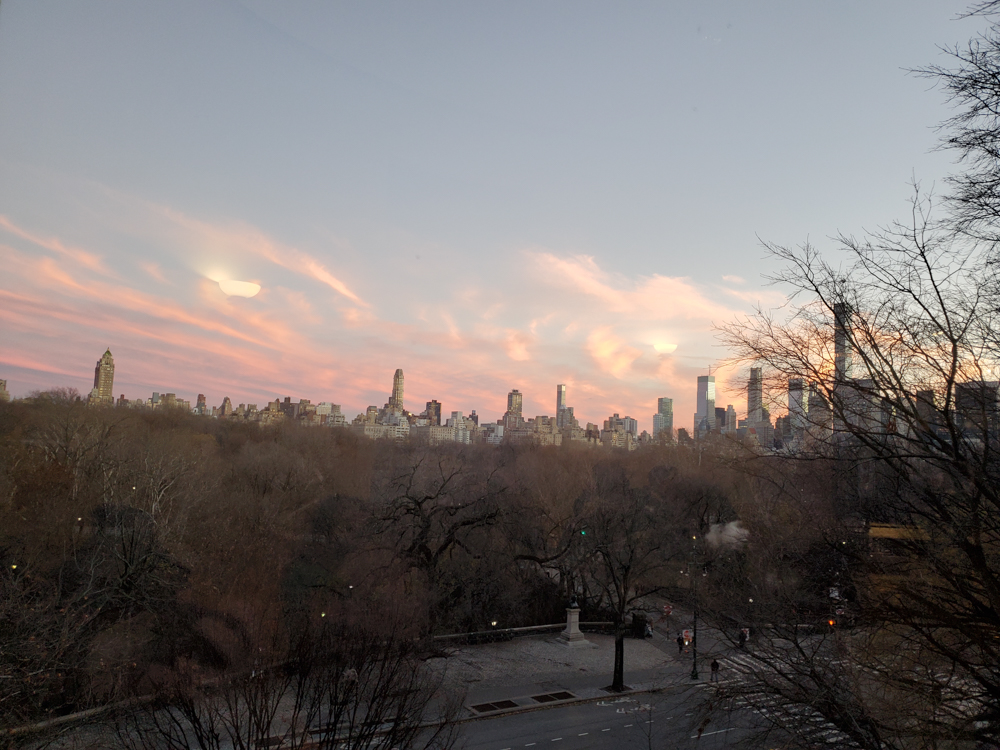
Found a random, beautiful view of Manhattan at sunset!


This beautiful mummy is my very favorite dinosaur, Edmontosaurus annectens! I own so many of your fossilized tendons, sweet Edmontosaurus!


Eventually, not even halfway through Will's list of THINGS SHE ABSOLUTELY MUST SEE OR SHE'LL SIMPLY DIE, the AMNH had the nerve to close!

Oh, well. Let's go see if Times Square is tacky!


Yep, it's tacky, all right! And now we can say we know that first-hand!


Okay, I am so disappointed that I don't think I can even talk about this, and I kind of want to vomit right now just thinking about it because emotions are tough, but before we went back to our AirBnb and ordered take-out pizza, we walked over to see how to get to Hadestown the next day.


Turns out we really will have to take the long way 'round to get there. Another time!

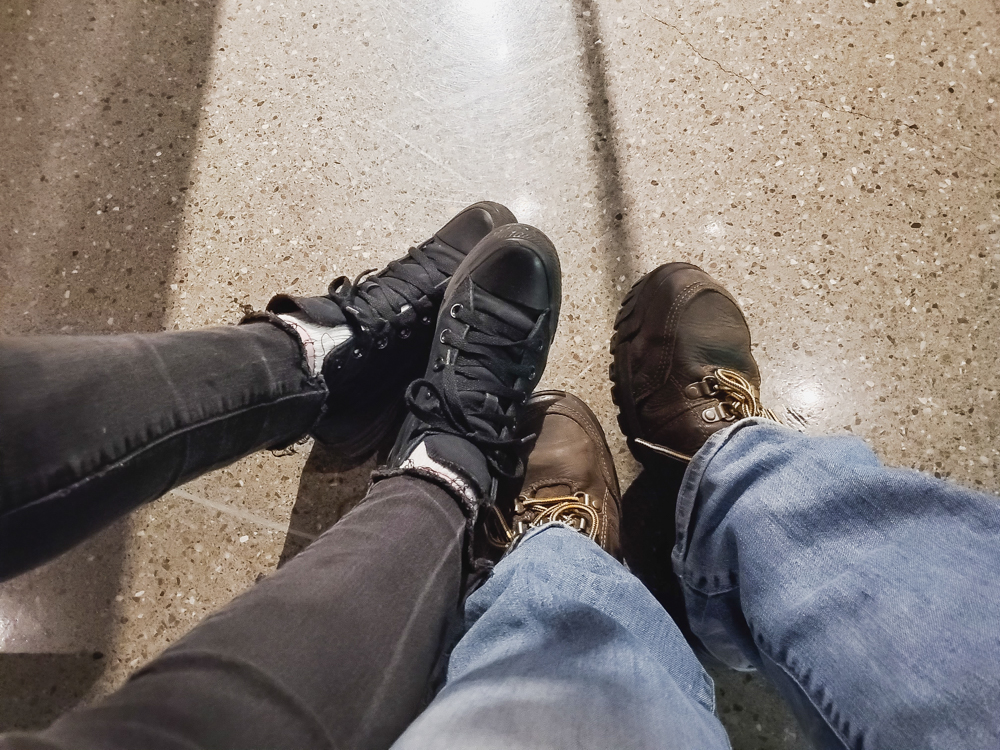
I continually reminded the kids to make memories of the cool NYC stuff that we were already getting used to, so here's your ubiquitous subway shot:


And here's Sylvia's, the super famous soul food restaurant across the street from our AirBnb!


I loved our AirBnb. LOVED it. However, I did not love it on this night, because it turns out that the seafood restaurant below us was having some kind of... rave, maybe? On a Sunday night? All I know is it was so loud that it vibrated the drinks in our glasses, and we had to shout to talk to each other, and it did not end until after 1:30, because it was still going when I finally fell asleep, the bed shaking to the rhythm of the DJ's sick beats.