Friday, March 9, 2018

Girl Scout Cookie No-Bake Mini Cheesecakes, and 25 Other Girl Scout Cookie Recipes

We've come a long way from that inaugural Girl Scout cookie season just three years ago, and if I ever doubted what Girl Scouts gives my daughters, I could compare those unsure, shy kids three years ago to these savvy businesswomen who marketed, publicized, and sold their cookies, easily talked to thousands of strangers, used some pretty great--and quite effective!--sales techniques, and made change, worked the credit card reader, figured out percentages, created pie charts, and calculated ratios like the math wizards that they've learned how to be.

Cookies take over our lives for two full months, which is not surprising considering that 8,060 Girl Scout cookies passed through my house, with my girls selling 1,840 of those between the two of them, and we spent ALL of our free time (and much of our time that should have been devoted to other activities) organizing, chaperoning, and doing the counting and paperwork to make it possible for the troop's girls to meet their goals. We ate our fair share of cookies--so tempting, when there were 2,000+ at a time in my hallway--and the whole cookie season, I kept wanting to do a Girl Scout cookie baking project with the kids but...

There was just. No. Time!

I collected loads of super-cute recipes that I super wanted to make, but in the end, Syd and I only managed to create one easy, no-bake recipe during cookie season. Fortunately, it was adorable and delicious!

I made these up, but I'm giving them the official name of Girl Scout Cookie No-Bake Mini Cheesecakes:


All you do is take a Girl Scout cookie--we used Trefoils and Thin Mints, ice it with your favorite cream cheese frosting (ours is so brown because we used coconut sugar), spreading it on nice and thick, and then decorate it with raspberries and chocolate chips:


And candy googly eyes. I mean obviously.


And really, a cheesecake is just about the same, only you add an egg to the cream cheese frosting and bake it.

You can still decorate it like a flower if you want to!


These keep well for a couple of days in the refrigerator, although the Trefoils will get soft. The Thin Mints will stay nice and crisp, though.


Syd does have one more Girl Scout cookie baking assignment to complete; one of the requirements for the Cake Decorator IP that she's working on is to decorate a cake or cupcakes using Girl Scout cookies, so she will be baking and decorating a cake with Tagalongs and Thin Mints for our troop's post-cookie season celebration later this month, and I've already set aside the boxes for that. Other than that, though, I'm blissfully happy to see all zeroes on all of the Cookies Remaining lines in my database, and all those recipes that I collected?

I'm just going to put them right here and make them next year:


  1. Do-Si-Do icebox pie. Mac used to LOOOOVE peanut butter icebox pie. I wish I could make this for him.
  2. Girl Scout cookie cake bars. The author used Thin Mints and Tagalongs in these, but I think that any variety would taste equally delicious.
  3. Girl Scout cookie fudge. Will's favorite dessert is fudge, and I love any recipe that lets you use whatever you have on hand as a mix-in!
  4. Girl Scout cookie pizza. This would be a fun party food, with each kid getting to top part of the pizza and share their portion with everyone.
  5. Girl Scout cookie pops. These would be so cute at a bake sale, and a fun recipe to try with any variety.
  6. Girl Scout cookie-stuffed doughnuts. This isn't a recipe that I'd make, myself, but Syd is obsessed with doughnuts, and I know she'll be all about this one.
  7. Samoa brownies. Syd's favorite Girl Scout cookie is the Samoa, but otherwise, she doesn't much enjoy chocolate. I think we'd make these with blondies, instead.
  8. Samoa chess pie. Just in case the cookies, themselves, aren't rich enough for you!
  9. Samoa martini. This is what I'll be drinking allllll next cookie season!
  10. Samoa milkshake. Now that I know about dipping the rim of a glass into melted chocolate, I'm probably only going to drink from glasses with their rims dipped in melted chocolate.
  11. Seven-layer Samoa cookie bars. Here's another recipe to have on hand, in case just eating a Samoa isn't decadent enough for you.
  12. Savannah Smiles icebox pie. This is a recipe I'd put a box of Savannah Smiles into the freezer for, to take out when blueberries are in season!
  13. Savannah Smiles puppy chow. Savannah Smiles are the perfect addition to puppy chow, since they're already covered in powdered sugar.
  14. Tagalong cupcakes. I am SUPER into the idea of putting a whole cookie at the bottom of a cupcake.
  15. Tagalong-stuffed pudding cookies. Apparently, stuffing things with Tagalongs is the way to go!
  16. Tagalong-stuffed Oreos. I think I'd be even more into these than I would the Thin Mint-stuffed Oreos, below.
  17. Thin Mint and white chocolate popcorn. I think I'd also put some chocolate popcorn into the mix.
  18. Thin Mint bread. I have a recipe that I love for a vegan pumpkin chocolate bread, and you know what? Thin Mints are vegan, too! 
  19. Thin Mint cookie bars. There is a LOT going on in these cookie bars, to be frank, but trust me--it NEEDS to happen.
  20. Thin Mint milkshake. I think it would be fun to pull ANY box of Girl Scout cookies out of the freezer mid-summer and challenge yourself to make a milkshake to suit it!
  21. Thin Mint parfait. I'd go for the full-fat, full-sugar versions, because artificial sweetener tastes weird in my mouth.
  22. Thin Mint cupcakes. I like the idea of crushing the cookies very fine and incorporating them into the piped frosting; Syd thinks that the cupcakes should be minty, too, though.
  23. Thin Mint s'mores. These couldn't be easier, and you could substitute any of the chocolate Girl Scout cookies.
  24. Thin Mint-stuffed Oreos. This is insane, but in, like, a good way. If I was feeling really crazy, I'd only use the cream-attached sides of the Oreos to sandwich the Thin Mints, so that they'd be Thin Mint-Double-Stuffed Oreos.
  25. Trevoil s'mores. Now I also want to dip the actual Girl Scout S'mores cookies in chocolate, too!


Or, rather, I'll realize near the end of cookie season next year that my life has once again been overtaken with Girl Scout cookies and I'll maybe get to make one entire recipe...

But that one will be delicious!

Wednesday, March 7, 2018

Homeschool Science: 10 DIY DNA Models, Plus 2 More!

Chapter 7 of the CK-12 Biology textbook covers DNA and RNA. It's a big concept to understand, these building blocks of our selves, so we're taking plenty of time to explore.

After reading the section in the chapter specifically on DNA and RNA, and exploring several additional resources, I challenged the children to make their own DNA models.

Actually, I first beat my head against the wall for a goooood long while during my lesson planning, trying to find a DNA model tutorial that both children would enjoy making, before realizing that not only was I doing work that they were perfectly capable of doing on their own, but also that I was depriving them of valuable research and problem-solving and creative experiences by doing so.

Instead, I gave the children this model DNA assignment from DIY. Happily, it encapsulates exactly what I'd wanted them to do! The assignment was on their work plans for Wednesday, with space for them to continue working on it on Thursday and Friday. This gave us some time to hit up the grocery store for the supplies that the younger kid decided she needed to make the double helix model of her dreams:


Yes, that's Twizzlers and gummies. The kid likes what she likes!

The older kid's DNA model was made with supplies on hand, but I was pleased to see that she had clearly spent time working out a design, constructing it, and making sure the details were accurate:


I doubt that I could have gotten that level of buy-in on a model that I assigned specifically.

While I loved the DNA models that the kids made, and they learned from them what I wanted them to, I'm pretty sure that I could busy myself quite happily for years doing nothing but making DNA models from tutorials found on the internet. The things that kids come up with these days! The elaborate, cleverly-designed, lovingly-constructed projects! Here are some of my favorites, if you, too, would like to make a DNA model in your free time:
  1. Tape and straws. I really like this model, especially how easy it is to manipulate, although I shudder at the purchase of so many drinking straws.
  2. Cut-and-paste. This is one of the most scientifically-accurate models, and one of the most accessible in terms of materials.
  3. Beaded pendant. I SUPER want to make this for myself.
  4. Knitted. If I knew how to knit, I would make this immediately. I need to learn how to knit!
  5. Toothpicks, Styrofoam balls, and pipe cleaners. I LOATHE Styrofoam, but this is a larger model that would display well.
  6. Recycled cans. This is a brilliant idea, and would be perfect for a large group or co-op to build together.
  7. Origami. This model is easier than it looks, thanks to a printable template.
  8. Pony beads. This is another kid-friendly model that would make a great craft project simply on its own.
  9. LEGO mosaic. There isn't a tutorial here, but it wouldn't be too hard to figure out.
  10. LEGOs. There are several pics of LEGO DNA models floating around the internet, but here's an actual step-by-step, including exactly the LEGO pieces that you need.

Monday, March 5, 2018

Hand-Dyed Wooden Beads and Blocks in Pumpkin+Bear

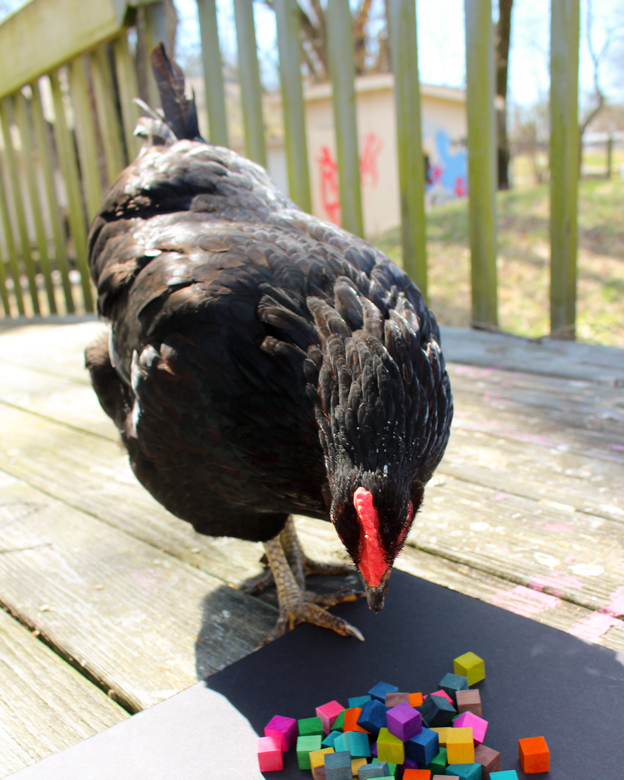
"Aww, look!" I thought. "The chicken wants to seee what I'm doing out on the deck on this gorgeous afternoon!"


"Isn't she pretty?"

"HEY!!! Those are not berries!"

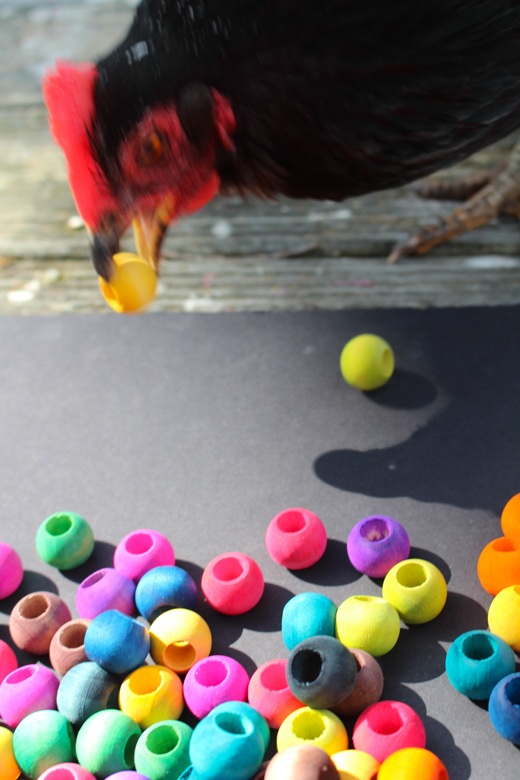
So there you go. My hand-dyed wooden beands and blocks are so pretty that chickens think they're berries.

I can't even tell you when I dyed these--a couple of years ago, perhaps?


We were doing several projects that involved hand-stained wood, and I was working out just the perfect technique to share over at Crafting a Green World.


While working out the technique to my satisfaction, I made waaaaaay more dyed wood pieces than we needed for the projects.


Apparently, I just squirreled the surplus away in my stash, because I am actually a hoarder.


I rediscovered them the other day while I was cleaning and decided I might as well peep into that plastic drawer in the closet--I'm still finding containers that I haven't unpacked after our move (which was four years ago now, for those of you playing the home game), so perhaps that drawer could contain my wedding ring, or my folk music anthology!


It didn't.

What it did have, however, were projects that I'd meant to list/relist in my Pumpkin+Bear shop. Some were projects that I used to have listed but wanted to rephotograph or rework in some way, and some where projects that I wanted to list in Pumpkin+Bear, but I'm guessing the light was poor on the day that I wanted to photograph them, or I got busy, and set them aside, consequently forgetting all about them.


Of course.

Fortunately, last week we had our first sunny, above freezing days in FOREVER, and there was nothing I wanted to do more than spend the afternoon out on the deck photographing stuff.


These cubes are 1/2" across, nice and light and brightly-colored now.


These beads are 3/4" diameter, with a 3/8" hole.


The kids actually use our stash of undyed wooden cubes as a sensory material. I pour them out onto a tray that sits on our homeschool table, and off and on all week I'll notice a kid fiddling with them as she thinks or reads. They're stackable, arrangeable, and they just feel good in your hands.


Syd really wants to turn some of these beads into Camp Halfblood beads, so that's a project we'll be taking on before too long.


I've used these stained beads to make magnetic mosaic tiles for our giant metal memo board. I'll probably use some of these to make more, and I'm tempted to upcycle a metal tin from somewhere and make a travel-sized version.


Of course, if you bought these from me, I'm sure I'd find something else to happily hoard and/or occupy my time with...

Thursday, March 1, 2018

The Kid Makes Handmade Slime

My tactile, hands-on, crafty, busy girl has busied herself at the big table that we bought for just that purpose, in the playroom that we designated for just that reason, ever since we bought this house. It's one of the reasons why we bought this house, that room that I knew could be a room of the children's very own. Will lounges on the floor, reading or coloring (which is why I have two giant floor pillows in progress taking up half of my study/studio space), but the table is mostly Syd's domain, for Perler beads, play dough, drawing, jewelry-making, and mostly slime.

Slime for days. Slime for YEARS!

All of Syd's slimes have original recipes. They all have original names. They all have peculiar qualities that she can tell you all about. None of the rest of us really give her handmade slime hobby the respect that it deserves, so the other morning I took my camera, found her in the playroom (making slime, of course)--


--and said, "Okay, Kid. Show me all your slime."

This is not EVEN all her slime, because my camera battery died. It is, instead, a fairly representative selection:

This is Pink Speck Slime:


It contains glue, red liquid watercolor, liquid starch, glitter, and the tiniest little bit of shaving cream:


This is White Fluffy Slime:


It's made from glue, shaving cream, and liquid starch:


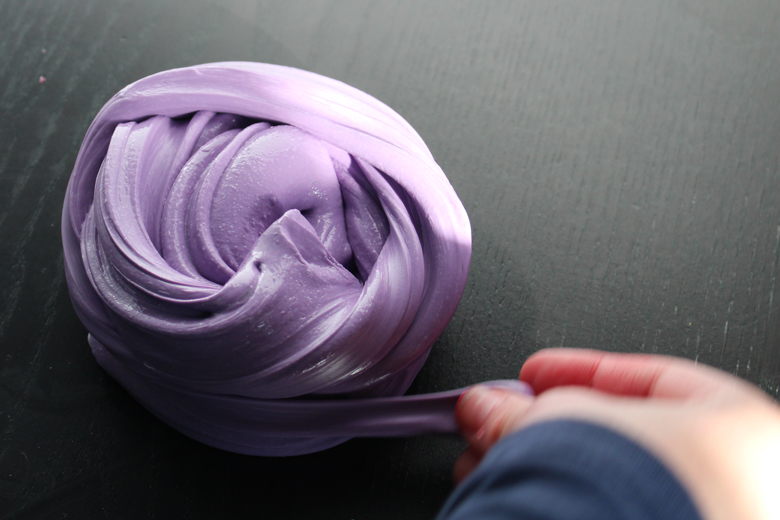
This is Purple Putty Slime:


It's made from one teaspoon thermic powder (which did nothing), glue, liquid starch, and red liquid watercolor:


This is Blue Speck Slime:


It's made from glue, glitter, and liquid starch:


This is Purple Fluffy Slime:


It's made from purple powdered tempera, glue, liquid starch, and shaving cream:

This is Black Glitter Slime:


It's made from a giant heap of glitter, the smallest amount possible of glue, and liquid starch. It's the glitter that makes it black:


This is Yellow Butter Slime:


It's made from stale yellow Model Magic, glue, and liquid starch:


This is White Cloud Slime:


It's made from glue, shaving cream, and liquid starch:


This is Clear Jelly Slime:


It's made from water, clear glue, and liquid starch:


This is Mash-up Slime:


It's made from all of the excess slimes that wouldn't fit into their containers:


This is Pink Floam Slime:


It's made from clear glue, pink floam beads, and liquid starch:


This is Syd's personal favorite, White Snowy Slime:


It's made from clear glue, a bunch of glitter, liquid starch, and shaving cream:


This is another White Fluffy Slime or White Cloud Slime, although when I told Syd that she had  showed me both a White Fluffy Slime and a White Cloud Slime already, she rolled her eyes at me, and when I pointed out that she'd just rolled her eyes at me, she informed me that she was just looking up at the door instead:


It's made from glue, a lot of shaving cream, and liquid starch (and a sarcastic tone and a couple more eye rolls, it seems):


This is Blue Floam Slime:


It's made from glue, blue foam beads, and liquid starch:


This is White Normal Slime:


It's made from glue and liquid starch:


This is Green Sand Slime:


It's made from glue, a little bit of green kinetic sand, and liquid starch:


This is Clear Unicorn Pee Slime:


It's made from clear glue, liquid starch, and some glitter:


Since slime making is Syd's area of interest, I buy her whatever she asks for as far as slime ingredients go, and sometimes, if I happen upon a recipe with an unusual ingredient, I'll surprise her with something she hasn't asked for--that's how she ended up with the foam beads, which are a hit, the thermochromic powder, which she hasn't been able to make work so far, and some metallic pigments, which she hasn't experimented with yet.

I also bought her saline solution, which she used to make a whole series of slimes that led her to decide that she far prefers to work with liquid starch.

Here are Syd's favorite slime-making supplies so far:

  • 2-ounce plastic storage containers. These work well for giving slime away, especially on Valentine's Day.
  • 8-ounce plastic storage containers. These are the standard size that Syd uses.
  • glitter. Syd has recently also asked for large-flake glitter, so we'll make a trip to the craft store this weekend to hunt some down.
  • clear glue. I buy this by the gallon.
  • foam balls. The dye comes off of these balls when it's mixed into slime, so Syd says that you might as well just buy the white foam balls and dye the slime your color of choice.
  • glitter glue. Syd is just as happy dyeing and glittering her slime from scratch, but she likes these, too, so I buy them if I see them on sale.
  • white glue. I also buy this by the gallon.
  • Stay-Flo liquid starch. This is Syd's ingredient of choice for all of her slimes.
  • miscellany. Syd has experimented with all kinds of mix-ins for her slime, everything from sand to beads to dry rice and any other ephemera that comes her way. She also likes to find unusual ingredients to make slime from. She made some awesome slime from stale Model Magic, but the slime that she tried to make from leftover play dough turned into a slimy nightmare that still makes me shudder a bit to think of it.
I don't always appreciate Syd's passion for slime making; it's sticky, and messy, and that playroom table will likely never recover, sigh. But I figure that I bought the playroom table for the kids to use, and the stickiness and messiness is just the kid feeding her senses. She's being creative, she's exercising her STEM skills with all that creating and remixing recipes and discovering new combinations, and she's engaging in whole-body physics and chemistry by exploring the properties of a whole series of non-Newtonian fluids. 

And she's mastering the entire field of slime making, and experiencing the confidence and satisfaction of that mastery. What more could I ask glue and starch to do for a person?