Monday, March 2, 2020

February Favorites: Anne, Aubrey, and a Lot of Books I Haven't Read


As with January, alas, I did not distinguish myself by reading a respectable quantity of books in February. The good news, however, is that Girl Scout cookie season is almost over! By this time next week, I will be very, very, very close to taking to my bed for several days with snacks, wine, a free two-week trial of Disney Plus, and every single novel still on my library shelves.

Captain Aubrey and I are going to have so many adventures!

My favorite book of this month, you'll not be surprised to learn, again involves my darlings, Captain Aubrey and Doctor Maturin:


I was reading this in the Senate Page office of the Indiana Statehouse early in February, waiting for two very particular Senate Pages--


--to finish writing thank-you notes to Senator Koch, when another teenaged Page, one who apparently writes much more quickly than my own two, walked past me after handing in her own thank-you note and said, "Ooh, is that the Master and Commander series?"

"YES!!!" I said.

"DO YOU LOVE IT?!?" she said.

"I LOVE IT SO MUCH!!!" I said.

And then we spoke about how the books are so good, and there are so many of them, and the movie is really good, too, and it's supposed to be super accurate to the time period, and then, you guys, she told me that once she saw the complete set of Master and Commander novels in a bookstore, and you guys, all of the books' spines lined up together to make an ocean scene featuring the HMS Surprise!

I must own this for myself one day.

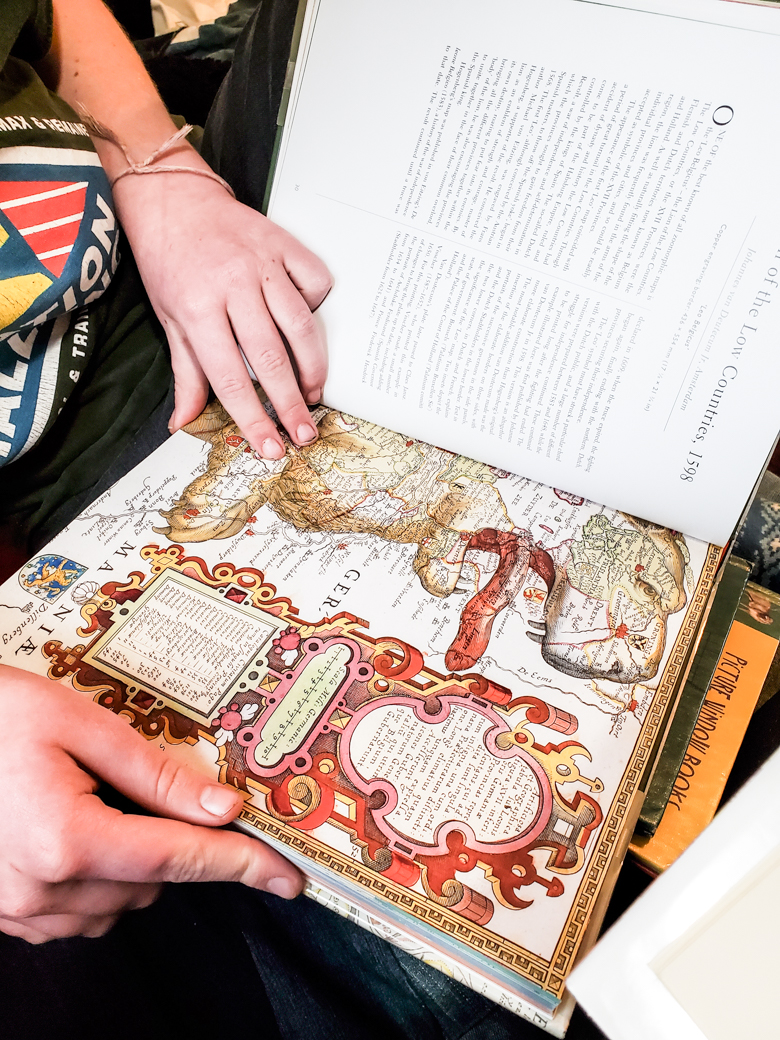
Another book that surprised me in February was Anne Frank's diary, which I possibly have not read since I was in junior high. It's a beautiful book that I know for a fact I read several times during those early teen years, so you can imagine my absolute shock to re-read it and learn that the book that I read as a teenager?

IT HAD BEEN CENSORED!!!!!

The official term for what was done to the book is "abridged," but oddly enough, it was mostly the parts in which Anne explores her body and her sexuality that were actually deleted from the edition that I read. I'm outraged on behalf of my own thirteen-year-old self, who would have loved to have read Anne's quite detailed descriptions of her first menses and her genitalia--whatever else they brought to the Secret Annex, they definitely packed a hand mirror!

I think they left some of the kissing in my censored edition, but I'm pretty sure they deleted most or all of Anne's fantasies about rubbing her and Peter's cheeks together. To me, all grown up now, those are the most heartbreaking passages in the diary. Anne was SUCH a teen girl--thinking about her period, exploring her body, spending much of her free time having super weird yet adorably innocent sex-adjacent fantasies.

Seriously, I know you read Anne's diary in school. If you, too, do not remember a passage in which she takes you on a tour of her labia and everything that lies in between, go check THIS version out of the library and read it again, because you, too, are missing parts of one of our culture's most beautiful and canonical works of art:


And if you can read Dutch, you can apparently read even MORE previously censored passages!

Here's what else I read in February:


Will, of course, has a long list of books that she read in February. But for the first time EVER, I have not read a single one of them! They are ALL completely new to me! Here are her favorites that I know nothing about:


And here's the rest of what she read that I know nothing about!


GASP! I did find a book on Will's list that I've read, too:


This has to be at least the fifth time that Will has read War Horse.

I had been super excited to listen to the second season of The Dream, the one focused on the wellness industry, but it didn't hold my interest like I'd expected. There are a lot of "wellness" topics, which is probably why the episodes seemed to jump around a lot, but I like a little more flow to the the podcasts that I'm binging.

So I switched to Cold, and I AM OBSESSED WITH IT:


I'm going to go out on a limb here and say that never before have a murderer, a murder victim, and a super creepy possible accomplice but also for sure sex criminal who also victimized the murder victim all been devoted diarists. That's the most compelling thing about this extremely compelling cold case--almost everyone we know to be involved kept diaries! The criminals even kept audio and/or video diaries, so we can hear their inflection and see their body language.

It's a fascinating story, so suspenseful that I invented chores so I could keep listening. It's also agonizing and painful, because of course you know what's going to happen in the end to Susan, Charlie, and Braden, and listening to the video diaries that detail Susan's exploitation by her father-in-law and every single misstep in the police investigation and the care and protection of Charlie and Braden is pretty awful. But it's fascinating, too, and enlightening.

Will and I are starting to plan an autumn trip for just the two of us. We're heading to a Girl Scout national convention, camping in the Everglades at the worst time of year to do so, and hitting up both Disney World and Universal Orlando! I've got a couple of Disney YouTubers that I enjoy watching, but I don't yet know any Universal YouTubers who I can stand, so most of our Universal research has so far consisted of ride videos:


I'm pretty sure that I do NOT want to ride this roller coaster. I'm pretty sure that I will, however, end up strapped into it at some point...

I also had to show Will this video as a very important part of our research into the Everglades:


Unfortunately, Syd has forbidden us from taking the murderbrat Jones with us to scare away alligators.

And that's the approximately .05% of February that I spent not doing Girl Scout cookie stuff! What were YOU up to while I was counting cash and cookie boxes and entering booth time slots into databases?

Thursday, February 27, 2020

How to Make a Tote Bag from Scratch


I never did find a pattern for the perfect zip-top tote bag.

So I made one up from scratch!

Fortunately, a tote bag pattern is dead simple to construct. Here's what both sides will look like--minus the Girl Scout marketing (and the cat hair, sigh...)!

We're currently in the middle of our third day of straight rain, with another full day of rain forecast tomorrow. Sucks, because I do not have the skills to make gloomy indoor spaces look lovely!
 Start with the desired finished dimensions of your tote bag. To each side and the bottom, add 1/2 the desired finished depth of the tote bag, plus 1/2" seam allowance.

Notice the square that you'll be cutting out of the bottom left and right pieces. This is a nice place to self-correct, because if it's not square, you need to go back a couple of steps and re-measure!

Because you're going to fully line this tote bag, you can use any non-stretch fabric that you like. I am pretty excited about making a fleet of appliqued felt-on-felt tote bags to replace the paper bags that we usually get at the grocery store (yikes, I know), because probably an entire decade ago Matt and I had a failure of communication during a Black Friday sale at Joann's that resulted in our ownership of an absolutely ungodly yardage of Eco-fi felt in every single existing color.

That absurd amount of felt has been a weight on my mind ever since, and I'm always on the lookout for felt projects. I think these tote bags are finally going to bring my felt stash down to the amount that a sane person could possibly be expected to own!

So, yes, feel free to satin stitch embellishments to your tote bag, if for no other reason than it uses up even more felt!

Next, cut out two more identical pieces:


I wanted these tote bags to be reversible, with one plain option and one embellished option.  Other than that, I don't really care about making the felt colors too mitchy-matchy--I mostly just want to use up all that felt!

For each front-and-back pair, put right sides together and sew up both sides and the bottom. Do NOT sew that square shut!


Instead, for each square match the two seams and make those your middle point--


--then sew the square shut, creating a box corner:


Put the two tote bag pairs together wrong sides together, one inside the other:


It should look something like this!


Cut a length of webbing for your strap, then insert it between the tote bag pairs and pin it well:


Edge stitch around the top of the tote bag. If you're using a fabric that will fray, you can fold the raw edges under and pin them first, but with felt or fleece you can just stitch away.

Stitch to reinforce the webbing straps by sewing down the length, then sewing an x:


Admire how many boxes of Girl Scout cookies your new tote bag can hold!


When it's not Girl Scout cookie season--because I have faith that one day it will not be Girl Scout cookie season--we'll turn the tote bag so that the purple faces out.

And when it's Girl Scout cookie season again--because it somehow seems to be always Girl Scout cookie season!--there's one more marketing tool all ready to use!

Monday, February 24, 2020

Homeschool Math: Make Geometry Nets with Building Toys

Want a super-fun hands-on geometry and spatial reasoning activity for multiple ages of kids?

Make geometry nets!

Unfortunately, almost all of the geometry net kits and models that you'll see are pre-made to form a specific net, and all the kid gets to do is fold and unfold them.

It's better than nothing, sure, and it's still fun to physically manipulate a model, and to guess what three-dimensional shape a particular net will form, but other than that there's not a lot to do there.

It's definitely not the problem-solving practice and spatial reasoning challenge that a kid gets when tasked to use open-ended building toys to make their own geometry nets.

Like these!

Forgive the poor quality of these photos. We both have inadequate indoor lighting AND homeschool even when it's gloomy outside!
 

This nifty little set is Googolplex, a vintage building toy that I checked out of our local university's library.

It's too bad that it's no longer manufactured, because it really is perfect for this project. Each line segment had a hinge attached to it, so that you really could fold the planes together and explore what 3D shape they made.


You could also add wheels!

 I mostly made boring basic shapes, but Syd enjoyed the problem-solving involved in creating more interesting shapes and then making them move:


Her spatial reasoning game has always been pretty fly.


If you're interested in even more older kid exploration with polyhedra, check out these projects:

  • giant cardboard house. I LOVE this house idea! I should have saved the 753 corrugated cardboard Girl Scout cookie cases that have come through my house so far this year to make this with the kids, and I really had been trying to save all those boxes to upcycle, but I hit the wall on Saturday and had Matt take them to the recycling center. Perhaps next year!
  • geodesic dome with straws. I don't usually craft with single-use plastic like this, BUT the kids have it on our ultimate wish list to build ourselves a giant PVC pipe geodesic dome in our backyard. We may have to practice our designs with these!
  • gross-motor geometric solids. With this Bernoulli windbags, kids can make larger-than-life geometric solids that are as light as a feather. It's really fun!
  • paper polyhedra. These are just models to cut out and assemble, but it's a good gross motor activity, good for memorization, and they're pretty!
  • tetrahedron wall art. The STEAM skill here is in using pleasing colors and patterns to make art with different sizes of tetrahedra. 
  • Zometool geometry. This super sophisticated building toy is perfect for complex geometric structures. The antiprism broke my brain!
Will is taking an online geometry course this year, and so I'm always on the lookout for even more interesting and complex hands-on geometry activities. Let me know in the Comments below if you spy something she or Syd would like!

Saturday, February 22, 2020

Old-School Animation with a YouTuber Teen: Our DIY Zoetrope


I must tell you that my child has turned into one of those teenaged YouTubers. She has a channel on which she posts cartoons that she makes, usually music videos or memes.

Here's my favorite of her little skit-thingies:


Anyway, basically what I'm saying is that the kid has her animation hobby well in hand, and there is no technical instruction that I could usefully provide her on this subject.

But technical instruction is rarely my role, anyway. What I do is contextualize. Historicize. Enrich and embellish. Strew, if you will.

So on a typical Thursday afternoon, after lunch and before everyone starts getting ready for evening extracurriculars, you contextualize and historize a teen's YouTube animation hobby by talking about the earliest history of animation together, and then you make and play with a zoetrope!

I'm obsessed with everything Crash Course, so you won't be surprised that to get started, we watch the first episode of Crash Course: Film History. In it, the host talks about the zoetrope and the persistence of vision, a fun little optical trick that we've played with off and on over the years, although usually with a thaumotrope instead of a zoetrope:


To make our own zoetrope, Syd and I used a DIY zoetrope kit that I had squirreled away (for too many years to be proud of...), but it looks like to make something similar, you'd have to consult something like this book, because all the other DIY kits that I'm seeing now have too much plastic:


Like, I think that you're going to have fun with your zoetrope, but I don't think that you're going to love it so much that you're going to be glad that it's made of sturdy, keep-it-forever plastic and not nearly as sturdy, recycle-it-when-you're-done cardboard.

Anyway, the fun part, at least for Syd, isn't so much constructing the actual zoetrope. It's creating the animations!


If you can get it to rotate quickly and at a consistent speed, it works quite well!

We kept ourselves entertained with that thing for a looooooong time...

Syd and I also watched a video of this, the COOLEST ZOETROPE EVER CREATED:


I love that the 3D zoetrope represents such an intense intersection with art and hands-on craft. There's still place for old-school DIY used with tech-savvy techniques, is the take-away that I'm hoping that my little artist/tech-savvy creator took away from our project.

P.S. Here are a couple of other DIY zoetrope builds that you could utilize:

Tuesday, February 11, 2020

Fraction Models to Review with Your Eighth-Grader

Cover your ears, Friends, because this is me saying it again louder for the people in the back:

MATH MANIPULATIVES ARE NOT JUST FOR LITTLE KIDS.

I mean, everybody knows this if they think about it. Everybody likes a good graph or chart or 3D model or virtual model or LEGO model or hand-drawn diagram or Google map. Everybody likes to see visual representations of information, and to fiddle with stuff to figure it out.

It drives me bonkers, then, that math manipulatives very rarely make their way out of the early elementary classrooms, especially when they're so useful for exploring and explaining a wide variety of more sophisticated concepts.

Ask me sometime about my handmade, take-apart model of the binomial and trinomial theorems!

In her intro to algebra curriculum, Syd is currently learning more about rates and proportions (handy timing, as that's what I use to allocate sales to my Scouts who work Girl Scout cookie booths--guess who's going to do all my cookie booth math for me this weekend?). In order to focus on problem-solving with rates and proportions, one should already have a competent working knowledge of calculating fractions.

Here, by the way, is one of those places where a kid can get lost in math for life. Math builds upon itself, and a curriculum that's currently teaching a kid how to graph proportional relationships is not going to hyperlink a review of every type of calculation that she should have mastered in order to solve the problem.

It should, but that's a different gripe.

So if graphing a set of proportional relationships requires a kid to divide fractions and she doesn't remember how, she's not going to be able to graph that set of proportional relationships. And then the next set that she's asked to graph, she still won't be able to do it, because she didn't learn how during the previous set, because she couldn't do the necessary calculations.

And then when the class moves on to scaling figures, if any of that work assumes that the kid can graph proportional relationships, then, well, she's not going to learn how to scale figures, either. And so on and so on until she gratefully taps out of math completely after Algebra 2 and spends the rest of her life telling people she's bad at math.

She's not bad at math, Friends. YOU'RE not bad at math, even if you think you are. You just got lost somewhere and nobody helped you pick yourself back up.

So when Syd was doing unit rates the other day, and for a moment she couldn't remember how to turn an improper fraction into a mixed fraction, even though she looked at the fraction for a second and then was all, "Oh, right, I've got to divide," I said, "Do you know why you have to do that?"

She said, "Because that's how you do it."

When a kid says that, it's because they don't KNOW why a certain algorithm works, and if they don't know WHY the algorithm works, then they haven't mastered the concept behind the algorithm. A kid who hasn't mastered the concept behind the algorithm that's really just a calculation shortcut is on shaky ground, mathematically, because memorizing algorithms isn't math, or at least it's not what math ought to be.

When I'm in charge of making sure people understand math, I make sure they understand the actual math, so that they can apply it to new situations, incorporate it into patterns, problem-solve using it, think creatively about it.

The best way that I've found to that level of understanding is seeing it and touching it. And that's how I found myself bringing out the fraction circle manipulatives and Cuisenaire rods and reviewing some fraction models with my eighth-grader.

First up: that tricky little improper fraction to mixed fraction conversion! You need to do this a LOT in algebra, and forgetting the algorithm or being unsure that what you're doing is correct will distract you from the algebraic concept you're trying to master, or just cause you to get the wrong answer so that you can't master the concept at all.


This model is an easy reminder of what you're doing when you convert an improper fraction to a mixed fraction, and vice versa.

To model how to convert an improper fraction to a mixed fraction, give your kid a pile of the same fraction from a set of fraction circle manipulatives, and ask her how many she has. Let's say she has 7 1/4s. She can write that as the improper fraction, or she can go a step farther and write 1/4+1/4+1/4+1/4+1/4+1/4+1/4=7/4.

Then, ask her to assemble the fraction manipulatives, seeing how many wholes she can make. She'll be able to assemble one whole, with another partial circle next to it. Write the new fraction, which is 1 3/4.

Walk through that in reverse, and you're instead modeling how to convert a mixed fraction to an improper fraction. Remind them of the algorithm, and have THEM show YOU how the algorithm matches the model at each step.

If they need some drill to cement the algorithm, here's a worksheet builder.

Here's another example, still with unit rates (I tell you, algebra has a LOT of fractions in it!): Syd missed a problem because she multiplied a fraction when she was supposed to divide it. When I pointed out to her that she'd multiplied instead of dividing, she of course knew that what she'd done had to be wrong, but she couldn't at first figure out what exactly was wrong about it, because she also correctly remembered that there WAS multiplication involved when you divided fractions.

After thinking for a bit, Syd remembered that you of course have to invert the divisor before you multiply it, but because that step didn't make any sense to her, it was easy for her to forget.

Time to get out the Cuisenaire rods for a review of dividing fractions!

I have a very thorough step-by-step showing how to model fraction division using Cuisenaire rods here, so I mostly took these photos for fun.

Here's Syd doing the first step every time you work with Cuisenaire rods. Got to build the stairs to remind you which color represents which number!


Syd always likes doing this, too. Ahh, those number bonds for ten!


By the time we got out the Cuisenaire rods, Syd had remembered on her own how to work the algorithm for dividing fractions, so I had her work the algorithm first, then prove it using the Cuisenaire rods:


I think that the visuals here make the mathematical process so interesting. I'm fascinated at the way that the numerator of the divisor becomes the denominator of the quotient, and how elegant is the way that it becomes so.


And you'd never see it without these colorful math manipulatives in your hands!


Also, I DARE you to work with Cuisenaire rods for more than five seconds and not get distracted making fun patterns with them:


Again, if you do need some drill work afterwards, this is my favorite worksheet generator.

Speaking of multiplying fractions... that's also a good one to review models for, because doesn't it break your brain that multiplying fractions makes the product SMALLER?!?

I really like this fraction multiplication model that uses colored cellophane:


This is more enrichment than review, but middle school is a great time to play with the Fibonacci Sequence:


Need even more ideas for making fractions fun and real? Check out my Fractions, Decimals, Percents and Ratios Pinboard.

Because of COURSE I have a Fractions, Decimals, Percents and Ratios Pinboard!!!