Our spine for this unit was the Civil Air Patrol's Air Environment curriculum, supplemented with this home weather station, the Girl Scouts of Central Texas Hurricane Relief patch program, and, of course, lots and lots and LOTS of other books, videos, and activities.
Such as this one!
We studied Bernoulli's principle as a supplement to the Air Environment chapter on wind. Bernoulli's principle explains pressure changes in the flow of fluid, but also works with air. It's one of the main components of flight, and explains some of the mysteries around wind, such as why the roof can blow off your house in a hurricane or tornado.
But first, we play a mean trick on the big kid:
We have several of these Steve Spangler windbags that are specifically used for demonstrating Bernoulli's principle. To start the demo, I gave each kid a windbag and asked her to fill it with air. The thing about homeschooled kids, though, is that they're always going to some sort of hands-on museum or festival or program or workshop, and so half the time whatever you try to demonstrate, they've already done it fourteen times.
In this particular case, it seemed that the little kid had played with windbags somewhere that the big kid hadn't, and she knew that there was a trick. Here's the big kid's face when the little kid asked her if she wanted to be taught the trick:
I'm guessing her answer was a no...
So in this demo, the big kid unwittingly played the part of the rube who tries to blow up the entire windbag with only her breath--
--until she got lightheaded and had to admit defeat:
Here's her noticing that while she was huffing and puffing unsuccessfully--
--her little sibling has managed to fill her windbag to the brim!
The trick, of course, is to use the pressure difference to fill the windbag for you. Instead of holding the opening of the bag to your mouth like a balloon, open it wide and hold it away from your mouth a bit. Blow a slow, steady stream of air into the bag. The moving air has lower pressure than the still air, but all air wants to be even, so the still air will move into that area of low pressure, where you will trap it inside your windbag.
Another word for magic is science!
As you can probably tell from the lousy quality of my photographs, it was a lousy day outside, which means that we couldn't do our next activity, gross motor geometry, out in the wide-open space where it's meant to be.
Rarely do I wish that I worked in a school environment, but we sure could have used a nice, big gymnasium for this!
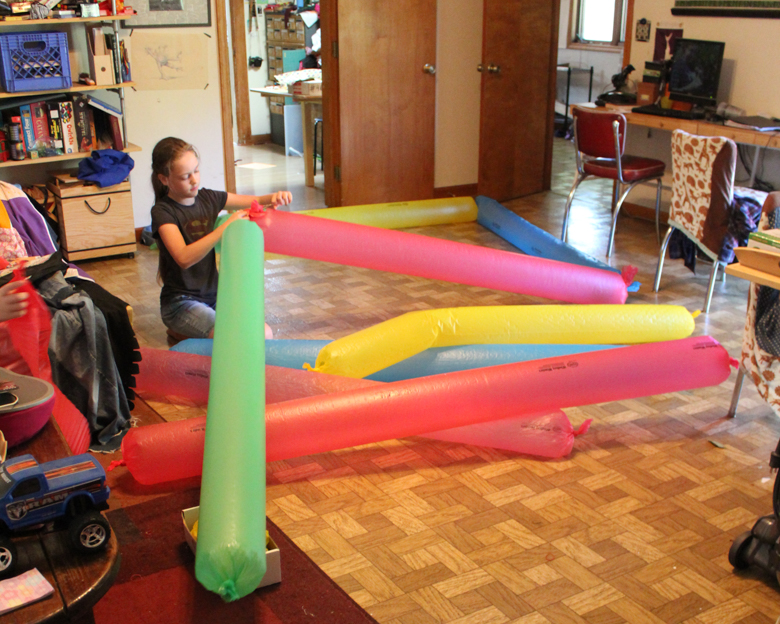
The idea is that after the kids have filled several windbags (a handy way to practice their new skill!), you can challenge them to build a giant structure using the bags and rubber bands to tie the ends together. Building the largest self-supporting structure possible would be a terrific engineering activity, but since we had to work in the family room OR in the pouring rain, I challenged the kids to build geometric solids:
Building them with the proper supports to hold themselves up would be another good challenge! As it is, though, the way that they collapse leads to interesting explorations in how the shapes might be folded or otherwise manipulated.
The more room you have for this, the better, but nevertheless, I think you can see why it's such a great gross motor activity!
As you can tell, the little kid, my active one who loves hands-on and sensory projects more than anything, absolutely LOVED this demonstration. It's a helpful reminder to me that however much effort it takes to create these types of immersive activities, an engaged and joyful child is worth it.
Interested in more hands-on meteorology activities? Here are some more that were a big hit with both kids:
P.S. If you like hearing about hands-on homeschool or afterschool activities, check out my Craft Knife Facebook page. I'm always on there sharing something or other, most of it weird.


No comments:
Post a Comment