Showing posts with label quilts. Show all posts

Saturday, September 26, 2020

How to Sew a Fibonacci Quilt

I originally published this tutorial on Crafting a Green World.

Quiltmaking is surprisingly mathematical. If you love to sew quilts, then whether you realize it or not, your geometry and trigonometry skills are probably on point!

Why not celebrate how mathematically beautiful a well-made quilt is by making a quilt out of one of the most beautiful mathematical sequences that we know so far.

Let's sew a Fibonacci quilt!

The Fibonacci sequence, named after the guy who first noticed it, is a series of numbers created by adding up the two previous numbers in the sequence. You're given 0 and 1, so add them together and the next number is also 1. 1 and 1 make 2, but then 2 and 1 make 3. 3 and 2 make 5, 5 and 3 make 8, and you can just keep going, ad infinitum.

To make the Fibonacci squares, use each of the Fibonacci numbers as the length of the sides of a square--leave out 0, because that doesn't make a square, of course. Piece them together in a spiral, much like a log cabin quilt block, and you'll have a Fibonacci rectangle that looks like this:

CC BY-SA 4.0

We're going to go up one more number in the sequence, all the way to 34, because that's the last number in the sequence that you can make from one continual piece of yardage. Here, then, will be the finished measurements of the quilt pieces that you'll need:Now, pretend that each of these squares is the finished measurement of a quilt block--wouldn't that make an absolutely beautiful quilt?

  • 1"
  • 1"
  • 2"
  • 3"
  • 5"
  • 8"
  • 13"
  • 21"
  • 34"

I used a quarter-inch seam allowance on all of the pieces, so add a half-inch to each of these measurements when you cut your quilt pieces.

You will also need the following:

  • one 34"x55" piece of backing fabric. I backed this quilt with nothing but another piece of quilting cotton, and I am in love with how light it is. Not every quilt has to be warm enough for winter--some quilts are destined for summertime naps on the couch!
  • double-fold bias tape. You can make your own double-fold bias tape, but I buy mine from Laceking on Etsy.
  • cutting and sewing supplies.

1. Pre-wash, measure, and cut fabric pieces. Don't forget to add 1/2" seam allowance to each measurement!

2. Piece the quilt. This Fibonacci quilt is easy to piece--just follow the above diagram, adding each piece in numerical order of its measurement. Be very strict about your 1/4" seams, and iron after every seam. I like to use a walking foot when I sew quilts, so if you're struggling to feed your fabric evenly, that might be worth checking out.

3. Put the front of the quilt with the back, wrong sides together. Pin it as much as you can stand to!

4. Sew double-fold bias tape all the way around the quilt. Miter the corners as you go to save time--I really like the first method shown in this video.

When you're finished, you'll have a lovely, light summer quilt that's both aesthetically and mathematically beautiful:

Interested in more cool math activities? Check out my list of even MORE fun Fibonacci sequence stuff!

Now get back to your sewing machine and get going!

Saturday, August 1, 2020

How to Sew a Nine-Patch Quilt for an American Girl Doll

I originally published this tutorial on Crafting a Green World.

A nine-patch quilt is the easiest type of quilt to sew, although I might be biased since as a child I first learned how to sew by back-stitching, under my grandmother's supervision, nine-patch quilt blocks of my very own.

A nine-patch quilt block is made from nine pieces in two different fabrics. The pieces are all square and are sewn together in alternating fabrics in three rows of three. This pattern works well with both a dedicated color scheme and layout or a seemingly random mishmash of color and contrast, which is another reason why it's such a favorite with sewers of all ages and levels--and their recipients!

Just as the nine-patch quilt is the easiest type of quilt to sew, I find a doll quilt to be the easiest size of quilt to make. There's nothing like a tiny quilt to give one instant gratification! An American Girl doll quilt, in particular, is a great size to start with--at just 12" x 18", you can make the whole thing in a single afternoon.

Here's what you'll need!

Supplies

  • Fabric and cutting supplies
  • Sewing machine and matching thread
  • Double-fold bias tape
  • 12" x 18" fleece piece


Directions

1. Measure and cut the fabric pieces

The most important thing that you can do to make a beautiful quilt is to cut the pieces completely accurately. Each piece in this quilt is a perfect square, 2.5" x 2.5". Each nine-patch quilt block uses two different fabrics and a total of nine pieces--four of one fabric and five of the other. You will need six total nine-patch quilt blocks for this quilt.

The nine-patch quilt lends itself to an easy hack if you'd like to make two at a time--for two children, say, or two dolls. All you have to do is cut nine of each fabric piece, and then you'll easily have two complementary, but NOT identical, nine-patch quilt blocks in the making:

2. Piece each nine-patch quilt block

Have your iron at hand, because you always want to iron every seam flat. To sew a complete nine-patch quilt block, first sew the three separate rows of three pieces--

--ironing each seam flat as you go, and then sew the three rows together to complete the block:

Repeat for each additional nine-patch quilt block until you have six completed blocks.

3. Piece the quilt

Arrange and rearrange all of the nine-patch quilt blocks until you're happy with the look of the quilt as a whole.

Use exactly the same method to piece the full quilt as you did to piece the individual blocks. First piece the quilt blocks together into rows, then piece the rows together until the quilt is complete.

4. Back the quilt with fleece

Because this is a doll quilt you get to skip some of the more fiddly steps involved in making a full-sized quilt. You don't have to sandwich batting between the front and back of your quilt, unless you really, really, really want to, and you won't actually have to quilt or tie this quilt--unless you really, really, really want to!

A neat trick to give a doll quilt a thicker, fluffier feel without bothering with batting is to back it with fleece, instead. If you simply must have three layers to your quilt, you can always use a double layer of fleece, but I promise that the quilt top plus one layer of fleece gives this doll quilt an authentic heft and feel.

5. Bind the quilt

Binding a full-sized quilt can also be time-consuming, so you're lucking out again with this doll-sized quilt. I use a lot of different methods to bind quilts (one of my all-time favorites is back-to-front blanket binding), but my go-to method for a quick-and-easy doll quilt is to use double-fold bias tape. Bias tape can be store-bought (although you should look for bias tape made from natural fabrics, not polyester--blech!) or handmade nearly as easily, and 10mm double-fold bias tape is absolutely perfect for this project.

Your completed nine-patch quilt is the perfect size and scale for an American Girl doll to snuggle up under. Size up the quilt blocks to 4.5" to make a matching quilt for that doll's favorite person, or size the blocks down to 1.5" to make a Barbie doll-sized quilt.

P.S. Want to know more about our adventures in learning, and the resources that we use to accomplish them? Check out my Craft Knife Facebook page!

Saturday, July 11, 2020

How to Make a DIY Weighted Blanket

I originally published this tutorial on Crafting a Green World.

Weighted blankets are a high-ticket item, and that's for good reason: they're touted as somewhat of a miracle cure for problems like sleeplessness and anxiety, and you know that if you suffer from sleeplessness and/or anxiety, you're willing to do a lot to find some relief!

Unfortunately, as pricey as weighted blankets are, they're still not always made with great ingredients. Polyester fabrics and plastic pellets are crummy for the environment--seriously, we do not need more plastic (especially plastic pellets!) in our waste stream--and I'm not gonna blame you if you don't feel like sleeping every night with that nonsense draped all over your skin, either.

Supplies & Tools

It takes some fiddly work and some sewing prowess, but it's completely possible to DIY your own weighted blanket, and to do so using natural and/or sustainably-sourced materials. Here's how:

  • Instead of buying new fabric, upcycle flat sheets. For my weighted blanket, I'm using two cotton twin-sized flat sheets. Nope, they're not even the same color, and I don't care! If you care, you can buy organic cotton flat sheets or upcycle something cuter to DIY a duvet cover.
  • Instead of buying plastic pellets, use glass pellets. They're hypoallergenic and don't contain anything harmful that can leach out over time, although I do recommend sewing yourself a duvet cover, as I would with any filled bedding to give yourself an extra layer in case of rips.

In addition, you're going to need some good measuring tools and sewing tools. Spring for an excellent-quality universal sewing needle for this project, because it's shocking the amount of straight-line sewing you're going to be doing. I switched out needles midway through sewing the first series of channels for the filling and then spent longer than I care to admit trying to troubleshoot why the thread tension was suddenly shot before finally realizing that the problem was, of COURSE, the needle.

Fun fact: when in doubt, change the needle. It's nearly always the problem.

So now that you have a brand-new, excellent-quality needle installed the correct way in your sewing machine, a couple of sheets, and several pounds of glass pellets, here's how to turn all of that into a future of sound sleep!

Directions

1. Wash, Dry, And Iron Your Fabric

It's crucial for both brand-new and upcycled fabrics alike! Pro tip: sheets can come out of the dryer ridiculously wrinkly, no matter how much care you take. Instead of tumble drying them, use a clothesline. Smooth them absolutely flat, pin them well, and when they're dry you'll have an easier time ironing out the remaining wrinkles!

2. Measure Out A Grid


You can tell I worked so hard at getting out all those wrinkles, lol! Eh, whatever.

First, re-measure your flat sheets. Even though they're supposed to be a standard size, I learned the hard way (via a bunch of unhappy comments!) that most/many/all flat sheets, perhaps particularly after washing and drying, do not match these measurements.

Divide each measurement into a reasonable number of divisions to make a grid. You'll be sewing long columns of stitching parallel to the short sides of your blanket, filling a row with filling, then sewing parallels to the long sides of your blanket to close each row until your entire blanket is a grid with each module containing an equal amount of filling. It takes a little bit of math and a little bit of eyeballing to figure out what will be practical for your blanket.

My twin flat sheets measure approximately 66" x 96", so I decided on a grid of 16 columns by 8 rows, for 128 total modules.

Use a marking pen or masking tape to mark out the columns on one of the flat sheets. I like to do this even before I sew the two sheets together, although you can certainly complete the next step and then come back to this.

3. Sew The Flat Sheets Together

Pin the flat sheets right sides together, then hem together around three sides, leaving one long side open. You'll be using this open side to fill the columns, and will close it in the last step.

If you preferred to sew the sheets together before measuring and marking the columns, then measure and mark them now.

4. Sew The Channels


 If you look closely, you can see that I've got all of the columns sewn to make channels for the filling, and I've taped out the rows. I'll stitch down each row after I fill it.

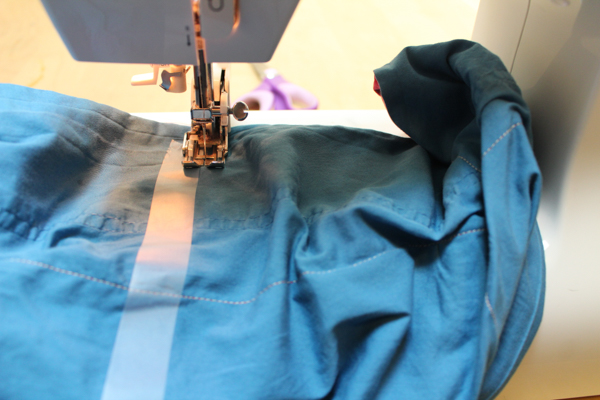
Using a very short stitch length, stitch all of the column divisions, using your markings as the guide. You can stitch each of these twice if you want to make sure that the sewing line is very, very sturdy.

5. Measure And Mark The Row Guidelines

Lay your blanket flat again, and mark all the row gridlines the same way that you marked the column lines. Do this before you start to fill your blanket because you'll be sewing each row gridline down after you fill the modules below it.

6. Calculate The Amount Of Filling For Each Module

Remember that the total weight of your blanket should be about 10% of your body weight and that the total number of modules that you have to fill is represented by the number of columns multiplied by the number of rows.

For instance, I have a 16x8 grid making up my blanket, so I have 128 modules to fill. I'd like my blanket to weigh approximately 18 pounds, which is 288 ounces (fun fact: there are 16 ounces in a pound!). Dividing 288 by 128, I find that I should fill each module with 2.25 ounces of glass pellets.

That's too fiddly for me, so I estimated and let myself fill each module with between 2 and 2.5 ounces of glass pellets. Feel free to fudge your own numbers a bit, too!

7. Fill The Blanket

Tare a kitchen scale to a small cup, and weigh out the appropriate amount of filling for one module. Pour that filling into the first channel, shake it down, then repeat until you've done all of the channels. Lift the blanket up by the open end, shake all the filling down again, and sew along the first row marker so that you lock the filling into the modules along the bottom row of the blanket.

Repeat for each of the remaining rows. It helps to push your sewing machine back towards the middle of the table so that you've got room for the entire weighted blanket up there.

When you've reached the last row, you can double-fold and sew the blanket's opening closed, sealing that row and hemming that edge.

As you might be able to tell from the iamge below, my entire family loves my weighted blanket! On the day I completed it, in fact, I showed it off to my partner as soon as he came home from work, he lay down on the bed to test it out, and within a couple of minutes was sound asleep in his work clothes, out like a light for an unexpected 7pm nap. My teen likes to veg out under it while listening to music, and I really only get it back at night, where it's added to my arsenal of anti-insomnia remedies.

Full disclosure: I don't know if it's super helped my insomnia, but I already suspected that I was a hard case, and it IS very, very, very comfy. Totally worth the time and effort!

Monday, December 11, 2017

How to Make a No-Sew Tied Fleece Blanket

This tutorial is so easy that apparently I decided that you don't even need nice photos for it, and I just shot what the kids were doing as they made a few more of these no-sew tied fleece blankets for our local animal shelter.

These blankets make great animal shelter donations, because you can make them to fit specific kennel sizes (we were asked to make one size for the cat kennels, and another, larger size for the dog ones), and the fleece is easy for the staff to wash. The fact that the blankets can go home with the doggies and kitties when they're adopted is a big bonus!

These no-sew tied fleece blankets are actually good gifts for people people, too, though, not just for fur people. It's a bigger project to tie a lap blanket, or even a full-sized blanket, for a person, sure, but it's also a project that can be easily done while one watches Netflix.

Season 2 of The Crown just came out, so I am a BIG fan of projects that can be completed while one watches Netflix! I'm sewing SIX variations of mermaid/shark/mermaid skeleton lap blankets, and let me tell you that I am binge-watching SO much dishy Queen Elizabeth II drama! And Philip! I can't even!

Anyway...

To make this project all you need are two pieces of fleece, cut to identical dimensions. Make a cardboard template that is 1"x2", and use that to fringe all the way around each piece of fleece. You need the template so that your fringes are identical, as well:

To make those larger cuts out of the corners, just completely cut away two of the cardboard template dimensions, to make a 2"x2" square cut from each corner.

Now all you have to do is put the fleece wrong sides together, then tie them together by matching the fringes and tying them together with a square knot:

A square knot is just the simplest knot you know, but you do it twice, once with your right hand dominant, then again with your left hand dominant. So if you tied the first knot going left over right, do it again right over left:


My Girl Scout troop taught the square knot to several Brownies early this semester (as well as teaching them how to braid to make these dog toys, and how to make these pumpkin and oat dog treats!), but on another day the kids and I were teaching an activity at the Children's Museum that required tying ribbon to chopsticks, and I was surprised at how many older kids, even teenagers, couldn't tie a knot, or didn't want to try.

I always make them try twice before I help them, just in case you previously thought that I'm nice.

Of course, even knot-tying goes faster when you have a sister to help you!


Even better when you turn it into a sing-along!


When you've tied all the knots all the way around, your blanket will likely look horrifyingly wonky, because you've just naturally tied your knots with varying degrees of tension. It's an easy fix, though--just stretch it by hand all the way around, and it'll straighten itself out. You'll probably need a buddy if you're making a larger blanket, but regardless, when you're done, it will look nice and perfect just like this:

This particular blanket went to a cat at the animal shelter. I'm hoping that it's long found its forever home along with her!

Want to do a little more with your no-sew fleece blanket? Here are some other ideas on my radar:

  • I like the look of this different method that doesn't use knots, but it does require cutting a slit into each fringe, so that feels like the same amount of work, and also less kid-friendly.
  • I've seen weighted blankets talked about around the internet, and it's always been kind of casually on my to-do list for the kids (and maybe for me!). This tutorial for a no-sew weighted blanket, using bean bags stuffed with poly beads, looks like the easiest tute, and a great one for a kid, as you can add more beans as she grows.
  • This braided-edge fleece blanket is even more work, but again, the edging looks quite lovely, and looks harder to make than it is.
  • You can use this same knot-tying method to make all kinds of fleece projects. I like the look of this patchwork blanket made by knotting all of the pieces together--it has so much dimension, and looks so snuggly!
If I have any fleece left over after sewing two mermaid tail blankets, two mermaid skeleton blankets, and two eaten-by-a-shark blankets this week, I might try one of these and let you know how it went!

And after I sew all of those, I'll also be able to catch you completely up on The Crown!

Thursday, June 14, 2012

New Blue Tablecloth

It wasn't until AFTER we completed the Great Room Switch that I realized that this, my children's former bedroom, my current study/studio, is REALLY small. I mean really small. It's basically an enlarged hallway with a closet.

I've been used to working in my former study/studio, now my children's bedroom, which was larger and also completely stuffed full with many upon many shelves and bins of stuff, stuff that simply won't fit tidily into this smaller room, stuff that now spills out messily onto the floor and sits in piles and makes me feel like a hoarder and an awful person.

All this is to explain, of course, why I have been stash busting so single-mindedly this year. I've been listing random bits of extra supplies in my pumpkin+bear etsy shop--

--sewing the girls entire wardrobes of summer clothing from a few years' accumulation of awesome thrifted T-shirts, and finishing up projects that have been long dead in the water.

For instance...do you like my new tablecloth?

I strip pieced it sometime in 2011 entirely out of blues from my stash fabric, most of which was given to me by other crafters getting out of the sewing game over the years, then decided that I hated it and folded it away and stuffed it in a closet.

Nothing gets stuffed away in this new tiny room, so last week as I was attempting to pull something else out of the same space, a bunch of crap fell out (and it's still on the floor), including this pieced top, and I thought, "Hmmn, why did I hate that? I love it now!"

Does that ever happen to you? It happens to me enough that it's now a thing--if I make something and hate it, I just have to put it away for a bit and the next time I see it, I'll love it.

I backed it with plain blue fabric, also stash, stitched and turned it, quilted it, and set the table:

I'm not perfectly happy with it; I think because of all the different types of fabrics that I used in the top (I attempted to get all cotton, but since I don't know the provenance of most of this I'm thinking that I mixed a lot of cotton and cotton blends together, and of course a lot of slightly different weights), it simply does not lay flat, but instead is lofted and rumply and, well, quilted:

It does make the table look comfy and homey, however, like having a picnic on a quilt outdoors. We're on a brief hiatus from schoolwork right now, so I haven't yet decided if, when we begin again next week, I'll want to roll the tablecloth back from our work surface or finally get around to making the Waldorf-style painting boards that I've been contemplating making for...well, my children's whole lives, likely.

Tuesday, January 25, 2011

Snuggly Warm, Snowy Cold Photo Shoot

My house has rotten lighting (I'm house hunting, by the way--know of any good two-story non-ranch houses on around five acres of land, no more than a 20-minute commute from a good graphic design job, for under $200,000?), and so I have to do my product shoot outdoors. It's challenging enough in the summer, when I have to find the perfect spot of indirect lighting, but in the winter, when I have to find that spot on a sunny day...well, the Midwest isn't really famous for that.

I tried to compromise by shooting some indoor shots next to an east-facing window blocked by scrub trees, but combined with a model prone to making goofy faces, I only got a few keepers out of dozens of shots:
 
 
 However, even though it was stinkin' cold so I only got my I Spy quilt done, I did discover that the snow makes an excellent photo backdrop:
 
 It's so hard to put a quilt into one shot, and so I think that this corner-to-corner angle is going to be my new go-to quilt shot:
 And then, of course, there's fringe:
The I Spy quilt is now up in my pumpkinbear etsy shop, to be followed by some more one-of-a-kind listings as soon as we get some more snow!

Tuesday, August 10, 2010

I Spy Four Kittens

Sydney's I Spy quilt took a LOT longer to quilt and put a mock binding on than I had anticipated. I just kept having all this parenting to do, and homeschool parenting, etc., so I have not had nearly as much hands-on just-the-Momma craft time that I'm accustomed to.

I've had a lot of Momma/baby craft time, in which Sydney sticks lots of random open safety pins into a quilt as I'm pinning it, until I run out of safety pins. I've had a lot of Momma/baby baking time, which I'll post about a little later, but just know that French bread? Yum. Chocolate cookies six different ways? YUM! Scrubbing the table and scrubbing the chairs and scrubbing the floors and washing every mixing bowl that I own four times every day for four days straight? Not so yum, but it is a hazard of the house.

And I've had a little, little bit of just-the-Momma craft time, thank goodness for Magic Tree House audiobooks, and in that little bit of just-the-Momma craft time, I finally finished quilting and putting a mock binding on Sydney's I Spy quilt, and laid it nicely and neatly out on her bed:
Two minutes in, it was already looking loved:
Of course, loved as Sydney's new I Spy quilt is, it really isn't even today's big news. Here's today's big news:
Four new foster kittens, come to stay with us until they're big and fat and ready to be adopted. We're already smitten with them:
And they seem pretty happy with us, too:
Kittens plus kiddos? I think my wild ride's going to keep going for a while.

Friday, July 23, 2010

Home: The Newest WIP

Ah, it's good to be home! The dishes didn't wash themselves while I was away, but my bed sure is comfy.

I am somehow unable to leave the house for a vacation without wrecking said house, so quite a bit of the last couple of days has been taken up with cleaning, and laundry, and those darn dishes, and cleaning some more. There's been plenty of weeding, although not enough, and some harvesting, and some reading and playing, walking, and swimming, and some working out of some homeschool kinks (I tried to be one of those mommas who is comfortable with letting the kiddos have free access to the TV, but I am NOT one of those mommas, at least not yet), and a lot of grocery shopping.

What there has not been a lot of is crafting or writing. The Matty and I have a tentative schedule, just recently, wherein I have one evening a week at home alone to craft, and one evening a week in the generally empty grad lounge on campus to write. I'm not good at keeping such promises to myself, and so I even wrote it on the calendar this time--I LOVE to mark things off of the calendar.

And that's how yesterday evening, while the Matty took the girls to the playground and to water our two gardens and who knows where else, bringing them comfy home just in time for bedtime, I got to stay home, watch Seven Pounds and Doubt on Netflix, and lay out and halfway piece Sydney's I Spy Quilt:
I cut accurately, and yet it has so far been a bitch to get perfect corners on this quilt, even with a walking foot. I'm settling now for more perfect seams than not, and I'm hoping that practice makes...well, perfect!

Friday, July 2, 2010

I Spy Sydney in Progress

Here's what my work table looks like this week:
I have been planning to sew an I Spy quilt for Sydney for quite a while, and now I need to hop to it lest she outgrows it before I even begin!

Monday, March 15, 2010

Dinosaur Dreams Tonight

It took a lot of sewing and over a year longer than I thought it would, but one little girl's dinosaur dreams came true today:
Phew! Nine dinosaur T-shirt panels--some from outgrown or ripped/stained shirts that Willow and Sydney wore, and some bought straight from thrift shops for this project--surrounded by a Courthouse Steps log cabin design in both dino and traditional prints quilting cotton--
and backed and with a back-to-front binding made from a handmade dino-print quilted blanket scored from the Goodwill Outlet Store (stuff is $1.39 a pound there, so definitely under a buck):I think the little girl likes it:
A lot:
The slightly smaller wall quilt, also dino-themed, is on its way to my Dinosaur swap partner, but I somehow managed to totally screw up the wall quilt that I was making for my pumpkinbear etsy shop, AND the girls, in a completely unauthorized activity, spilled smoothie all over the piles of fabric that I was using for the quilt, so that little project is on hold for a bit while some fabric goes through the wash and I take several deep breaths. I may use the time to re-make my idea from a wall quilt into another kid-sized lap quilt, anyway, because I LOVE how Will's turned out.

And don't worry about Sydney. She's getting an I Spy quilt next, which she will probably be unhappy about because she really wants a pony quilt, but a pony quilt?

So now I'm on the look-out for pony T-shirts.