Showing posts with label kids' crafts. Show all posts

Monday, October 7, 2019

Girl Scout Senior Programming Robots Badge Step 2: Build a Robot Arm (Using Girl Scout Cookie Box Cases!)

Step 2 of the Girl Scout Senior Programming Robots badge asks girls to build a robot arm, so that's just what we did!

The kids and Matt used this cardboard robotic hydraulic arm tutorial and template, and this set of syringes and tubes.

Fun fact: Matt is now low-key fired from doing school projects like this with the kids, because you ought to be able to do a big, complicated project with your own children without screaming at them. So if I assign you to do a big project with my kids, now you know how to get out of it!

ANYWAY, the kids and Matt did manage to assemble a sort-of working hydraulic arm, although perhaps because it heard so much yelling during its formative hours, it never has performed quite right. Will spent an entire extra afternoon fussing around it and got it to function much better, but none of us could get those pincers to close properly:


Ah, well. It's a lesson on the way that adding more moving parts (whether they're people or bits of cardboard and twisted wire and tubing) adds complexity and increases the potential for error!

So the cardboard hydraulic arm didn't function perfectly, but it did function well enough for the kids to better understand degrees of freedom and how the system as a whole works, and hopefully they'll remember hydraulics and cardboard as options when they're imagining and building their own robots later.

And considering that it's all cardboard, toothpicks, tubing, and glue, I think it looks pretty baller!


My favorite part, though, is all of the cookie cases that they used to build it!


I have a plan this cookie season to collect/hoard more of those cookie cases, which are all that lovely corrugated cardboard that's so perfect to make every single thing out of. And who knows? The Designing Robots badge is still to come, and perhaps in the process of earning that one, the children will discover that cardboard cookie cases and LittleBits are the perfect power couple!

Want to complete this badge step in a different way? Here are three other good DIY robot arm projects that Senior girls can do:

  • cardboard robot arm. This arm uses string to mimic the way that the muscles in a human hand pull. It would be a lot more doable for a group of girls to create individually.
  • giant computer-controlled robot arm. This arm is GIANT, and perfect for a group of girls to create together. Combine it with the Introduction to Programming Journey, since you'll be controlling this arm via computer.
  • popsicle stick arm. Here's another arm that girls could make individually, and popsicle sticks are easy to obtain!
P.S. Want more Girl Scout projects and tutorials? Check out my Craft Knife Facebook page for photos, links, and resources!

Tuesday, September 10, 2019

We Made Pressed Flower Bookmarks!

I am absolutely enchanted by this nine-year-old tutorial for making pressed wildflower bookmarks, even more so because the author states that the tutorial was originally found in a 1950s Boy Scout manual.

And now here's me interlibrary loaning a bunch of old Boy Scout manuals from our university library (You know I already interlibrary loaned all the old Girl Scout manuals and read them years ago)...

The kids are working on earning the Wildflowers of Ohio fun patch--each of them has just one more activity left!--and one of the steps asks girls to "make something" with wildflowers.

Obviously, that's my favorite step!

I gave the girls some options, including inventing their own wildflower craft or looking through Pinterest to find something that appealed to them, but I also showed them this particular craft that I've been wanting to do for a while, and I asked if they might want to try it with me.

They did, and so we did. And it turned out amazing!

Our first step was to spend an afternoon collecting and drying a bunch of flowers, some from a neighborhood wildflower walk, and some from my garden:


Fun fact: if you're not drying your flowers in the microwave, you should be!

We completed the tutorial pretty much as instructed, except that I collected several templates--playing card, bookmark, business card, 8x10 cardstock--and we traced the template that we wanted onto the wax paper first, so that we could arrange the dried flowers prettily in the space. Syd make bookmarks, and Will got quite invested in one 8x10 piece that she can use to embellish a journal cover:


I actually really like painting the single ply of tissue over the flowers. It's fussy and it takes a while, but it's easy and you can listen to music. Here, we listened to the Hadestown Broadway soundtrack and I interrupted it every six seconds to expand on the theming, wax rhapsodic about the choreography, add context, and basically blather on endless annoying interjections.


Just as the tutorial states, we then let them dry for a day, backed them with watercolor paper and sewed the fronts and backs together, and dabbed on matte medium. We let them dry for another day, and then they were absolutely perfect.

Here's my bookmark!


And here are some pieces the size of playing cards that I made:


I'd originally intended them to be handmade business cards, because I am ALWAYS in need of more handmade business cards, but now that I've made them I might love them too much to simply toss them in someone's Pumpkin+Bear order (unless you ask me to--then I happily will!).

Instead, I'm kind of wondering if I could use them as permanent, reusable gift tags for our family holidays. If I got Matt to write a recipient's name on the back very prettily, and we were quite careful, couldn't we use the same tag for a gift to that person on every holiday?


Of course, I'd need lots more if I wanted to cover, say, an entire Christmas worth of gifts to every person, but over the course of several years it would surely be a more eco-friendly option than gift tags that are used and tossed every year, especially if I also found a reusable gift wrap solution.

Any excuse to make more of these dried flower cards, I suppose!

Thursday, January 31, 2019

We Made Pretty Things with The Art of Modern Quilling


Syd is generally to be relied upon as my crafting buddy. Along with watching cooking videos on YouTube, it's about our favorite way to spend time together. Whenever a publicist sends me a crafting book, she's right in there with me, checking it out and then trying it out and seeing what we can make of it.

Our most recent score is The Art of Modern Quilling. This is the first time that Syd or I have ever tried anything to do with quilling, and it turns out that we're both super into it!


The book has instructions for making all the different quilling shapes, and they're all fairly easy to do, and much, much, MUCH easier after I figured out how to DIY a quilling tool from a coffee stirrer:


After that, making all the shapes was a piece of cake for both of us!


Can you find Syd's original quilling shape invention in here?


Syd most enjoyed the process-oriented activity of making all the quilling shapes, and we ended up with quite a collection that we can use for future projects:


I have some old Mason jar lid rings hanging around, left over from Syd's Christmas ornament project last December. I realized that if I cut the quilling strips to be 1/2" wide instead of 1/4", they would perfectly match the width of a Mason jar lid ring, so I used the lid ring as a form to make a project:


I filled the space with the main design that I wanted (I experimented with quilling old sheet music, and it looks okay as the background, but you can't, of course, see the notes. I'm very curious to try quilling color-saturated magazine pages next!), and then pressed in other quilled shapes until tension held the entire thing in the Mason jar lid ring.

To actually secure it, I brushed glue under the edge of the Mason jar lid ring as I was coating the entire piece with several coats of Mod Podge to seal it:


I really wanted to use polyurethane, but I can't find it in the house, and at -14 degrees outside, it would take a far more important reason than simply desiring my preferred sealant to make me go outside and dig around for it in the garage.

Not to mention that I suspect I'll be pissed when I find it, because I store my paints in the closet inside so that they WON'T get frozen, and if the polyurethane is in the garage then not only did someone borrow it without asking and not put it away properly, but also it's probably ruined. Because it's -14 degrees outside. And that stuff is expensive. 

So Mod Podge and a peaceable mood it is!

It's awesome to have another crafting skill in the toolbox, and I'm looking forward to seeing what future projects quilling lends itself to. I mean, cardmaking is a given, but I have a couple of flat picture frames that I thrifted but haven't refinished yet, and I'm toying with the idea that quilling on top of the frame would look really cool. Syd embellished a couple of very elaborate headbands recently using polymer clay; wouldn't quilled pieces, sealed very well (I sure wish that polyurethane was on my closet shelf where it's supposed to be right now!), be just as pretty?

Stay tuned!

P.S. Syd and I are always making something weird. Want to follow along and see what else we're working on? Check out my Craft Knife Facebook page!

Monday, July 2, 2018

How to Make a Wood Burned Leather Bookmark

Some time ago, I bought a package of leather scraps from RSVPhandcrafted on etsy, so that I could introduce crafting with leather to Syd. Leather isn't a material that I, personally, have a ton of interest in, but Syd is a gifted artist and an avid crafter, and it's one of my homeschool goals to introduce her to as many facets of arts and crafts as possible.

Unsurprisingly, she took to leather crafting like a natural!

To make a wood burned leather bookmark, first use sturdy scissors to cut a bookmark out of leather. I used another bookmark (we make them often!) as the template.

Next, use a pencil to make your pattern. It's helpful to decide what tip on the wood burner you're going to want to use, so that your pencil marks are suitable. You can get quite narrow and detailed lines with the right tip, but Syd wanted to use something a little wider, so made sure to make her lines suitably wide.

Then get out the wood burner and trace over your pattern!


You'll notice that Syd does the busy mom trick of listening to her audiobook with only one headphone on--the other is off her ear so that she can participate in conversations. It means she only pays half-attention to whatever is going on, but like her sister (and, frankly, like me...) she's gotta feed that brain with stories or she'll squirm out of her skin!


Here's the part that I think is the coolest: after you've finished wood burning the leather, you can get a set of permanent markers (Sharpies would work, but here Syd is using Prismacolors) and embellish the bookmark.

Notice that Syd has another piece of scrap leather by her side to test colors, because the tan leather gives unexpected results, sometimes:


Finally, you can use an eyelet setter, an awl, or the wood burner to put a hole near the top of the bookmark, then thread through embroidery floss and knot it. And then admire your bookmark, because doesn't it look pretty!


We have so many books constantly going in our family, that making bookmarks is somewhat of a collective obsession of ours. Here are some other bookmark projects that we like a lot:

  • Upcycle a coloring book page into a bookmark. I love these for preserving the sweet coloring pages that the children complete, without adding another thing to my stack of keepsakes.
  • cardboard record album bookmark. The duct tape is optional for this project; I generally only use it if the back of the album cover looks gross.
  • upcycled cross stitch bookmark. I buy a ton of old picture frames at Goodwill, and this one had an elaborate, but not to my taste, cross stitch creation framed in it. So I gave it new life!
  • upcycled Girl Scout cookie boxes. Seasonally, we have endless supplies of these, and so we have endless supplies of bookmarks made from them!
  • favorite quote bookmark. This is a fun way to fancy up plain cardboard for a bookmark.
  • comic book bookmarks. These are my favorite!
  • downloadable coloring page bookmarks. It's actually easy to find bookmark templates online for printing in cardstock and coloring in. We found lots of ones for TV shows and comics that we love.
  • secret bookmarks. This isn't a bookmark tutorial, but when Syd was a Brownie, the Take Action Project for her World of Girls Journey was these "secret bookmarks" that she hid in library books in the children's department of our local public library. It was such a clever project, and so perfectly suited to a Girl Scout her age!
I don't have concrete plans for the rest of the leather scraps in the package that I bought, although Syd has made other bookmarks and a few other projects. If you think of something else awesome that we should do with leather scraps, let me know!

P.S. I post more WIP pics and crafting and homeschool resources every day over on my Craft Knife Facebook page. Come find me!

Thursday, March 1, 2018

The Kid Makes Handmade Slime

My tactile, hands-on, crafty, busy girl has busied herself at the big table that we bought for just that purpose, in the playroom that we designated for just that reason, ever since we bought this house. It's one of the reasons why we bought this house, that room that I knew could be a room of the children's very own. Will lounges on the floor, reading or coloring (which is why I have two giant floor pillows in progress taking up half of my study/studio space), but the table is mostly Syd's domain, for Perler beads, play dough, drawing, jewelry-making, and mostly slime.

Slime for days. Slime for YEARS!

All of Syd's slimes have original recipes. They all have original names. They all have peculiar qualities that she can tell you all about. None of the rest of us really give her handmade slime hobby the respect that it deserves, so the other morning I took my camera, found her in the playroom (making slime, of course)--


--and said, "Okay, Kid. Show me all your slime."

This is not EVEN all her slime, because my camera battery died. It is, instead, a fairly representative selection:

This is Pink Speck Slime:


It contains glue, red liquid watercolor, liquid starch, glitter, and the tiniest little bit of shaving cream:


This is White Fluffy Slime:


It's made from glue, shaving cream, and liquid starch:


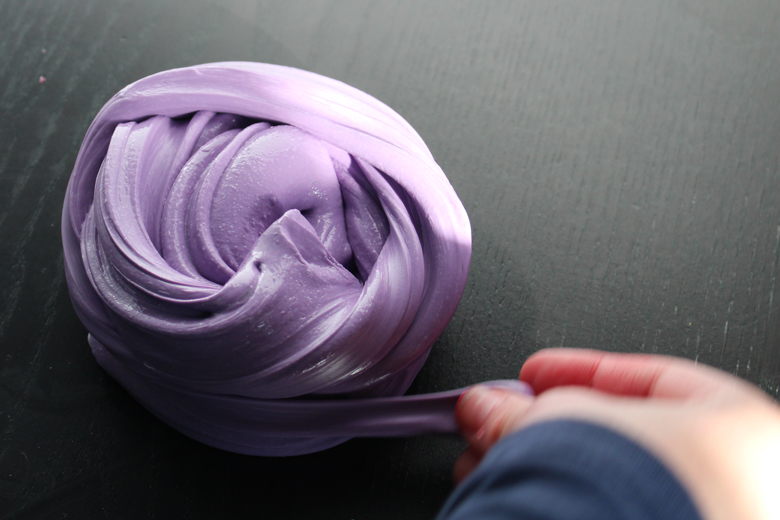
This is Purple Putty Slime:


It's made from one teaspoon thermic powder (which did nothing), glue, liquid starch, and red liquid watercolor:


This is Blue Speck Slime:


It's made from glue, glitter, and liquid starch:


This is Purple Fluffy Slime:


It's made from purple powdered tempera, glue, liquid starch, and shaving cream:

This is Black Glitter Slime:


It's made from a giant heap of glitter, the smallest amount possible of glue, and liquid starch. It's the glitter that makes it black:


This is Yellow Butter Slime:


It's made from stale yellow Model Magic, glue, and liquid starch:


This is White Cloud Slime:


It's made from glue, shaving cream, and liquid starch:


This is Clear Jelly Slime:


It's made from water, clear glue, and liquid starch:


This is Mash-up Slime:


It's made from all of the excess slimes that wouldn't fit into their containers:


This is Pink Floam Slime:


It's made from clear glue, pink floam beads, and liquid starch:


This is Syd's personal favorite, White Snowy Slime:


It's made from clear glue, a bunch of glitter, liquid starch, and shaving cream:


This is another White Fluffy Slime or White Cloud Slime, although when I told Syd that she had  showed me both a White Fluffy Slime and a White Cloud Slime already, she rolled her eyes at me, and when I pointed out that she'd just rolled her eyes at me, she informed me that she was just looking up at the door instead:


It's made from glue, a lot of shaving cream, and liquid starch (and a sarcastic tone and a couple more eye rolls, it seems):


This is Blue Floam Slime:


It's made from glue, blue foam beads, and liquid starch:


This is White Normal Slime:


It's made from glue and liquid starch:


This is Green Sand Slime:


It's made from glue, a little bit of green kinetic sand, and liquid starch:


This is Clear Unicorn Pee Slime:


It's made from clear glue, liquid starch, and some glitter:


Since slime making is Syd's area of interest, I buy her whatever she asks for as far as slime ingredients go, and sometimes, if I happen upon a recipe with an unusual ingredient, I'll surprise her with something she hasn't asked for--that's how she ended up with the foam beads, which are a hit, the thermochromic powder, which she hasn't been able to make work so far, and some metallic pigments, which she hasn't experimented with yet.

I also bought her saline solution, which she used to make a whole series of slimes that led her to decide that she far prefers to work with liquid starch.

Here are Syd's favorite slime-making supplies so far:

  • 2-ounce plastic storage containers. These work well for giving slime away, especially on Valentine's Day.
  • 8-ounce plastic storage containers. These are the standard size that Syd uses.
  • glitter. Syd has recently also asked for large-flake glitter, so we'll make a trip to the craft store this weekend to hunt some down.
  • clear glue. I buy this by the gallon.
  • foam balls. The dye comes off of these balls when it's mixed into slime, so Syd says that you might as well just buy the white foam balls and dye the slime your color of choice.
  • glitter glue. Syd is just as happy dyeing and glittering her slime from scratch, but she likes these, too, so I buy them if I see them on sale.
  • white glue. I also buy this by the gallon.
  • Stay-Flo liquid starch. This is Syd's ingredient of choice for all of her slimes.
  • miscellany. Syd has experimented with all kinds of mix-ins for her slime, everything from sand to beads to dry rice and any other ephemera that comes her way. She also likes to find unusual ingredients to make slime from. She made some awesome slime from stale Model Magic, but the slime that she tried to make from leftover play dough turned into a slimy nightmare that still makes me shudder a bit to think of it.
I don't always appreciate Syd's passion for slime making; it's sticky, and messy, and that playroom table will likely never recover, sigh. But I figure that I bought the playroom table for the kids to use, and the stickiness and messiness is just the kid feeding her senses. She's being creative, she's exercising her STEM skills with all that creating and remixing recipes and discovering new combinations, and she's engaging in whole-body physics and chemistry by exploring the properties of a whole series of non-Newtonian fluids. 

And she's mastering the entire field of slime making, and experiencing the confidence and satisfaction of that mastery. What more could I ask glue and starch to do for a person?