This post was originally published on Crafting a Green World.
Way back in the day, my very first editor at Crafting a Green World wrote a post entitled "Steampunk is the New Green." Steampunk isn't so new now, but it's still a heck of a lot of fun to play with!
By this point in our collective steampunk obsession, we've definitely used up all of our old watch parts, and everyone's outgrown swim goggles have been painted black and had silver studs glued on, but there are still plenty of components to be found.
Here, I'm modding a steampunk snowman using the wooden gears from a child's old DIY marble coaster kit and some wire pulled out of an analog clock. Add in my special trick for making metal paint look grungy, and you've got yourself a brand-new-to-you made-entirely-from-old-stuff steampunk snowman.
Supplies & Tools
You will need:
- The gears and a couple of other parts from one of those DIY wooden marble coaster kits. Wait a couple of months for the tween to make it, play with it, and get tired of it, and then rescue it from dusty oblivion.
- White primer
- Bronze or gold acrylic paint
- Brown or black acrylic paint
- Water-based polyurethane sealant
- Hot glue
- Other steampunk-themed ephemera
Directions
1. Figure Out Your Basic Snowman Layout
Obviously, you need a big gear for the snowman's butt, a medium gear for its torso, and a small gear for its head. I gave my kids my box of stash ephemera and they added a few more bits and bobs, like eyeballs and arms and wire to twist all around.
2. Paint All Of The Snowman Pieces
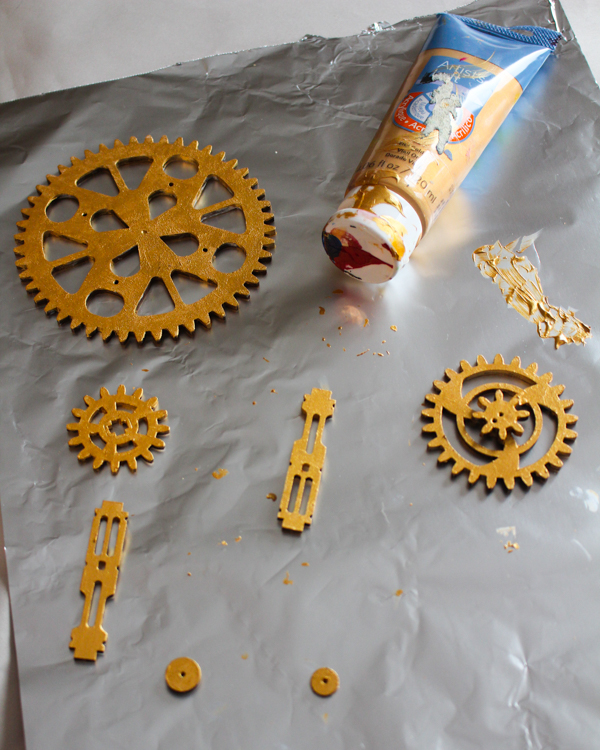
Start with white primer, and make it a no-sand primer if you're not sure what material your snowman pieces are made of. Follow that with a few coats of gold or bronze acrylic paint, so that all your snowman pieces look industrial and metallic.
3. Add A Grungy Patina
Making your snowman look like it's had a hard few centuries in the icicle mines is easy to do. First, coat all the pieces in a thin layer of water-based polyurethane sealant. Then, while that layer is still wet, pour out a little more sealant onto a palette.
Sidenote: my super sophisticated palette for this project is a piece of aluminum foil covering the folding plastic table that why, yes, I DID HAUL IN FROM MY GARAGE INTO MY FAMILY ROOM. One kid is hogging the actual family room table with her actual schoolwork, and the other kid is hogging the studio table sewing her entry into our town's annual Trashion/Refashion Show. They're only being charming and industrious in this way because I've banned them from screens until 5:30 pm, just so you know. Anyways, add a small dab of black or brown paint.
Stir the paint into the polyurethane sealant until it's a blotchy mess and you're a little worried about it, then use your paintbrush to daub it all over all of your snowman parts. It seems bonkers, but you really do want to take off most of the shine and put on lots of obviously grimy bits. After you've got some nicely grimy spots, you can even add another bit of black paint to your polyurethane sealant mess and daub on a few even dirtier spots.
If you really hate it, you can go back over the whole thing with more metallic paint and make it shiny again, but I think you'll like it!
4. Glue The Snowman Pieces Together
You could use an epoxy glue like E6000 here, but honestly, hot glue is a billion times quicker and does the job just as well. It's always a bit of a trick to keep the front of your project looking clean of glue, but you can add more glue to the back for reinforcement if you need to.
5. Embellish Your Snowman (Optional)
Depending on what you have on hand and how artsy you're feeling, there are lots of fun embellishments that you can add. For instance, one of my kiddos decided that she wanted to add even more detail to the distressing that I did with acrylic paint and polyurethane sealant, so she got out her set of chalk pastels and a paintbrush and did her thing, and then I hit the entire snowman with a quick spray of clear glaze.
After the glaze dried, I wrapped some of that thin copper wire I found in an old clock around the centers of the gears to make them look like these woven embroidery floss ornaments (which you also upcycle cardboard for, making it another great eco-friendly project!).
Depending on what you, yourself, have on hand, other awesome embellishments could come from jewelry charms, other small gears, and clock parts, cardstock cut into cool shapes and embellished (I think my own snowman could really use a pair of cardstock mechanical wings!), or anything else that you can think of!
6. Add An Ornament Hanger
Using that same thin copper wire, I tied a lark's head knot around the snowman's gear head and made a hanging loop. Leather or a necklace chain would also work well for this.
Our happy steampunk snowman is large enough that it could have been our tree topper, except my other kid had already made a giant 3D origami star for the tree topper this year. So instead we hung it on our Christmas tree, where it shares real estate with a scrapbook paper chain, a felt Darth Vader, and a couple of old lightbulbs filled with colored sand and glitter.
Perhaps steampunk snowman will top our tree next year!


No comments:
Post a Comment