Showing posts with label homeschool middle school. Show all posts

Friday, May 22, 2020

We Made Terrariums... and I LOVE Them!


We didn't exactly make the self-contained ecosystems that was my intended hands-on project for the Principles of Ecology chapter in CK-12 Biology

Honestly, adding any animals into our lives, however tiny and shrimp- or snail-like, is just a recipe for me fretting endlessly about their health, safety, and emotional well-being. The years that the kids had pet fish encompassed some of the most miserable day-to-day experiences of my life. I'm stressed out enough in general, and if Will wants to incubate chickens this summer I'll be stressed out even more, and I just don't have it in me to experiment with the lives of tiny critters in a sealed plant world.

Maybe later this summer we'll collect some jars of pond water and watch them for a few weeks. 

Terrariums are MUCH more my speed, and the kids were super into the idea, as well, so that's what we did!

Happily, we were able to make our terrariums entirely from supplies we already own, although that's mostly because I'm a supplies hoarder. Here's what we used:
  • glass container with a loose-fitting lid. This keeps most of the moisture inside, while still allowing some air flow. We used some old solar-powered lanterns that were on our property, not working, when we moved here... yeah, I've had them kicking around until 2012. And I'm STILL hoarding the flat-backed glass marbles that were inside them!
  • rocks. I need to stop using the rocks that I bought for landscaping for craft projects, instead. Also, I need to buy more rocks for landscaping.
  • activated charcoal. I bought this a few Halloweens ago to make black food. It's just occurred to me that I bet I could dye play dough with it! It's also good for soapmaking and bath bombs.
  • peat moss. I HATE that I bought this once upon a time, because peat is SO unsustainably sourced. I am never, never, never going to buy it again, although I guess that means I'll have to research what to use for terrariums instead!
  • potting soil. This is basic potting soil, with no fertilizers or moisture-retaining polymer beads.
  • plants. Mosses and ferns and other shade-loving woodsy botanicals do great in terrariums like this.
When the kids were so busy with extracurriculars (if we were homeschoolers, why were we never home?!?), we'd probably have split this project up into two or even three days, so it is true, I guess, that one of our pandemic silver linings is that we're lucky enough to all be quarantined together, with time to do big projects all in one day and space on our own property in which to do them.

I'd still rather my kids had their ballet classes and summer camp internships and our big Girl Scout troop trip, though!

We're lucky enough to be together at home, though, and so together we spent one morning making our terrariums!

We put a layer of rocks at the bottom, added two-ish scoops of charcoal to cover, then an inch or so of peat moss, then a couple of inches of potting soil:


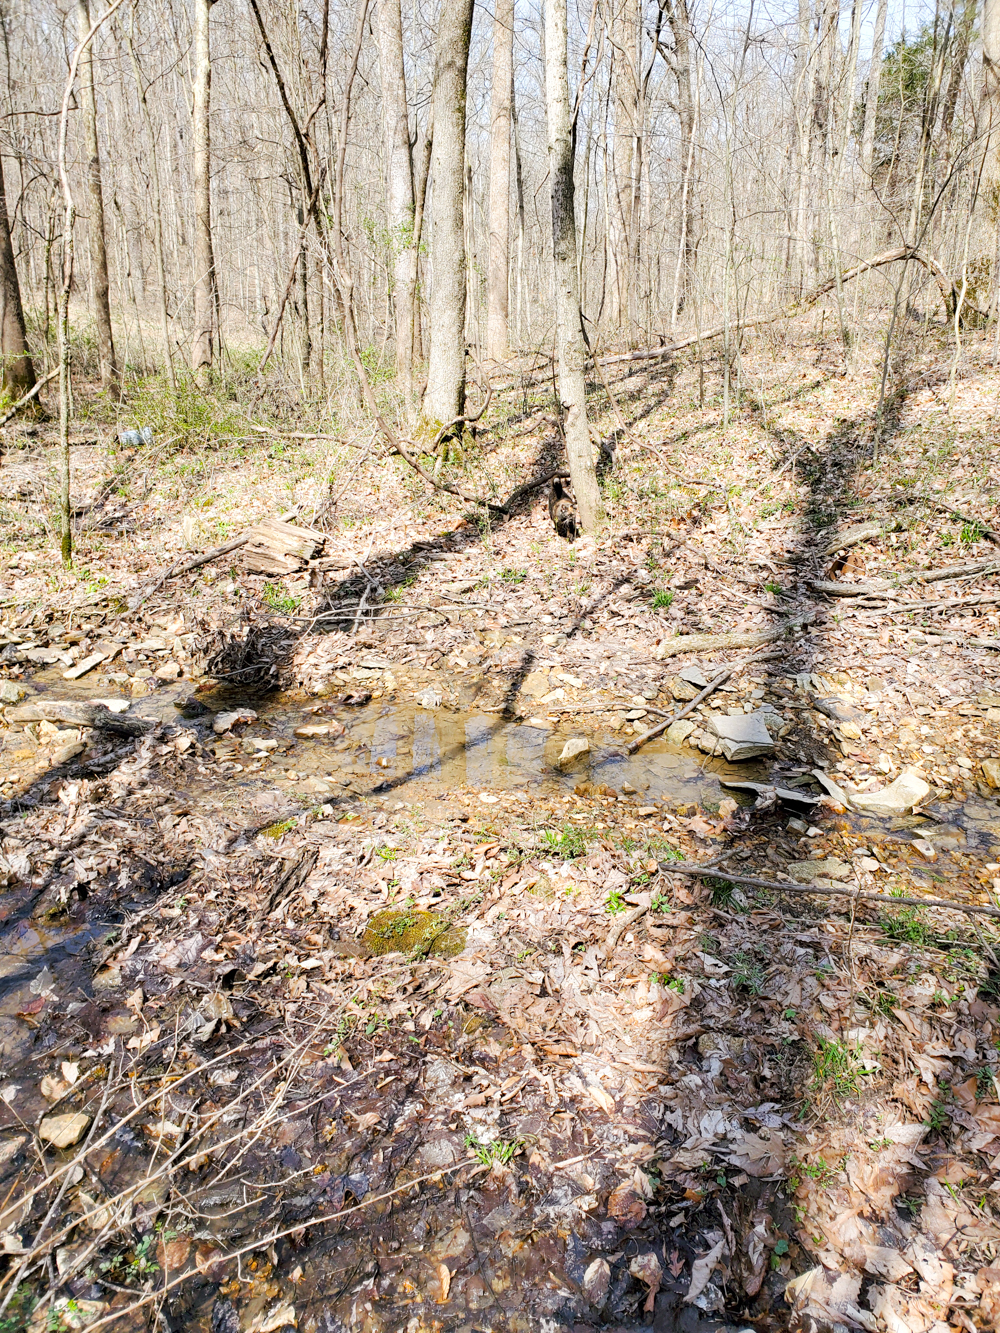
And then we went for a hike in our woods:

Can you see the elusive Spots? Torties are pretty well camouflaged in the spring woods!


Among the mayapples and Jack in the Pulpit, we collected little mosses and ferns, trying to include as much of their matrices as we could along with them, and trying for at least a couple of different kinds of plants, in case some didn't take:


Syd found a lovely horn corral fossil that she gave to me for my terrarium, and in our little creek I found a well-worn vintage green glass marble that also went in.

The lids of our old solar lanterns were an ugly chipped black, so I asked the kids if they would like to repaint them:


Indeed, they would!


We've had our terrariums for almost two months now, long enough for the plants to see if they like it and settle in if they do.

Syd says that she forgot she owned her terrarium (sigh), and it definitely needed a few caps of water when I went off to investigate it--


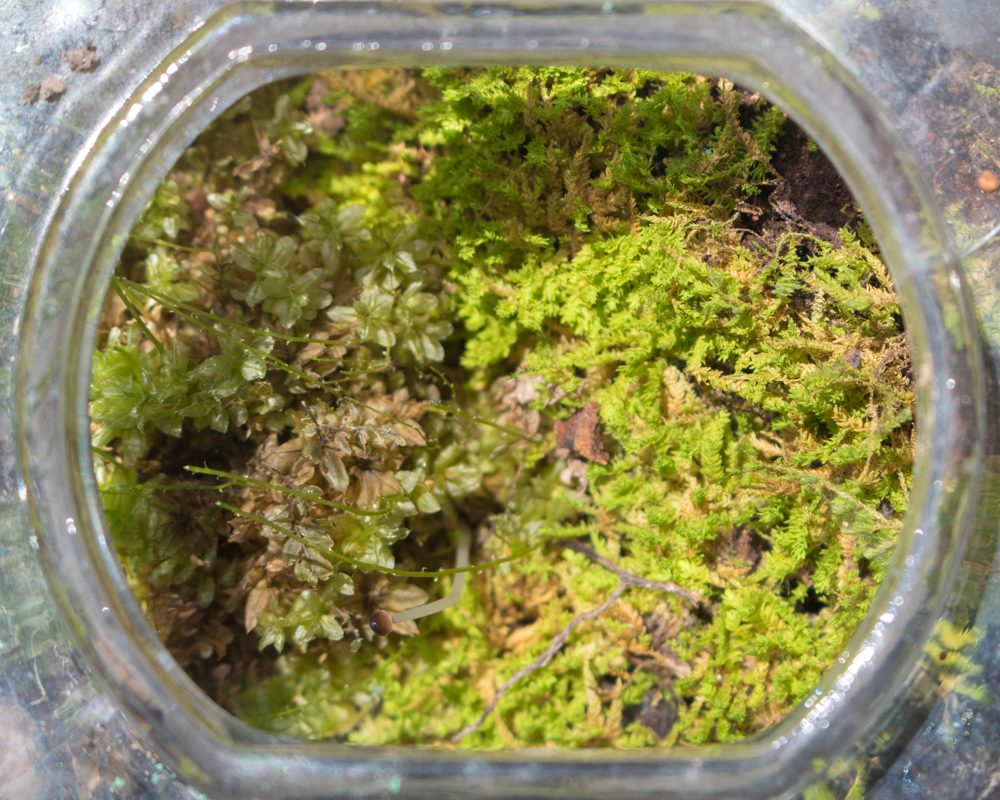
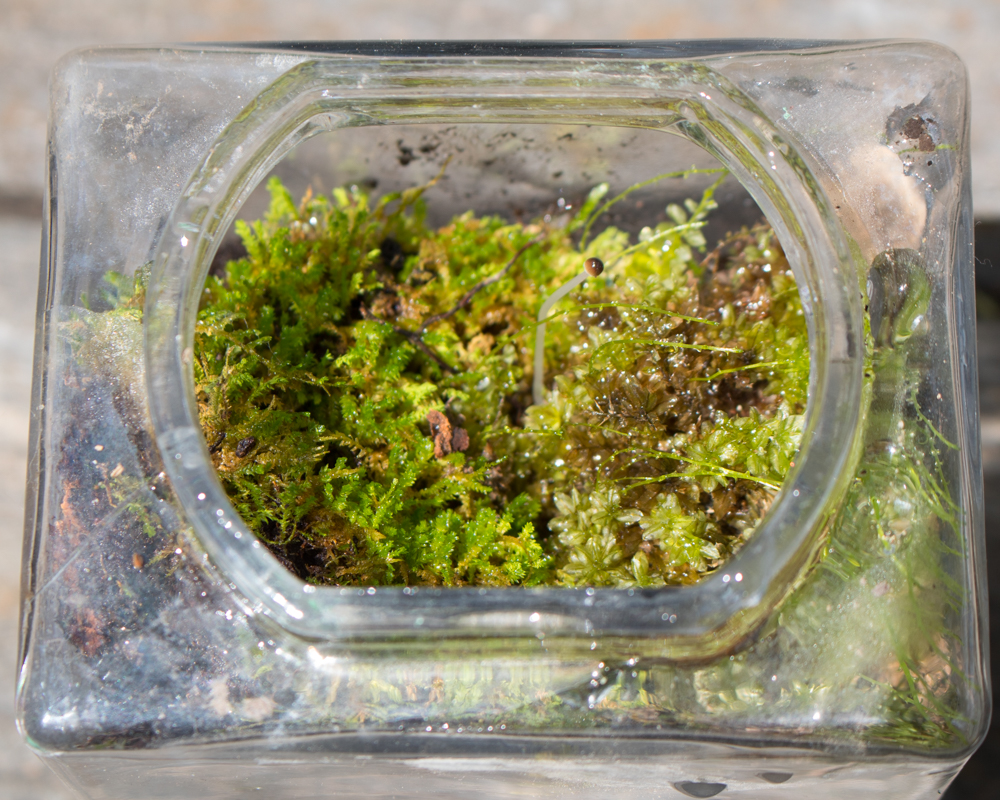
--but look how it's thriving!


Will's plants were so thrilled to be there that we had to remove the lid to give them some more space to blissfully spread out!


Matt's might be the most successful, since it's not clear if he ever even knew that Syd made him this terrarium:


You guys, it's got a wee little MUSHROOM!!!

My terrarium, which I dote on far more than the children dote on theirs, is the least vigorous, but it's happy, as well.


Even if it wasn't part of our biology study, this was the perfect spring project. Now I just have to go put mine on a shelf somewhere where I can forget it for a couple of months, so it can grow as happy as the rest of the family's terrariums!

Thursday, May 14, 2020

Junior Ranger Badges Kids Can Earn from Home ONLY during the Pandemic


One of my blog readers sent me on a giant expedition this week!

Earlier this week, a reader left this comment on my post about Junior Ranger badges that can be earned from home (thanks, Unknown!):

I immediately checked up on this, and it's true!!! Yellowstone National Park IS offering its Junior Ranger badge program by mail, only during the pandemic!

And if one national park site is doing this, maybe there are others!

Maybe I have too much time on my hands, or maybe it was simply time that I go through my map and list of Junior Ranger programs and make sure they're all up-to-date, anyway, because I spent practically the entire day yesterday--you know, in between giving Will constructive criticism on her APES and AP Psych FRQs, being the only person in the house to actually sort of clean it, making and mailing a couple of Pumpkin+Bear etsy orders, doing just enough of an online kickboxing workout to convince myself that I'd definitely worked out that day and should absolutely eat an entire sleeve of Thin Mints that evening, and trying to convince Syd that wouldn't it be fun if she for once and for all finished this Silver Award project that she's been working steadily on for over a year--going through every site on my map, adding lots of new Junior Ranger by mail programs to my list (yay!), taking some programs that no longer offer Junior Ranger badges by mail off my list (many national park sites are now moving to a "virtual Junior Ranger" program, for which a kid does some work on their website, self-corrects it, and then prints off an image of the Junior Ranger badge), and at the same time noting the national park sites that don't usually offer Junior Ranger badges by mail, but are now doing so ONLY during the duration of the pandemic.

And here they are!
I am SO excited about these, and Will is, too. We homeschool year-round, but after Will's AP exams are finished and she takes a bit of a break, we'll begin having more fun, project-filled days than we've been able to indulge in for quite a while, with those two big standardized tests looming. I am absolutely thrilled that we can now spend some of these days learning about and doing fun hands-on activities related to these special, limited-time-only Junior Ranger books--what a great way to sneak some engagement, enrichment, and education into what's starting to look like a long, long, long quarantined summer.

P.S. Want to follow along with our projects when we begin our studies for these Junior Ranger books? Keep in touch via my Craft Knife Facebook page!

Tuesday, May 12, 2020

Dancing during a Pandemic: Ballet at Home, with 20 Free Online Ballet Class Resources to Make it More Fun


I know that we are all soldiering on and putting on our brave faces and thanking our lucky stars for every single piece of good fortune that we're fortunate enough to possess during this pandemic, but I just want to tell you that if your kid is legit grieving something from her pre-pandemic life, this is your safe space to complain about it right here.

Because we can all put on our brave faces and soldier through our own shit, but when your kid is suffering and you can't fix it, that is a hard load to bear, and it legitimately sucks. Fortunate as we are in all the ways that we are, watching your kid have to miss their favorite people and favorite activities out in the big, wide world is hard, and if you want to gripe about it, you can go ahead and gripe about it right here to me, because I'm hating it, too.

I'll even go first: I HATE how much my kid is missing ballet. She misses her friends, she misses her teachers, she misses the companionship of other dancers, she misses rehearsing for and performing in the spring recital (what a blow that cancellation was!), she misses the in-person instruction, she misses pointe class... essentially, she's grieving for every aspect of her favorite thing in life.

Online classes and dancing at home are poor substitutes.

And yet that's where we are, and that's what we've got, so that's what she's doing. 

Thankfully, we already had a DIY ballet barre set up at home. I think most of the kids at my kid's level in her classes who didn't already have one by the time the pandemic started do have one by now, because although something like a countertop or the back of a chair works if you're relatively stationery, it doesn't help much for moves that require you to travel--and you do a lot of that in pointe class!

If you want a non-DIY portable ballet barre, I know several kids who have this one and they all seem to like it:


Or, if you've got a space to wall-mount a ballet barre, I also know people who like this one:


We've also got large wall mirrors set up in the kid's ballet area, but interestingly, she often prefers to practice and take class away from the mirror, all the way on the opposite side of the room:

I had assumed that the mirror would be crucial for evaluating one's position or technique or whatever, but I've actually been hearing that other kids in her class are responding well to dancing without the wall of mirrors in their ballet studio. Such an unexpected takeaway, right?

The photo above was taken with the kid dancing on our bare laminate floor, which is pretty horrible even when it's not covered in dust and hair... not that I'd actually know for sure what the floor is like when it's not covered in dust and hair, but I've got a good imagination.

HOWEVER, it was even while I was taking those photos that I realized that if the kid really was going to be having to take pointe classes from home, and do all her practicing and dancing on pointe here, too, she could not continue to do it on this floor. It's slippery, and she looked unsteady.

I took her into my bedroom to see if dancing en pointe on the carpet would be any better, and she nearly rolled an ankle after about five seconds.

So then I bought this:


It's this exact piece of marley floor, and it's perfect for the kid and for our space. Even on sale for 40% off when I bought it (yay!), it was still quite spendy, but I've been told that we should be getting a partial refund for the kid's also quite spendy ballet tuition, and even if we weren't, the kid has to be able to continue her pointe training and she clearly cannot do so if she's in danger of hurting herself.

When the floor isn't in use, the kid rolls it up and stores it beneath the mirror. I SUPER want to buy her this storage bag, because somehow this marley floor manages to pick up and show off all the dust and fuzz and cat hair and dog hair and human hair even better than the laminate floor shining in the sunset does, but that's definitely not in the budget until that theoretical partial tuition refund is in my bank account.

So here is how the kid takes ballet class now:


Actually, I guess she CAN see herself in the mirror when she dances. Maybe across the room from it is better than being a nose-length away!

She doesn't love it--honestly, she HATES it--but she has discovered that with the right instructor, she does find it useful. There are times when it really, really sucks, though, and I hate seeing the kid's disappointment and frustration when, say, she can't hear the instructor's music, or maybe the music is way too loud but the instructor's voice is super quiet so she can't turn the volume down, or that one time when we couldn't get the audio to work at all and she had to do a whole class without being able to hear a thing--for some reason we have a LOT of audio problems over here!

I also really feel for the dance teachers who have had to learn what might be an entirely new technology to them, and a new method of instruction, and figure out their own music, and find a way to give good feedback to a bunch of students using different equipment on different floors with varying qualities of webcams.

Like, dancers are ALREADY well-versed in grit and perseverance. They really don't need this whole series of challenges just to teach them life lessons!

One good thing, I guess, about the quarantines across the country is that many ballet companies and institutions are generously providing free online classes and other enrichment. It's sometimes hard to figure out the level for these, or they're most often at a beginner's level or for young children, but it can be fun to try something new, and some of the classes on offer are very unusual!

These change all the time, but here are some current favorites:

  1. Ballerinas by Night has free YouTube ballet classes, exercises, and tips. 
  2. Ballet 24 has mostly YouTube workouts for dancers, but also stretches and some classes.
  3. The Ballet Coach has YouTube classes for all levels from "little kids" to "grandma and grandpas," including some at the intermediate/advanced level. 
  4. Berkeley Ballet Theater hosts several pay-what-you-can ballet classes through Facebook every week, and these are especially great because some of them are intermediate/advanced level.
  5. Canada's National Ballet School has online ballet classes through intermediate level.
  6. Charlotte Ballet is holding weekly classes on African dance and jazz!
  7. Charm City Ballet has a live weekly barre class that's also available for viewing afterwards.
  8. Cincinnati Ballet has a whole series of conditioning classes on Facebook Live, or you can dance along to their livestreamed company classes on YouTube
  9. Cleveland Inner City Ballet has a free children's classes every week on Facebook Live. 
  10. The Dutch National Ballet has several online classes on YouTube. Most are barre, but there are some on other topics. 
  11. English National Ballet at Home classes on YouTube definitely aren't for beginners!
  12. Front Range Classical Ballet Academy has Facebook videos for intermediate/advanced classes and conditioning.
  13. Huntsville Ballet has tap, modern, and hip hop classes free on YouTube!
  14. Kathryn Morgan has tons of classes and tutorials on YouTube, including pointe classes from beginner through advanced!
  15. Lazy Dancer Tips has full ballet classes, but also strength training and workouts.
  16. The New San Jose Ballet offers pay-what-you-can ballet classes through YouTube. There are all levels, including an adult ballet bootcamp that I might secretly try.
  17. New York City Ballet has basic-level ballet classes for adults that don't feel basic because they're engaged with a theme--this week's is going to sneak some modern in via a Balanchine ballet!--and classes for young children.
  18. Pro Ballet is in Russian on YouTube, so you sort of have to look at the thumbnail to see what the class is, but once it starts you can easily follow along.
  19. The Rockettes teach a new segment of one of their routines on Instagram every week, but you can still see them after if you don't catch them live. I'm fascinated that they do most of this in heels! 
  20. Sarah Arnold has YouTube videos with mostly warm-ups and exercises for improving specific skills, like turnout. 
All those classes are enough to keep any dancer engaged and in condition, if you remember that they don't provide any instructor feedback and so aren't a real substitute for a live class.

I particularly hate that this pandemic happened so early in the kid's pointe training, when she really needs the hands-on instruction and feedback to help her develop good habits and good form, but honestly, there's no great time in a dancer's training... or in anyone else's, either... for a pandemic to suddenly quarantine everyone away from their peers and teachers. We're just... soldiering on, game faces in place, trying not to focus on how much it all sucks.

If you've got a dancer who's training at home, too, tell me YOUR favorite tips and tricks and equipment. Maybe there's something new that I haven't thought to throw my money at yet!

P.S. Want to know what else we're doing during quarantine, like the science experiments and the art activities and the weird craft projects and the random Jane Austen tea parties? Check out my Craft Knife Facebook page!
Wednesday, May 6, 2020

Hawaii Unity Study: Make a Corrugated Cardboard Topographic Map of the Big Island


I know it's taken us almost a year to complete this unit study of Hawaii (including when we actually WENT to Hawaii in June 2019!), but this study has actually been a pretty comfortable one to keep on the back burner, just dipping into it every now and then when we've got a free hour or so in our school day.

It was easy, then, to look at my massive stash of corrugated cardboard Girl Scout cookie cases this winter, and think, "Hey! This would be a great time to talk about mapmaking and Hawaii!"

Our specific lesson was on contour maps, the circumstances under which you'd want to make or read one, and how to interpret the information--not super high-level stuff, but useful, practical knowledge for kids who have vastly more experience looking at hyper-real digital maps than they do black and white paper maps.

There are a lot of resources online for learning the basics of contour maps. This lesson specifically connects the study of contour maps to Hawaii, so was perfect for our purposes. This graphic shows common contour map topography linked to their elevation profiles. This USGS mapping system lets you dial down all the way to your neighborhood, seeing increasing layers of detail in the contour map as you go. Here's the USGS map legend so you can interpret what you see.

We also read a little bit from this book that I happened to have on hand. It isn't terribly rigorous but IS very clear!


Mostly just for fun, but also to make sure the kids internalized the connection between the 2D map and the 3D topography, I had them translate a 2D map into a 3D one, using this contour map of the Big Island of Hawaii as their template.

The process is dead simple: print that contour map of the Big Island as big as you'd like, then let the kids cut it up, trace the contour lines onto corrugated cardboard, cut the layers out--


--and hot glue them in place.

The result is a quite accurate and good-looking 3D representation!


I like the way that this overhead shot matches the 2D map:


To make the project more rigorous, you could require a higher level of craftsmanship by having the kid paint each layer, or label various features with toothpick flags. It would be especially interesting to map the Big Island's towns onto this, so you can see how elevation affects where people choose to live, or river and volcano features, so you can see how they affect topography, or even just the special and iconic tourist sites.

If you're including this in a deeper study of geology, you could even add the underwater elevations to your island--the Big Island would be massive if you mapped it from its true base!

If you've got a few kids or are in the mood for a super big project, you could even take the giant map of Hawaii project that we did here and translate the whole thing into a 3D contour map!

If you're not studying Hawaii specifically, you can give a kid much more ownership of the project by allowing her to choose what she'd like to map, and this would also make the project more rigorous as she'd have to figure out what to choose and how to source that contour map for reference. Or you could give the project a theme, and ask kids to build and compare different volcanoes, or different mountains.

I also like this project, which first has a kid build a model mountain, then slice it into elevations to draw the contour map. It would be fun to do this if you're reading a book that contains interesting and important topography--how cool would a map of Mordor be?!?

*wanders off to make a corrugated cardboard topographic map of Mordor*

Wednesday, April 29, 2020

A DIY Binomial Cube/Trinomial Cube Manipulative


If you've figured out that you can make a manipulative to literally represent (a + b + c)^2, then it's not a big stretch to figure out that you can also make a manipulative to literally represent (a + b + c)^3.

One is a literal square. The other is a literal cube!

I made this DIY trinomial cube to match faces with my DIY trinomial square. This means that it's also set to a 1" standard, NOT a 1 cm standard as are most of my other DIY math manipulatives. But since it was soooooo much easier to find 1", 1.5", and 2" blocks than it was to find 1 cm, 1.5 cm, and 2 cm blocks, it also means that I could take some major shortcuts on this build and save myself a lot of time gluing teeny-tiny wooden blocks together.

I'll take the shortcut every time!

The math isn't exactly tricky on this, but there's a lot of it, and a lot of moving parts, so bear with me.

The trinomial cube has three layers. Layer A is a trinomial square in which every prism has Height a. For my project, a = 1".

Layer B is a trinomial square in which every prism has Height b. For my project, b = 1.5".

Layer C is a trinomial square in which every prism has Height c. For my project, c = 2".

The base block for each layer is a wooden cube that I purchased from Casey's Wood Products:

From left to right, that's a 2" cube, a 1.5" cube, and a 1" cube.

Let's go back to Layer A. We already know that every prism in Layer A will have a height of 1". The cube in Layer A is a^3, with a measurement of 1" x 1" x 1". This is nothing but a 1" wooden block, with no extra pieces added to it. As part of this layer you're also going to have a piece that's b^2, and a piece that's c^2, each with a height of 1", and the prisms that combine the measurements of ab, ac, and bc, each with a height of 1"

For every prism in this layer, you can start with a 1" wooden block, and glue on either .5" wooden blocks or 1" wooden blocks to make the correct sizes.

Here are all the prisms for Layer A:
  • a^3 (1" x 1" x 1"). This is a 1" wooden block.
  • ab^2 (1.5" x 1.5" x 1"). This is a 1" wooden block plus 10 .5" wooden blocks.
You need one ab^2 for Layer A and two ab^2 for Layer B.
  • ac^2 (2" x 2" x 1"). This is four 1" wooden blocks.
You need one ac^2 for Layer A and two ac^2 for Layer C.
  • two copies of  ba^2 (1.5" x 1" x 1"). This is a 1" wooden block plus four .5" wooden blocks.
  • two copies of ca^2 (2" x 1" x 1"). This is two 1" wooden blocks.
  • two copies of abc (1" x 1.5" x 2"). This is two 1" wooden blocks plus eight .5" wooden blocks.
You need two copies of abc for every layer, so six in total.

Every prism in Layer B will have a height of 1.5". The cube in Layer B is b^3, with a measurement of 1.5" x 1.5" x 1.5". This is nothing but a 1.5" wooden block, with no extra pieces added to it. As part of this layer you're also going to have a piece that's a^2, and a piece that's c^2, each with a height of 1.5", and the prisms that combine the measurements of ab, ac, and bc, each with a height of 1.5".

Here are all the prisms for Layer B:
  • ba^2 (1.5" x 1" x 1"). This is a 1" wooden block plus four .5" wooden blocks.
You need two ba^2 for Layer A and one ba^2 for Layer B.
  • b^3 (1.5" x 1.5" x 1.5"). This is a 1.5" wooden block.
  • bc^2 (1.5" x 2" x 2"). This is a 1.5" wooden block plus twenty-one .5" wooden blocks.
You need one bc^2 in Layer B and two bc^2 in Layer C.
  • two copies of ab^2 (1.5" x 1.5" x 1"). This is a 1" wooden block plus 10 .5" wooden blocks.
  • two copies of abc (1" x 1.5" x 2"). This is two 1" wooden blocks plus eight .5" wooden blocks.
  • two copies of cb^2 (2" x 1.5" x 1.5"). This is a 1.5" wooden block plus nine .5" wooden blocks.
You need two cb^2 for Layer B and one cb^2 for Layer C.

Every prism in Layer C will have a height of 2". The cube in Layer C is c^3, with a measurement of 2" x 2" x 2". This is nothing but a 2" wooden block, with no extra pieces added to it. As part of this layer you're also going to have a piece that's a^2, and a piece that's b^2, each with a height of 2", and the prisms that combine the measurements of ab, ac, and bc, each with a height of 2".

Here are all the prisms for Layer C:
  • ca^2 (2" x 1" x 1"). This is two 1" wooden blocks.
You need two ca^2 for Layer A and one ca^2 for Layer B.
  • cb^2 (2" x 1.5" x 1.5"). This is a 1.5" wooden block plus nine .5" wooden blocks.
  • c^3 (2" x 2" x 2"). This is a 2" wooden block.
  • two copies of abc (1" x 1.5" x 2"). This is two 1" wooden blocks plus eight .5" wooden blocks.
  • two copies of ac^2 (1" x 2" x 2"). This is four 1" wooden blocks.
  • two copies of bc^2 (1.5" x 2" x 2"). This is a 1.5" wooden block plus twenty-one .5" wooden blocks.
I painted these prisms the same way I painted the trinomial square prisms, except for the cube, every face will be painted. All the 1"^2 faces are yellow, the 1"x1.5" faces are green--


--the 1.5"^2 faces are blue--


--the 1"x 2" faces are orange, the 1.5" x 2" faces are purple, and the 2"^2 faces are red:


Some prisms in different layers are identical, so here are the total number of prisms by type that I needed:
  • one a^3 (1" x 1" x 1"). This is a 1" wooden block.
  • one b^3 (1.5" x 1.5" x 1.5"). This is a 1.5" wooden block.
  • one c^3 (2" x 2" x 2"). This is a 2" wooden block.
Here's a^3, b^3, and c^3.
  • three ba^2 (1.5" x 1" x 1"). This is a 1" wooden block plus four .5" wooden blocks.
  • three ca^2 (2" x 1" x 1"). This is two 1" wooden blocks.
  • three ab^2 (1.5" x 1.5" x 1"). This is a 1" wooden block plus 10 .5" wooden blocks.
You need one ab^2 for Layer A and two ab^2 for Layer B.
  • six abc (1" x 1.5" x 2"). This is two 1" wooden blocks plus eight .5" wooden blocks.
you need two abc prisms for each layer.
There are a lot of abc blocks, so thankfully Spots was willing to help me photograph them!


  • three cb^2 (2" x 1.5" x 1.5"). This is a 1.5" wooden block plus nine .5" wooden blocks.
three cb^2
  • three ac^2 (1" x 2" x 2"). This is four 1" wooden blocks.
three ac^2
  • three bc^2 (1.5" x 2" x 2"). This is a 1.5" wooden block plus twenty-one .5" wooden blocks.
three bc^2
 Spots is sorry that she knocked over my blocks, so here's a blep to make up for it:


And also a boop for good measure:


 And here's what it looks like when it's all finished!

LAYER A


LAYER B


LAYER C


Spots is still not helping...


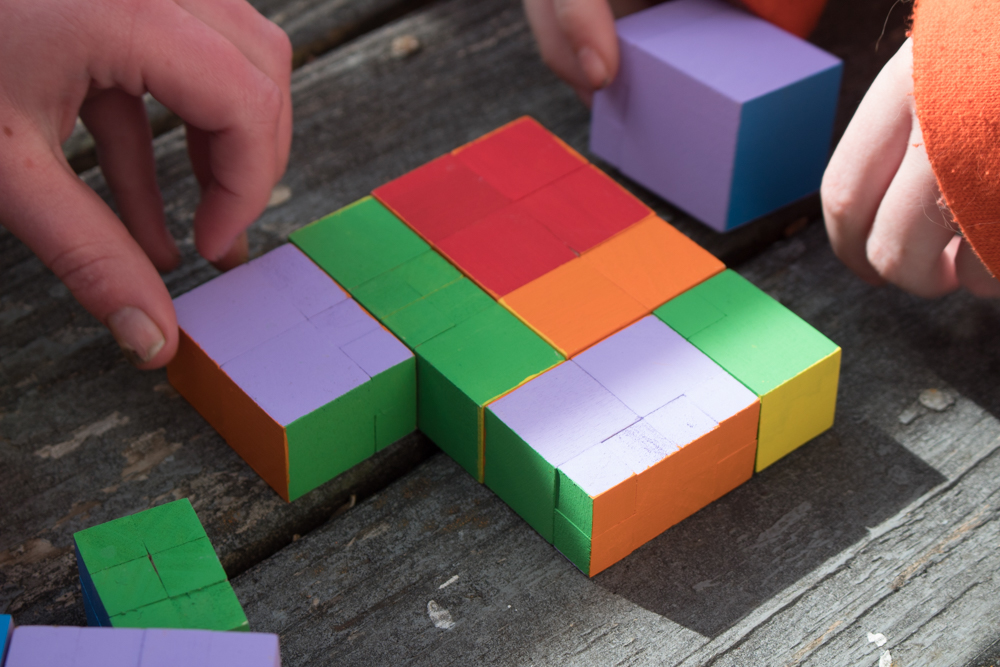
The kids wandered over as I was finishing photographing the cube (meaning that now I had two teenagers AND a cat helping me...), so I told them this was a puzzle that I'd just finished building and invited them to see if they could put it together:


They didn't notice that it was a pattern, at first, and so made some unworkable choices:


Eventually, though, a light bulb came on...


And behold! It's laid out unusually, but it's our trinomial cube!


Here's the Montessori setup for the binomial and trinomial cubes. They're normally given to small children to work as a puzzle, which is a great way to make that higher level math familiar and not scary at all when they come to it later.

And here are a couple more references, if you want to plan a lesson around the binomial or trinomial cube:

Want to see what other mischief we (and the cats) manage to get up to with our brand-new DIY trinomial cube? Check out my Craft Knife Facebook page for updates!