Showing posts with label homeschool art. Show all posts

Thursday, April 7, 2022

AP Studio Art: Taking Reference Photos in the Cemetery

Syd needs several hundred reference photos to use in her AP studio art classes, so we've been taking lots of little field trips out and about lately, in search of interesting places with lots of interesting things to photograph there. 

While Syd roamed around a local cemetery the other day, taking photos of things she might want to reference in her art someday, I roamed around, too, stayed out of her way, and took my own photos:


One of my Girl Scouts told me recently about the multi-faceted artistic tool that is "portrait mode" on one's cell phone camera, so that's what I'm experimenting with. I think she's quite correct!

Found a Freemason:


Found a fellow photographer!


Limestone used to be a major local industry, so the older cemeteries have lots of examples of masterful and detailed carving:


Once upon a time, a sapling was planted in between the graves of two departed lovers...

I would rather my corpse be tossed into a ditch than interred in a cemetery, but I wouldn't say no to a limestone memorial to my love of reading!


Our town thinks it has an urban deer problem, so much so that every now and then the city council will pay some of our hard-earned tax money to hire either hunters to shoot them down or other hunters to shoot them with birth control. I think it's absurd, but to be fair, it was a little disconcerting to see a couple of deer wandering around the cemetery in broad daylight, as brazen as squirrels:

It's too bad that the camera on Syd's ipod touch isn't great, because I can see that a cell phone camera is obviously the ideal tool for taking reference photos. It's probably better for her overall artistic growth, though, to increase her familiarity with my DSLR.

I'll be very curious to see if Syd finds these reference photos useful during her AP studio art work. She doesn't think she will, but collecting them is a strong recommendation for the courses, so that's what she's doing. I guess we'll both just be happily surprised if they happen to come in handy!

Saturday, February 5, 2022

Kid-Made: How to Make 3D Glasses


Got some scratched sunglasses, or an old pair of prescription glasses with a cracked lens? Pass them over to your kids, because this is a project just for them! Here's how to make 3D glasses from an old pair of frames.

How to Make 3D Glasses

These DIY 3D glasses are an excellent kid-build, and really fun for kids to play with afterwards. Here's what your kid should do to make them: 


1. Remove the lenses from the frame. You may have to help your kid bust the plastic lenses out of plastic sunglasses (or just give her a hammer!), but all old prescription frames should require are a teeny-tiny screwdriver and the assertion of your kid's fine motor skills: Screw the little screws back into the frame after the lenses are removed. Save those lenses for telescope-making! 


2. Trace each lens onto colored cellophane. Colored cellophane is the real trick pony here! Have your kiddo trace around the outside of the lens, so that it will fit over the frame, not inside it: The traditional order is red for the left lens and blue for the right, but there's nothing to prevent an interested kid from experimenting--how would a yellow/blue combo work? A purple/green? 

3. Glue the cellophane to the front of the frames. Hot glue can be a little messy (as you can tell from the pic of the finished glasses!), but it holds well and dries quickly, perfect for my kid who likes to see results right away! 


4. Play with drawing. Let the kid choose marker colors that closely match the cellophane, then experiment with drawing images that will be perceived as three-dimensional. My kiddo first tried taping two markers together, but now prefers to simply hold the two together. You can also play with drawing the red and blue lines not as parallels, but as different elements of a single drawing--this works especially well if you draw a 3D cube, for instance, making some lines blue and some lines red. Your kiddo can also experiment by trying different papers--plain typing paper, graph paper, or graph paper with red or blue lines. 

5. Troubleshoot. After making a set of glasses using a single layer of colored cellophane for each lens, my kiddo spent some time goofing around with the extra cellophane pieces and discovered that doubling or tripling each piece, to make the color darker, improved the 3D effect, so she glued a couple more layers of cellophane to each lens, and now her 3D glasses REALLY pop.  Another variable that might make a difference is marker color. Play around with brands of markers or shades of color to see what works the best. 

Because there are so many interesting variables to explore, this is a terrific STEM-enrichment activity for an interested kid, and could also make a stellar Science Fair project. Just have your kid write up her hypothesis and procedure for how to make 3D glassses, paste up a diagram of an eyeball, draw a couple of pictures to look at through the glasses, and BOOM! Blue ribbon.

Wednesday, December 8, 2021

The Kid and I Made a Duct Tape Dressform


You might remember that Syd has a passion for fashion design, yes?

She and I are especially happy that now she's homeschooling again, she's once again got plenty of time to dive into all these big passions of hers. Along with her academic work and her everyday art projects, I've been encouraging her to design and make some bigger, more ambitious art projects. The planning and troubleshooting are great skills to practice, and the projects, themselves, are always sources of inspiration for Syd to teach herself something new. The four-foot-tall acrylic painting on canvas that now hangs in our front hall taught Syd not just a billion more things to know about acrylic painting, but also got us discussing and making decisions about how artists obtain and use reference images, and what's acceptable professionally versus academically.

So when Syd started thinking about planning her next Trashion/Refashion Show design, I started thinking about ways to make the project even more open-ended for her. We decided that one good way to help her elevate the sophistication of her designs is to make her a custom dress form.

And what should we make this custom dress form out of?

DUCT TAPE!!!!!

We used this Etsy Labs tutorial as our spine, but I got the expanding foam idea from this tutorial.

I bought this set of duct tape way back when the kids and I were making duct tape wallets and I wanted them to have a lot of color options:

Five years later, I still have some remnants of the least popular colors from that set left. I've been using them whenever I need duct tape, of course, but this project used up every single last little bit, and I'm pretty thrilled to 1) have had just the random supply that I needed when I needed it, and 2) have all those rolls of duct tape GONE!

Syd put on a baggy old T-shirt, and we had a hilarious time wrapping her in tape. That morning was definitely a contrast in homeschooled kids--Will, hard at work on her calculus homework, and Syd, hard at work on being mummy-wrapped in tape. 

Side note: personally, I find the calculus easier to mentor. Will's kind of homeschool work is easy for me to identify as "proper" work, and I have really been struggling to find my legs homeschooling an art kid whose schoolwork looks so different. She's over there bopping along, listening to a podcast and drawing in her sketchbook, working hard on improving her draftsmanship or whatever, and I'm over here trying equally hard not to nag her about reading the rest of her biology chapter, or working on her poetry essay. Anyway...

After we finished wrapping the kid in duct tape, I cut it off her and we taped it back together and stuffed it full of newspaper and expanding foam.

Three expanding foam pro tips:
  1. Buy the kind that says minimal expanding, or it'll expand so much that it will warp the dress form.
  2. Resign yourself to using the entire can at once. I used half a can, then cleaned it off according to the directions and set it aside. But when I came back to it, I couldn't for the life of me get it going again! I had to go buy another can, and they're not the cheapest thing at Menard's. This time, though, when I got through half a can and felt like the dress form was done, I handed the rest of the can off to Matt and was all, "Pretty please go wander around outside and fill in cracks and stuff." I think the chicken coop will be insulated exceptionally well this winter!
  3. Do NOT be this kind of fool:

You know I'm not squeamish about getting my hands dirty, and I have zero problems walking around for days with hands stained by fabric dyes, permanent markers, or other colorful mishaps. But not only did this stuff NOT come off for many, many, many days, but it also irritated my skin the entire time, and when I got desperate and tried applying straight acetone, I irritated my skin even more. 

Just... wear gloves, you know? Not that hard. Please remind me of that often.

It actually wasn't a bad thing that I ended up using two cans for this project, because the waiting period allowed me to see what spots still needed a little more foam after the previous batch had fully expanded. 

I wasn't sure if sometime Syd would want to do more with the dress form's neckline, so I left it unfinished but later put a piece of cardboard over it to keep the newspaper stuffing inside:


Once upon a time I bought a yard sale dress form that hasn't ever gotten much use because it's never mimicked the size of anyone I'm sewing for, but it does have an excellent stand that works perfectly for this project!


That wider PVC pipe goes through the dress form and is adhered inside with expanding foam, so it can't be removed. The narrow PVC pipe fits inside that wider one, and over the metal rod of the stand, so it can be removed if Syd wants to work with the dress form on a table top. But Matt also cut it so that when you put it on the floor stand, it exactly matches Syd's height!

And yes, I've made her pose for MANY photos with her dress form twin. It's hilarious.

Tuesday, November 30, 2021

Homeschool Art History: A Timeline of the History of Photography


The kids and I are doing a short art history study on the history of photography, so it's a fine time to bring back our absolute favorite homeschool staple: the DIY timeline!!!

We still speak often about our big basement timeline, and I wish so much that we'd continued it in this house. But its magic lives on, I suppose, in the kids' happy memories, and in their eagerness, even at the ripe old ages of 15 and 17, to DIY this photography timeline with me.

I used A Chronology of Photography as my main resource for deciding upon the photos to include. I added in additional photos of LGBTQIA+ history and the history of People of Color, but looking at our finished timeline I can clearly see that I need WAY more non-Eurocentric photos, too, yikes. I also added in photos of important events, like the first Moon landing, World War 2 events, etc., because I want the kids to remember that photography, along with its artistic value, is an important way to explore and analyze history. Photographs are also cultural artifacts that speak to the time, place, and culture of their creation, so it's helpful to also source photos where those aspects are easy to identify.

 To get a high-quality image of a photograph, do a Google Image search, click Tools to reveal a set of filters, then filter the Size for Large:

Anyone else obsessed with the Cottingley Fairies? The kids and I talk about these world's greatest pranksters ALL THE TIME. 

Even though the photographs that I'm printing for this project are only about a quarter-page at the widest, if I'm going to the trouble to find and download an image, I like to get the largest size possible.

Because what if next year I need a wall-sized version of the Cottingley Fairies photos, hmm? What then?!?

I rename artwork images Title Artist Year, and put them in folders that I'll hopefully be able to make sense of later, ahem. 

Once I had a good selection of photos representing the history of photography, I sent the images to Matt, he put them four to a page for me, and I printed them onto cardstock and cut them out:


On the back of each photo card, I wrote the work's title, artist, and year, and that was our stack of photos all ready to go!

To play a game with these, deal out a few photos to everybody, and leave another stack of photos as a draw pile. Take the top photo from the draw pile, read out its title, artist, and date, then place it down to start your timeline.

The goal of the game is to place your photos in their correct spots on the timeline. You put your photo where you think it goes, then turn it over and read out the title, artist, and date. If your photo is in the correct spot, your turn is over. If your photo is incorrect, correct it and then draw another photo. The first person to correctly place all of their photos is the winner!

The game gets harder as it goes on and you fill in all those big gaps in time!

Look at that lovely, long timeline, chock-full of fascinating moments of history and interesting artistic interpretations:

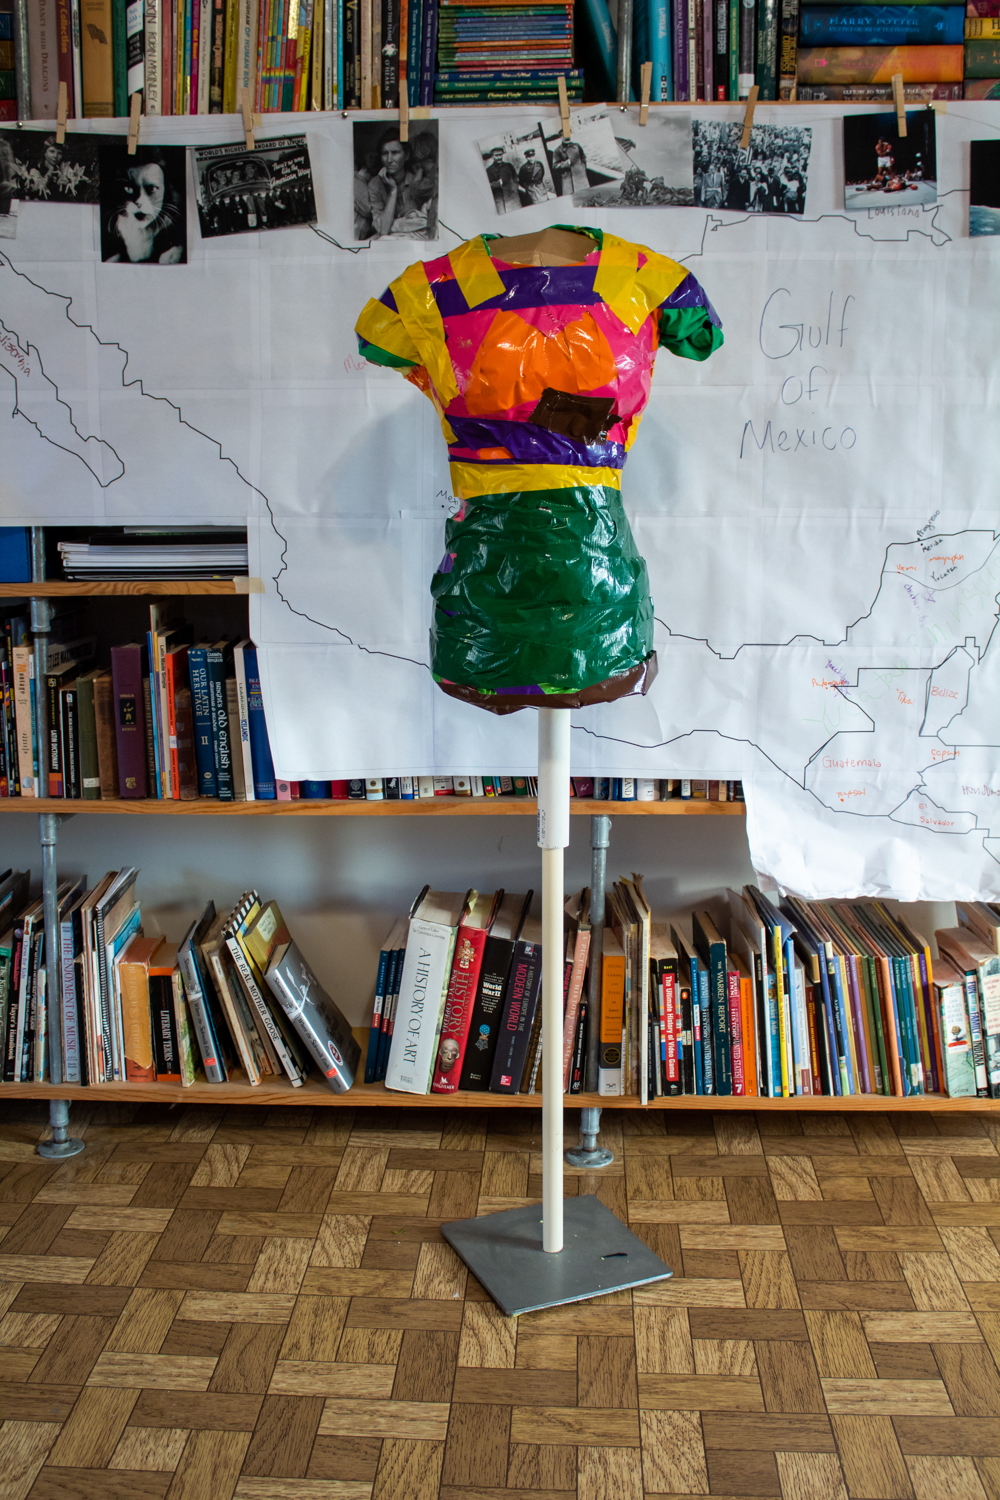
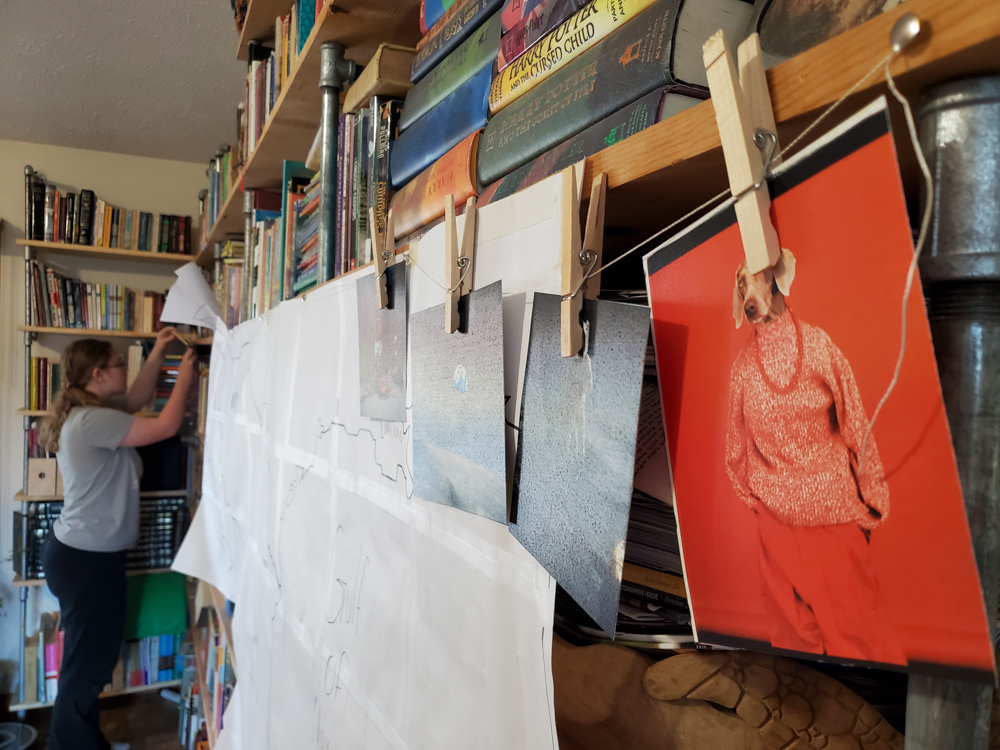
I wanted to leave our timeline on display--maybe the kids will memorize some dates, and maybe it'll allow us the space to have more conversations about some of these images--so Syd and I tacked twine to the front of our big bookshelves, then the kids transferred the completed timeline to it:

We're slightly overlapping the map for our Meso-America study--oops!

The result isn't quite the big basement timeline of our memories, but it IS chaotic and messy enough to remind us of it!


The kids are currently working on a separate photograph analysis project, so we'll definitely add those photos to this timeline, and now that it's up I might as well keep adding more photos relevant to our other studies. You know how much I love context!

And then we'll take some photographs of our own!

Here are the resources that we've used so far: