Thursday, March 22, 2018

Yes, You SHOULD Take Your Kids to a Bourbon Distillery!

We've visited northern Kentucky several times (Louisville!!! The Kentucky Horse Park!!!), but otherwise, it's been just a drive-through state for us when headed for sites more southern.

On this Spring Break trip, however, we visited Kentucky for real! I had planned to spend plenty of time at the Lincoln Birthplace National Historical Park (it has a Junior Ranger program!) and Mammoth Cave (it also has a Junior Ranger program!), but I got distracted from both of those goals on the first day of our trip, when as soon as we hit the state line we started seeing billboards for bourbon distilleries.

Huh. I've never been to a bourbon distillery. Could kids go there? I Googled it and yes, kids can go, too.

So off we went to see some bourbon distilleries!

We opted for the free, self-guided tour of the Jim Beam American Stillhouse, so we didn't learn much about the process of making bourbon here, but we did get a look at the buildings involved:


Now we know what a bourbon aging warehouse looks like! We drove past a LOT of these on the back roads of Kentucky:


Oops, Jim Beam! That's not how the apostrophe works!

The kids, as you can see, were quite ready to get back to the car at the end of our hike--


--so I was a little concerned that we were heading to Maker's Mark next, where we DID plan on taking their hour-long guided tour, but fortunately the beauty of the location--


--and the fact that our Kitty Whisperer found herself a friend--


--made sure that everything worked out well. Also, it just so happened that the computers were down at Maker's Mark that day, and so instead of telling people that there were no tours available after we'd driven all that way, they told us that all tours were free!!! And it wasn't even a cheap-o, free version of the tour--it was the full hour, bourbon-tasting and all.

I'd worried that the kids would be bored spending an hour learning how to make something that they couldn't even drink, but actually, they were fascinated, happily following along at the tour guide's heels, listening intently, and asking her questions. And on this guided tour, we DID learn how the process works!


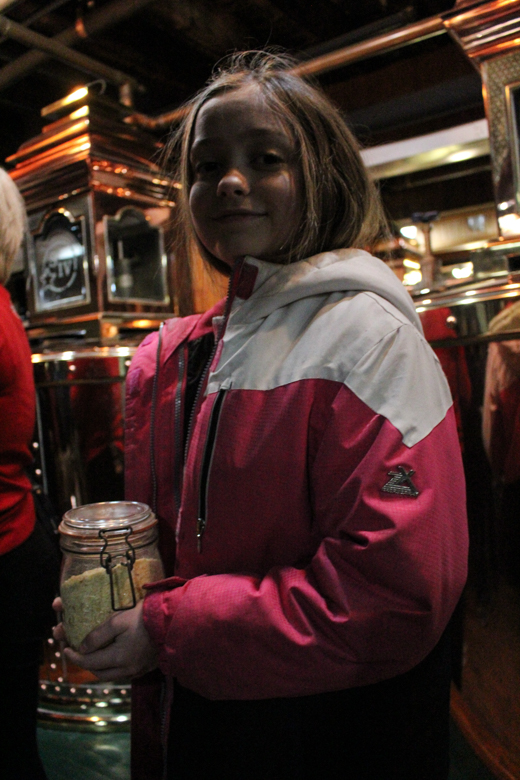
Here's the cornmeal:


And here it is actively fermenting with yeast!


We were invited to dip a finger into the open vat of fermenting cornmeal mash and taste it. Afterwards, I asked the tour guide if it was sanitary for us to do that because of the alcohol already in the mash, but she replied that it was fine to do because the bourbon was going to be distilled so many times that no contaminants would be able to pass through to the final product... Oh, dear. I was ACTUALLY asking if the alcohol was why it was sanitary NOW for every tour group who passed by to all dip their filthy fingers together into an open vat of fermenting soup and then LICK THOSE FINGERS, but it appears that my answer was that it was not sanitary, ugh.

Oh, well. We managed to escape without any subsequent bouts of gastro-intestinal distress, so maybe there was enough alcohol in there, after all:

The campus is lovely, all the buildings and trees black with whiskey fungus and whiskey bottle cut-outs on the red shutters framing every window:


After seeing how the bourbon is made, we saw where it is put into barrels, and where it is aged:


It's flavored by having planks of different woods put in with it, and you can customize your bourbon this way, experimenting with different combinations of wood (you can also buy the wood to take home and smoke your food with!).

And when you're done with that, you'll want to taste it all!


And look, the kids had their own bourbon tasting selection, as well!


They actually weren't supposed to touch that, and they didn't drink any, but as the tour guide led us through the tasting, instructing us to smell this and that and telling us what we were smelling, I looked over and noticed that the kids were busily sniffing each glass, too. It was quite an educational field trip!


I don't think that I have a very discerning palate. I could definitely taste the difference between the moonshine, say and the Maker's Mark 46, but I couldn't really tell the difference between any of the aged bourbons:


I did my best to sample them all, nevertheless. One must be thorough!


You'll never guess what surprise we discovered after this:


Chihuly!


Apparently, Maker's Mark commissioned some Chihuly installations. We know his work well, remember, from the Children's Museum of Indianapolis.

This part of Kentucky is so lovely, and you know what's just a short drive away?

The Abraham Lincoln Birthplace National Historical Site, that's what!

Tuesday, March 20, 2018

Second Breakfast, Followed by Elevenses: Inspiration for a Tolkien Feast That Even a Hobbit Would Love

Tolkien has been our family read-aloud for YEARS--since 2015,  at least! We got through tons of great books before we started down the path leading from his hobbit hole with Bilbo, but now that the kids are older we have more variety to our evening activities, and Matt reading aloud to us now may just happen once or twice a week. In busy seasons, we don't get to it at all.

And yet, Bilbo, and now Frodo and Samwise, continue to consent to travel with us, in spite of our sporadic attendance. We all understand that Sam, whose superpowers are both friendship and the act of hiking without complaint, is the real hero, and that Gandalf's majestic steed, Shadowfax, is actually a beautiful, fat unicorn with flowing rainbow mane--it gets a little crazy during late evening read-aloud time.

Our family copy of the Lord of the Rings trilogy is for sure looking the worse for wear--it's been a decade and a half since I blew through the entire trilogy during one looooong Christmas break working the front desk of the Lilly Library, and since then that book has gone with us on years of road trips and camping trips and evenings out by the fire:


This is a tangent, but if you buy a real Christmas tree every year, then I highly recommend burning it on the night before the first day of spring:


The kids like it quite a lot: 


ANYWAY...

Whenever we finish a book, we like to have a hobbit-style feast, then show the kids that book's movie version for the first time. We always try to make the foods that were referenced in the book that we just read, although we only recently finished The Two Towers, and it was too early in the year to get rabbit. Instead we had some nice fishes and some PO-TAY-TOES!!!
We listened to The Tolkien Ensemble while we cooked; Will made seed cake, and Sydney painted Krispy Kreme doughnuts with lustre dust dissolved in vodka:

We didn't have to worry about trying to decorate the inscription, because we didn't plan to thrown them into the fire.

We also had a Prancing Pony-style plate of cheese and cold cuts and fresh bread, with cider and mulled wine to drink. I'd intended to roast mushrooms, but we already had plenty of food, so I saved them for another meal.

Our hobbit tummies were nice and tight while we watched the movie!

Here are some other Tolkien recipe ideas that I have planned for our next feast, which will be after  we finish The Return of the King, and will therefore be an epic, weekend-long movie marathon!

  • During our last feast, we ate the Prancing Pony's cold meats, new loaves, butter, and ripe cheese, but we still need to make the blackberry tart!
  • If you REALLY want to be theme-driven, here's a list of all the food seen/mentioned in the Lord of the Rings movies, and the times that they appear!
  • The kids and I have made hardtack a few times during our history studies--cram is a Middle Earth version!
  • There are loads of recipes for lembas bread online, but none of them really match what's in my head. I mean, of course, since the lembas bread in my head is magical and made by elves...
  • This isn't the recipe for the seed cake that Will baked (hers was more like a lemon poppyseed cake), but this one looks more authentic.
  • We absolutely must have rabbit stew as our main course for our next feast, even if we have to buy one in season this year and then put it in the freezer.
  • If you're going to make blackberry tarts, you might as well make apple tart, as well, to be served with raspberry jam.
  • In case seed cake, blackberry tart, and apple tart isn't enough dessert for you (because you're a hobbit!), Beorn has also offered to share his honey cake.
  • We ate Sam's fish and chips (although we cheated and bought them frozen), for our Two Towers feast.

P.S. Here are some other ideas for enrichment activities that we've completed or have planned to go along with our reading of The Lord of the Rings: The Return of the King.

Friday, March 9, 2018

Girl Scout Cookie No-Bake Mini Cheesecakes, and 25 Other Girl Scout Cookie Recipes

We've come a long way from that inaugural Girl Scout cookie season just three years ago, and if I ever doubted what Girl Scouts gives my daughters, I could compare those unsure, shy kids three years ago to these savvy businesswomen who marketed, publicized, and sold their cookies, easily talked to thousands of strangers, used some pretty great--and quite effective!--sales techniques, and made change, worked the credit card reader, figured out percentages, created pie charts, and calculated ratios like the math wizards that they've learned how to be.

Cookies take over our lives for two full months, which is not surprising considering that 8,060 Girl Scout cookies passed through my house, with my girls selling 1,840 of those between the two of them, and we spent ALL of our free time (and much of our time that should have been devoted to other activities) organizing, chaperoning, and doing the counting and paperwork to make it possible for the troop's girls to meet their goals. We ate our fair share of cookies--so tempting, when there were 2,000+ at a time in my hallway--and the whole cookie season, I kept wanting to do a Girl Scout cookie baking project with the kids but...

There was just. No. Time!

I collected loads of super-cute recipes that I super wanted to make, but in the end, Syd and I only managed to create one easy, no-bake recipe during cookie season. Fortunately, it was adorable and delicious!

I made these up, but I'm giving them the official name of Girl Scout Cookie No-Bake Mini Cheesecakes:


All you do is take a Girl Scout cookie--we used Trefoils and Thin Mints, ice it with your favorite cream cheese frosting (ours is so brown because we used coconut sugar), spreading it on nice and thick, and then decorate it with raspberries and chocolate chips:


And candy googly eyes. I mean obviously.


And really, a cheesecake is just about the same, only you add an egg to the cream cheese frosting and bake it.

You can still decorate it like a flower if you want to!


These keep well for a couple of days in the refrigerator, although the Trefoils will get soft. The Thin Mints will stay nice and crisp, though.


Syd does have one more Girl Scout cookie baking assignment to complete; one of the requirements for the Cake Decorator IP that she's working on is to decorate a cake or cupcakes using Girl Scout cookies, so she will be baking and decorating a cake with Tagalongs and Thin Mints for our troop's post-cookie season celebration later this month, and I've already set aside the boxes for that. Other than that, though, I'm blissfully happy to see all zeroes on all of the Cookies Remaining lines in my database, and all those recipes that I collected?

I'm just going to put them right here and make them next year:


  1. Do-Si-Do icebox pie. Mac used to LOOOOVE peanut butter icebox pie. I wish I could make this for him.
  2. Girl Scout cookie cake bars. The author used Thin Mints and Tagalongs in these, but I think that any variety would taste equally delicious.
  3. Girl Scout cookie fudge. Will's favorite dessert is fudge, and I love any recipe that lets you use whatever you have on hand as a mix-in!
  4. Girl Scout cookie pizza. This would be a fun party food, with each kid getting to top part of the pizza and share their portion with everyone.
  5. Girl Scout cookie pops. These would be so cute at a bake sale, and a fun recipe to try with any variety.
  6. Girl Scout cookie-stuffed doughnuts. This isn't a recipe that I'd make, myself, but Syd is obsessed with doughnuts, and I know she'll be all about this one.
  7. Samoa brownies. Syd's favorite Girl Scout cookie is the Samoa, but otherwise, she doesn't much enjoy chocolate. I think we'd make these with blondies, instead.
  8. Samoa chess pie. Just in case the cookies, themselves, aren't rich enough for you!
  9. Samoa martini. This is what I'll be drinking allllll next cookie season!
  10. Samoa milkshake. Now that I know about dipping the rim of a glass into melted chocolate, I'm probably only going to drink from glasses with their rims dipped in melted chocolate.
  11. Seven-layer Samoa cookie bars. Here's another recipe to have on hand, in case just eating a Samoa isn't decadent enough for you.
  12. Savannah Smiles icebox pie. This is a recipe I'd put a box of Savannah Smiles into the freezer for, to take out when blueberries are in season!
  13. Savannah Smiles puppy chow. Savannah Smiles are the perfect addition to puppy chow, since they're already covered in powdered sugar.
  14. Tagalong cupcakes. I am SUPER into the idea of putting a whole cookie at the bottom of a cupcake.
  15. Tagalong-stuffed pudding cookies. Apparently, stuffing things with Tagalongs is the way to go!
  16. Tagalong-stuffed Oreos. I think I'd be even more into these than I would the Thin Mint-stuffed Oreos, below.
  17. Thin Mint and white chocolate popcorn. I think I'd also put some chocolate popcorn into the mix.
  18. Thin Mint bread. I have a recipe that I love for a vegan pumpkin chocolate bread, and you know what? Thin Mints are vegan, too! 
  19. Thin Mint cookie bars. There is a LOT going on in these cookie bars, to be frank, but trust me--it NEEDS to happen.
  20. Thin Mint milkshake. I think it would be fun to pull ANY box of Girl Scout cookies out of the freezer mid-summer and challenge yourself to make a milkshake to suit it!
  21. Thin Mint parfait. I'd go for the full-fat, full-sugar versions, because artificial sweetener tastes weird in my mouth.
  22. Thin Mint cupcakes. I like the idea of crushing the cookies very fine and incorporating them into the piped frosting; Syd thinks that the cupcakes should be minty, too, though.
  23. Thin Mint s'mores. These couldn't be easier, and you could substitute any of the chocolate Girl Scout cookies.
  24. Thin Mint-stuffed Oreos. This is insane, but in, like, a good way. If I was feeling really crazy, I'd only use the cream-attached sides of the Oreos to sandwich the Thin Mints, so that they'd be Thin Mint-Double-Stuffed Oreos.
  25. Trevoil s'mores. Now I also want to dip the actual Girl Scout S'mores cookies in chocolate, too!


Or, rather, I'll realize near the end of cookie season next year that my life has once again been overtaken with Girl Scout cookies and I'll maybe get to make one entire recipe...

But that one will be delicious!

Wednesday, March 7, 2018

Homeschool Science: 10 DIY DNA Models, Plus 2 More!

Chapter 7 of the CK-12 Biology textbook covers DNA and RNA. It's a big concept to understand, these building blocks of our selves, so we're taking plenty of time to explore.

After reading the section in the chapter specifically on DNA and RNA, and exploring several additional resources, I challenged the children to make their own DNA models.

Actually, I first beat my head against the wall for a goooood long while during my lesson planning, trying to find a DNA model tutorial that both children would enjoy making, before realizing that not only was I doing work that they were perfectly capable of doing on their own, but also that I was depriving them of valuable research and problem-solving and creative experiences by doing so.

Instead, I gave the children this model DNA assignment from DIY. Happily, it encapsulates exactly what I'd wanted them to do! The assignment was on their work plans for Wednesday, with space for them to continue working on it on Thursday and Friday. This gave us some time to hit up the grocery store for the supplies that the younger kid decided she needed to make the double helix model of her dreams:


Yes, that's Twizzlers and gummies. The kid likes what she likes!

The older kid's DNA model was made with supplies on hand, but I was pleased to see that she had clearly spent time working out a design, constructing it, and making sure the details were accurate:


I doubt that I could have gotten that level of buy-in on a model that I assigned specifically.

While I loved the DNA models that the kids made, and they learned from them what I wanted them to, I'm pretty sure that I could busy myself quite happily for years doing nothing but making DNA models from tutorials found on the internet. The things that kids come up with these days! The elaborate, cleverly-designed, lovingly-constructed projects! Here are some of my favorites, if you, too, would like to make a DNA model in your free time:
  1. Tape and straws. I really like this model, especially how easy it is to manipulate, although I shudder at the purchase of so many drinking straws.
  2. Cut-and-paste. This is one of the most scientifically-accurate models, and one of the most accessible in terms of materials.
  3. Beaded pendant. I SUPER want to make this for myself.
  4. Knitted. If I knew how to knit, I would make this immediately. I need to learn how to knit!
  5. Toothpicks, Styrofoam balls, and pipe cleaners. I LOATHE Styrofoam, but this is a larger model that would display well.
  6. Recycled cans. This is a brilliant idea, and would be perfect for a large group or co-op to build together.
  7. Origami. This model is easier than it looks, thanks to a printable template.
  8. Pony beads. This is another kid-friendly model that would make a great craft project simply on its own.
  9. LEGO mosaic. There isn't a tutorial here, but it wouldn't be too hard to figure out.
  10. LEGOs. There are several pics of LEGO DNA models floating around the internet, but here's an actual step-by-step, including exactly the LEGO pieces that you need.

Monday, March 5, 2018

Hand-Dyed Wooden Beads and Blocks in Pumpkin+Bear

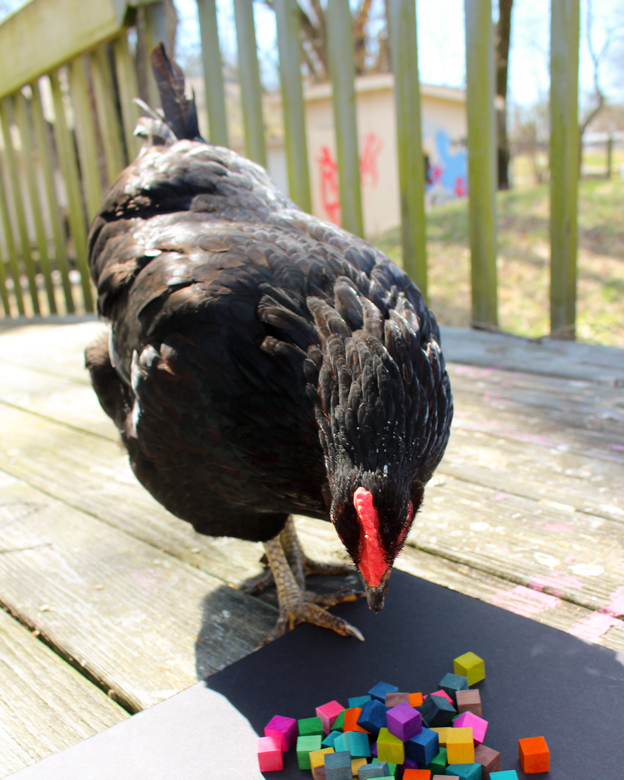
"Aww, look!" I thought. "The chicken wants to seee what I'm doing out on the deck on this gorgeous afternoon!"


"Isn't she pretty?"

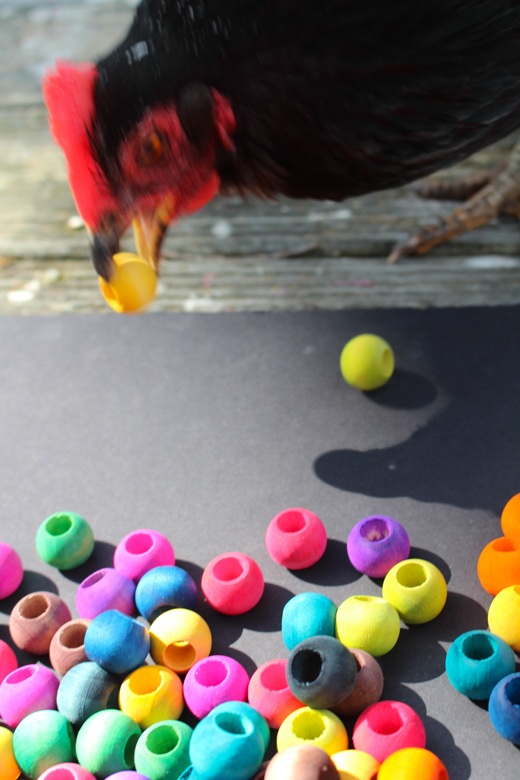
"HEY!!! Those are not berries!"

So there you go. My hand-dyed wooden beands and blocks are so pretty that chickens think they're berries.

I can't even tell you when I dyed these--a couple of years ago, perhaps?


We were doing several projects that involved hand-stained wood, and I was working out just the perfect technique to share over at Crafting a Green World.


While working out the technique to my satisfaction, I made waaaaaay more dyed wood pieces than we needed for the projects.


Apparently, I just squirreled the surplus away in my stash, because I am actually a hoarder.


I rediscovered them the other day while I was cleaning and decided I might as well peep into that plastic drawer in the closet--I'm still finding containers that I haven't unpacked after our move (which was four years ago now, for those of you playing the home game), so perhaps that drawer could contain my wedding ring, or my folk music anthology!


It didn't.

What it did have, however, were projects that I'd meant to list/relist in my Pumpkin+Bear shop. Some were projects that I used to have listed but wanted to rephotograph or rework in some way, and some where projects that I wanted to list in Pumpkin+Bear, but I'm guessing the light was poor on the day that I wanted to photograph them, or I got busy, and set them aside, consequently forgetting all about them.


Of course.

Fortunately, last week we had our first sunny, above freezing days in FOREVER, and there was nothing I wanted to do more than spend the afternoon out on the deck photographing stuff.


These cubes are 1/2" across, nice and light and brightly-colored now.


These beads are 3/4" diameter, with a 3/8" hole.


The kids actually use our stash of undyed wooden cubes as a sensory material. I pour them out onto a tray that sits on our homeschool table, and off and on all week I'll notice a kid fiddling with them as she thinks or reads. They're stackable, arrangeable, and they just feel good in your hands.


Syd really wants to turn some of these beads into Camp Halfblood beads, so that's a project we'll be taking on before too long.


I've used these stained beads to make magnetic mosaic tiles for our giant metal memo board. I'll probably use some of these to make more, and I'm tempted to upcycle a metal tin from somewhere and make a travel-sized version.


Of course, if you bought these from me, I'm sure I'd find something else to happily hoard and/or occupy my time with...