To start with rock painting you need some ROCKS. Who would have guessed?
You could, of course, go and find some rocks in the rock wilderness. Beware, some may bite! I used some bagged rocks, which are nice because they are much flatter and smoother than rocks you would find outside.
The rock painting book that will be the guide in this journey is The Little Book of Rock Painting, full of cute and kinda strange ideas.
Once you have your hands on a rock you should open the book and choose a design. I chose a feather for my first one.
Bellow you see the instruction page for the feather--it is very straightforward and simple!
I choose a medium squarish rock, perfect for an oval feather shape? Maybe not but it worked despite my poor planning, which was a relief.
Here are the paint pens that I used on the rocks. The more colors you use the better and more vibrant the rock!
Here is the beginning phase of the feather. The book was very helpful for making it look like a feather and not a corn dog.
Here is the design for the feather. If the pen was thinner it might have worked better.
The book had nothing to do with this, though. I should have made the feather larger to compensate for the pen size.
Next I followed the owl pattern. It was slightly more difficult then the feather but came out pretty cute!
Here is how the owl came out. You should most likely sketch out the design beforehand so that one of the eyes doesn't hang off the rock.
I followed the raindrop one next. It kind of looks like firecrackers, which is a cute idea for a rock design!
This is how the raindrop came out--super cute!
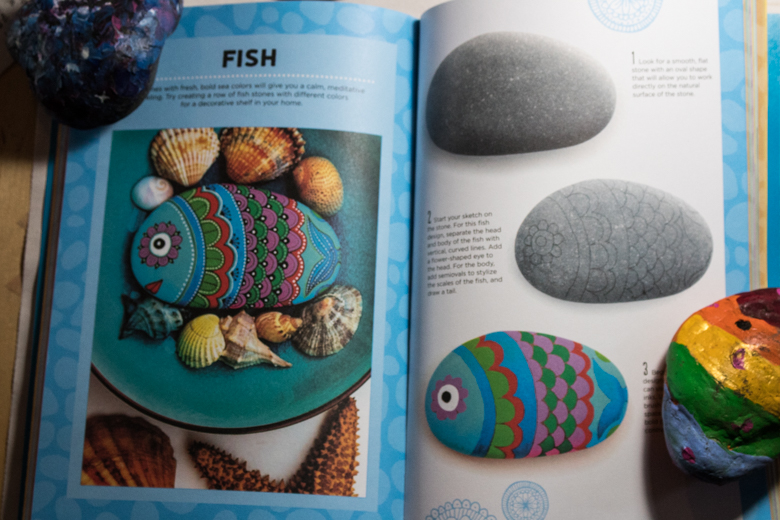
Next, I chose the fish. Their fish came out super cute but it doesn't have a fin for some reason so I chose to add a fin to my fish.

A nice square rock, yet again the wrong shape but it turned out nice!

I sketched a fish... cause I am doing the fish... nice!
Here is the fish all done. I added the googly eyes cause why not?
This one is if you don't have a rock that fits rock painting standards. I used a nice wooden egg to show you can pretty much use anything.
I chose the fox for this one. It turned out pretty cool on the egg.
It wasn't as hard as I feared to draw on a round object. But it was kind of cool to draw on a wooden egg!
I found that this book was full of nice ideas and tips that you could expand on to improve your rock painting knowledge and skill. I enjoyed the simple steps making it easy and fun to use.
Syd is a fashion designer, author of two previous blogs (Syd the Craft Kid and My My Little Ponies), and slime expert.


2 comments:
Great review, Syd!
Syd says thanks! She seemed to enjoy crafting this review, so I'm hoping that she wants to try another one and therefore gets in so much more sneaky reading and writing, mwa-ha-ha!
Post a Comment