I originally published this tutorial on Crafting a Green World.
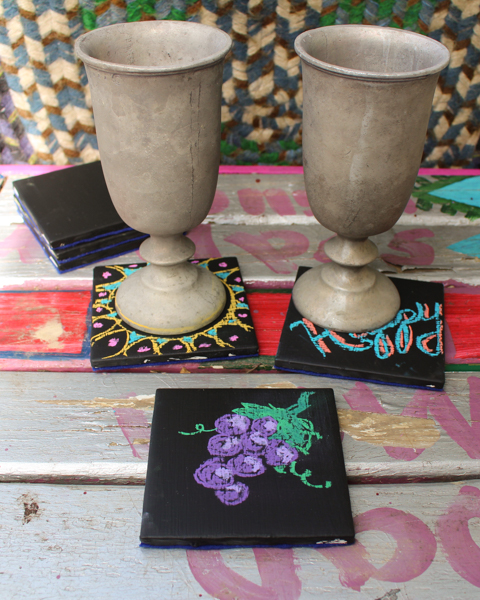
Here's an easy (and cheap!) project to spice up your holiday events: chalkboard coasters! You can use them every day just as they are because black goes with everything, but when guests come over, hand them the chalk and let them personalize their own coasters. It's fun AND avoids accidentally drinking from someone else's cup!
Supplies & Tools
You will need:
- Tiles. Even brand-new, plain white tiles cost pennies at the big-box hardware store. And if you've got a ReStore near you, you can nab them for far fewer pennies. I used white tiles in this particular project, but don't be afraid to snap up super ugly tiles if they're even more of a steal, because the primer will cover all the tackiness for you.
- Primer. You want a no-sand primer for sure, but color doesn't matter unless you're using tinted chalkboard paint. You can see in these photos that I'm actually using the tinted primer that I used to paint my daughters' bedroom this summer. Paint doesn't keep forever, so I'm using this stuff wherever I can!
- Chalkboard paint. Use any non-aerosol brand of your choice, but expect to paint on a few layers.
- Felt. Feel free to be creative with this material, which will cover the bottom of your coaster. Felted wool sweaters, fleece, leather, old vinyl, etc., could all be used. Include the correct glue for your material; for felt, hot glue works well.
Directions
1. Prime your tiles.
Make sure they're clean, then coat the tiles with no-sand primer and let dry completely.
2. Cover the tiles with several coats of chalkboard paint.
This project is time-consuming in that it requires several coats of paint overall, each of which needs enough time to dry before the next coat, but it takes up little of your hands-on time:
3. Let the chalkboard paint cure.
This is an easy step to miss because the curing time for your chalkboard paint will be written in small type on the container. It's absolutely crucial to allow the paint to cure for the required time in order to have a nice-looking, long-lasting finished product.
4. Glue on the coaster bottoms.
 |
| There are three other humans who live in my house, and none of them can really be relied on to take a decent photo of me working. At least this one is in focus! |
You can do this while the chalkboard paint is curing if it's at least dry to the touch:
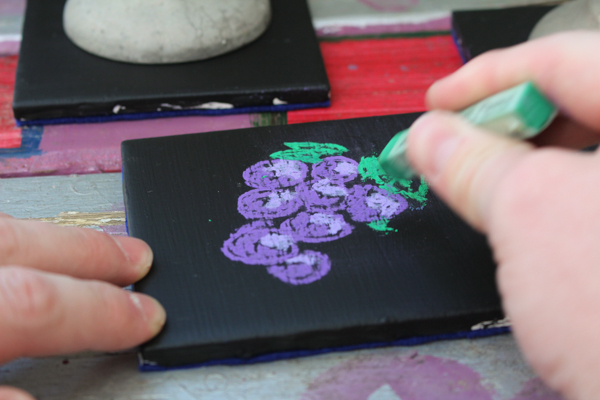
After the chalkboard paint has cured, your chalkboard coasters are ready to go! If you want to prepare them ahead of time, you can use a set of artist-quality chalk pastels to draw on designs that are as elaborate as you like:
Another option is to set up a few pieces of chalk with the tiles at your drinks station so that people can decorate their own coasters.
If you give your tiles as a present, include a piece of chalk and some brief written instructions--writing them on the coasters themselves would be cute! I've given these as presents a few times, and I've found that as obvious as it seems to me (because in my mind, if something holds still for long enough then, of COURSE, it's going to be turned into a chalkboard...), my recipients invariably look a little puzzled at first to be gifted with black coasters and a piece of chalk.
Tell them what the coasters do yourself, and watch their faces light up!


No comments:
Post a Comment