I originally published this tutorial on Crafting a Green World.
There are lots of cute ways to upcycle an old puzzle into something completely new, but what if what you'd really prefer is simply another puzzle?
I mean honestly, have you ever looked at the picture on the front of a puzzle and thought, "Huh. I could do better than that!"
Well, you absolutely can!
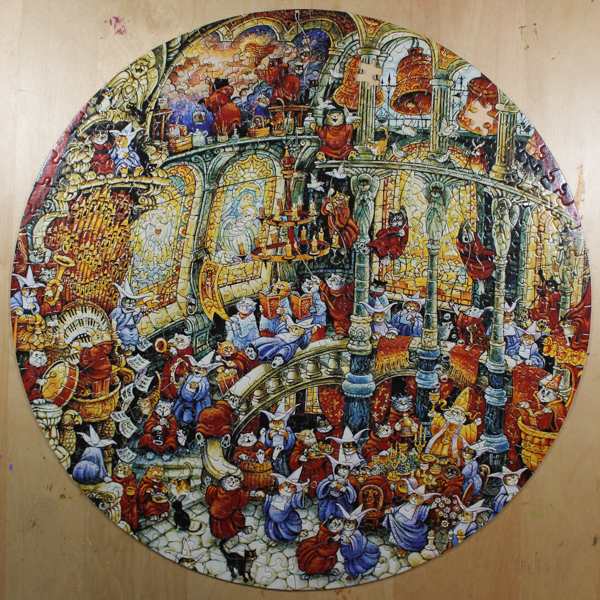
It's surprisingly easy and doesn't take a ton of artistic talent to remake a puzzle into one that's brand-new-to-you. This is a great craft for kids or a great way to make an educational toy for a kid. Here, for instance, I've remade a very odd puzzle (I'll show you in a minute, but trust me--it's ODD!) into a puzzle of the digits of pi. What classroom wouldn't want to have that on the shelf in readiness for a rainy-day recess?
Here's how to remake a puzzle of your own!
Supplies Needed
An old puzzle to upcycle
I have a very firm Puzzle Policy, which consists of this: we buy puzzles only from thrift stores or yard sales, never spending more than a buck or two. We happily put together our puzzles, knowing that it's highly likely that there will be missing pieces. When there are, we don't care, because we still had the fun of putting together the puzzle and anyway, it only cost a couple of dollars; I'll recycle or upcycle that puzzle, then, with a clean conscience.
When the puzzle gods smile down upon us, however, it's a real treat, and then when I put the puzzle back in the box I'll securely tape it shut, tape on a note that reads "NO MISSING PIECES," and donate it to a thrift shop to move on to some other lucky soul. So even though my family loooooved putting together this very, very, VERY strange puzzle, it has two missing pieces, so recycled or upcycled it must be:
Acrylic paints and brushes
You'll be watering the paints down, so a little will go a long way.
Paint Pens
These can be pricey, but you don't have to buy a full set if you're planning on a limited color scheme. I got by using only black for this project.
Spray sealant (optional)
Aerosol sprays are the WORST, but if you feel like you have to seal your work--I would only if it's quite detailed and delicate--then you'd better use this instead of a brush-on sealant, which will go on too heavy and stick the puzzle pieces together.
Directions
1. Assemble the puzzle, turn it upside down, and make any necessary repairs. When my kids were younger and much more emotionally attached to their puzzles, I figured out how to make a pretty decent replacement for missing pieces--it's at least good enough to make the puzzle complete again, although of course you can tell the difference:
Here's my tutorial for how to repair a puzzle by recreating missing pieces. Give it a try!
2. Paint the puzzle with watered-down acrylic paint. Watercolors would work, but wouldn't be vibrant, and acrylic straight from the tube would be so thick that the puzzle pieces might stick together. Instead, use a paint palette to water down your acrylic paints, and use those to paint your puzzle.
Pro tip: to avoid the colors bleeding together, let an adjacent color dry before you paint right up next to it.
3. Add details with paint pens. Since the acrylics have been altered to behave more like watercolors, when you want to add detail to your painting, you'll want to use paint pens. These are spendy, but they're absolutely terrific for fine work, and you can add tons of detail that you'd otherwise need the tiniest paintbrush for.
After all the paint and glue has dried, the only thing left to do is work your brand-new puzzle!
As you can see, this puzzle is even more fun than working one whose only claim to fame is that you bought it from a store, and the more time that you put into it, the better it can look. I kept mine pretty plain, because my children are heathens and wouldn't appreciate it anymore if I'd spent fifteen more hours on it making it look cute.
You could add a ton more embellishments with the paint pens alone, and there's nothing to stop you from adding even more decorative elements, such as Swarovski crystals, glitter, or anything else that you fancy.


No comments:
Post a Comment