I originally published this tutorial on Crafting a Green World.
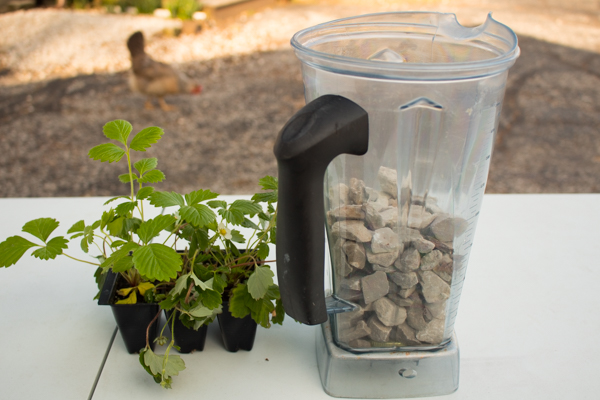
Yes, that's a super-expensive Vitamix blender pitcher that finally cracked (it's too embarrassing to tell you why, but I assure you it was because of Reasons).
No, I could not stand to simply toss it away, even after it spit something like a half-gallon of hot tomato soup onto the counter before I figured out it was broken.
Instead, I did what I do with every single even vaguely container-shaped piece of junk that needs a second life around here--I turned it into a planter!
The process is so easy that yes, you, too, should be turning every single even vaguely container-shaped piece of junk into a planter. Think about how much sturdier your piece of junk is than a chippy terra cotta pot, and how much more eco-friendly than a brand-new plastic pot.
And think about how roomy that beautiful broken blender pitcher is. So much space for strawberries!
Tools and Supplies
Here's what you need to plant strawberries or anything else that delights you, in your own broken blender pitcher:
- old jar lid (optional: see Step #1 to see if you'll need one)
- gravel
- potting mix
- plant
Directions
1. Prepare the blender to be water-tight.
Blender pitchers have their blade attachment at the bottom. Generally, this won't be a problem, and in fact, it's even easier to turn your blender pitcher into a planter if you keep the blades installed.
However, this is my super-expensive Vitamix blender pitcher that we're talking about here. I saved up a LONG time to buy that baby, and I sure ain't dropping a ton more money for another entire brand-new pitcher! Instead, my partner removed the blade attachment from this broken pitcher and installed it in the new pitcher that I bought to replace it. It was still pricey as heck, but way less expensive than buying the complete replacement pitcher with the blades included.
So if you, too, have removed the blade attachment from your blender pitcher, making the pitcher water-tight again is as easy as scavenging an old jar lid that is larger than the hole but smaller than the bottom of your blender. Set the lid over the hole and you're done. If you want to be perfectly safe, use epoxy glue to adhere the lid in place, but since the next step is going to be filling something like half this pitcher with rocks, all that weight will also keep the lid in place.
2. Add a layer of rocks.
This depends on the plant, of course, but it's likely that your blender pitcher is far deeper than necessary. Instead of wasting a LOT of potting soil in that space, fill up what you don't need with rocks.
Some really cute options would be river rocks, broken pottery pieces, shells, even aquarium gravel if you've got it, but I am flat out of cute rocks and such and so honestly, I just scooped up some of the gravel off of my driveway.
Whatever. Pretend like it was a thoughtful aesthetic choice.
3. And then you plant!
I'm so in love with the transparency of this planter. Look at what pretty layers the rocks and potting soil make--even prettier if you add that aquarium gravel or shells or pottery shards! I'm also loving the fact that it's got a handle, making it easy for me to move around; add just the right bracket, and you could also hang it or mount it somewhere fun.
And that's how you might find me deliberately thrifting old blender pitchers this year--because now I'm all about the idea of a planter with a handle!


No comments:
Post a Comment