I had my own non-softball, non-contact injury last week when, while racing the girls to their school building, I tripped and fell and skinned my knee something fierce. Oh, what did I trip on? Um...nothing.
I'll save you the descriptions of the blood and gore and scabs and general grossness--let's just say it was AWESOME--and turn, now, to the damage done to my third-favorite pair of pants, a comfy pair of cargos bought for two dollars at Goodwill. They were, of course, ripped to all get-out. It was tragic. Heartbreaking. It called, clearly, for a jaunty applique patch. Here's how to make one:
First, you have to seam together the rip in your pants:
.jpg)
See, isn't it huge? Hearbreaking, I tell ya.
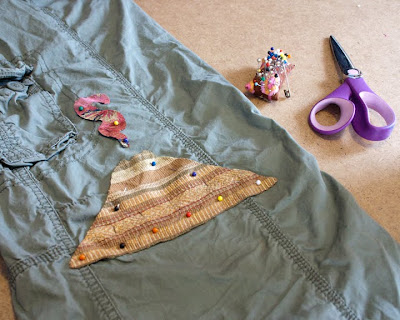
Next, you have to cut yourself out a jaunty applique. Use a pre-washed fabric that's the same weight as, or heavier than, your pants fabric. I'm using pre-washed upholstery sample fabric, and I used my Cricut to cut a pattern template from
out of cardstock: my patch is going to be a volcano.
Pin your applique exactly where you want it on your pants. I don't use fusible webbing or any of that heat-set crap for clothing anymore, so use as many pins as you need to feel confident that your patch won't shift. Feel free to add on whatever you want to make your repair job not just functional but super-awesome:
.jpg)
The plume of fire coming out of the volcano? Just there for show.
Now that wide-legged pants are in style, you can satin stitch your applique without having to open up a side seam, although it does require a little fiddling:
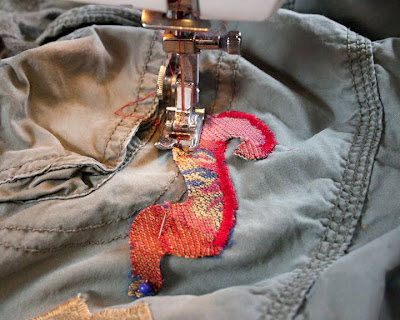.jpg) See, here I've got the fabric fiddled in such a way that I can sew all those roughly parallel spots pretty easily, and when I've done those I'll shift and futz the fabric around to get a new angle and sew the perpendicular spots. If you're getting skipped stiches, it probably means that you need to move to a heavier needle--you're already using a jeans needle, right?
See, here I've got the fabric fiddled in such a way that I can sew all those roughly parallel spots pretty easily, and when I've done those I'll shift and futz the fabric around to get a new angle and sew the perpendicular spots. If you're getting skipped stiches, it probably means that you need to move to a heavier needle--you're already using a jeans needle, right?When you're done, you'll have an awesome, sturdy applique that makes your pants look even better than they did originally:
.jpg)
And you'll discover how hard it is to get a good photograph of your own knee.
2 comments:
oh, okay. now i see what i did wrong when i put a patch on cosmo's jeans. you have to sew the rip first, THEN put the patch on. i skipped that first step.
looks great! way to make lemonade!
Rule of thumb: even if it doesn't look pretty (which it won't), the rip should be repaired to such an extent that you could wear the clothing again, although you wouldn't want to. The patch mostly guards against further damage.
Now a hole? That's a whole other story.
Post a Comment