
In other news, I'm teaching a cloth diapering workshop at Barefoot Herbs + Barefoot Kids this Saturday, April 26, from 4:00-6:30. Cloth diapers are better for baby and better for the environment for a myriad of reasons, and overall they're also cheaper than an entire baby's worth of disposables, but they can have a large up-front cost. Fortunately, the actual diaper material that goes into the cute little moisture-proof cover is something that it's possible to make yourself with a bare minimum of sewing skills and using recycled/repurposed materials. This takes a LOT of the cost out of cloth diapers, and it's all terrific in that since a diaper's insides are purely functional, not necessarily attractive at all (though they can be!), you can use fabric so unsightly that there is hardly any other way to usefully repurpose them. To wit:
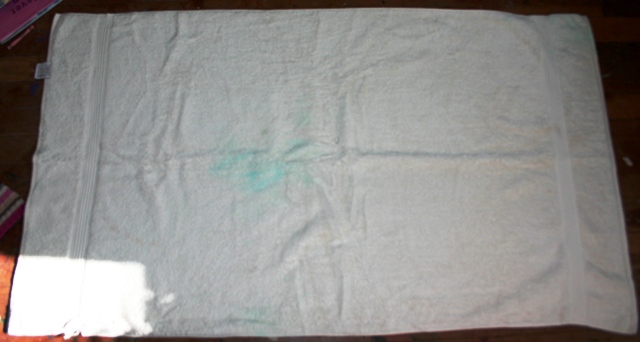
- Go through your linen closet and pull out all your old, nasty, beaten-down bath towels. You know you have them, and you know you need to get rid of them before company comes over. The one below is the one I'm going to be cutting up today. Notice the old fingerpaint stains in the middle, and the big tear there where the sun is shining in through the window. This was in my linen closet, y'all!
 2. Find a nice, big rectangle or square to use as a template. Below I'm using my 12"x18" cutting mat, which is a really nice size, but lots of sizes would work--pizza boxes make good templates, or large picture books.
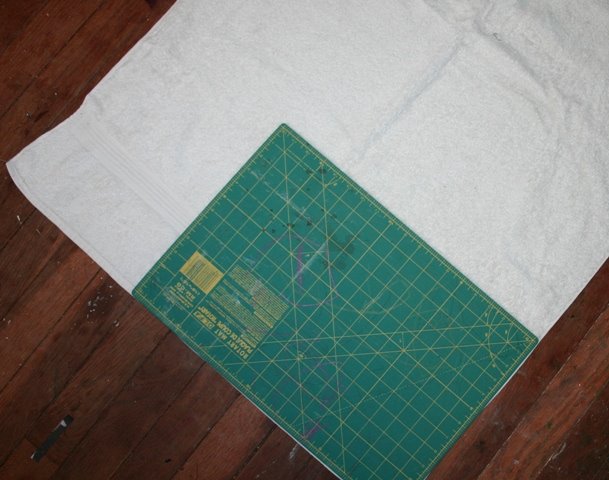
3. Cut up the towel using the template--with my template, I got five big rectangles. It's fine to include the stains, because this diaper is going to be purely functional here, but do not include worn parts of the towel--they won't last. Notice that you're going to have to vacuum later, because little bits of terry will get everywhere.

4. Using the towel as a template, now, cut a piece of 100% cotton fabric for the facing. I used some flannel leftover from the ring sling I made when the big kid was the baby, but stained cotton T-shirts are also really terrific--I often like to use fabric for these that is so ugly, stained or just stupid, that I'd never repurpose it in anything else. You can either cut out one piece of cotton fabric for each piece of terry, ending up with a diaper that is terry on one side and cotton on the other, or cut out two pieces and make a cotton-terrycloth-cotton sandwich out of it. I'm making an open-faced cotton-terry sandwich here.
 5. Pin it or don't pin it, but put a sharp, strong needle in your sewing machine, and begin to stitch your two pieces of fabric together.
You will be interrupted at this point by a diaper-wearing child who is tired of independent play, and you'll likely nurse, read books, make a cheese quesadilla that no child eats, switch over the laundry, go to a children's dance class, etc., before you can get back to sewing. Frankly, I don't mean to be pessimistic here, but you may never get back to sewing.
 6. However, if one child is at preschool and the other is napping for the moment, awesome, and don't forget to leave a space open so we can turn this puppy right side out when we're done.
  7. Clip the corners so they'll turn right side out neatly...
 ...and turn that baby right side out. You can iron it flat, now, or just smooth it out some, but get back to the sewing machine and sew that opening closed. Sometimes I like to topstitch around all the edges to disguise the spot where I sewed the opening closed, but really, that's just fanciness, and regardless, your diaper will now look like this:
To see how it looks nice and folded inside a Bummis cover, check out the photo at the top of this post!
You can also stuff these inside a pocket diaper such as Fuzzi Bunz, and you can stitch on or just lay on top a nice rectangle of fleece if you want, which will wick moisture away from baby's butt and keep them feeling dry.
P.S. Want to follow along with my craft projects, books I'm reading, road trips to weird old cemeteries, looming mid-life crisis, and other various adventures on the daily? Find me on my Craft Knife Facebook page!
3 comments:
The MOST oblivious man? I will not stand for this besmirchery. Oh, and when did you start blogging?
hehe @ Matt
This was great. I just moved to the darkside today (cloth diapers) but realized that as cute as the g diapers are, they are freakin expensive. So, I was perusing the web for patterns to sew my own (especially out of repurposed material!!) and voila here you are telling me all I need to know.
Thank you, thank you, thank you :)
Heather
Awesome, you! I am so fanatical about cloth diapers that it's really kind of weird. Now when I see a baby who's clearly wearing a disposable diaper under its clothes, I think the baby looks all abnormal and skinny-butted.
I have plans later this week to sew up some quick-and-dirty pull-on diaper covers out of recycled fleece and felted wool sweaters, so I'll post a tute for you!
Post a Comment